License Plate Light Assembly Replacement

BRUIN8124

New member
Hello all,

I noticed I have a license plate bulb out and I have the common problem of the screws being rusted and refusing to budge.

I have tried WD-40, drilling them out, etc... I have pretty much beat on it so much the assembly on one of the lights is breaking.

So, my question(s) is...

PLAN A - How do I replace the assembly? I would like to avoid this BS in the future. I have done some research and it looks like I need to go in through the interior panel in the rear hatch.

Anyone done this? I am hesitant because there is the lock/latch and the power window in there. I don't want to go in and mess those up.

Is the license plate light assembly easy to reach without messing with the latch and window?

Any photos?

PLAN B - I may just try to break the plastic lenses to see if I would be able to get the screws that way with a little more room? If this works... I just replace the lenses, piece of cake! I will have to fight with it again when the other bulb goes out. If it wont work, I need to replace the assembly...

What do you guys think?

Thank you,
 
Register to hide this ad
You just have to pull the inside cover of the rear gate, it snaps off after removing the pull-down strap. Then you'll see 4, maybe 5, nuts that hold the light assembly on. Let it drop from the outside and unplug the wires. An extension with socket makes it real easy.

It's been a long time since I did it but it's easy and the above is pretty close to correct, if not completely correct.
 
Had the same problem. After following ^^^ this guy's advice, use a dremmel to cut a slot in the head of the rusty screws then use a flathead to remove them. Works every time.
 
Hello all,

I noticed I have a license plate bulb out and I have the common problem of the screws being rusted and refusing to budge.

I have tried WD-40, drilling them out, etc... I have pretty much beat on it so much the assembly on one of the lights is breaking.

So, my question(s) is...

PLAN A - How do I replace the assembly? I would like to avoid this BS in the future. I have done some research and it looks like I need to go in through the interior panel in the rear hatch.

Anyone done this? I am hesitant because there is the lock/latch and the power window in there. I don't want to go in and mess those up.

Is the license plate light assembly easy to reach without messing with the latch and window?

Any photos?

PLAN B - I may just try to break the plastic lenses to see if I would be able to get the screws that way with a little more room? If this works... I just replace the lenses, piece of cake! I will have to fight with it again when the other bulb goes out. If it wont work, I need to replace the assembly...

What do you guys think?

Thank you,

You can buy reverse threaded drill bits, or screw remover kits. Either of these may help you remove the screws more easily.
 
Thanks for the responses!

I will give the dremmel a shot. I will have to borrow one. Wish me luck. If that is a no go... I suppose I will figure it out from there.

I just want to get this done before Johnny Law decides to nail a bad guy with a plate light bulb out.

Bored Maine cops...
 
Other screw extractors...

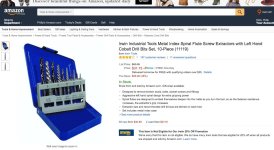
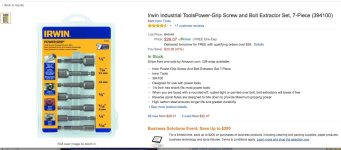
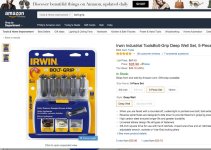
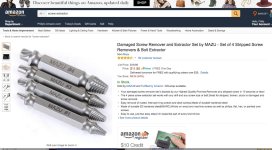
You may want to try any of the following (see attached images).

1) The first one is what I was talking about by reverse threaded drill bits.

When you drill a hole, you set the bit to rotate counter-clockwise (instead of clockwise) so it not only drills, but as it grips, it applies pressure to remove the screw. I understand that these can work very well. Buying a set is on my to do list. :-)

2 & 3) I've had good results with both of these types of extractors. Go SLOWLY if you try them. If you go quickly, you simply chew up the metal. The goal is to grip the metal, and get the screw out.

4) The fourth style has *sometimes* worked for me. The idea is that use use a reverse drill thread to make a small hold in the head, and then turn it over to screw in the other end and back the screw out. The key is to apply a lot of pressure and go very slowly backing out the screw. Otherwise, you simply chew up the metal. Sometimes these work for me... sometimes they don't.

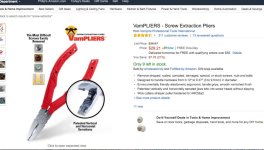
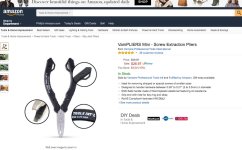
5&6) I've never seen these before, but they look cool and have a LOT of positive reviews.

Don't ask me why I have so much experience trying to remove stripped screws!!!

I don't know... maybe it's bad luck... but I've been down that road too, too many times!

Good luck. Please let us know what ultimately works.... ESPECIALLY if it ends up being one of these tools.


P.S. --- I'm wouldn't suggest using a dremmel. They don't have reverse threaded bits, they aren't reversible, and they are designed to spin the bits at high speed (10K to 30K rpm).

I would think a dremmel would be hard to control if if your goal is to drill and cut out the screw. Even the speed controlled dremmels spin at high speed (they don't have much torque at low speed, they are designed to be high speed devices) and are hard to keep on target when trying to cut out something hard (like a screw shank) when it is probably embedded in something soft (like possibly a plastic housing). I would expect that you would chew up the housing around the screw shank, and also heat up the screw shank which could soften the plastic in the surrounding housing (I *think* is plastic... IIRC).

If anything, you may want to try gently using a drill bit to "pop off" the two screw heads, leaving only the shanks of the screws... then remove the plastic lens cover, and they try needle nose pliers, electrician's pliers or locking grip pliers to try and grip the little nub sticking up and unscrew the screw. Of course, the problem for me is always getting a good grip on a small, deteriorating piece of metal. It can sometimes be difficult if not impossible to get a good enough grip to remove the screw.

That's why I've tried so many gizmo's over the years... and I'm especially intrigued by the pliers in photos 5 & 6. They may just what I've needed all of these years!!!
 

Attachments

  • image2.jpg
    image2.jpg
    119.8 KB · Views: 4,078
  • image3.jpg
    image3.jpg
    93.8 KB · Views: 4,079
  • image4.jpg
    image4.jpg
    115.4 KB · Views: 4,099
  • image5.jpg
    image5.jpg
    136 KB · Views: 4,151
  • image7.jpg
    image7.jpg
    91.2 KB · Views: 4,098
  • image6.jpg
    image6.jpg
    92.8 KB · Views: 4,009
Last edited:
Good info PJB! Personally, I have had good luck with the first ones. Drill a small hole through the center of the damaged bolt and then insert the bit and reverse it.

I can't remember the head style on the factory bolts. I have since changed mine to SS hex bolt heads. If they are hex bolt, you could carefully use a dremel with a cut off wheel to slice a small section to put a flat head screwdriver in (as mentioned by Fullboogie.
 
PJ - I don't think you understood my suggestion. It was not to use a dremmel to drill out the screw head. It is to use a cutoff wheel, slot the head, and use a flat screwdriver to back the screw out. 90% of the time the phillips head strips out on these rusty little screws, but the head is still there. Slotting with a dremmel is much cheaper and quicker.
 
PJ - I don't think you understood my suggestion. It was not to use a dremmel to drill out the screw head. It is to use a cutoff wheel, slot the head, and use a flat screwdriver to back the screw out. 90% of the time the phillips head strips out on these rusty little screws, but the head is still there. Slotting with a dremmel is much cheaper and quicker.

You're right... I did misunderstand...

but at least I found a decent set of reverse drill bits to order (item #1), plus those "vampliers" seem really cool. I've have to give them a try.

:usa2:
 
Just replace it with this!!!

PJ - I don't think you understood my suggestion. It was not to use a dremmel to drill out the screw head. It is to use a cutoff wheel, slot the head, and use a flat screwdriver to back the screw out. 90% of the time the phillips head strips out on these rusty little screws, but the head is still there. Slotting with a dremmel is much cheaper and quicker.

OK Bruin.... I'm determined to help you on this one. :tea:

Try this instead... rip the old light bulb and housing out using any method of brute force that you desire... just don't mess up the metal on your rear gate.

Next... Pull the housing out as far as you can, and then CUT THE WIRES OFF...

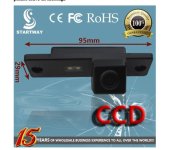
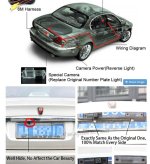
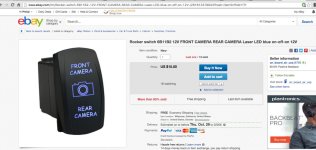
Then order the four items shown below, and install them.

When you're done, you'll have a NEW light fixture with an LED light AND a high quality CCD rear view camera.


The first images is from AliExpress.com

It's a complete replacement for the light housing that fits exactly, includes an LED light for your license plate, AND a camera. I actually ordered this one shown in the photo and installed it in my old T4R.

This particular one uses a high quality CCD chip, and puts out a high quality 16x9 aspect ratio image. It was awesome both day and night. Almost all of the others I found had lower quality camera's using CMOS chips or some other type of technology that isn't as good especially at night.

The next two items are from Amazon.

The last item is a switch from ebay. Note that it's labeled "Camera".

I did this on my old T4R, wired it in with the rocker switch to activate the cameras on demand. It worked GREAT. The mirror is super-high OEM quality. You'd never know it's aftermarket. It even comes with a neat and clean channel to hide the wires going to it.

Plus, the mirror shown has two video inputs, so I mounted a second camera on the underside of my rear spoiler, and used the "Front" camera to show the high view, and the "Rear" camera to show the lower view.

When I was pulling my boat, the upper camera gave me a great view of what was going on behind me.... much better than the mirror alone. I could see the boat and everything above it... such as if my cover were flapping too much in the wind.


How's that for trying? Do I at least get an "E" for effort?

P.S. -- I sunk my old T4R, so I don't have any photos, but if you decide to do it, I can consult on the project to tell you what worked well, and what to avoid.

My new 4R has a factory camera, so I can't have the fun of doing THIS upgrade to it.

-Phil
 

Attachments

  • image1.jpg
    image1.jpg
    89.4 KB · Views: 4,777
  • image2.jpg
    image2.jpg
    50.4 KB · Views: 4,735
  • image3.jpg
    image3.jpg
    67.3 KB · Views: 4,782
  • image4.jpg
    image4.jpg
    100.5 KB · Views: 4,761
  • image5.jpg
    image5.jpg
    110.5 KB · Views: 4,543
  • image6.jpg
    image6.jpg
    114.4 KB · Views: 4,546
Last edited:
Holy! You guys are awesome! I really appreciate you guys taking time to respond. I plan to get on this today after work.

Thank you all again!
 
This is great advice, and comes in handy across applications!

True, true... cutting a slot in the screw with a dremmel and backing out the screw might be easy, cheap, and fast. But who wants cheap and easy (hehe!)... :noidea: :noidea: :noidea:

Why do that, when you can spend about $160 plus several hours work and UPGRADE!!!! :biggrin1: :biggrin1: :biggrin1:

Plus, for those of us who have a live-in boss (Read WIFE), you have the perfect
excuse to spend more time and money on that #@$#$ truck.

"But honey, I HAD to put in the rear view camera and new mirror to see the image. My rear license plate light was blown, and the screw wouldn't come out.
I really had no other choice... it was a SAFTEY issue..." :croc:

She'll know you're full of it... but if you smile just right, and give her the "who me?" type of look (see below) you'll get away with it without too much retribution! (hehe!)
 

Attachments

  • puppy-dog-eyes.jpeg
    puppy-dog-eyes.jpeg
    82.7 KB · Views: 3,877
Last edited:
SWEET!

GOT IT!

The Dremmel did the trick! What a pain in the A...

Thank you all for the help! That back up cam would have been sweet but it just is not in the financial cards right now.

I was able to save the lenses and light assembly and just put some stainless screws in. Hopefully that helps in the future.

Thank you all again!
 
SWEET!

GOT IT!

The Dremmel did the trick! What a pain in the A...

Thank you all for the help! That back up cam would have been sweet but it just is not in the financial cards right now.

I was able to save the lenses and light assembly and just put some stainless screws in. Hopefully that helps in the future.

Thank you all again!

Any particular size screws?
 
Pulled the liftgate inner panel, removed rear light assembly/liftgate handle trim (see trim panel removal video on Youtube), used kroil/penetrant on screws, then used vice grips on back of screw to break them lose. Used dremel to cut new screwdriver slot and removed the screws.
 

Members online

Forum statistics

Threads
278,307
Messages
3,554,056
Members
248,016
Latest member
Advally Service

Trending content

Back
Top