
You are using an out of date browser. It may not display this or other websites correctly.
You should upgrade or use an alternative browser.
You should upgrade or use an alternative browser.
Locked Up's 4Runner
- Thread starter locked up
- Start date

locked up
Member
3/21/25
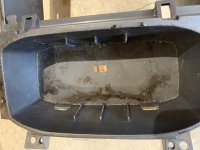
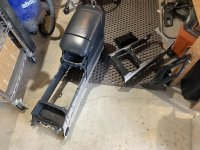
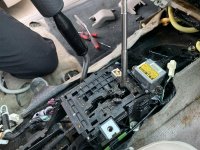
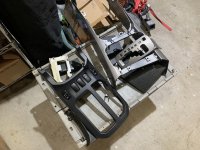
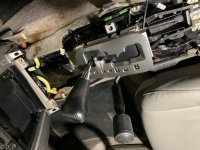
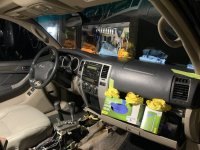
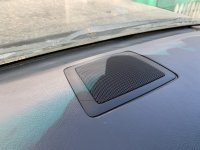
Time to clean up whatever the heck the PO spilled in the center console.
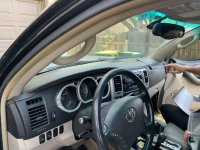
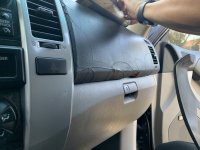
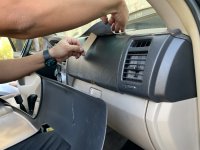
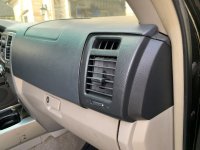
Also added a coverlay dash cover and reskinned the seats.
The dash went OK. I'd say it is 8/10 whereas before it was 2/10.
I ordered the "Dark Gray" but should have gone with black. It's not a huge color difference and 100% better than the carpet the PO had in there.
Time to clean up whatever the heck the PO spilled in the center console.
Also added a coverlay dash cover and reskinned the seats.
The dash went OK. I'd say it is 8/10 whereas before it was 2/10.
I ordered the "Dark Gray" but should have gone with black. It's not a huge color difference and 100% better than the carpet the PO had in there.
Attachments
Last edited:
locked up
Member
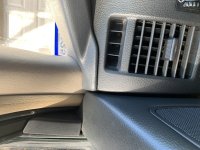
More pics.
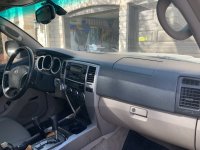
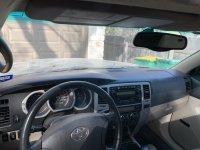
Dash color difference is less noticeable than in the pics.
I think I am going to try to fill and paint the ends that are still visible.
If I had to do it all over again, 100% go with the black.
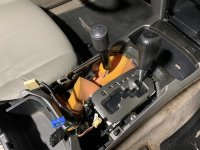
The foam is just to quiet some of the noise form the T-Case till my dynamat gets here and I can install it & seal up the shift boot.
But the foam is actually working quite well for now.
Dash color difference is less noticeable than in the pics.
I think I am going to try to fill and paint the ends that are still visible.
If I had to do it all over again, 100% go with the black.
The foam is just to quiet some of the noise form the T-Case till my dynamat gets here and I can install it & seal up the shift boot.
But the foam is actually working quite well for now.
Attachments
Last edited:
locked up
Member
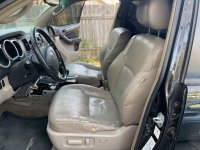
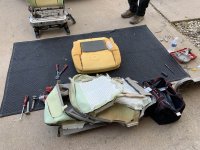
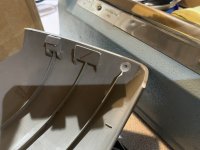
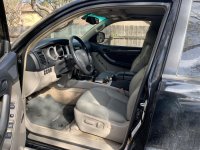
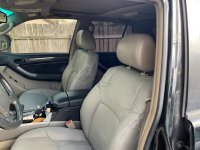
And of course the seat skins.
Install was not easy but they were $100:
Amazon.com
Broke a screw stay so I ordered a new piece.
Color is more grey than the stock tan, but less noticeable in person and less trashed looking.
100% better IMO.
I will update as they smooth out.
Probably should have replaced the foams but mine were not too bad.
We did repair one area on driver side bottom that gets the most use.
I think I may also go to black head rests with an embroidered "V8" on them because why not.
Install was not easy but they were $100:
Amazon.com
Broke a screw stay so I ordered a new piece.
Color is more grey than the stock tan, but less noticeable in person and less trashed looking.
100% better IMO.
I will update as they smooth out.
Probably should have replaced the foams but mine were not too bad.
We did repair one area on driver side bottom that gets the most use.
I think I may also go to black head rests with an embroidered "V8" on them because why not.
Attachments
Last edited:
locked up
Member
3/22/25
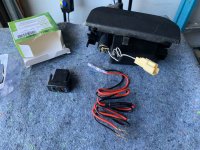
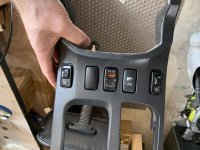
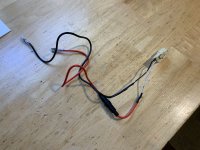
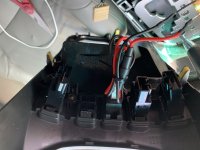
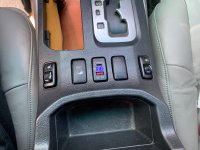
Lets add a USB!
Since I no longer have a cig lighter, I went ahead and added this USB port.
It shows voltage for the circuit so you have a general idea of your charging system but it will show a big drop when you plug something in.
So not 100% accurate as to what is happening at the battery itself.
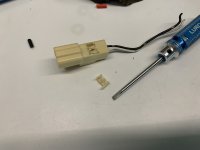
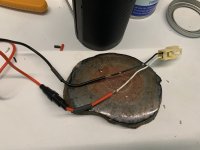
I tried to depin the little plug to make this super clean but bastard did not want to come apart.
This is the one I used:
Amazon.com
Lets add a USB!
Since I no longer have a cig lighter, I went ahead and added this USB port.
It shows voltage for the circuit so you have a general idea of your charging system but it will show a big drop when you plug something in.
So not 100% accurate as to what is happening at the battery itself.
I tried to depin the little plug to make this super clean but bastard did not want to come apart.
This is the one I used:
Amazon.com
Attachments
Last edited:
locked up
Member
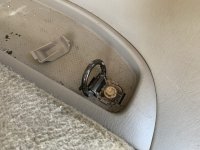
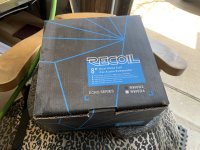
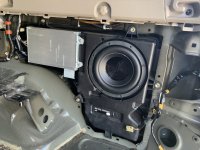
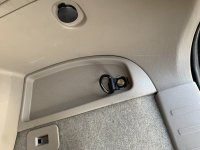
And finally I got around to replacing the sub.
What a PITA.
Really have to take things apart to get to it.
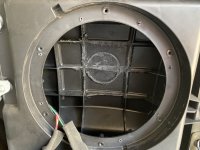
Had to modify the enclosure to make it fit.
Not quite the same diameter but made it work and feel good about it staying in place.
This is the one I used:
Amazon.com
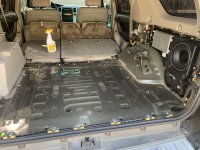
Also did a little more clean up because eeewww.
What a PITA.
Really have to take things apart to get to it.
Had to modify the enclosure to make it fit.
Not quite the same diameter but made it work and feel good about it staying in place.
This is the one I used:
Amazon.com
Also did a little more clean up because eeewww.
Attachments
Last edited:
locked up
Member
3/24/25
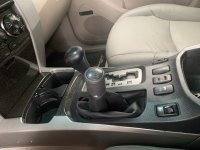
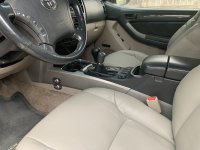
Added a shift boot to cover the hole.
Still need to affix it permanently but still ... better than the visible foam.
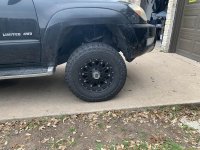
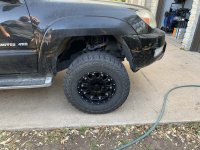
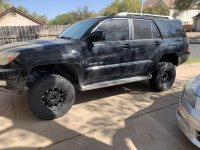
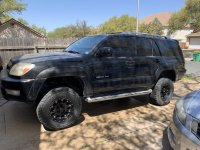
Also, playing around with caps on the wheels.
The wheels are just too busy for me and not sure what to do.
Tried removing them and then just black ones.
Might try removing the larger plastic bolts (yes they are plastic!) to see if that is better.
Not sure if I like the black caps but I guess I could make some center deals that say "Locked Up" or something silly.
Added a shift boot to cover the hole.
Still need to affix it permanently but still ... better than the visible foam.
Also, playing around with caps on the wheels.
The wheels are just too busy for me and not sure what to do.
Tried removing them and then just black ones.
Might try removing the larger plastic bolts (yes they are plastic!) to see if that is better.
Not sure if I like the black caps but I guess I could make some center deals that say "Locked Up" or something silly.
Attachments
locked up
Member
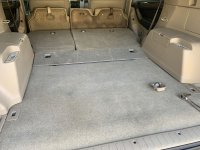
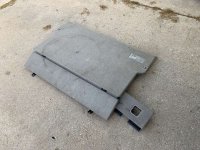
Pulled out the rear shelf system.
I didn't "hate it" but for me this is better.
If you are thinking about doing it, this is a easy change.
You really only "need" the 1 big cover & 2 little cups (they are deeper when you have the shelf).
I don't have all the parts to make it perfectly clean though.
The carpet and the cleats on the wheel wells would be different but I couldn't find them in good condition.
I may find something to put under the edge of the carpet if it bother me after I get the weather tech mats.
Anybody want a shelf system near Austin?:biggrin1:
I didn't "hate it" but for me this is better.
If you are thinking about doing it, this is a easy change.
You really only "need" the 1 big cover & 2 little cups (they are deeper when you have the shelf).
I don't have all the parts to make it perfectly clean though.
The carpet and the cleats on the wheel wells would be different but I couldn't find them in good condition.
I may find something to put under the edge of the carpet if it bother me after I get the weather tech mats.
Anybody want a shelf system near Austin?:biggrin1:
Attachments
Last edited:
locked up
Member
I definitely feel a difference driving when it is wet.
Never had traction control kick on before but this past Thursday it was raining and I kept it quite busy when pulling out onto the roads.
I'm not sure if I notice it more with it having been an AWD than a normal 2wd or v6.
I wonder if the V6 4wd Module would make more sense for me now?
Or maybe they are exactly the same.
Need to look up some part numbers I guess.
I do not feel any difference when it's dry pavement but I also don't go around trying to spin a tire.
Looking at doing a VSC switch too.
Maybe both versions.
I really need more experience with the systems though.
Never had traction control kick on before but this past Thursday it was raining and I kept it quite busy when pulling out onto the roads.
I'm not sure if I notice it more with it having been an AWD than a normal 2wd or v6.
I wonder if the V6 4wd Module would make more sense for me now?
Or maybe they are exactly the same.
Need to look up some part numbers I guess.
I do not feel any difference when it's dry pavement but I also don't go around trying to spin a tire.
Looking at doing a VSC switch too.
Maybe both versions.
I really need more experience with the systems though.
locked up
Member
I looked up a few random vins on Partsourq to see if the 4WD control computers are the same.
Just wondering if I could swap out to a different one and get different results.
Mostly wondering if a V6 4WD computer would be able to recognize when I am in 2WD and treat the VSC differently.... or might be exactly the same?! lol
My 03 V8 comes up as: 8953035290 (Substitution:8953035291).
-2WD 03 V6 shows the same base part number in the diagram (89533) but it is not clickable.
-2WD 03 V8 shows the same base part number in the diagram (89533) but it is not clickable.
-4WD 03 V6 shows part number 8953035310 no substitution.
-4WD 04 V6 shows a different part number 8953035311 (substitution: 8953035312).
I repeated this on Amayama.
-2WD 03 V6 shows the same base part number in the diagram (89533) but it is not clickable.
-2WD 03 V8 shows the same base part number in the diagram (89533) but it is not clickable.
-4WD 03 V6 shows part number 8953035310 (substitution: 8953035311).
-4WD 04 V6 shows a different part number 8953035311 (substitution: 8953035312).
Also searched for a 2009 V6 4WD and that part number is 8953035313.
Did not search all the years to see when it changed over.
So definitely a difference in the V8 to V6, which makes sense.
I poked around on Ebay and the plugs look the same.
Might see if I can grab one cheaply next time I am at the parts yard.
Just wondering if I could swap out to a different one and get different results.
Mostly wondering if a V6 4WD computer would be able to recognize when I am in 2WD and treat the VSC differently.... or might be exactly the same?! lol
My 03 V8 comes up as: 8953035290 (Substitution:8953035291).
-2WD 03 V6 shows the same base part number in the diagram (89533) but it is not clickable.
-2WD 03 V8 shows the same base part number in the diagram (89533) but it is not clickable.
-4WD 03 V6 shows part number 8953035310 no substitution.
-4WD 04 V6 shows a different part number 8953035311 (substitution: 8953035312).
I repeated this on Amayama.
-2WD 03 V6 shows the same base part number in the diagram (89533) but it is not clickable.
-2WD 03 V8 shows the same base part number in the diagram (89533) but it is not clickable.
-4WD 03 V6 shows part number 8953035310 (substitution: 8953035311).
-4WD 04 V6 shows a different part number 8953035311 (substitution: 8953035312).
Also searched for a 2009 V6 4WD and that part number is 8953035313.
Did not search all the years to see when it changed over.
So definitely a difference in the V8 to V6, which makes sense.
I poked around on Ebay and the plugs look the same.
Might see if I can grab one cheaply next time I am at the parts yard.
locked up
Member
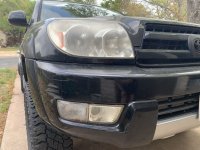
My pass side turn signal housing was leaking & filling up with water.
So each time it would rain I ran the chance of it shorting the bulb.
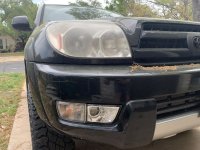
All my lights were cloudy and since I have a headlight restore kit lying around I figured the easiest/cheapest thing to do, for now, is replace what is in there.
Just to get it road worthy.
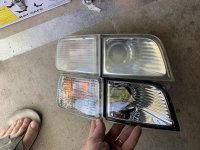
I ordered new parts from Amazon.
Blinker Housings
Fog Lights
The blinker housings went right in.
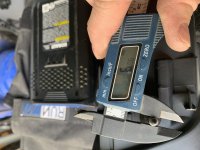
The fog lights had a minor issue.
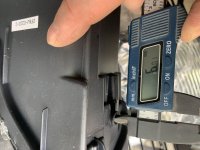
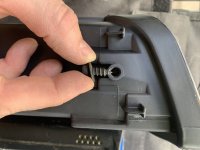
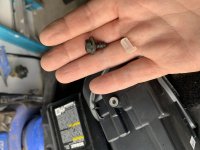
One of the screw holes was the same ID as the OD of the OEM screw.
So that wasn't going to work.
First attempt was to cut down and glue in some plastic sheet rock anchors.
The glue failed so I had to come up with something else.
So each time it would rain I ran the chance of it shorting the bulb.
All my lights were cloudy and since I have a headlight restore kit lying around I figured the easiest/cheapest thing to do, for now, is replace what is in there.
Just to get it road worthy.
I ordered new parts from Amazon.
Blinker Housings
Fog Lights
The blinker housings went right in.
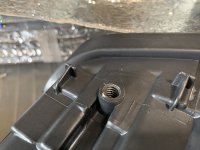
The fog lights had a minor issue.
One of the screw holes was the same ID as the OD of the OEM screw.
So that wasn't going to work.
First attempt was to cut down and glue in some plastic sheet rock anchors.
The glue failed so I had to come up with something else.
Attachments
Last edited:
locked up
Member
I suspect I could have used a 5/16 lag screw and just dulled the tip so it didn't bust through the housing.
That would require a trip to the store.
I'm impatient.
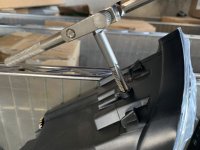
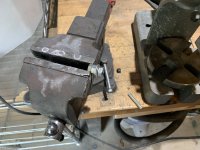
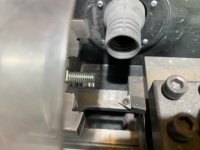
I opted to modify some hardware I had lying around.
Tapped the housing.
Cut the screw to match the length of the OEM unit.
Chamfered the end.
It worked just fine.
Anyway ... this is a VERY easy swap to make if you are in this boat. Just check your bolts first.
Next up I will do the headlight restore.
That would require a trip to the store.
I'm impatient.
I opted to modify some hardware I had lying around.
Tapped the housing.
Cut the screw to match the length of the OEM unit.
Chamfered the end.
It worked just fine.
Anyway ... this is a VERY easy swap to make if you are in this boat. Just check your bolts first.
Next up I will do the headlight restore.
Attachments
Last edited:

4RunnerAquasport
Senior Member
Nice thread! Lots of work done in the last year. Taking pics and posting all this stuff is time consuming.I definitely feel a difference driving when it is wet.
Never had traction control kick on before but this past Thursday it was raining and I kept it quite busy when pulling out onto the roads.
I'm not sure if I notice it more with it having been an AWD than a normal 2wd or v6.
I wonder if the V6 4wd Module would make more sense for me now?
Or maybe they are exactly the same.
Need to look up some part numbers I guess.
I do not feel any difference when it's dry pavement but I also don't go around trying to spin a tire.
Looking at doing a VSC switch too.
Maybe both versions.
I really need more experience with the systems though.
After having AWD for several years of ownership, the 2wd capability achieved with the manual t-case was alarming in the rain. Especially with the width of a 12.5" tire. I was slipping and sliding quite a bit. In Florida that is definitely a problem.
The PO of my rig already had an ABS switch installed and after resetting the zero point calibration a dozen times, got tired of that so I've just left it turned off for most of my ownership tenure with this vehicle. Was never really a problem until the manual swap and then the slippy sliddy shit in the rain started happening lol.
So now I'm very careful in 2wd during light rains, and I use 4-Hi when it's a steady rain and the roads are thoroughly wet or ponding. That works out Ok, but I'm curious if you can get a module and ABS to work with a manual t-case. Most of us with a manual swap have disconnected it, so I don't think anyone has tried that. Edit: I wonder if a 5th gen manual t-case module would work? In 05' the CAN Bus was changed to the same protocol as the 5th gen, so the newer 4th gens might be able to use that module.
Last edited:
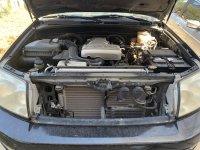
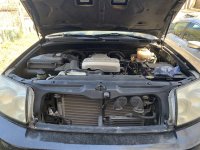
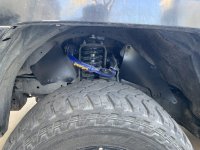
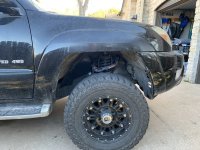
2/28/25 Update
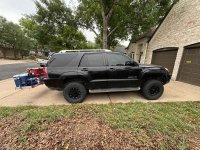
Runner was with Krawltex getting the manual T-case slapped in.
I know it isn't "that difficult" to bolt in, but I no longer have access to a welder to modify the shifter. The rear main seal was also leaking so they replaced that. I also had them replace ALL the body mounts with OEM parts and do a 1/2" body lift to help with the shifter fab.
They also ordered & put in new driveshafts from Tom Woods.
So this was just a little more work than I wanted to do in the driveway to then drive it to them for just the shifter fab. Anyway.... photo dump and please don't judge me on how nasty it was....I already cleaned it up!
Just ran across your thread and your info on the manual t-case swap. Nice work. Do you have any more pictures of the modified shifter? I too am planning to install the manual shift case but the shifter routing is one thing that’s holding me up—I’ve just not seen a way that the stick has been modified that I like. Any info/pics would be greatly appreciated!
locked up
Member
Been too long since I updated!
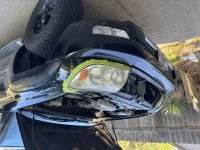
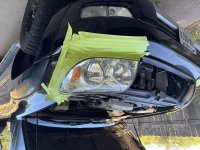
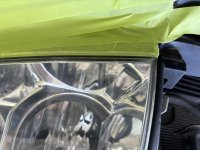
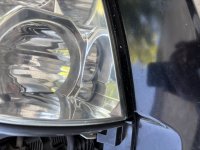
Back in April I went ahead and redid my headlights.
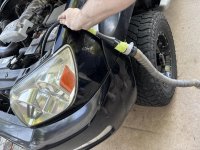
Nothing out of the ordinary but I did come across the most sun baked bug on the planet that I sucked out with a creative hose attachment. :wtf:
They look so much better!
Back in April I went ahead and redid my headlights.
Nothing out of the ordinary but I did come across the most sun baked bug on the planet that I sucked out with a creative hose attachment. :wtf:
They look so much better!
Attachments
Last edited:
locked up
Member
5/8/2025
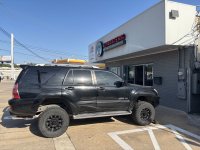
Ceramic Tint Day!!
I had the entire truck done by Sunbusters using their Formula One Stratos. 30% Front sides & Sunroof.
5% Rear sides.
15% Back Window.
Used "Air 90" which is 90% for the windshield.
Made a pretty big difference in the heat for me.
Photo is before but I'll get some afters eventually.
Ceramic Tint Day!!
I had the entire truck done by Sunbusters using their Formula One Stratos. 30% Front sides & Sunroof.
5% Rear sides.
15% Back Window.
Used "Air 90" which is 90% for the windshield.
Made a pretty big difference in the heat for me.
Photo is before but I'll get some afters eventually.
Attachments
locked up
Member
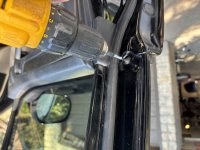
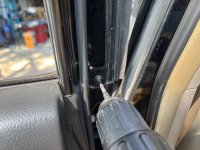
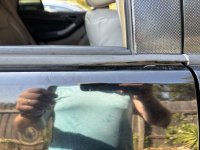
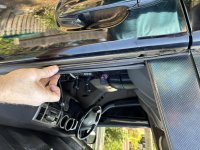
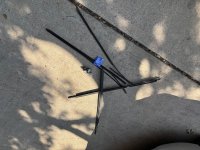
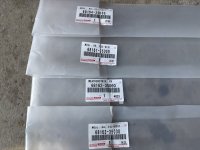
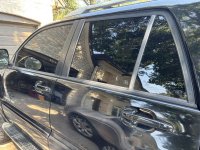
And today was weatherstripping day.
Woohoo!
I thought the parts were confusingly labeled but they were all correct.
I guess check yours before you rip the old ones off because they probably will not com off in one piece.
Woohoo!
I thought the parts were confusingly labeled but they were all correct.
I guess check yours before you rip the old ones off because they probably will not com off in one piece.
Attachments
locked up
Member
Just ran across your thread and your info on the manual t-case swap. Nice work. Do you have any more pictures of the modified shifter? I too am planning to install the manual shift case but the shifter routing is one thing that’s holding me up—I’ve just not seen a way that the stick has been modified that I like. Any info/pics would be greatly appreciated!
Sorry I just saw this!
I do not have any pictures of that but I am meaning to get in there and get some. My plan is to grab some when I either do the dyna mat or add in some boot trim for the 4wd shifter.
Probably won't be until the fall because it just too dang hot right now to do the matting and I want to wait on the boot trim until I get a better 3D printer that can handle ABS or ASA or something fit for these TX summers.
Similar threads

- Replies
- 0
- Views
- 1K
- Replies
- 3
- Views
- 4K

- Replies
- 2
- Views
- 2K

- Replies
- 6
- Views
- 4K


