Long-Term Build

Pyroboy

New member
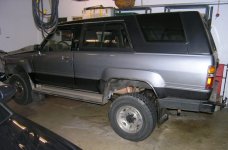
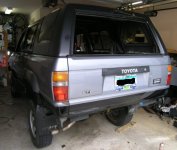
I bought my '89 'Runner new and it was my DD until 2009. I didn't do much to it other than regular maintenance and a switch to some slightly larger tires. I ran it on some trails and sand dunes in Ontario, and some mud, but nothing too rough. I moved to BC a few years ago and started getting interested in more serious off-roading but marriage, kids and a mortgage meant not a whole lot of play money. Here's a picture of the truck from 2004, basically the way I bought it.
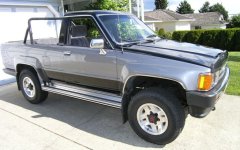
P6060338 red.jpg
Since the stock suspension was pretty bagged after almost 400,000 km, I swapped in a 2" OME lift in 2005 with springs, torsion bars and shocks. I also put on an ARB bull bar.
Before:
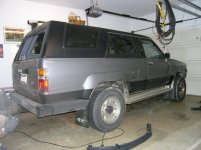
Before 060205 red.jpg
After:
After 060205 red.jpg
In 2008 I went to 32" A/T tires on 17" forged wheels, swapped the 4.10 gears for 4.56s and added an ARB air locker. I also added a 1" body lift. Last summer I finally got out to play and had some fun. Now it's time for some serious changes.
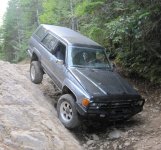
IMG_0377 red.jpg
The parts list includes:
-36" super swampers on 15x8 wheels
-dual t-case and adapter (likely MC)
-SAS with a Trail Gear 3-Link
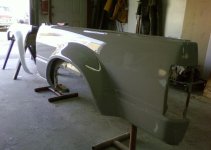
-High-Clearance fiberglass fenders and quarters from toyotafiberglass.com
-rock sliders
-solid rear bumper
-fender hoops to connect the bumpers and sliders

I stuck the tires on for fun and decided to get the body done first.
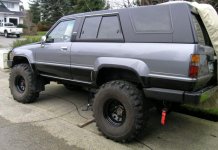
P1010203 red.jpg

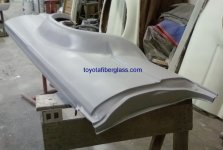
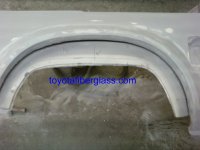
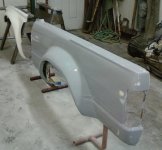
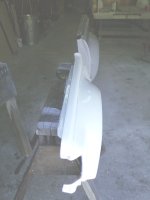
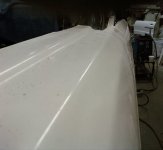
Here are the pieces from toyotafiberglass.com
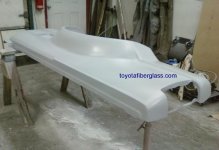
SSPX0655.jpg
SSPX0656.jpg
SSPX0657.jpg
 

Attachments

  • P6060338 red.jpg
    P6060338 red.jpg
    72.4 KB · Views: 4,165
  • Before 060205 red.jpg
    Before 060205 red.jpg
    92.3 KB · Views: 2,891
  • After 060205 red.jpg
    After 060205 red.jpg
    96.1 KB · Views: 2,623
  • IMG_0377 red.jpg
    IMG_0377 red.jpg
    121.6 KB · Views: 3,497
  • P1010203 red.jpg
    P1010203 red.jpg
    81.9 KB · Views: 4,744
  • SSPX0655.jpg
    SSPX0655.jpg
    42.4 KB · Views: 2,522
  • SSPX0656.jpg
    SSPX0656.jpg
    43 KB · Views: 2,593
  • SSPX0657.jpg
    SSPX0657.jpg
    88.4 KB · Views: 2,637
Register to hide this ad
Continued

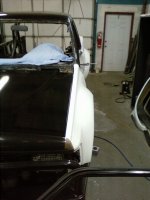
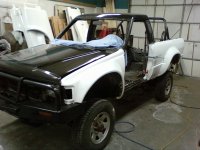
And a couple more of the panels. The 'stock' flare is 2" and this are about 3" wider than that. Should cover the tires no problem.

SSPX0667.jpg

SSPX0668.jpg

SSPX0669.jpg

The plan is to gut the interior in the next few weeks then get the truck up to Penticton BC. Since Corey (Slacker on the board) makes the panels and knows more about these trucks than I ever will , I think it's best to have him do the install. Can't wait to see these on. In the meantime, I have to order the 3-link and coilovers for the SAS. More pix to come.
 

Attachments

  • SSPX0667.jpg
    SSPX0667.jpg
    74.7 KB · Views: 2,588
  • SSPX0668.jpg
    SSPX0668.jpg
    71.3 KB · Views: 2,463
  • SSPX0669.jpg
    SSPX0669.jpg
    44.5 KB · Views: 2,452
Very nice, I am in the well not exactly same boat (not married, no kids, or a mortgage) but am not getting any younger, but between being away from my truck 90% of the summer due to work and school in the winter and my supra It is a long term build, but the important thing is its mine and paid for and there will always be a market for parts and upgrades for these unbelivable vehicles.

Take your time and make a plan. right!

Good luck keep us posted!
 
Nice truck man! Loving those 36's. I know how ya feel money ain't easy and Toyota mods ain't free. But keep up the good work and keep us posted. Hands down my favorite '89 on this site!
 
Wow what a nice 4Runner:trophy: Is it a special edition with two tone paint? Not sure I would mod such a nice and rare 1st gen 4Runner for off road.
 
Special Edition

Yes, it's a 1989 Special Edition. I think Toyota threw some chrome and SR5 seats in the leftover 4-cylinders to move them out for the new 2nd Gen 1990s.
I know what you mean about being rare but it has a ton of miles on it and some rust issues. This way, I get to keep it for another 20 years!

I plan to keep the paint scheme as it is and do a gravel guard or bedliner for the lower black portion. Will keep posting.
 
:bravo: The rig is coming along nicely!! Cant wait to see the SAS and 36's! Keep up the good work! :cheers:

I plan to keep the paint scheme as it is and do a gravel guard or bedliner for the lower black portion. Will keep posting.

Nice plan! I saw an old T100 at work yesterday with bedliner on the bottom 6" and it looked sweet and practical!
 
Getting Ready for the Body Work

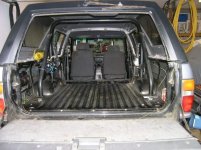
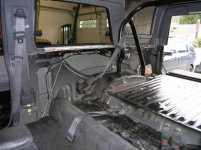
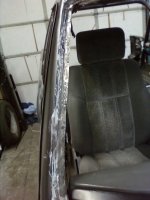
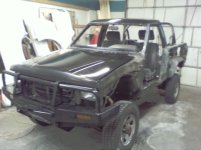
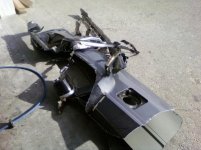
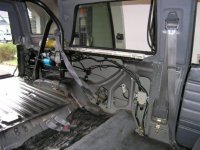
The truck will be going to toyotafiberglass.com next week. Today I took the rear bumper and trim off and cleared out the interior.
Outside:
Prep 1 110320.JPG
Inside:
Prep 2 110320.JPG
Prep 3 110320.JPG
Prep 4 110320.JPG

More to come.
 

Attachments

  • Prep 1 110320.JPG
    Prep 1 110320.JPG
    82.3 KB · Views: 2,349
  • Prep 2 110320.JPG
    Prep 2 110320.JPG
    81.2 KB · Views: 2,439
  • Prep 3 110320.JPG
    Prep 3 110320.JPG
    72.1 KB · Views: 2,362
  • Prep 4 110320.JPG
    Prep 4 110320.JPG
    80.4 KB · Views: 2,363
Ongoing...

I took the truck to Penticton Saturday and dropped it off with Corey. Spent and hour talking about the build. Lots of rust in the windshield pillars but I have another roof to be used for patches. There's also rust in the rear innner wheel wells. Corey got right into it and by Sunday night it looked like this:
SSPX0757.jpg
SSPX0758.jpg

The small tires are the only snows I have and the trip is close to 250 miles with mountain passes so they had to go on. 36s will look a bit less dorky.
 

Attachments

  • SSPX0757.jpg
    SSPX0757.jpg
    128.8 KB · Views: 2,614
  • SSPX0758.jpg
    SSPX0758.jpg
    39.2 KB · Views: 2,596
I took the truck to Penticton Saturday and dropped it off with Corey. Spent and hour talking about the build. Lots of rust in the windshield pillars but I have another roof to be used for patches. There's also rust in the rear innner wheel wells. Corey got right into it and by Sunday night it looked like this:
View attachment 41703
View attachment 41704

The small tires are the only snows I have and the trip is close to 250 miles with mountain passes so they had to go on. 36s will look a bit less dorky.


Thing looks sick bratha!!!
 
Update 110329

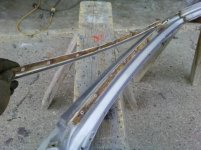
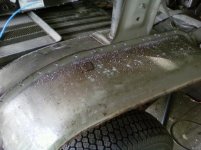
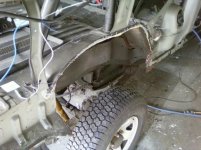
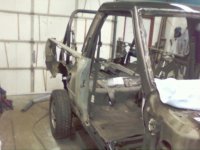
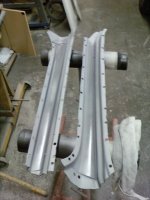
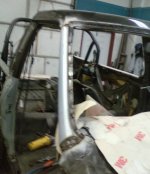
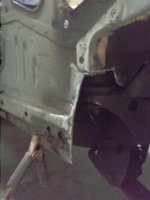
Today Corey got the rest of the rear quarters off and the outer wheel wells. Also got into the replacement roof pillars. See the rust behind the spot-welded drip rail. This was invisible from outside and the rails will be cut off where they used to bend down the pillar. Looks like years of Rust Check paid off as there is little rust in the body. Too bad about the pillars.
Shiny scrap metal:
SSPX0759.jpg
Replacement pillar and drip rail:
SSPX0765.jpg
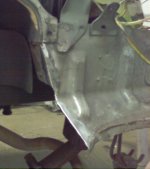
Wheel well prep:
SSPX0760.jpg
Wheel well removed:
SSPX0761.jpg
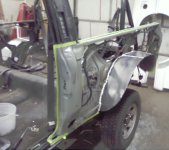
Side view:
SSPX0767.jpg
 

Attachments

  • SSPX0759.jpg
    SSPX0759.jpg
    35.9 KB · Views: 2,322
  • SSPX0760.jpg
    SSPX0760.jpg
    37.2 KB · Views: 2,266
  • SSPX0761.jpg
    SSPX0761.jpg
    39.5 KB · Views: 2,239
  • SSPX0765.jpg
    SSPX0765.jpg
    38.2 KB · Views: 2,278
  • SSPX0767.jpg
    SSPX0767.jpg
    109.6 KB · Views: 2,245
More Progress

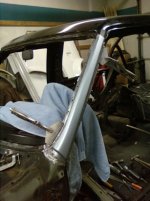
Today Corey test fit the driver's side panels and got the replacment outer A-pillars ready. Those pillars made me nervous everytime I drove the truck. Can't wait to get it back with no rust!

Driver's side panels test fit:
SSPX0770.jpg
Front view. Nice curves!
SSPX0773.jpg
Outer A-pillars prepped:
SSPX0775.jpg
Driver's side pillar fit:
SSPX0778.jpg
 

Attachments

  • SSPX0770.jpg
    SSPX0770.jpg
    56 KB · Views: 2,289
  • SSPX0773.jpg
    SSPX0773.jpg
    46.4 KB · Views: 2,286
  • SSPX0775.jpg
    SSPX0775.jpg
    49.8 KB · Views: 2,209
  • SSPX0778.jpg
    SSPX0778.jpg
    61.8 KB · Views: 2,216
More Progress

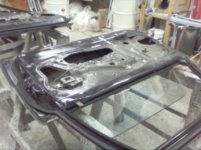
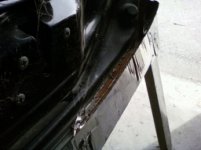
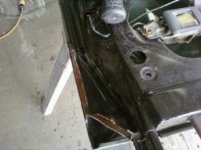
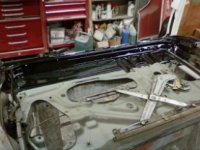
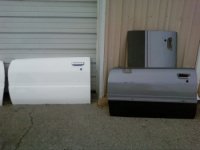
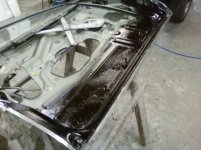
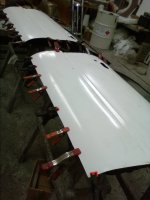
Got into the doors, today. Removed the skins and prepped for POR15 and the new skins. There was rust in the doors seams. Not unexpected since the driver's one was re-skinned twice.
Door Prep:
Door Prep.jpg
Seam Rust:
Seam Rust 1.jpg
Seam Rust 2.jpg
Prepped and POR'd:
Stripped and PORd.jpg
New and Old Skins:
New and Old Skins.jpg
 

Attachments

  • Door Prep.jpg
    Door Prep.jpg
    62.4 KB · Views: 2,239
  • Seam Rust 1.jpg
    Seam Rust 1.jpg
    52 KB · Views: 2,218
  • Seam Rust 2.jpg
    Seam Rust 2.jpg
    59.3 KB · Views: 2,172
  • Stripped and PORd.jpg
    Stripped and PORd.jpg
    61.8 KB · Views: 2,217
  • New and Old Skins.jpg
    New and Old Skins.jpg
    88.2 KB · Views: 2,218
Last edited:
More Progress

I think the weight savings is about 1/3.

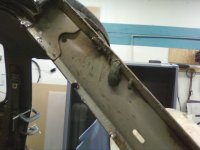
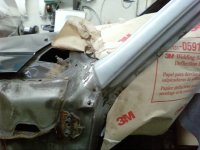
More progress yesterday. Got the doors prepped and the skins installed. Also got the outer A-pillars in place. Lots of fiberglass / filler 'goo' in the passenger side pillar.

Doors prepped, POR15'd and undercoated:
Driver Door Undercoated.jpg

Skins bonded and clamped:
Door Skins clamped.jpg

Goo in the passenger side pillar:
Pass A-Pillar Goop.jpg

New outer steel welded in:
Driver A-Pillar Welded.jpg
Pass A-Pillar Welded.jpg
 

Attachments

  • Driver Door Undercoated.jpg
    Driver Door Undercoated.jpg
    123.7 KB · Views: 1,490
  • Door Skins clamped.jpg
    Door Skins clamped.jpg
    98.6 KB · Views: 1,460
  • Pass A-Pillar Goop.jpg
    Pass A-Pillar Goop.jpg
    102.8 KB · Views: 1,442
  • Driver A-Pillar Welded.jpg
    Driver A-Pillar Welded.jpg
    102 KB · Views: 1,443
  • Pass A-Pillar Welded.jpg
    Pass A-Pillar Welded.jpg
    83.3 KB · Views: 1,442
Progress

Lots of progress this week...

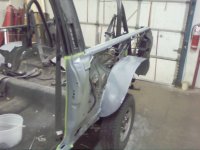
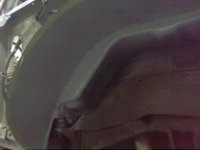
The rear inner quarters were prepped. The new outer wheel wells were cut and fabricated from sheet metal, formed to fit, trimmed and painted with epoxy primer. New quarter was fit up to check fit.
Front of driver's side inner:
SSPX0805.jpg

Rear of driver's side:
SSPX0806.jpg

Welded and sealed:
SSPX0826.jpg

Primed:
SSPX0828.jpg

Inside view:
SSPX0829.jpg

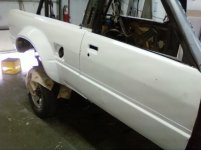
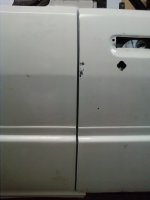
The passenger side panels were test fit again. Body line alignment is awesome.

SSPX0818.jpg
SSPX0819.jpg
SSPX0820.jpg
 

Attachments

  • SSPX0805.jpg
    SSPX0805.jpg
    105.2 KB · Views: 1,444
  • SSPX0806.jpg
    SSPX0806.jpg
    110.9 KB · Views: 1,457
  • SSPX0826.jpg
    SSPX0826.jpg
    112.9 KB · Views: 1,491
  • SSPX0828.jpg
    SSPX0828.jpg
    126.5 KB · Views: 1,442
  • SSPX0829.jpg
    SSPX0829.jpg
    103.8 KB · Views: 1,429
  • SSPX0818.jpg
    SSPX0818.jpg
    116.8 KB · Views: 1,467
  • SSPX0819.jpg
    SSPX0819.jpg
    117.1 KB · Views: 1,438
  • SSPX0820.jpg
    SSPX0820.jpg
    103.3 KB · Views: 1,447
Last edited:
Progress

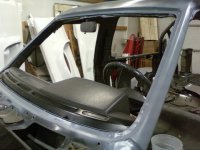
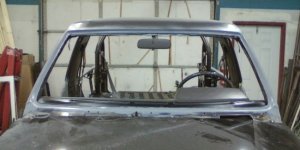
And the windshied frame and A-pillars were finished and primed. Better than new!

SSPX0827.jpg
SSPX0830.jpg
 

Attachments

  • SSPX0827.jpg
    SSPX0827.jpg
    135.6 KB · Views: 1,485
  • SSPX0830.jpg
    SSPX0830.jpg
    133.5 KB · Views: 1,405

Members online

Forum statistics

Threads
278,305
Messages
3,554,041
Members
248,016
Latest member
Advally Service

Trending content

Back
Top