Metaltech OPOR sliders 20% off sale

I'm about to place my order for the sliders. Question, Should i powder coat it or save some $$$ and paint it myself? Any benefits of PC vs Painted? Theres a warning that during shipment the powder coat is not warranty if it's damages or chip, etc.

Two things...

-it's cheaper for them to ship bare metal

-if you get them powder coated and tear them up on the trail how will you fix them, with a rattle can right??

I just went through this dilemma myself and all roads point to rattle can for me. Why get them fancy powder coated when they are there to take on damage? Can't wait to paint mine this weekend, coming Thursday! Less than 2 weeks after I placed the order.
 
True,

I noticed the descriptions said front plate only but the pictures shows front and rear plate. I don't see an option to add the rear plate. Does that mean it should look like what is picture on their website (i would think that is the case) but i'm confused. Did every one that have received looks like what the OP had posted?
 
True,

I noticed the descriptions said front plate only but the pictures shows front and rear plate. I don't see an option to add the rear plate. Does that mean it should look like what is picture on their website (i would think that is the case) but i'm confused. Did every one that have received looks like what the OP had posted?

I wanted them to add rear plate so I sent an email after I placed the order, they sent me one back the same day to confirm. It's a extra 50 bucks for the rear plate FYI.
 
I have looked all over and I am trying to find out the difference between the OPOR's and the more expensive metaltech branded? Is it the diameter of the tubing etc?

I didn't see any specs on their website (for the metaltech's anyway... they only list specs on the OPORS).

These very few negative posts also don't mention if it was the OPOR's bending or the Metaltech's...

I did read the metaltech's stick out further?

Thanks for the enlightenment if anyone has the info!
 
Last edited:
Glad u all are having good luck with MT. I have experienced horrible customer service with them and took my money elseware. Granted this was for my LC and not my 4R. I really wanted their sliders but couldn't get anyone to return calls, messages or voicemails. Kinda surprising....
 
Any one know what the standard fill plate option looks like? I saw some images on google of that metal wire mesh...hoping it isn't that.
 
Any one know what the standard fill plate option looks like? I saw some images on google of that metal wire mesh...hoping it isn't that.

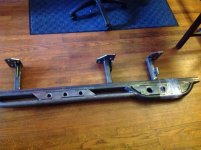
Here ya go. I added rear plate +$50
 

Attachments

  • image.jpg
    image.jpg
    134.5 KB · Views: 1,014
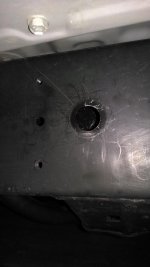
Woho, they arrived today!!! Got them setup for a test fit before coating them and all looks good except for one question that I have: On the drivers side their is a plastic cap in one of the screw holes for the front most mount. Can I just pull that out, or is that attached to something important on the other side?

aby9ubaz.jpg


ezasygut.jpg
 
I doubt there's anything in there. I want to check these out at the Georgia meet. Maybe convince the wife I need them.
 
I'm thinking that too... I'll be ripping that plug out tomorrow to find out unless anyone says not to for some reason :)


Also, I'll definitely have them on for the GA meet and your welcome to jump on them if you like... They feel VERY stout from the test fit, but I guess they should if their supposed to support the truck :)
 
I'm thinking that too... I'll be ripping that plug out tomorrow to find out unless anyone says not to for some reason :)


Also, I'll definitely have them on for the GA meet and your welcome to jump on them if you like... They feel VERY stout from the test fit, but I guess they should if their supposed to support the truck :)

Do you have KDSS? And are the brackets fairly self explanatory?

Let me know what you find behind the plug. I will be install mine next week.
 
Do you have KDSS? And are the brackets fairly self explanatory?

Let me know what you find behind the plug. I will be install mine next week.

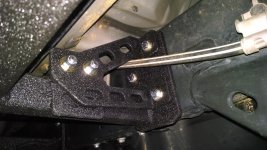
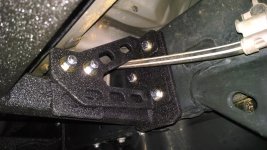
I do not have KDDS. Also I'll let you know tomorrow on the plug thing. The brackets are self explanatory all except for one that threw me off at first but it makes sense when you look at the sliders a little more. The back of the drivers side doesn't have a triangle brace welded on it and instead comes with a separate bolt on brace that mounts around whatever line is running on the frame back there (brake line maybe? its the black one with the white line on it...maybe xreas line...I never got a window sticker on my 4Runner so I am not sure if I have xreas but know I don't have KDDS from checking the shocks).

Oh yah, one other thing I wasn't expecting was that I had to remove that little 2" trim piece on the front bottom of the rear wheel wells. I'll go grab a pic in the garage to show you, but its bolted on so its easy to remove and seemingly useless anyway.
 
OK, here is the trim piece that you have to remove (with a #10 socket or wrench):

u2eduna5.jpg


myhuhyha.jpg


And here is the mount that threw me off at first (and how it looks like should be oriented to install)

qajy9yjy.jpg


qasaby8u.jpg
 
I got the same sliders and they shipped quickly with great CS from metaltech. I coated them myself with bedliner. I have not installed yet, since I'm waiting on my trail trim and a few other parts.
 
Ok, got them installed. Here is what I learned (with a bunch of pics so you don't make the mistake I did :bash:)

First bit of advice, Install the Driver side first because it is harder than the passenger so it was good to knock out the hard side first.

Secondly, don't remove the plug that I posted about earlier, as there is literally nothing behind it (it’s just a big hole, so nothing to screw into here):

Plug.jpg

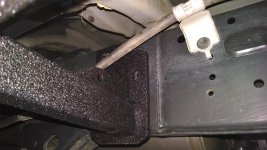
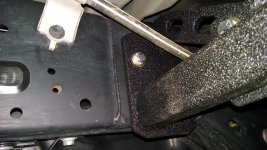
Third, and this is where the mistake came in, DO NOT fully tighten the separate bracket on the driver side back to the frame before bolting it to the slider itself, otherwise you have to go back and loosen everything and do some fighting. Also, on this note if you get the sliders coated with something thick (like Bullet liner like I did) just get the bolt in there the best you can and start to screw it in when it doesn't want to go through. In my case I had to forcibly screw the bolt through the bracket because of the thickness of the coating I believe, but it eventually worked its way through. Once it gets through all is good but that was a pain!!

Driver Back .jpg
 

Attachments

  • Plug.jpg
    Plug.jpg
    115.4 KB · Views: 908
  • Driver Back .jpg
    Driver Back .jpg
    140.9 KB · Views: 1,037
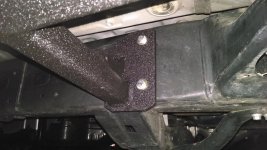
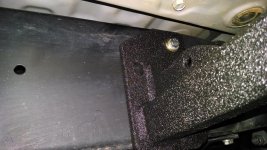
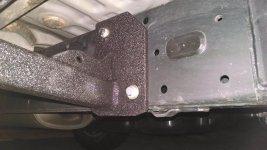
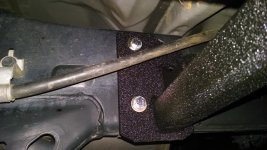
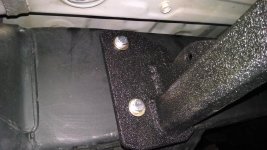
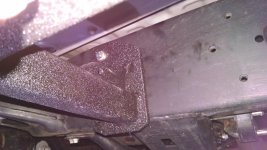
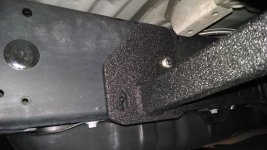
Here are some more pics (Passenger Side)...Driver side in the next post:

Passenger Front:
Passenger Front.jpg

Passenger Front Empty Hole:
Passenger Front Empty Hole.jpg

Passenger Middle:
Passenger Middle.jpg

Passenger Rear:
Passenger Rear.jpg

Passenger Rear empty hole:
Passenger Rear Empty Hole.jpg
 

Attachments

  • Passenger Front.jpg
    Passenger Front.jpg
    138.1 KB · Views: 852
  • Passenger Front Empty Hole.jpg
    Passenger Front Empty Hole.jpg
    139.7 KB · Views: 852
  • Passenger Middle.jpg
    Passenger Middle.jpg
    137.7 KB · Views: 850
  • Passenger Rear.jpg
    Passenger Rear.jpg
    139.2 KB · Views: 930
  • Passenger Rear Empty Hole.jpg
    Passenger Rear Empty Hole.jpg
    138.7 KB · Views: 907
More Pics (Driver Side and some measurements):

Driver Front:
Driver Front.jpg

Driver Front Empty Hole:
Driver Front Empty Hole.jpg

Driver middle (missing screw...Metal Tech shorted me one, so I'll be heading to Home Depot tomorrow to pick one up. Anyone know the size by chance?):
Driver Middle Missing Screw.jpg

Driver Back (front view):
Driver Back (front view).jpg

Driver Back (Back View):
Driver Back .jpg

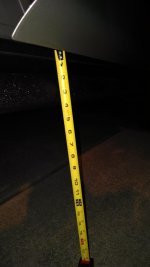
Total Height:
Long Tape.jpg

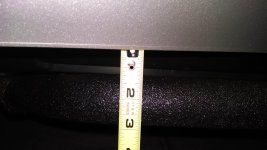
How awesome Metal Tech did at making these close to the doors (this is passenger side, driver side is slightly further away but it was too dark to take a picture):
Short Tape.jpg
 

Attachments

  • Driver Front.jpg
    Driver Front.jpg
    140.7 KB · Views: 837
  • Driver Front Empty Hole.jpg
    Driver Front Empty Hole.jpg
    138.3 KB · Views: 922
  • Driver Middle Missing Screw.jpg
    Driver Middle Missing Screw.jpg
    137 KB · Views: 932
  • Driver Back (front view).jpg
    Driver Back (front view).jpg
    140.8 KB · Views: 855
  • Driver Back .jpg
    Driver Back .jpg
    140.9 KB · Views: 805
  • Long Tape.jpg
    Long Tape.jpg
    119.4 KB · Views: 849
  • Short Tape.jpg
    Short Tape.jpg
    136.3 KB · Views: 859
Oh, I just remembered when I saw a separate thread that the bolts are M12's...Got to get some rust cleaner for the missing bolt hole to clean it up (its the only one rusted thankfully) and then get the new bolt in there.
 

Forum statistics

Threads
278,312
Messages
3,554,087
Members
248,016
Latest member
Advally Service

Trending content

Back
Top