Mojave Mad Man's - Multi Use - Build Thread

All I gotta say I wow! Love the build and the bumper! It's a great mix between rock and prerunner for sure.

I'm just just starting to build my own stuff and I know I have tons to learn yet but I'm in between you and LA burning up in 29 palms.

I had almost the same idea for a front bumper (minus the tube). I'm trying to save weight where I can as well. Got some good tips from reading everything and can't wait to see some more!

Sub'd
 
So it's been a busy 2 weeks! Got another big project done, and then got to spend the last two days finally working on my rig.

Fabbed up some armor for this Land Rover:


Now for my rig. Big install weekend!!!

- All-Pro UCA's
- Sonoran Steel 1.2
- Outter Tie Rods
- Poly LCA bushings
- Poly Rack Bushings
- Wheelers Brake Lines
- CV's Rebuilt

Thoughts:

So I will be taking this pig out tomorrow to test it out. But as of right now I have some initial impressions. The front end, it's perfect. It drives straight, firm but not covered wagon stiff, and seems to have nice road manors. The rear on the other hand is a little disappointing so far... It is the LC 7.5 wraps that Sonoran Steel includes with their lift. They are lifting it like 5", and the back feels very bumpy and stiff on the road. I even weighed it down with a spare tire and three sheets of steel in the back and the rear is still really high and bouncy. I will be ordering ToyTec's long trail coils up for this thing as I really wanna see the rear end come way down. I will make my final decision tomorrow after my trip but so far it's not what I want...


So I would say yesterdays trip was a success! 4runner did well and the only issue I had was the weight on the drive shaft contacted my factory gas tank skid. Easy fix, a little beating to move it over and no further problems.

Thoughts on SS 1.2 kit: So I have mixed feelings, the jury is still out on this one. The rear is still sky high. I was hoping that after a day of trail use it would settle a little more. At times on the trial it looked as if it settled, but when I got home from my trip it still measured 41" from ground to fender, which is where I was before... And also, surprisingly the front seemed to settle about 3/4". I have the shocks set on the first setting. I am going to clean my rig and move the springs to the 2nd or maybe 3rd setting and see where I sit. I don't wanna go too high. It's at 37.5" right now and I wanna be closer to 39".

Also, I ordered up a set of ToyTec superflex coils for the rear. I want to try those as well and see where it sits. My goal is to have a level truck, or at most 1" up in the rear. I still need to finish my rear bumper and get all the back stuff finalized to see exactly which set of springs I will run for the long term. I do have 3 4'x2' sheets of steel and a spare tire in the back to simulate that right now (at 41") but I am hoping it will go lower once I hang that weight off the back more. I like that I will have 2 sets of springs to play with here.

Also, I will have a more detailed update coming in the next week or two. I have done a bunch of little things and will be doing more work.


A truck like yours should be running the middle notch. No one runs the bottom notch. Stockers run 1 up.

It will work a lot better if it is installed the way we designed it. Kind of a problem with a used kit. Once you build a rear bumper, the rear will drop quite a bit. The 80 coils will. You will have to ask Toytec what their springs will do, I don't know.

So adjust the parts as they should be and re-call the jury.
 
A truck like yours should be running the middle notch. No one runs the bottom notch. Stockers run 1 up.

It will work a lot better if it is installed the way we designed it. Kind of a problem with a used kit. Once you build a rear bumper, the rear will drop quite a bit. The 80 coils will. You will have to ask Toytec what their springs will do, I don't know.

So adjust the parts as they should be and re-call the jury.

Thanks for chiming in. Used is never as good, but sometimes you have to make sacrifices...

I popped the front coilovers up to the 2nd notch, I think there are 4 or 5? That seemed to really help with the stance. The front rides nice and I don't have any solid complaints yet, just not picky stuff as anyone does. I may pop up to the 3rd, we will see...

The rear I took off the 7.5 wrap LC coils for now. In it's current situation they are just too tall. But they are on the shelf and once I get the full load on the rear I plan on testing both since they are relatively easy to change. For a stock weight rear end they are just too high... But we will see where I finally do land. The rear shocks work very well though.

Still open to see how everything does and so far I think you have a great kit without going full 2.5" shocks. It is hard for you to make a one size fits all kit when we all have different stuff haha.
 
I still say you should run the 3rd Middle Notch. I would also swap out that goofy top plate with the really long spacer studs for the one that came with the truck. While your at it. Make sure you use the factory toyota top cup and lower cup with a new upper bushings, this will avoid the limiting straps. The factory cups, suck the shocks up just that tad they need to not be too long.

Move the poly seat over to the other stock top plate and I can give you the part number for the top busing we use, it is not from a 4Runner. Email me if you need that.

I don't know who bought that one, but they put the front together too low. It is also a newer one from after I went to the Chilli Challenge it has those changes in it.

Amatista_Ledges_2013.jpg


The Chilli Challenge is a great event look into it. This was 2013. Amatista Ledges.
 
I still say you should run the 3rd Middle Notch. I would also swap out that goofy top plate with the really long spacer studs for the one that came with the truck. While your at it. Make sure you use the factory toyota top cup and lower cup with a new upper bushings, this will avoid the limiting straps. The factory cups, suck the shocks up just that tad they need to not be too long.

Move the poly seat over to the other stock top plate and I can give you the part number for the top busing we use, it is not from a 4Runner. Email me if you need that.

I don't know who bought that one, but they put the front together too low. It is also a newer one from after I went to the Chilli Challenge it has those changes in it.

The Chilli Challenge is a great event look into it. This was 2013. Amatista Ledges.

Funny you mention the top cup. I changed it out with a factory one I had when I adjusted the springs to the 2nd notch. Just been too busy to post a quality update on here. If you wanna PM the part number I will check out what you are saying, for some reason I am not able to invision what you are talking about... If you have them, shoot me a quote too please if you don't mind. I probably need it because as I was putting my shocks back on I noticed that the All-Pro UCA's are topped out and the shock barely fits in there.

Who I bought the kit from... some guy, and a few things were missing that I had to make myself (e-brake extender, brake line fittings, etc). Risk you run when you buy these things used though, what can you do haha.
 
Made some edits to the first post to add work I have done. I have been majorly slacking on this thread. But I have a big update coming (I think I have said that before, haha).

I have a lot of backwards documenting to do to include lighting, front bumper updates, a new custom rear bumper, and my whole new electrical system for all my accessories, and you guessed it, a bunch of new accessories haha.

Hoping to get it updated this weekend...
 
So today is double update day, with a third to follow mid week haha. After some serious neglect and a busy schedule its finally time to add some updates.

Lets start with the work I didn't do. I had this thing wired up! Sgt Taco on TW did the work for me. If you are in ABQ I 100% suggest you talk to this man. Not only was his work very clean and to my standard, but way above! He knows all kinds of tricks on things you didn't know you need tricks for. Like relays, I guess there is the normal way where the relay can only go in a specific way and if backwards will cause problems. But he wires this thing up so it can go in either way and not only will it not cause problems, but everything still works. Didn't know I needed that but he took care of it.

Here is a picture of the engine bay. Nice and clean even though there is a lot going on in here.


This is the Bussman fuse and relay block. It is 100% weather sealed, holds 5 relays and 10 fuses. You use all metrapack connectors and everything is all pinned out like a factory distro block. These things are very cool!


And a look inside.


This is where all the wires run into my cab for my switch panel.


And the grounding block.


Here is where the magic happens. 10 switches of glory haha. They are all tapped into the dimmer and you can adjust brightness with the factory knob. They glow green on the bottom at night with the lights on, and the pictures light up red when on. I will get some night shots one night. Some switches are for future mods (winch, inverter, front locker).


In addition to all of that I got my CB mounted and wired in. Still need to get the antenna mounted, more to come on that. I also installed a DVD head unit in this thing a while back. I don't think I posted on that. It's a pioneer. Doesn't have the Nav feature but I use the smart phone for that anyways.


Next big addition, got my rear bumper built and installed!!!! I didn't post much on the build for this one. I was concurrently working on 4 bumpers at the same time so it all got blurry haha. But this is the finished product. I am still buttoning up the swing out and all the attached goodies, so that is my additional update I plan on posting mid week next week. It's rather elaborate so it will have it's own section haha. More on the bumper. Made from 3/16" main rectangle tube, 1/4" mounts and hitch stuff, and then 1/8" plate everywhere else in an attempt to save overall weight on the rig. It is a seriously heavy bumper though even with the thinner plate work. Has a hitch that I am confident will handle decent weight. Have to give some credit on this one. Did a lot of feature searching on bumpers before I built mine and I drew some influences from some CBI features and style cues from [MENTION=22788]prospectator[/MENTION] 's bumper that he built.

Side shot


Pass corner.


The tube work on the side. The jury is still out on how I feel about the tubing. It will add some good protection but I scratched up the side of my rig trying to put this on by myself... haha kinda defeated the purpose there, oh well.


Rear shot, you can see where the swing out will attach and bolt on.


Drivers corner.


Hitch area. This will get a filler panel down the road when I get to it.


Swing out pivot and electrical weather pack connector.


Front bumper got a major overhaul. I posted in my bumper build, but was waiting to add to this one. Added an 1/8" aluminum skid with dimples. Also I took the LED strip blinkers out and added the standard optical eye looking ones. Did some various clean up on the thing and re-painted it satin black. If I like this I may end up getting it powder coated some form of this color down the road.


Other small stuff, got the GT seat covers installed. These are very nice leather and look stock. I am a little too dirty for these haha... I may end up switching to Poly ones later. But not because they suck, I am just ruff on cars.


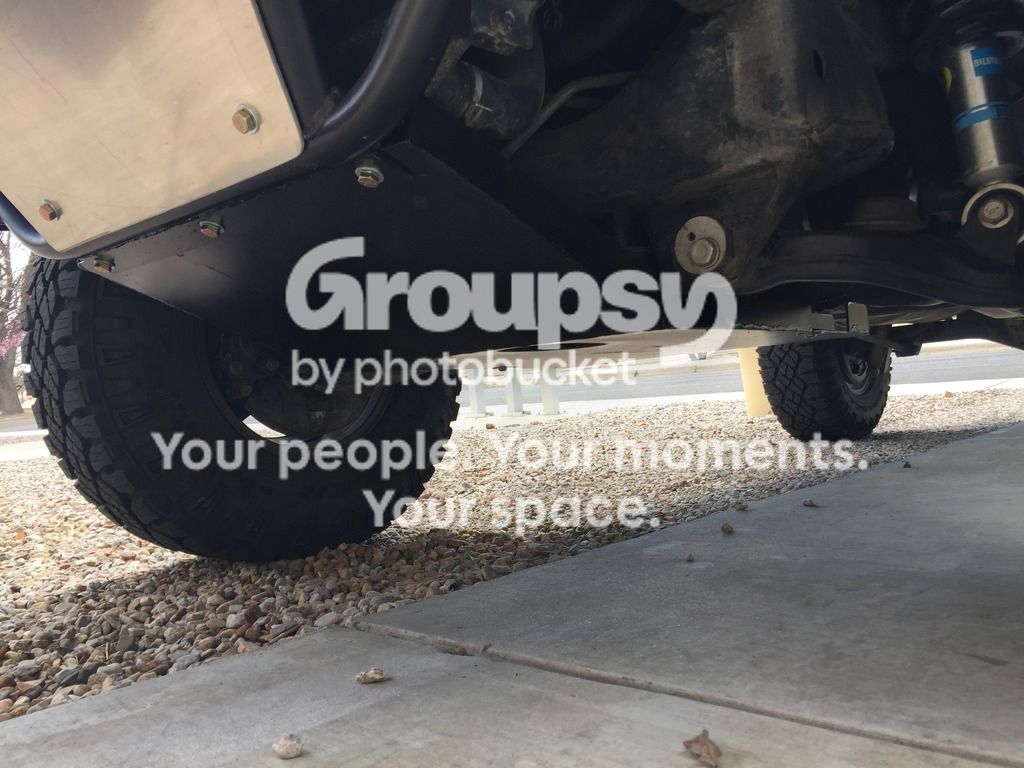
Lastly, finished my front skid. This is all 1/8" steel plate. IT has about 8 ribs in various spots to keep it rigid. I know it won't stay straight from the big hits, but I am not a big rock crawler and this things will offer plenty of protection. I won't be sad if it gets tweaked, haha.


 
2nd update for today. This isn't 4runner related though it did get us there haha. I have been so busy with with work, other people's trucks and my 4Runner that I haven't been able to get out much. As much as these 4runners are cool to work on the whole purpose is to get us outside and to the cool spots, even if our 4Runner has to be left at the trail head.

Hiked a trail in the Sandia Mountains in East Albuquerque, NM. It's to a TWA plane crash. 3.5 miles each way. All up hill to the crash, then you guessed it, down hill on the way back. We started at sun rise and went for it. It was a beautiful and warm day but we got a freak 5 min of light snow which added to the mistique of it all. Great hike and if you live near by I suggest you do it!!!


Great looking truck you have built. The fusebox setup you have is way cool.

I sure miss Abq, its good to see pics of the sunshine and the Puerco.
 
I went the bussman route when I started adding stuff and it truly is the best way to do it. I really like the rear bumper as well. Sturdy is what I would call it.
 
The tube work on the side. The jury is still out on how I feel about the tubing. It will add some good protection but I scratched up the side of my rig trying to put this on by myself... haha kinda defeated the purpose there, oh well.


The rear bumper looks sweet, Chris. It's got some cool lines to it.

As far as that tubing on the sides though, I would strongly consider cutting that off and re-welding it with the hoops tilted outward about 15 degrees. The rear end of the body moves around quite a bit in relation to the frame, and those hoops look like they are sitting close enough to the body that your install scratches may turn into dents once things start to twist and flex.

Wish you could make it on the 21st, but we'll catch up again soon. What kind of paint are you using for the bumpers? I just went through a bit of a debacle painting the most recent addition to my rig with a couple of Rustoleum products.

Great hike and if you live near by I suggest you do it!!!

I've always wanted to make it up there. Let me know the next time you plan on going and I'll tag along if I've got the day off.
 
The bumpers look great! The switches look good too. Hehe

Whoever gave me that file made a nice part... Haha the guy who did my wires really liked it. Thanks again for sharing!!!

The rear bumper looks sweet, Chris. It's got some cool lines to it.

As far as that tubing on the sides though, I would strongly consider cutting that off and re-welding it with the hoops tilted outward about 15 degrees. The rear end of the body moves around quite a bit in relation to the frame, and those hoops look like they are sitting close enough to the body that your install scratches may turn into dents once things start to twist and flex.

Wish you could make it on the 21st, but we'll catch up again soon. What kind of paint are you using for the bumpers? I just went through a bit of a debacle painting the most recent addition to my rig with a couple of Rustoleum products.


I've always wanted to make it up there. Let me know the next time you plan on going and I'll tag along if I've got the day off.

Ya I really think they might just come off and stay off... They were something I added at the end. I'm gunna do my test run shortly and see what happens. Like you said though I don't want to end up with dents... Might just cut off sooner.

For paint, it's just Rustolium Self Etching Primer, then Riustolium Satin Black. I went through a lot of paint. The satin has a clear element to it so it requires 3 or more coats to look right. I am not the most patient painter so I have a couple runs... We will see how it holds up on my trip and April. Good color though, I like that, haha.

Let me know when you have time off, I'm always down to go hiking there or where ever. Sat or Sun mornings are the best. And Ya m bummed I can't make it on the 21st... It's hard to take a whole day away from the family right now with my big trip approaching. Half days I can swing but that's it... Hoping to take my oldest out with us one of these times soon.
 
Last edited:
Ok so here is the 3rd update I mentioned above. Got the swing out done and on! This was a big one for me, has a lot of parts and took a while to figure out. Still need to finish a couple small things on it, but for the most part it is done!


Here is the pivot with the out lock. It is greased bearings with seals, real smooth. The T-handle is the out lock. it has two settings, normal and extra open.


This is the other side. You can see in the previous picture and this one I have two cheap LED pods, these should make for decent back up and camp lighting. Also you can see the handle. This is a simple thread in design. There is a thick rubber washer on the back side that sandwiches between the bumper. This keeps any noises away and keeps the handle in place when it's open. Kind of a pain, but I like the idea of a solid tight swing out vs. the potential for a latch to rattle over time. I added the red bicycle hand grip for old time BMX nostalgia haha.


High lift mounted. Got the neoprene "condom" on it to keep out the dirt. Took the base off as it was close to the light. That will stay in the back and can go on real easy.


Here it is open, showing off some hidden charm!


Weatherpack connections for easy on and off. The plug that is empty is for a hidden dome light not installed yet.


And this is what you need the dome light for! Cooking and misc. table.


Pivots on some nylon washers to keep the noise away. Also have some rubber bumpers on each corner where it contact the top for noise cancellation as well.


The table is Rustolium bed liner in a spray can. I wouldn't do a truck bed with this but should be great for the job of cooking table.


This is the gas can mount. Hard to see the other side where it wraps around the can handle. Wing nut keeps it tight and a spot for a lock if I want one.


A couple other small things I knocked out. Finally finished up my tube job. Finished welding in the filler plates from where I cut out the inner fender and got everything painted up. It will lose it's shine after the first dirt patch, haha


And per [MENTION=44220]BigFishAllDay[/MENTION] 's recommendation I altered my side tubes. I was lucky; I was able to cut out a pie shape from the outside of the tube and bend them out, then re-weld where I cut. Can't say my touch up paint job was nice, but I'm not too worried about that. Should have some good room for flex now!


Members online

Forum statistics

Threads
278,310
Messages
3,554,079
Members
248,016
Latest member
Advally Service

Trending content

Back
Top