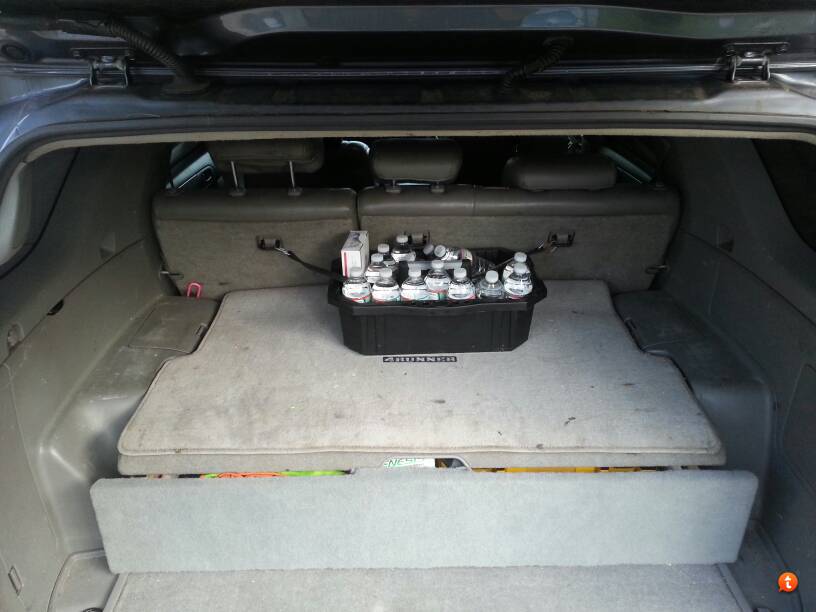
New member into/ build thread from the beginning.

Also moved my warn solenoid pack so i can close my hood now with it plugged in.


Only piece of chrome on my car that i added...bracket for the solenoid pack. Also thats a Warn Sydura Synthetic line. dumped the old steel cable.


Walking the dog, lol...winding up the synthetic line


all tucked in


another shot of the lights at dusk


it was at the same time i took this, just for comparison
 
I shouldn't because this thread will put me in the poor house, but I am subscribing to it.

You have a lot of very creative and fairly easy mods done.

Very Very nice
 
I shouldn't because this thread will put me in the poor house, but I am subscribing to it.

You have a lot of very creative and fairly easy mods done.

Very Very nice

I agree with this. I see I'm going to have to pick my budget battles.
 
rack looks great i want one.....
do u have a sunroof?
if so does it clear with insert in?
did you paint your old factory rack?
or was it black from factory
i want a black rack
 
rack looks great i want one.....
do u have a sunroof?
if so does it clear with insert in?
did you paint your old factory rack?
or was it black from factory
i want a black rack

Yes sunroof, its aftermarket and i hate it. If i want my hair to blows in the wind, i have my convertible for that. I ordered a full length floor. No insert, sunroof opens but can't vent.. Pop up. So I put a switch on the power line going to the sunroof switch hidden in the fuse panel. This way no one can open it by accident.


Did you fire the dumbass employee.?

Can't fire family. Can't be mad, shit happens. I had to laugh about it. If I take any other attitude I'd be going crazy.
 
So if you have a steering problem that goes a little like this. turn the wheel then it gets tight and then it gets loose...you have a worn intermediate shaft.

this is the steering shaft that goes into the power steering rack. mine was so rusty that after i took it out, i couldnt bent the u joint with out some signifigant force!!!

You can see from the pictures the new updated part number.

this job cost $157 in parts, thats the shaft and 3 new bolts

 
did puddle lights under my mirrors at the same time did the front map light to dome light mod. also at the same time ran wires in for heated mirrors for both front mirrors. also installed a camera on the passenger side mirror for my next project....right turn blind spot camera.

pictures so IT DID happen lol


camera

video of puddle lights coming on with interior dome lights. click on picture below
 
added to the build thread.....

Recent MODS:
-removed front turn signal housings
-rewired front parking lights to blink instead of just parking
-moved flood hamma cr1212 from windshield ditch mount to oem fog area
-moved spot hamma cr1212 from windshield mount to where oem turn signal was
-mounted Rigid Industries Dually D2 Wide pattern on inside of CBI windshield ditch brackets
-mounted Rigid Industries Dually D2 flood pattern on outside of CBI windshield ditch brackets
-installed front camera
-installed side camera for right turns
-installed top of the line Kenwood DNN991HD, previous was Newest kenwood DNX891HD , ima radio whore lol
-Installed RCI Skid Plate
-Installed RCI A Arm Skid Plate
-Installed some bandaid stickers i made for some flair
-Installed Ultra-Man showing his butt decal i made for my skid plate for no apparent reason, besides it adds 5HP
-rewired front map lights to turn on with the rear
-added some puddle lights under the mirror
-changed the oil and made a HUGE HUGE mess, thats another story!


So we'll start with the first few. When you remove the turn signals, you have nothing that blinks ON then OFF. So what we will do is take both positive wires from the turn signal and marker light. then wire them to the parking light. Basically you cut the negative wire off the parking light and attach the positive from the turn signal. WARNING: this will only work with regular halogen bulbs, LEDs are polarity based(unless you get non-polarity LEDs. mine are not).
20140505_153440_zpsjvktlkal.jpg
[/URL]
20140505_161535_zpsww7arzbu.jpg~original
[/URL]

Missing turn signal now filled with new light :)
20140505_164753_zpsamxbshha.jpg
[/URL]
f12c8a7d-a2dd-4187-a399-803c253622de_zps466de830.jpg
[/URL]
20140505_194638_zpspdiwxo9h.jpg
20140505_175312_zpsq3gwrh1r.jpg~original
[/URL]


Now onto the Rigid Dually D2's
20140508_135450_zpsogycvm2p.jpg
20140510_113949_zps9a7ybhag.jpg~original

20140510_130026_zpstgfg0gk6.jpg~original
[/URL]

Front camera, its going here. You looking at the latest Kenwood WiFi, cloud, hdmi, app mode, screen mirroring for android and apple, etc DNN991HD radio....yea its all that and a bag a tricks!
20140508_143047_zps7fm1vgvn.jpg~original
[/URL]
20140509_161054_zpsahywqqcl.jpg
[/URL]
20140509_161050_zpsbaq4f4wa.jpg~original
[/URL]

Puddle lights and side camera. So how this works is. You signal right, pulse timer (pac-audio tr7-pro) with send power to a bank of relays that first turns the radio into backup camera mode, then dumps in the side view camera feed BUT if i had the right turn signal on to park and then throw it into reverse. It will over ride the side camera. Its easy to say what was done. execution was the hard part. if you want to know just ask and i can draw out a diagram for you. video to come when i get a chance.
IMG_20140417_142449_zpsngqhpcn0.jpg
IMG_20140417_143037_zpswlixftcr.jpg~original
[/URL]
IMG_20140417_164208_zps984gwboq.jpg~original


video of the puddle lights turning on with arm and disarm. click on the picture to see video :)


RCI Skids and control arm skids.

 
latest mod.
My interior LED lights, one set in blue and one in white. blue for ambient lighting. even my tent gets mods LOL

20140515_165006_zpshaixhtmp.jpg~original
[/URL]

My CVT Mt. Rainer opened up
20140515_194817_zpsj0ubgqhr.jpg~original
[/URL]

this is the part number for a v8 transfer case seal set. mine was leaking. its $30 and i used the two major seals and one tiny one
 
Rear reflectors and dually lights

Can you take pictures of the rear LED dually lights in the rear reflector positions, and also include what you used to fill the gaps? Someone backed into me and I figured id try this instead of buying new reflectors
 
Can you take pictures of the rear LED dually lights in the rear reflector positions, and also include what you used to fill the gaps? Someone backed into me and I figured id try this instead of buying new reflectors

took out the tail light to get to the reflector easier


shoved them in from the front and made a bracket like in this next picture. this is looking up at the light from the bottom
 
You've inspired me to spend $30 on amazon to get map LEDs, dome LEDs, rear hatch LED strips (for camping of course) & internal release switch, and mud LED strips on the doors. $30 well spent if you asks me.

Your truck is looking good, keep up the good work!

little bit of pictures from tonight


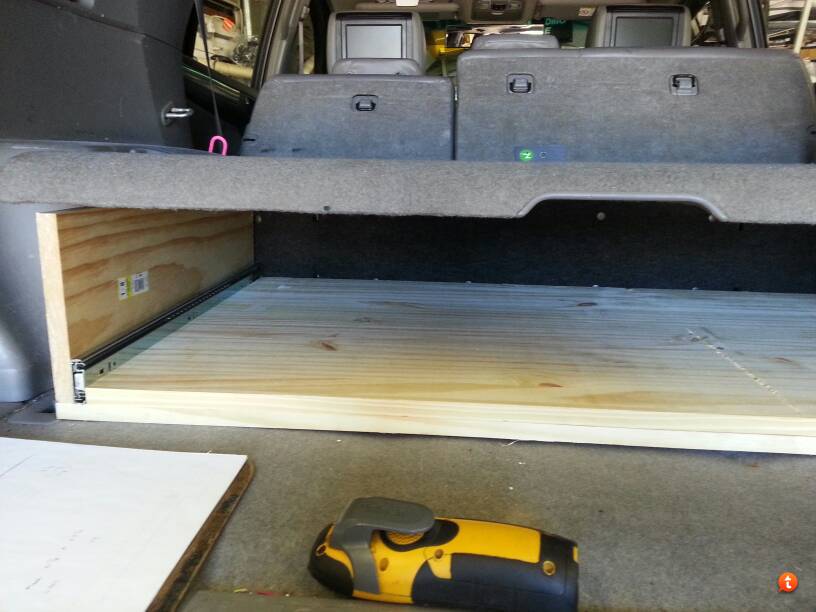
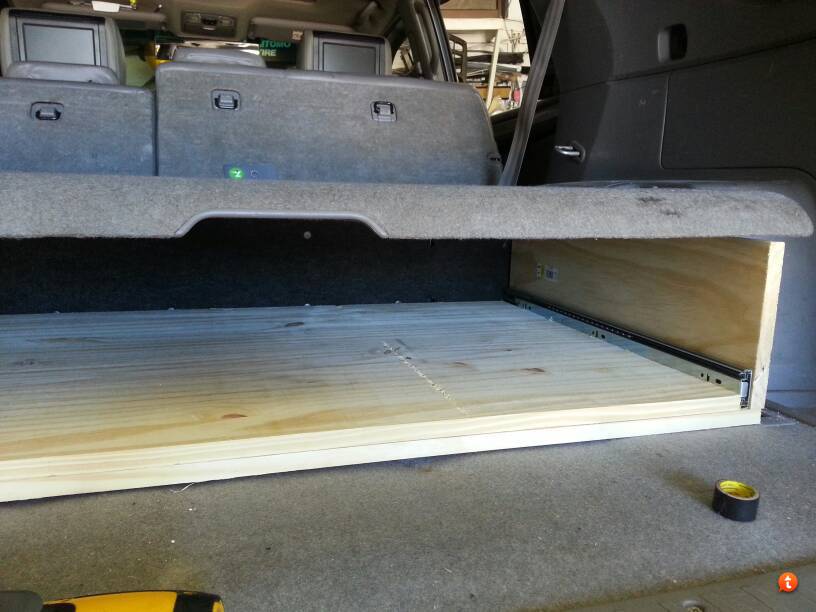
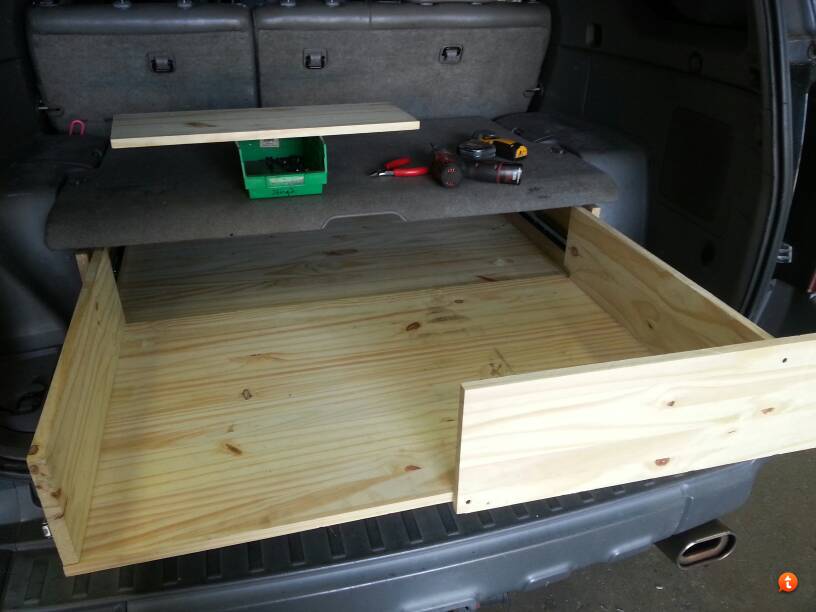
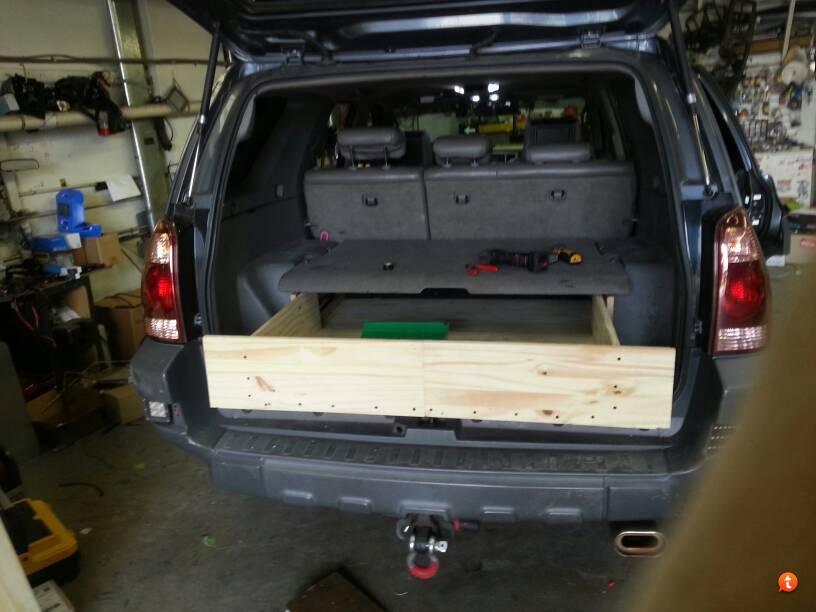
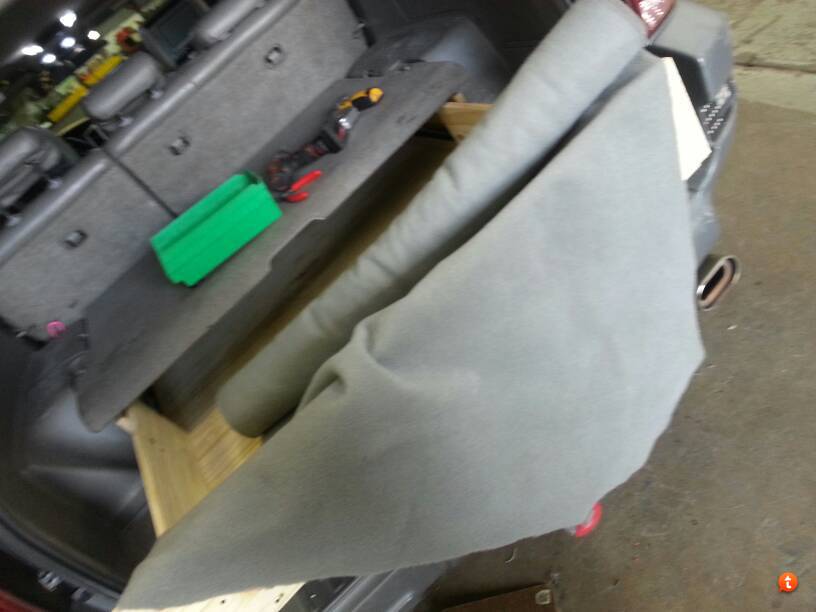
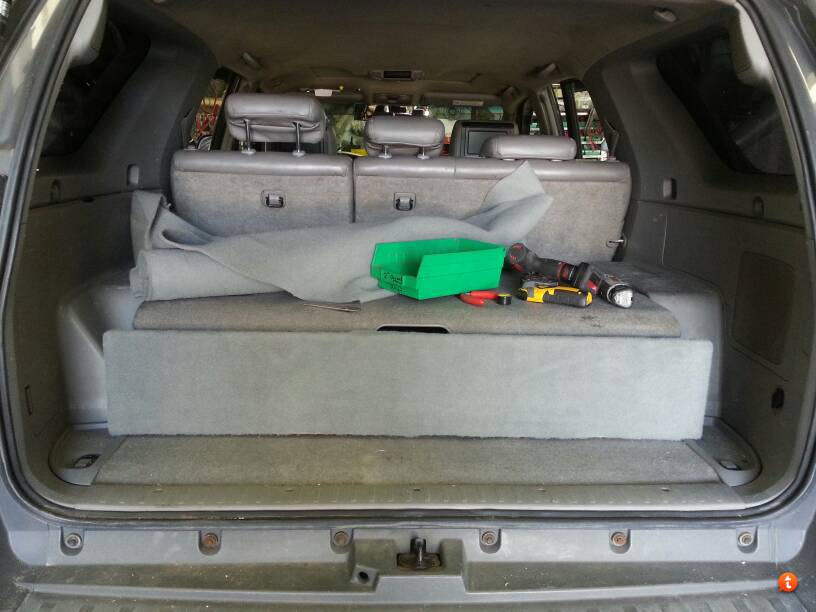
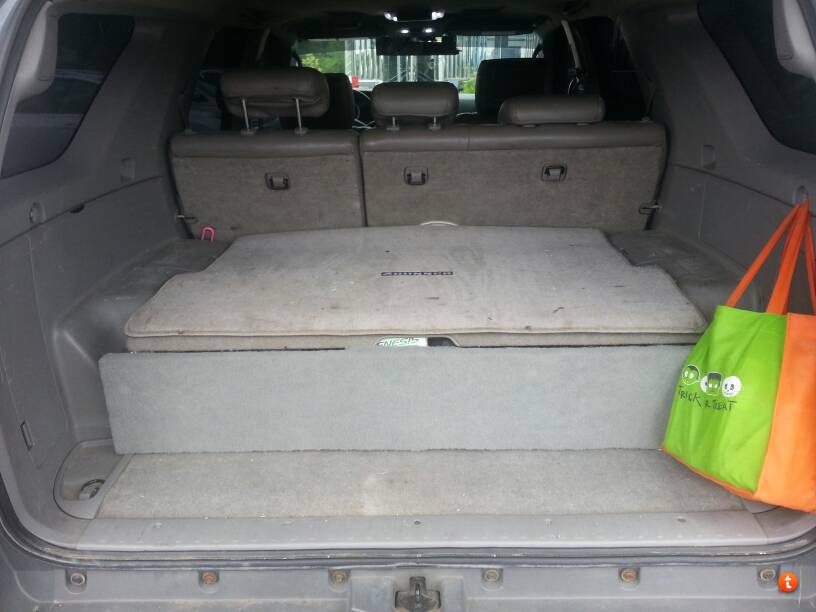
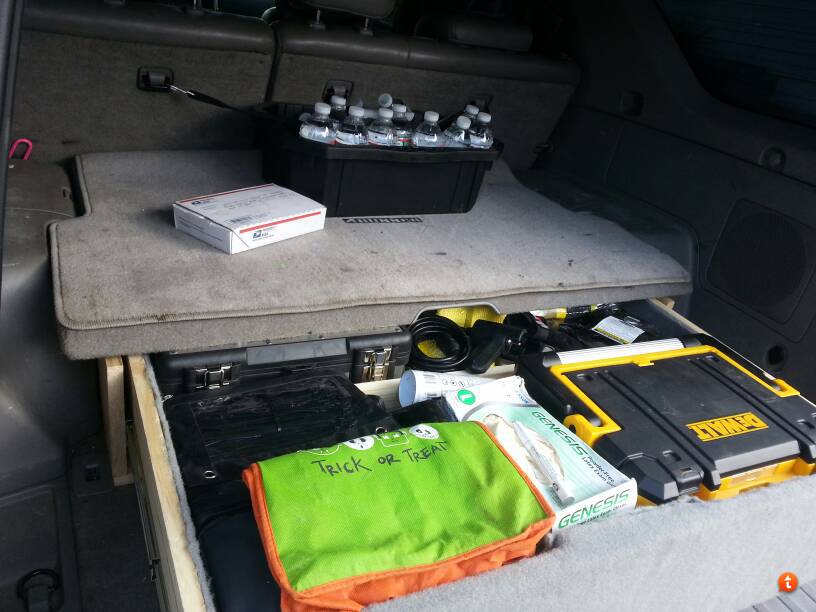
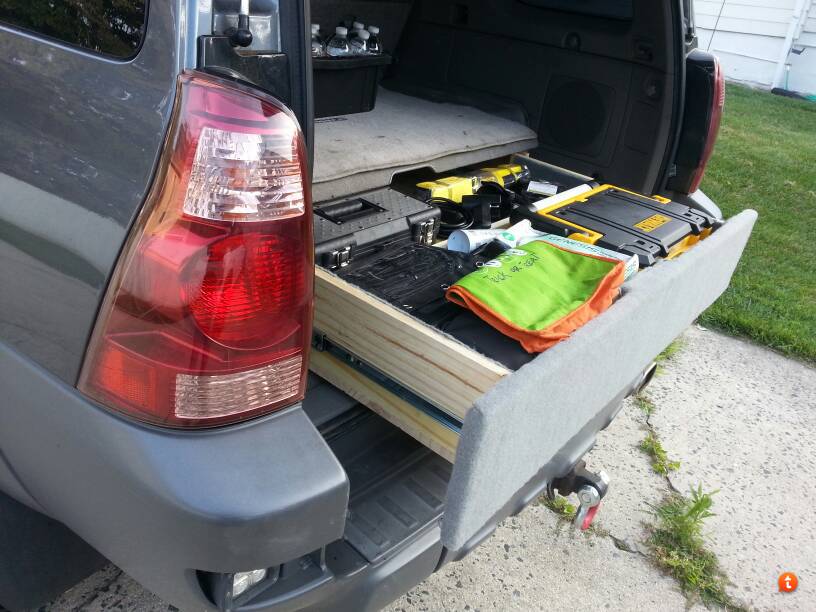
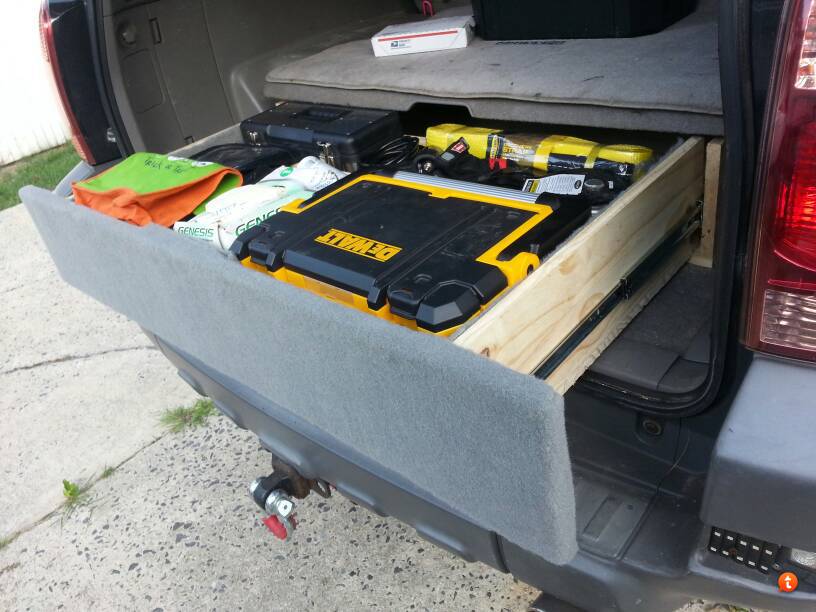
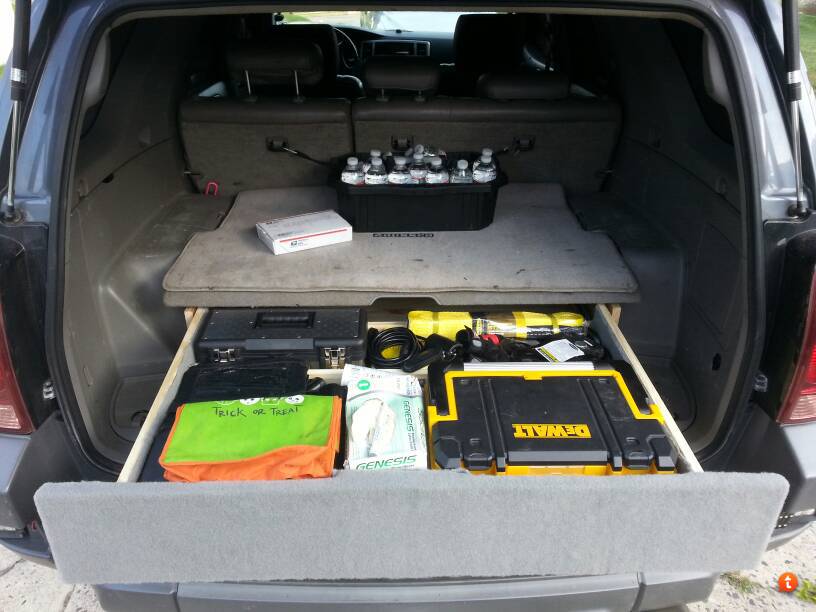
Thanks. Here is some more inspiration. ... woke up this past Saturday morning with nothing on the books, nothing planned, no honey do's, no birthday parties nothing. I said to myself at 645am I want to make my cargo box. 30 minutes later I'm at home Depot planning and buying wood and sliders. $155 and 3 hours later I was at my shop doing this.

Took 15 minutes of thinking and planning.
pateby3u.jpg

2esezy3u.jpg

ate2abe8.jpg

ega7agad.jpg


Saw some carpet on the shelf from another job I did
gepabame.jpg

qyta4evy.jpg


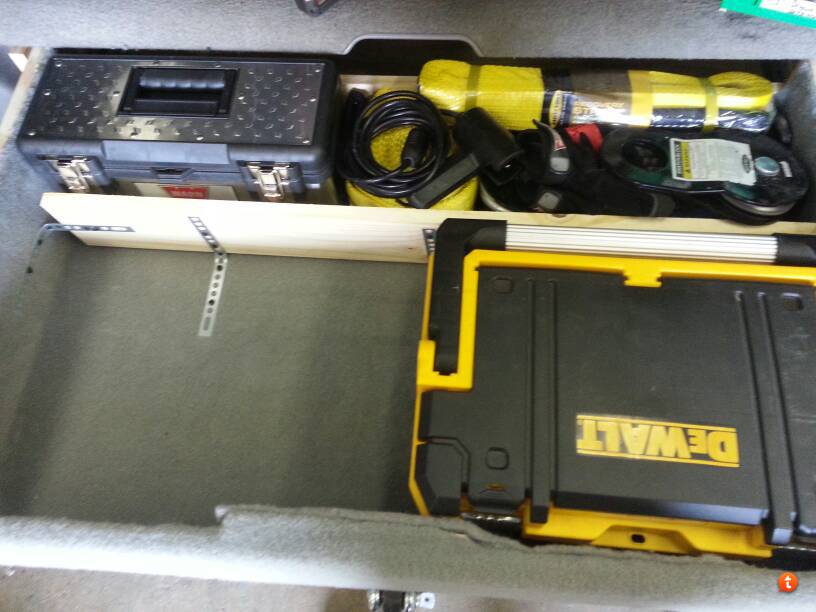
Is a match. Added sane carpet to the inside of the box. Made a divider out of some left over wood. Grabbed some radio back straps to make my brackets (I own a stereo shop so that's the materials I had on hand lol)
ary3y7u6.jpg


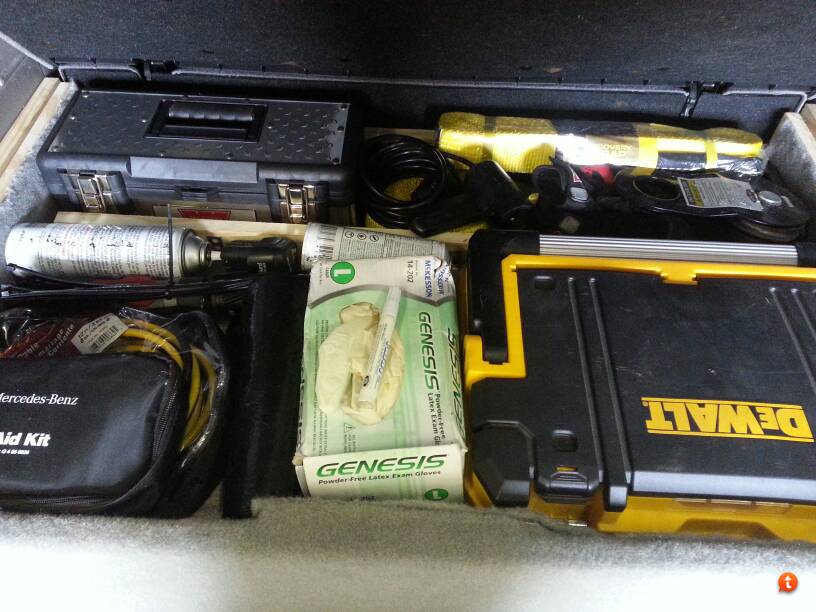
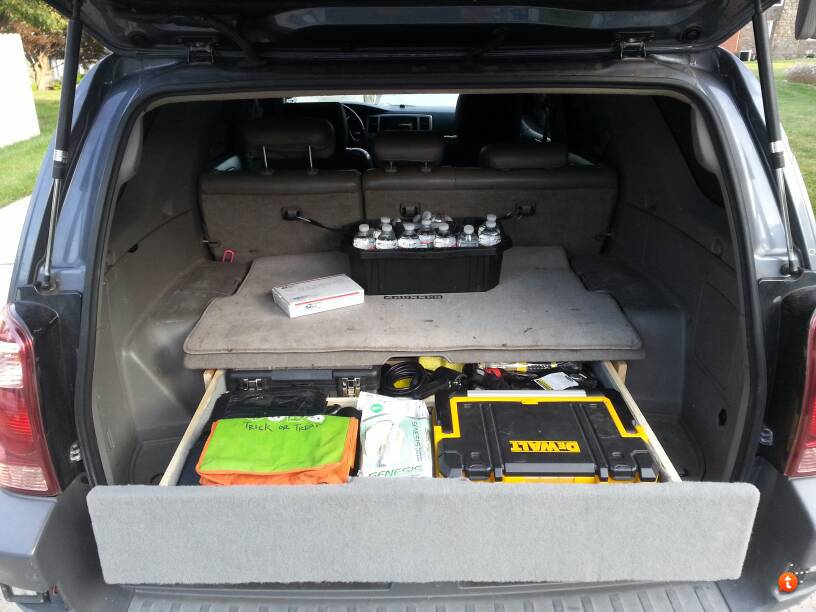
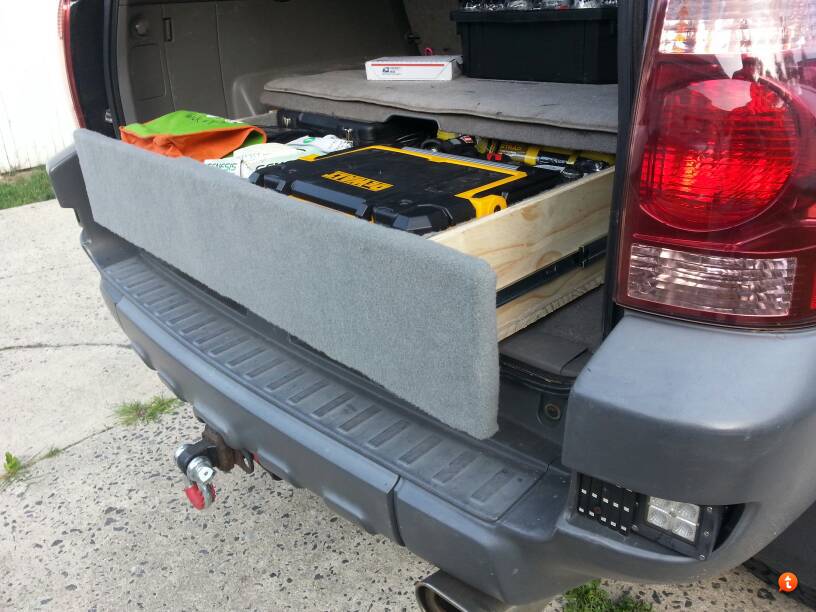
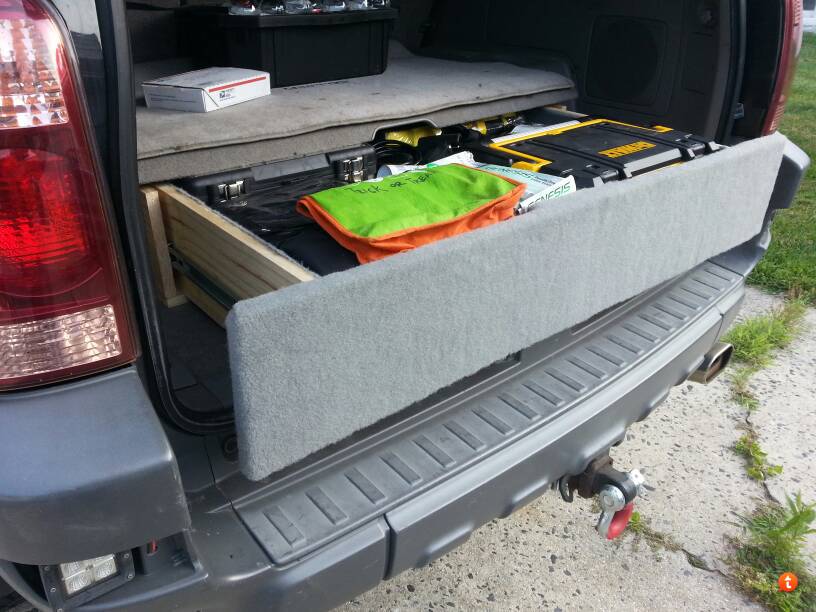
Recovery gear on the right rear, emergency first aid and basic survival box on the left rear. Most unused gear towards the back. Most used towards the front of the box. Tool box, towels, tarp, trash bags, rubber gloves, etc.
aby6ejuv.jpg


More shots of it opened and side shots.

Closed
peda8aja.jpg


2/3rd open
u3yda5u8.jpg

ytyje9u4.jpg

4e3ypynu.jpg

tadepema.jpg


Fully opened
a2ynypyq.jpg

yzedy8as.jpg

e9abe4ug.jpg


Closed back up.
a3abahe8.jpg


3 hours later, mostly because I had no plan just a vision on what I wanted.

Total cost after returning $45 of extra wood and adding cost of spray glue and carpet, total spent on this project $125.

Best money spent yet on my truck, besides train horns lol.
 
finally installed my @emilianenkov body lift for a full 1/2" of lift. nothing to write home to mom about BUT. its a super easy mod that can be done in a few hours. actually 1 if you know how to do it and have the proper tools. first timers will take a few hours. highly recommend this mod if you need that little extra lift.
 
did a few things to my 4runner in the last few days.

first:
-NEW OEM from toyota factory fresh not rebuilt front axles
-New oem front diff seals
-another new flush of redline 75w90 diff fluid in the front diff again.

part numers and price for the seals. changed the diff fluid again since some of it came out. ehh whats another $20 at this point. you get what you put back into your truck right. She deserves it, she's treated me well for the last 20,000 miles or 16 months!!!!!

Did new seals since she is sitting @ 184k

why did i change the axle? click on the video belwo and you can see the driver side hub is wobbly like its worn out inside. passenger side was not like that. click on the picture to see video.


20140718_145010_zps8dpigwxr.jpg~original
[/URL]
20140718_144816_zpsnija5yot.jpg~original
[/URL]


so i bought a new dash camera for the front since i was having problems with my old one. when i took down the old dash cam. found out the battery terminals were not touching anymore. cheap china crap.

now i have a extra dash cam. HMMM

introducing the rear dash cam mount!!

took the dome light off in the rear hatch and attached this
20140716_152912_zpskeqw3ihk.jpg~original
[/URL]

all powered by the 12v switched ignition plug in the rear.

diy on the rear camera here...
http://www.toyota-4runner.org/4th-g...ash-cam-install-pictures-how.html#post1752083
 

Members online

Forum statistics

Threads
278,316
Messages
3,554,105
Members
248,016
Latest member
Advally Service

Trending content

Back
Top