New member into/ build thread from the beginning.

thanks to [MENTION=55855]zopperman[/MENTION] for suggesting i go ahead with my next mod.

i had these 2010 bmw 5 series projectors for years, 2 trucks and 1 car ago. now i am going to put them in my t4r and blacken the housings


time to get my shrouds ordered up and halo's
 
Bi-xenon: Morimoto Mini H1 6.0$90.00
— Version: LHD (North American Standard)
— Shrouds: 3) Gatling 2.0+$10.00
— Bulbs: Don't Need

Qty: Delete: UPDATE
Morimoto XB LED Angel Eyes$55.00
— Wire Harness: Will Power off existing HID Relay
— Configuration: 4) 80mm Amber+$3.00

Qty: Delete: UPDATE
Gatling Gun 2.0$30.00
— Option: Premium
************************************************

Looks like i will be doing a quad bi-xenon setup.
*BMW's for the lows
*Morimoto Mini H1's in the highbeam location.
*DRL strip
*Amber Halo's
*Red demon eyes
*Black Housings

Kinda like how i did my volvo black housings


going to see how these drl's


look in this area circles in red
 
rear LED Hanma backup lights are in


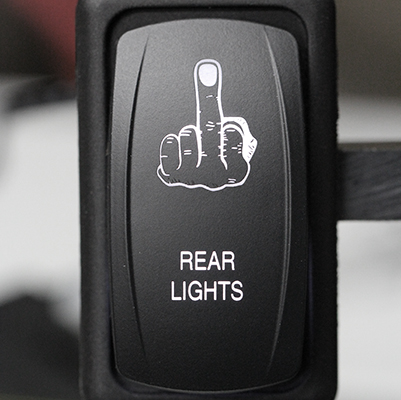
got my otrattw switches in


preparing for my quad retrofit. debating on ordering new lights to retrofit them into.

BMW E60 BiXenon on left, cheapo Morimoto Mini H1 projector on right
3" projector metal body vs 2" plastic body


playing with idea of red or white leds inside the projector


now need to make room for another switch for [MENTION=63211]emelianenkov[/MENTION] vsc disable mod. think i am going to order another switch like this one, but have it say traction
FU500-06.jpg
 
did VSC mod today, thanks to [MENTION=63211]emelianenkov[/MENTION] for the idea.

thread link here
http://www.toyota-4runner.org/4th-g...trac-abs-without-damaging-factory-wiring.html

what i did was just cut the red wire and soldered on a speaker wire. ran it inside and drilled a round hole where, in newer models, the TPMS switch is. mine is a 03 so no TPMS


Also finished wiring up my backup lights. now the Hanma's can come on with a flick of a switch when i am parked so i can load/unload stuff.
IMG_20131210_111434_zpsxhismpjs.jpg~original
[/URL]

Now i can have these lights


and do this with ease.


Also pre-ran the wiring to the switches for my a pillar lights. they going to be the outta my way lights. the zombie lights are going to turn on and off one set of the Bi-Xenons when the projector retrofit is done.

Also wired in my other switches.
 
rear heated seats, not that anyone cares

Today was blistering cold in Philadelphia! With old man winter breathing cold air down my back AND a trip in two weeks to Vermont to go skiing. I decided to give my rear seat passengers the luxury and comfort of heated seats. My passengers consists of my wife and two kids. So the kids will be spoiled with rear seat warmers like mommy and daddy :)

This mod is something i wanted to do in my cars for a long time. just never got time to do it. today i made time!

I have been collecting extra seat elements for the past few years. I only install one element of passenger side seats in the new cars we get. they have SRS seat pressure sensors. So i gots a bunch of extras. they are incomplete no switches to go from Hi to low. No problem. I can make my own switches :P

So here goes.

Materials:
-Crimestopper HSK150, one package is for one seat, two elements (back and bottom)
-I used a total of 5 elements. two for each left and rear passneger and one for center seat.

Flipped up the driver rear seat. removed the tow bolts that hold the seat to the floor 14mm IIRC


-You flip the seat over and basically pry around the metal to separate the seat cover from the frame.
-I go in and use pliers to remove the hog clips.


-once the clips are out you get something like this


-take the seat element and measure the area you heating. cut it down to length as needed


it will have a cable/power lines running to the element. here's how you hide it. take a razor blade and slice the seat.


-so it looks like this. a slit so the power cable can tuck inside


-bad picture and only picture :( of how the cable looks inside the slit


-instead of fussing with hog clips . i used what i have alot of, 8" 40lb test strength zip ties. they work, been doing it this way for years. no issues and a easy easy cheat :P


-replace the same way you took it off, lets move to the seat back.
-pop the panel off. it pries up but becareful not to break the clips off. the little white things in the next picture. are clips that broke off. BEFORE i got to it. my truck got screws installed since they broke the clips.


- rears are easy. take the two bolts off
-undo the hog clips for the lower portion of the seat back only. you are just going to slide the seat element in between the seat cover and teh foam. yes slide it in.


-replace it back in reverse order and use zipties instead of hog rings. easier to use.

-moving onto the passenger side rear.
-removes the same way as the other side only we have a center seat to heat too


thats it for today. ran out of time to finish wiring them up. so that will have to wait till tomorrow. stay tuned :)
 
projector retrofit coming along nicely.

did this today.
CBI Windshield Light Brackets were installed today.

Left Center and Right views. Note: right side has a little "P" cut out :)
20131218_135513_LancasterAve_zpsb2bcabba.jpg~original
[/URL]
20131218_135505_LancasterAve_zps37be54e2.jpg~original
[/URL]
20131218_135458_LancasterAve_zps92b93484.jpg~original
[/URL]

20131218_163233_N52ndSt_zps6526b03c.jpg~original
[/URL]

 
CUrt MFG 31006 spare tire carrier came in friday via amazon via fedex. they lost the mounting hardware for it. called to let them know and i got a 30% discount off as a refund. cost $85 after taxes, end up getting it for $59 after the $26 refund. the hardware i had in stock on my shelf. $2 bucks worth LoL Love amazon!

20131221_121903_LancasterAve_zps4fa3e8fc.jpg~original
[/URL]
20131221_121914_LancasterAve_zps09248a4f.jpg~original
[/URL]
 
bought two new OEM BNIB Toyota Axles for spares. i just read about us breaking axles all the time


Building my recovery bag. CHeaper for me to build a better bag than to buy a warn $110-435, smittybuilt $120 , rugged Ridge $130....Mine $160 with a lot more,
-TJM Tree Protector #867OXTREE1, one 3"x16'
-Smittybuilt Recovery Straps #CC220. two 2"x20'
-Smittybuily Snatchblocks #2744, two 18000#
-Crown Automotive #2546, two inch Hitch reciever D-ring
-Westin Automotive #473204, 3/4" Black and Yellow 57000# D-Ring
-MaterLock Hitch Lock #1479DAT, trailer hitch pin lock


For my winch, got some new accesories
-Warn steel fairlead Hawse Style
-Posion Sypder hawse fairlead lightmount. Yes more lights :)
-Daystar KU70046BK Hawse Fairlead Isolator
 
in case you missed it, i ran mud grapplers for 30 miles!

Yes you can fit 5 33" 12.50 x 18" Nitto Mud Grapplers in your 4th Gen 4runner!


Got a chance to buy these at a great deal. They came off a 2014 10th Anniversary Rubicon. Previous owner said they were too loud, i didnt believe they were that loud. I sold lots of Nitto Grappler series tires, Dura, Terra, Trail and crossteks...Never did a set of Mud, so i had no idea what i was getting myself into. The most agressive Nittos i did was the Trail grapplers. Those were nice and noise was tolerable when i drove them on a soft top 2014 unlimited wrangler. Honestly, how bad can the muds be?

So, i did what any normal person with access to a tire balancing and wheel mounting machine would do

A: Buy them, install them, if I like them i got them at a awesome price
B: Dont like them, sell them and maybe make some money while i am at it

Win Win either way i look at it.

So i install them saturday afternoon, nearly broke my back since they are so heavy!

Sizing them up.


Got one on and went for a ride around the block, it rides real nice.


So on with the rest.


This is how close they were to the rear and the front of the fender liner. they rubbed a little bit only in reverse while turning.


This is how they sat past the fender line


All mounted up and heading home.


When i got home, i sat on the grass and took these pictures. While i was admiring how great these tires looked the kids rode their scooters up and down the driveway.


While sitting there, I just couldnt get over that humming noise these tires make. I do love how i was able to ride over and off sidewalks like nothing. I went over railroad tracks like they didnt exist. Ride was so smooth. turning was sloppy and mushy like any big tire would be. Something i am not used to. So handling really sucks, noise really sucks. LOOKS REALLY GOOD :P not really my cup of tea. Woke up at normal 6am the next day and drove back to my shop and put back on my good ole BFGoodrich All Terrian TA KOs. Drove 125 that day, and really sat back and said to myself, the enjoy what you have. So i did!!! Got home and promptly put up a craigslist ad, and some ads on a few toyota forums.

In less than 8 hours after the ad went up. There was a deal struck. They went to a Navy girl, she's on her third jeep and just got this one 2 weeks ago.

Here are the mud grapplers on what i call a mini hummer, 2011 Jeep Wrangler Sahara Unlimited


Hate to see them go. I think they would have been real nice out on the trails. I could not justify having $2000 tied up in tires just sitting there.

Verdict: they should be real nice off roading tires but to me, i dont think they should be on a daily driver. very noisy, i had to turn the radio real loud to drown out the roar. I must be getting too old for this stuff. I love to hate them, love the look-hate the noise.

I love the way those look on the 4runner! I've heard they are ridiculously loud on the road, but man...compromises.. lol
 
I love the way those look on the 4runner! I've heard they are ridiculously loud on the road, but man...compromises.. lol

They noisy, so noisy that I usually ride with the radio at 10, with these tires I need to crank it up to 18 to hear anything over the tires. Max volume is 40! It's so loud, that it drowns out my magnaflow exhaust!
 
They noisy, so noisy that I usually ride with the radio at 10, with these tires I need to crank it up to 18 to hear anything over the tires. Max volume is 40! It's so loud, that it drowns out my magnaflow exhaust!

Lol, that IS pretty bad then! Have to hear the exhaust! I wouldn't be to happy with them being all mushy feeling going down the road either. I like the solid feeling of being in control.
 
UPDATES:

Well verson 2.0 of my projectors are done. chrome housing with black buckets


made templates of my fender liners and cut them out of some rubber mat i had in the shop


switched over to a HAWSE fairlead nad bought a posion syder hawse fairlead light mount

 
got a little brown boxed goodie


also a customer with a 5th gen wanted the same look i got.


So lighting so far in the front is. 1 pair of 2x3 rigid Dually D2's, 1 Pair of 2x3 Creed spot pattern dirtch light facing foward, 1 pair of 2x3 Creed Flood pattern ditch lights going to the sides, Quad Bi-Xenon's in the headlamps, and 12" Engo 72watt light bar


whitson metal works rack is on the way, debating the cvt group buy on the RTT
 
did a few things the last few weeks.

Kenwood DNX891HD replaced the Kenwood DNN990HD
thread here http://www.toyota-4runner.org/4th-g...d-dnx891hd-just-walked-via-ups-installed.html

Well [MENTION=77764]Whitson Metalworks[/MENTION] rack came in. FYI if Josh says he is shipping it out on monday and asks for you address on a sat night, you will have this show up at your door by thurday morning!


then you whole thursday will be spent looking at it then prepping it for bed liner spray. first coat


then i let it dry over night. moved it outside to put on a second and third coat. only to have an employee run the rack over! YES HE RAN IT OVER WITH A 1995 Chevy Suburban with 24" chrome wheels on it TWICE. One front wheel and then the back wheel followed.

All i did was laugh and said to myself 6 weeks of waiting and $1000 out the door.
 
Last edited:
My WMW rack specs
-Full floor
-Optional Crossbars
-Rustoleum Bed Liner Spray ( $7.49 per can from lowes and home depot) dont buy the roll on. used 16 cans, 5 extra due to getting ran over!
-front was made to accommodate 40" light bar

Well after some banging, bending, cursing, fit, take down, repeat, until it was back to 99% of what Josh created.

this was on my truck


first night home, wind noise was crazy! it came on at 28mph and progressivly got louder and louder! So i followed [MENTION=46025]HokieRunner[/MENTION] recipe for a DIY fairing ASAP
http://www.toyota-4runner.org/4th-g...k-fairing-whitson-metalworks.html#post1505404

here's my version of the fairing, for now till i get my paws on some lexan


42" LED bar installed and 8" PCV pipe to hold sign posts


Lighting Specs:
-42" 96 3W CREEs
-Engo 12" Combo bar on Poison Syder Hawse Fairlead Lightbar mount
-Rigid Industries Dually D2 Wide pattern in OEM location
-Generic 2x3 Hamma CR1212 Spots in center and Wide on [MENTION=64712]CBI OffRoad Fab[/MENTION] modded to fit 2 lights on each.
-Quad Bi-Xenon Retrofits, Morimoto Mini H1 in highbeam buckets and Hella E55 OEM BMW projectors in lowbeam buckets
 

Members online

Forum statistics

Threads
278,312
Messages
3,554,089
Members
248,016
Latest member
Advally Service

Trending content

Back
Top