fourfive
Senior Member
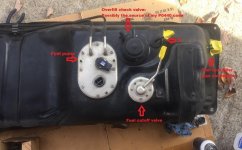
Short answer fix for my P0440: Replaced overfill check valve that had a small leak on top of my gas tank. This part only applies to 2001-2002 4runners.
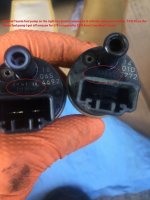
Overfill check valve: 77390-35010
======================================
Symptoms:
1. Certain gas pumps would shut off after filling for a few seconds.
2. A few thousand miles after getting the P0440 code, there was a very faint gas smell I would occasionally notice after parking my 4runner in my parking deck or at idle with my window down. Never noticed any gas smell if my windows were up.
Timeline:
May 2016 I get a cel and scan tool pulls up P0440 (general code for evap system issue). I installed a new Toyota gas cap just for the heck of it and cleared the code. A few weeks later the cel comes back as P0446. Cleared it just to see what would happen and cel came back as P0440 about a month later.
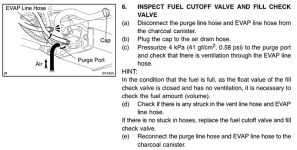
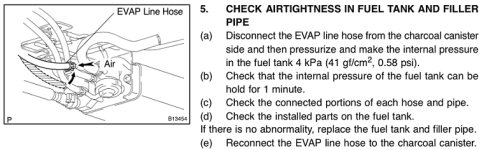
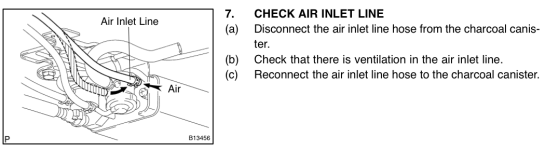
I used the FSM as my guide for troubleshooting my evap system. I started by troubleshooting the areas that seemed a little more straight forward via the fsm.
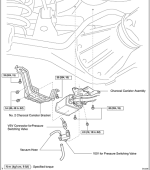
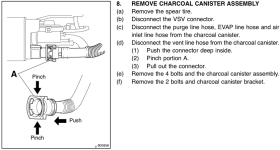
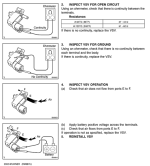
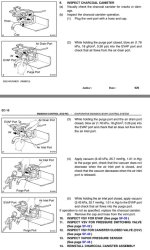
1. My charcoal canister & VSV for pressure switching valve (attached to the canister) passed the fsm pressure and vacuum tests. The charcoal canister is located above the spare tire for 2001-2002 4runners and for 96-00 it is under the hood along the driver side fender.
Tools used for testing:
1. A couple feet of 1/4" hose
2. various sizes of vacuum plugs
3. mityvac brake bleeder (has pressure & vacuum option)
4. air from my lungs
5. 9v battery
6. multimeter
2. I tested my gas tank components next due to the occasional mild gas smell. Since I was having issues with my air compressor I ended up just blowing into the various ports the fsm suggested using a 1/4" tube. I could hear air escaping from overfill check valve on top of my gas tank (only 2001-2002 4runners have the overfill check valve on top of the tank). Since I was going to have to drop my tank to replace the overfill check valve, I figured I'd replace all the other gas tank components including the fuel pump. I replaced the parts Thanksgiving weekend. After replacing the parts, I didn't clear the cel to see if it would turn off on its own. About 350mi later, the cel was still on so I manually cleared it. The cel was off & no pending codes but my scan tool said it was "not ready". A total of 950mi after replacing my overfill check valve, my scan tool indicated that my evap system was "ready" & no pending codes. Passed my emissions test last week! Thanks to the write ups, dropping the gas tank was much easier than I thought. I did get blasted in the chest with gasoline removing one of the fuel lines because I didn't depressurize the fuel system enough. That sucked.
Toyota part numbers for gas tank components:
*Overfill check valve: 77390-35010
*Overfill check valve gasket: 77177-33010
Fuel pump gasket: 77169-60010
Fuel pump: 23221-46010
Rubber cushion for fuel pump: 23249-74610
or
Denso 950-0100 (950-0100 is the product number on the package but 195130 is what's actually stamped on the denso fuel pump)
Fuel cutoff valve: 77380-26010
Fuel cutoff valve gasket: 77179-26010
*The overfill check valve only applies to 2001-2002 4runners
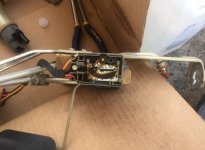
Picture of the dirty fuel pump sender contacts before using a pencil eraser, as suggested in a couple write ups, to clean it up.
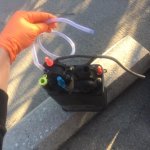
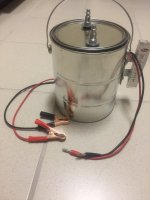
Picture of my homemade smoke machine. There are DIY vids on youtube for anyone interested in making a smoke machine. The smoke machine itself worked fine but when I had it running through my evap system, I never saw any smoke...possibly because I was outside making it harder to see the smoke escape from a very small leak on top of my gas tank.
Overfill check valve: 77390-35010
======================================
Symptoms:
1. Certain gas pumps would shut off after filling for a few seconds.
2. A few thousand miles after getting the P0440 code, there was a very faint gas smell I would occasionally notice after parking my 4runner in my parking deck or at idle with my window down. Never noticed any gas smell if my windows were up.
Timeline:
May 2016 I get a cel and scan tool pulls up P0440 (general code for evap system issue). I installed a new Toyota gas cap just for the heck of it and cleared the code. A few weeks later the cel comes back as P0446. Cleared it just to see what would happen and cel came back as P0440 about a month later.
I used the FSM as my guide for troubleshooting my evap system. I started by troubleshooting the areas that seemed a little more straight forward via the fsm.
1. My charcoal canister & VSV for pressure switching valve (attached to the canister) passed the fsm pressure and vacuum tests. The charcoal canister is located above the spare tire for 2001-2002 4runners and for 96-00 it is under the hood along the driver side fender.
Tools used for testing:
1. A couple feet of 1/4" hose
2. various sizes of vacuum plugs
3. mityvac brake bleeder (has pressure & vacuum option)
4. air from my lungs
5. 9v battery
6. multimeter
2. I tested my gas tank components next due to the occasional mild gas smell. Since I was having issues with my air compressor I ended up just blowing into the various ports the fsm suggested using a 1/4" tube. I could hear air escaping from overfill check valve on top of my gas tank (only 2001-2002 4runners have the overfill check valve on top of the tank). Since I was going to have to drop my tank to replace the overfill check valve, I figured I'd replace all the other gas tank components including the fuel pump. I replaced the parts Thanksgiving weekend. After replacing the parts, I didn't clear the cel to see if it would turn off on its own. About 350mi later, the cel was still on so I manually cleared it. The cel was off & no pending codes but my scan tool said it was "not ready". A total of 950mi after replacing my overfill check valve, my scan tool indicated that my evap system was "ready" & no pending codes. Passed my emissions test last week! Thanks to the write ups, dropping the gas tank was much easier than I thought. I did get blasted in the chest with gasoline removing one of the fuel lines because I didn't depressurize the fuel system enough. That sucked.
Toyota part numbers for gas tank components:
*Overfill check valve: 77390-35010
*Overfill check valve gasket: 77177-33010
Fuel pump gasket: 77169-60010
Fuel pump: 23221-46010
Rubber cushion for fuel pump: 23249-74610
or
Denso 950-0100 (950-0100 is the product number on the package but 195130 is what's actually stamped on the denso fuel pump)
Fuel cutoff valve: 77380-26010
Fuel cutoff valve gasket: 77179-26010
*The overfill check valve only applies to 2001-2002 4runners
Picture of the dirty fuel pump sender contacts before using a pencil eraser, as suggested in a couple write ups, to clean it up.
Picture of my homemade smoke machine. There are DIY vids on youtube for anyone interested in making a smoke machine. The smoke machine itself worked fine but when I had it running through my evap system, I never saw any smoke...possibly because I was outside making it harder to see the smoke escape from a very small leak on top of my gas tank.
Attachments





Last edited: