RdRunner Build

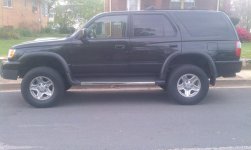
Running boards on/off

  • On

    Votes: 2 3.7%
  • Off

    Votes: 51 94.4%
  • who gives a sh!7

    Votes: 1 1.9%

  • Total voters
    54

RdRunNNeR

New member
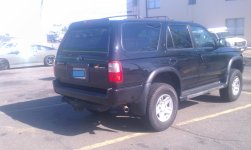
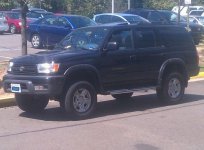
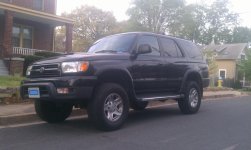
RdRunner Build (pic heavy)

Current

20180306_212123.jpg


dura6.jpg


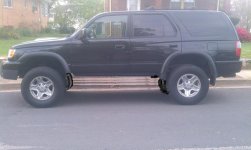
The day I brought the runner home...man she was clean ! :tongue:

side.jpg


side2.jpg


rear.jpg


front.jpg


moonroof.jpg

deck.jpg


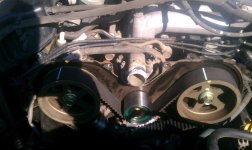
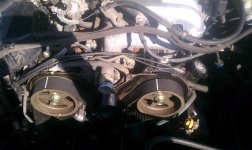
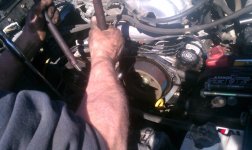
Been wanting to start a build thread. I've owned my runner for about 4 months now and have primarily just been catching up on maintainence. First was the timing belt, ideler pulleys, water pump, drive belts, tensioners and t-stat. I got the complete kit off of amazon at the following link...almost all parts in the kit were oem at $250 its a steal. Highly recommend it. Didn't really run into any issues beside the ac compressor being a PITA and getting in the way. Timing Belt Kit Toyota 4 Runner 1996 to 2002 3.4L 5VZFE V6 : Amazon.com : Automotive

OUT WITH THE OLD....
timing1.jpg

IN WITH THE NEW!

timing2.jpg
timing3.jpg

Same Saturday I decided an oil change and did a tranny drain & fill was in order. I'll have to drain and fill the tranny a few more times over the next 6k miles to be sure all the old crud is out of there

Next I bought some OEM Fogs off of [MENTION=38004]ryhi[/MENTION] good looks man! Threw those on there and the end result is great, so much more visibility at night.

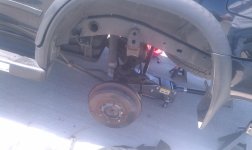
Next on the list was my daystar install...yea yea a lot of people dont like them, but I needed a lift on a budget and I'll eventually be upgrading. This rig is my DD so I'm trying to keep things subtle, that's always tough to do though. This past weekend my buddy [MENTION=82275]4ever4running[/MENTION] helped me install the coil spacers. Took the greater part of the day but some good beers and company and I was ~3" higher.
Picture1.jpg
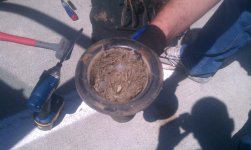
nest.jpg
nest2.jpg

:wtf:

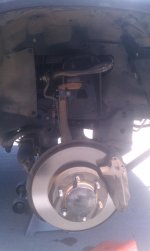
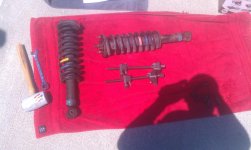
...so the rear was done then on to the front. Well my buddy and I each took a side and got the fronts out in what felt like 30 seconds :bowl: ...then reassembling them was a PITA, getting the lower shock to align with the mount was quite the task.
stilits.jpg
coilover assembly out.jpg
 

Attachments

  • Picture1.jpg
    Picture1.jpg
    52 KB · Views: 1,200
  • nest.jpg
    nest.jpg
    54.2 KB · Views: 1,230
  • nest2.jpg
    nest2.jpg
    50.2 KB · Views: 1,213
  • timing1.jpg
    timing1.jpg
    85.7 KB · Views: 1,244
  • timing2.jpg
    timing2.jpg
    65.9 KB · Views: 1,232
  • timing3.jpg
    timing3.jpg
    68.4 KB · Views: 1,245
  • stilits.jpg
    stilits.jpg
    40.7 KB · Views: 1,230
  • coilover assembly out.jpg
    coilover assembly out.jpg
    137.5 KB · Views: 1,061
Last edited:
Register to hide this ad
lift continued...

As I said before getting the front strut assembly back in place was a major pain because getting the shock seated in the shock mount was impossible. We had the stock jack pushing down the UCA and tried using another to push up on the shock to make it compress intending to get it seated. Eventually this worked...

Differential drop was next... so after buttoning up the front suspension we jacked up the front diff to secure it then took out the old hardware, replaced them with the new hardware including the spacers.

Picture3.jpg

Picture2.jpg

After allignment

Picture4.jpg


Love the lift and the ride, I'll be looking into 265/75s ATs next. BFG, NITTOS, DURATRAC, Yokihama don't know yet... we'll see. I'm looking to get one that will hit me the least on mpg and road noise but all of the above will give me the look and performance I want/need.

More work to come.
Rear O2 and front Air/Fuel Ratio sensor (my t4r is cali spec)
New radiator - long term
sway bar end links

COMPLETED
CV replacement both sides (Probably new NAPAs) X
12" sub & amp line\out converter stock headunit w/6 cd changer X
Repaint & reinstall skids X
New Radiator Hoses X
Fog Light Mod X
Tires (265/75/16s) AT brand undecided (duratracs) X
TB & MAF Clean (ongoing) X
Brake flush/bleed X
Remove running boards...? X


.........................................:juggle: :boxer:
 

Attachments

  • Picture4.jpg
    Picture4.jpg
    128.3 KB · Views: 1,220
  • Picture2.jpg
    Picture2.jpg
    79.7 KB · Views: 1,231
  • Picture3.jpg
    Picture3.jpg
    70 KB · Views: 1,229
Last edited:
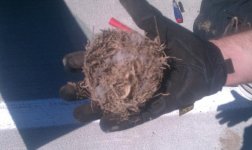
Glad I could help man! I still can't believe the birds nest, probably won't ever see that again.... It does look a lot better after the alignment. And let me know if you want to come install your amp/sub sometime.
 
Glad I could help man! I still can't believe the birds nest, probably won't ever see that again.... It does look a lot better after the alignment. And let me know if you want to come install your amp/sub sometime.

Definitely bro, next weekend I've got available is may 10th so hopefully we can get together then if you're free too. Let me know when you pull the trigger on the timing belt kit too.

Nice birds nest! :lmao: that would be great if it was still in use the whole time you've been driving it.

Haha who knows if it was, but I'm glad they're out now.
 
Update:

Throttle body and MAF cleaning. Removed my intake yesterday to get to the throttle body and cleaned the hell out of it with a tooth brush, rag and CRC throttle body cleaner. When I was all done, started her up and it revved high for about a min then back to normal.

I forgot to post my final measurements for the lift.

Before Lift Hub to WW:
Front: 21"
Rear: 21.25"

After lift:
24" on all 4 corners Hub to WW and 37.5" all the way around ground to ww.

Picture5.jpg
Picture6.jpg

Horrible job in paint to test ditching the rbs

Picture7.jpg

Now I need some tires :doh:
 

Attachments

  • Picture5.jpg
    Picture5.jpg
    65.4 KB · Views: 1,205
  • Picture6.jpg
    Picture6.jpg
    88.5 KB · Views: 1,207
  • Picture7.jpg
    Picture7.jpg
    64 KB · Views: 1,188
Last edited:
Definitely bro, next weekend I've got available is may 10th so hopefully we can get together then if you're free too. Let me know when you pull the trigger on the timing belt kit too.

Cool man just let me know. I'm taking my truck in for an alignment this weekend so the timing belt is probably going to have to wait a little longer...

Oh and take those running boards off!! :biggrin2:
 
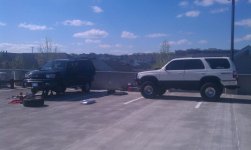
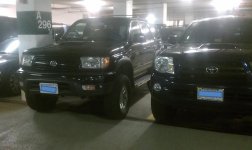
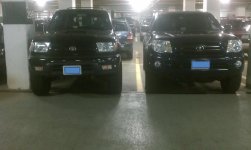
My t4r vs 2012 lifted Tacoma

Had to park next to this truck in the garage at work first week in after my lift. Hard to tell my t4r is 13+ years older.

t4r vs taco.jpg

t4r vs taco2.jpg
 

Attachments

  • t4r vs taco2.jpg
    t4r vs taco2.jpg
    55.5 KB · Views: 1,145
  • t4r vs taco.jpg
    t4r vs taco.jpg
    56 KB · Views: 1,180
Last edited:
At the bottom of your first post is a button that says "edit", just click on it and insert your pictures in your first post to your liking. Nice truck btw!
 
At the bottom of your first post is a button that says "edit", just click on it and insert your pictures in your first post to your liking. Nice truck btw!

Thanks that was my first thought too, although problem is I reached max capacity on the first post so I can't add anything else. I'd have to restructure the whole damn thread. If I can figure out how to code this last update as thread post #1 I'd be good to go. Maybe I can make an admin request.
 
Thanks that was my first thought too, although problem is I reached max capacity on the first post so I can't add anything else. I'd have to restructure the whole damn thread. If I can figure out how to code this last update as thread post #1 I'd be good to go. Maybe I can make an admin request.

Hmmm that's weird. PM one of the mods (steezemcqueen, emelianenkov, etc) they should be able to do it for ya
 
How difficult was it to do the timing belt. On my old one I had the dealer do it, but if I can save a few hundred by doing it my self next time I will.
 
How difficult was it to do the timing belt. On my old one I had the dealer do it, but if I can save a few hundred by doing it my self next time I will.

Luckily I had a tech with me. If your comfortable removing the fan, drive belts and pulleys then you're really half way there. Harmonic balancer puller can be rented from Autozone or Advanced, it was necessary getting my HB off so I'd recommend getting one. I was lucky that my camshaft bolt didnt give us any trouble. Breaker bar against the frame and one click on the starter and it came right off. Bought a new bolt to replace it because fsm says its a "non reusable" part but everyone reuses them. I just figure its an extra 9 bucks and made me feel good replacing it. Water pump and and t-stat are straight forward as well as the idler pulleys. The hardest part was timing belt tensioner (hydraulic auto-tensioner, not a bearing) , and that was just because the ac compressor got in our way, although most people don't have that issue. Lining up all the lines on the TB is really straight forward but make sure you do it right and don't skip any teeth, its okay if its not perfectly center on the pulleys it'll center itself out. Then button it all back up and make sure your drivebelts are tight then check again for tension after you start it up.

If you're comfortable with the work I'd say give it a shot. Just read a bunch of thorough write-ups on the forum and give yourself a whole weekend just in case its your DD. In all honesty it's something that can take you 4 hrs if you're cool with the work and don't run into any major issues. Otherwise taking your time and some snags it'll take you the better part of the day. Its worth it to do it yourself. Good luck.
 
Last edited:
AMP/SUB...FogLight Mod...CV Axles...Tires...Running Boards Off

Haven't updated in a while... [MENTION=82275]4ever4running[/MENTION] helped me install my amp and sub. I have the a stock in dash 6 cd changer and enjoy using it so I wanted to just keep it simple and stick with the stock head-unit all together. This required wiring up a line/out converter by tapping into some speaker wire in the wiring harness after the stock amp and before the head unit. The converter works great and so does my 10 year old boss amp lol. The new sub and enclosure all sound great.

apart.jpg
install1.jpg
install2.jpg


After that I wanted to do the FogLight Mod since I really wanted to use the FogLights with the parking lights and high beams. The stock restrictions are really annoying, luckily it was simply enough. Just bent the top left prong on the FogLight Relay and coupled it to the parking light fuse. Works like a charm and now I can use my FLs with any other lights.

Wish I had a garage with my own AIR IMPACT tools .....I got to use the shop at school to replace my CV Axles because the boots all ripped shortly after I added the lift. After a lot of research I found that the NAPA news were the best choice for me especially with that lifetime warranty. I'd recommend only the new and not the remans.

Steps I took to do this were simple.
1.) Jack up truck
2.) Take wheels off then hub dust cap off (hub nut gets torqued to 174 ft lbs when done)
3.) Cotter pin out 35mm on the hub nut (air impact)
4.) 4 14mm bolts on LBJ assembly (torque these back to 67 lb ft when done)
5.) Unhook the ABS line from the bracket to give you more slack in the line
6.) Swing the hub assembly out and towards the cabin of the truck
7.) Use a pry bar to get the old cv out, should come out without too much convincing (make sure you have a oil pan below to catch some of the gear oil that'll be released)
8.)Compare your old CV Axles to the new ones and make sure your spline count and dimensions are the same. Also make sure you dust guards and c-clips are in place. (NAPA news come with them so no need to transfer, remans don't and you'll have to transfer this hardware)
9.) Make sure you c-clip opening is facing down when putting the new axle in, should go in about half way. You'll need to use a dead blow to hammer it in the rest of the way
10.) Procedure is the same on both sides, don't forget to pull the fill plug on the diff and top it off with 75w-90 gear oil
11.) Spray everything down with some brake cleaner before you put it all back together
12.) Hop in the truck and go for a :driving:
13.) Check your cv angles make, sure you're not throwing grease anymore, pat yourself on the back...your done.

Finally after finding the time to do that I'll be able to put repaint and reinstall my skid plates. Few weeks ago I found some 265/75/R16 Duratracs on cl with no leaks or plugs. Guy had them on a light wrangler and they have about 70% tread left. $200 and they were MINE! :girl:

duras.jpg
duratrunk.jpg
duratrac+sample.jpg


I'll post some pics after I get to it.
 
Last edited:
That thing is coming together well! Keep it up. If you need any help on anything, I suppose I could make a trip to help, just let me know.
 

Members online

Forum statistics

Threads
278,304
Messages
3,554,041
Members
248,016
Latest member
Advally Service

Trending content

Back
Top