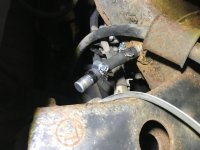
Rear Diff Breather Mod

Does the auto trans have a breather other than the dipstick?

If you remove the center console so you can see down to the top of the transfer case, on the passenger side there's a short hose that connects the transfer case and the transmission. There's just one breather for both, that little hose exists to equalize pressure between the two.

There's only three breathers, one on top of the rear diff, and two right next to each other in the engine bay. One of those is front diff, and the other is transmission/transfer case.
 
Have you heard of another way to remove those clips without breaking them?

When I saw how hard it would be to get a tool behind there to release the clip, breaking them seemed like the logical choice because they are not an expensive part. Since you're in Canada, I guess it would be more for you but it's still worth the money to not deal with the aggravation trying to get those clips off without breaking them.
 
If you remove the center console so you can see down to the top of the transfer case, on the passenger side there's a short hose that connects the transfer case and the transmission. There's just one breather for both, that little hose exists to equalize pressure between the two.


There's only three breathers, one on top of the rear diff, and two right next to each other in the engine bay. One of those is front diff, and the other is transmission/transfer case.


That's good to know. I don't remember the trans breather hose but it may have fallen off or pulled out when I pulled the engine and trans out of the wrecked 96. I still have the shell. I'm looking. Plus the trans and XFR case are still on the floor dolly.


Sent from my iPhone using Tapatalk
 
When I saw how hard it would be to get a tool behind there to release the clip, breaking them seemed like the logical choice because they are not an expensive part. Since you're in Canada, I guess it would be more for you but it's still worth the money to not deal with the aggravation trying to get those clips off without breaking them.

Yes I agree with your thinking, I would probably do the same thing if I started already. I'll probably just do as you did part way and zip tie the bottom two...

In this link:
http://www.4runners.org/writeups/typerdiff/index.html

The author only removes one clip - which may avoid having to break them
 
Last edited:
If you remove the center console so you can see down to the top of the transfer case, on the passenger side there's a short hose that connects the transfer case and the transmission. There's just one breather for both, that little hose exists to equalize pressure between the two.


There's only three breathers, one on top of the rear diff, and two right next to each other in the engine bay. One of those is front diff, and the other is transmission/transfer case.


These are pictures of the 96 trans and XFR case. I think each has a breather of some sorts.


Sent from my iPhone using Tapatalk
2be1f64123f83650378572998553eddc.jpg
be8b2632565fc375670a2b06cd06e57a.jpg


The trans one looks like it's been off for a while. I'll need to look if both 97 have a hose on the trans.
 
Yes I agree with your thinking, I would probably do the same thing if I started already. I'll probably just do as you did part way and zip tie the bottom two...

In this link:
http://www.4runners.org/writeups/typerdiff/index.html

The author only removes one clip - which may avoid having to break them

I finally attempted the diff breather mod, and only needed to take off the two bottom clips. I then was able to gently pry the cover open to ziptie the hose near the top of the filler neck.

I'm glad I just tried it, I probably spent more time reading how to do it then actually installing it myself! Like another member said, quicker than changing the oil.
 
Any photos/video or simple instructions on how to route it to the c-pillar ir by tail light? I don’t like the gas cap idea because I get water there from washing.
 
Any photos/video or simple instructions on how to route it to the c-pillar ir by tail light? I don’t like the gas cap idea because I get water there from washing.
Leave it short of popping out of the gas filler opening. You can get it within 6" or so of the gas filler height and it is completely protected by the stock splash shield for the filler neck. If the water is mid-door height, you have other problems!

-Charlie
 
Leave it short of popping out of the gas filler opening. You can get it within 6" or so of the gas filler height and it is completely protected by the stock splash shield for the filler neck. If the water is mid-door height, you have other problems!

-Charlie

I saw that was an option, but as others have said I can see it getting dirty easily in the wheel well, even with the splash guard. I’ve decided to bring it into the back of the cabin by tail light somewhere.
 
If I remember correctly. I could be mistaken. But the manual transmission has a breather on the shifter. The transfer case vents into the housing between the tranny and tcase.

People doing the rear breather mod. Please. Don't forget YOUR ELOCKER HAS A SEPERATE BREATHER. EXTEND THAT TO
 
If I remember correctly. I could be mistaken. But the manual transmission has a breather on the shifter. The transfer case vents into the housing between the tranny and tcase.

People doing the rear breather mod. Please. Don't forget YOUR ELOCKER HAS A SEPERATE BREATHER. EXTEND THAT TO

Did not know that, have to do some research and extend both in that case.
 
Did not know that, have to do some research and extend both in that case.

Yeah. Elocker has a breather. It's small hose. At the end it has a small cut into the hose. Thus making it a breather. It's not like the axle housing breather. But I recommend extending that along side with the axle housing. I'll try and find photos or upload it soon.
 
Tenporary fix until I get some tubing for the elocker breather and a T connector, then extend both up by the tail light somewhere.
 

Attachments

  • 08C3944E-702C-4BE5-91F6-23C41E9CF31F.jpg
    08C3944E-702C-4BE5-91F6-23C41E9CF31F.jpg
    121.7 KB · Views: 2,157
By the way, for some reason I thought the trans cooler hose would be good for this, but it's definitely too big. So I used the hose from the coolant tank (got a new one recently so this was sitting around) as a temporary solution until I buy enough new hose to route both diff and elocker breathers.
 
Finally finished this mod today. Took me about 2 hours total, 1.5 of those hours was buying the hoses and 1 of those 1.5hrs was figuring out exactly how to route it :).

Decided to go up through the little "vent or drain" just inside the cargo area behind the tail light. There was a clear tube/hose already there which I'm not sure where it goes (didn't look into it yet) so if someone knows what it is I'd love to find out.

Here are some photos I took along the way...

I purchased some vacuum line from Autozone, I believe 1/4 and 1/8 but I'm not 100% sure of the sizes. I ziptied the smaller elocker line to the ebrake hose so it wouldn't move around too much and be close to the rear diff breather line when it started going up to the frame...
<a data-flickr-embed="true" href="https://www.flickr.com/photos/130074049@N07/24041922678/in/album-72157687465282001/" title="Untitled"><img src="https://farm5.staticflickr.com/4504/24041922678_3de1e517e8_b.jpg" width="1024" height="768" alt="Untitled"></a><script async src="//embedr.flickr.com/assets/client-code.js" charset="utf-8"></script>

Left lots of slack for both lines and then ziptied together so they're not flying around (they're not touching the brake line, just looks like it in the photo. I may still check it every couple months and see if there's any rubbing from the body flexing, but I doubt it)...
<a data-flickr-embed="true" href="https://www.flickr.com/photos/130074049@N07/24041920758/in/album-72157687465282001/" title="Untitled"><img src="https://farm5.staticflickr.com/4461/24041920758_7c3900b63d_b.jpg" width="1024" height="768" alt="Untitled"></a><script async src="//embedr.flickr.com/assets/client-code.js" charset="utf-8"></script>

Ziptied twice to the subframe making sure it was a good 4" away from the exhaust pipe and wouldn't flex towards it...
<a data-flickr-embed="true" href="https://www.flickr.com/photos/130074049@N07/24041924218/in/album-72157687465282001/" title="Untitled"><img src="https://farm5.staticflickr.com/4508/24041924218_b2061b764f_b.jpg" width="1024" height="768" alt="Untitled"></a><script async src="//embedr.flickr.com/assets/client-code.js" charset="utf-8"></script>

Then I simply routed along the fuel tank piping...
<a data-flickr-embed="true" href="https://www.flickr.com/photos/130074049@N07/24041924858/in/album-72157687465282001/" title="Untitled"><img src="https://farm5.staticflickr.com/4478/24041924858_f3c9047a65_b.jpg" width="1024" height="768" alt="Untitled"></a><script async src="//embedr.flickr.com/assets/client-code.js" charset="utf-8"></script>

I took out one of the bottom clips from the splash guard in the wheel well and used the hole to ziptie the two breather lines and hold them in place along that route...
<a data-flickr-embed="true" href="https://www.flickr.com/photos/130074049@N07/37893825381/in/album-72157687465282001/" title="Untitled"><img src="https://farm5.staticflickr.com/4499/37893825381_5b09d13dfd_b.jpg" width="1024" height="768" alt="Untitled"></a><script async src="//embedr.flickr.com/assets/client-code.js" charset="utf-8"></script>

View from the bottom where I added the 3/8" oil cooler line (I had some for the trans cooler project) around the breather hoses to make sure they don't rub and cut through on that edge. They're not tight against it, but will probably rub a bit...
<a data-flickr-embed="true" href="https://www.flickr.com/photos/130074049@N07/37863190202/in/album-72157687465282001/" title="Untitled"><img src="https://farm5.staticflickr.com/4450/37863190202_aa34481fd1_b.jpg" width="1024" height="768" alt="Untitled"></a><script async src="//embedr.flickr.com/assets/client-code.js" charset="utf-8"></script>

<a data-flickr-embed="true" href="https://www.flickr.com/photos/130074049@N07/37863190462/in/album-72157687465282001/" title="Untitled"><img src="https://farm5.staticflickr.com/4456/37863190462_f1baedb6e9_b.jpg" width="1024" height="768" alt="Untitled"></a><script async src="//embedr.flickr.com/assets/client-code.js" charset="utf-8"></script>

Next I simply did the same thing with the 3/8" line both on the bottom part where it starts to curve up (touches another somewhat sharp metal edge) and also up where it enters the plastic vent/drain. If I was smarter I would've probably saved some time and zipties by using a longer piece of the 3/8" hose, but it is what it is...
<a data-flickr-embed="true" href="https://www.flickr.com/photos/130074049@N07/37863190642/in/album-72157687465282001/" title="Untitled"><img src="https://farm5.staticflickr.com/4507/37863190642_ac1e6f72c0_b.jpg" width="1024" height="768" alt="Untitled"></a><script async src="//embedr.flickr.com/assets/client-code.js" charset="utf-8"></script>

Where ever I used the 3/8" line for protection, I had to cut the 3/8" hose open and fit it around the larger breather hose, then used 2 zipties to hold it in place. For the smaller breather I simply fit the breather line through the 3/8 line and then ziptied to the larger breather hose. So the small breather hose can slide through the 3/8 hose, but it's not going anywhere because it's all fairly tight both before and after the 3/8 hose locations...
<a data-flickr-embed="true" href="https://www.flickr.com/photos/130074049@N07/37184302324/in/album-72157687465282001/" title="Untitled"><img src="https://farm5.staticflickr.com/4478/37184302324_b8d4b8840a_b.jpg" width="1024" height="768" alt="Untitled"></a><script async src="//embedr.flickr.com/assets/client-code.js" charset="utf-8"></script>

I stupidly forgot to take photos of the actual breather location and setup, but I will try to get some soon when I have the patience to open that up again and deal with broken clips! For the time being, here's the location and the clear hose I was talking about...

The breather lines come out just to the left of this hose...
<a data-flickr-embed="true" href="https://www.flickr.com/photos/130074049@N07/24041924008/in/album-72157687465282001/" title="Untitled"><img src="https://farm5.staticflickr.com/4467/24041924008_feb82ea373_b.jpg" width="768" height="1024" alt="Untitled"></a><script async src="//embedr.flickr.com/assets/client-code.js" charset="utf-8"></script>

Here's a photo a bit further away to show exact location in the car...
<a data-flickr-embed="true" href="https://www.flickr.com/photos/130074049@N07/24041925128/in/album-72157687465282001/" title="Untitled"><img src="https://farm5.staticflickr.com/4498/24041925128_220cda5b4b_b.jpg" width="768" height="1024" alt="Untitled"></a><script async src="//embedr.flickr.com/assets/client-code.js" charset="utf-8"></script>

Here's the final photo I took, showing the top of that clear hose that goes over the fuel filler towards the front of the car...
<a data-flickr-embed="true" href="https://www.flickr.com/photos/130074049@N07/37893824971/in/album-72157687465282001/" title="Untitled"><img src="https://farm5.staticflickr.com/4486/37893824971_483400ae53_b.jpg" width="768" height="1024" alt="Untitled"></a><script async src="//embedr.flickr.com/assets/client-code.js" charset="utf-8"></script>

I simply routed both breather hoses up that clear hose, then they both meet into a t-connector. The new breather plug (same part # as everyone is using, from front diff etc) and a small piece of hose come out of the t-connector and the whole connector assembly ends up ziptied a couple inches short of that red mark on the clear hose.

Again, I really hope I get some photos soon, but whoever decides to do it in this location it will be fairly straight forward once you open up the trim in the cargo area and see how it all looks.

Thanks to everyone for all the info etc.

 
Yeah. Elocker has a breather. It's small hose. At the end it has a small cut into the hose. Thus making it a breather. It's not like the axle housing breather. But I recommend extending that along side with the axle housing. I'll try and find photos or upload it soon.


arggg...I guess I did not pay attention to that, swapped in an elocker about a month ago, guess Ill have to tag into it and t connect to my existing breather mod
 
The breather lines come out just to the left of this hose...
<a data-flickr-embed="true" href="https://www.flickr.com/photos/130074049@N07/24041924008/in/album-72157687465282001/" title="Untitled"><img src="https://farm5.staticflickr.com/4467/24041924008_feb82ea373_b.jpg" width="768" height="1024" alt="Untitled"></a><script async src="//embedr.flickr.com/assets/client-code.js" charset="utf-8"></script>
That clear hose is one of your sunroof drain lines. Make sure it drains outside of the truck! (and don't block the outlet - it'll carry water that leaks through the sunroof seals (all sunroofs leak a bit).

-Charlie
 
That clear hose is one of your sunroof drain lines. Make sure it drains outside of the truck! (and don't block the outlet - it'll carry water that leaks through the sunroof seals (all sunroofs leak a bit).

-Charlie

Thanks for the info Charlie. Figured it was some sort of a drain.
 

Members online

Forum statistics

Threads
278,307
Messages
3,554,048
Members
248,016
Latest member
Advally Service

Trending content

Back
Top