Finally finished this mod today. Took me about 2 hours total, 1.5 of those hours was buying the hoses and 1 of those 1.5hrs was figuring out exactly how to route it

.
Decided to go up through the little "vent or drain" just inside the cargo area behind the tail light. There was a clear tube/hose already there which I'm not sure where it goes (didn't look into it yet) so if someone knows what it is I'd love to find out.
Here are some photos I took along the way...
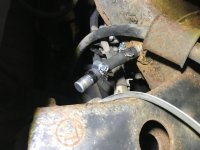
I purchased some vacuum line from Autozone, I believe 1/4 and 1/8 but I'm not 100% sure of the sizes. I ziptied the smaller elocker line to the ebrake hose so it wouldn't move around too much and be close to the rear diff breather line when it started going up to the frame...
<a data-flickr-embed="true" href="https://www.flickr.com/photos/130074049@N07/24041922678/in/album-72157687465282001/" title="Untitled"><img src="https://farm5.staticflickr.com/4504/24041922678_3de1e517e8_b.jpg" width="1024" height="768" alt="Untitled"></a><script async src="//embedr.flickr.com/assets/client-code.js" charset="utf-8"></script>
Left lots of slack for both lines and then ziptied together so they're not flying around (they're not touching the brake line, just looks like it in the photo. I may still check it every couple months and see if there's any rubbing from the body flexing, but I doubt it)...
<a data-flickr-embed="true" href="https://www.flickr.com/photos/130074049@N07/24041920758/in/album-72157687465282001/" title="Untitled"><img src="https://farm5.staticflickr.com/4461/24041920758_7c3900b63d_b.jpg" width="1024" height="768" alt="Untitled"></a><script async src="//embedr.flickr.com/assets/client-code.js" charset="utf-8"></script>
Ziptied twice to the subframe making sure it was a good 4" away from the exhaust pipe and wouldn't flex towards it...
<a data-flickr-embed="true" href="https://www.flickr.com/photos/130074049@N07/24041924218/in/album-72157687465282001/" title="Untitled"><img src="https://farm5.staticflickr.com/4508/24041924218_b2061b764f_b.jpg" width="1024" height="768" alt="Untitled"></a><script async src="//embedr.flickr.com/assets/client-code.js" charset="utf-8"></script>
Then I simply routed along the fuel tank piping...
<a data-flickr-embed="true" href="https://www.flickr.com/photos/130074049@N07/24041924858/in/album-72157687465282001/" title="Untitled"><img src="https://farm5.staticflickr.com/4478/24041924858_f3c9047a65_b.jpg" width="1024" height="768" alt="Untitled"></a><script async src="//embedr.flickr.com/assets/client-code.js" charset="utf-8"></script>
I took out one of the bottom clips from the splash guard in the wheel well and used the hole to ziptie the two breather lines and hold them in place along that route...
<a data-flickr-embed="true" href="https://www.flickr.com/photos/130074049@N07/37893825381/in/album-72157687465282001/" title="Untitled"><img src="https://farm5.staticflickr.com/4499/37893825381_5b09d13dfd_b.jpg" width="1024" height="768" alt="Untitled"></a><script async src="//embedr.flickr.com/assets/client-code.js" charset="utf-8"></script>
View from the bottom where I added the 3/8" oil cooler line (I had some for the trans cooler project) around the breather hoses to make sure they don't rub and cut through on that edge. They're not tight against it, but will probably rub a bit...
<a data-flickr-embed="true" href="https://www.flickr.com/photos/130074049@N07/37863190202/in/album-72157687465282001/" title="Untitled"><img src="https://farm5.staticflickr.com/4450/37863190202_aa34481fd1_b.jpg" width="1024" height="768" alt="Untitled"></a><script async src="//embedr.flickr.com/assets/client-code.js" charset="utf-8"></script>
<a data-flickr-embed="true" href="https://www.flickr.com/photos/130074049@N07/37863190462/in/album-72157687465282001/" title="Untitled"><img src="https://farm5.staticflickr.com/4456/37863190462_f1baedb6e9_b.jpg" width="1024" height="768" alt="Untitled"></a><script async src="//embedr.flickr.com/assets/client-code.js" charset="utf-8"></script>
Next I simply did the same thing with the 3/8" line both on the bottom part where it starts to curve up (touches another somewhat sharp metal edge) and also up where it enters the plastic vent/drain. If I was smarter I would've probably saved some time and zipties by using a longer piece of the 3/8" hose, but it is what it is...
<a data-flickr-embed="true" href="https://www.flickr.com/photos/130074049@N07/37863190642/in/album-72157687465282001/" title="Untitled"><img src="https://farm5.staticflickr.com/4507/37863190642_ac1e6f72c0_b.jpg" width="1024" height="768" alt="Untitled"></a><script async src="//embedr.flickr.com/assets/client-code.js" charset="utf-8"></script>
Where ever I used the 3/8" line for protection, I had to cut the 3/8" hose open and fit it around the larger breather hose, then used 2 zipties to hold it in place. For the smaller breather I simply fit the breather line through the 3/8 line and then ziptied to the larger breather hose. So the small breather hose can slide through the 3/8 hose, but it's not going anywhere because it's all fairly tight both before and after the 3/8 hose locations...
<a data-flickr-embed="true" href="https://www.flickr.com/photos/130074049@N07/37184302324/in/album-72157687465282001/" title="Untitled"><img src="https://farm5.staticflickr.com/4478/37184302324_b8d4b8840a_b.jpg" width="1024" height="768" alt="Untitled"></a><script async src="//embedr.flickr.com/assets/client-code.js" charset="utf-8"></script>
I stupidly forgot to take photos of the actual breather location and setup, but I will try to get some soon when I have the patience to open that up again and deal with broken clips! For the time being, here's the location and the clear hose I was talking about...
The breather lines come out just to the left of this hose...
<a data-flickr-embed="true" href="https://www.flickr.com/photos/130074049@N07/24041924008/in/album-72157687465282001/" title="Untitled"><img src="https://farm5.staticflickr.com/4467/24041924008_feb82ea373_b.jpg" width="768" height="1024" alt="Untitled"></a><script async src="//embedr.flickr.com/assets/client-code.js" charset="utf-8"></script>
Here's a photo a bit further away to show exact location in the car...
<a data-flickr-embed="true" href="https://www.flickr.com/photos/130074049@N07/24041925128/in/album-72157687465282001/" title="Untitled"><img src="https://farm5.staticflickr.com/4498/24041925128_220cda5b4b_b.jpg" width="768" height="1024" alt="Untitled"></a><script async src="//embedr.flickr.com/assets/client-code.js" charset="utf-8"></script>
Here's the final photo I took, showing the top of that clear hose that goes over the fuel filler towards the front of the car...
<a data-flickr-embed="true" href="https://www.flickr.com/photos/130074049@N07/37893824971/in/album-72157687465282001/" title="Untitled"><img src="https://farm5.staticflickr.com/4486/37893824971_483400ae53_b.jpg" width="768" height="1024" alt="Untitled"></a><script async src="//embedr.flickr.com/assets/client-code.js" charset="utf-8"></script>
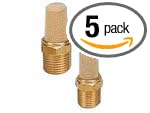
I simply routed both breather hoses up that clear hose, then they both meet into a t-connector. The new breather plug (same part # as everyone is using, from front diff etc) and a small piece of hose come out of the t-connector and the whole connector assembly ends up ziptied a couple inches short of that red mark on the clear hose.
Again, I really hope I get some photos soon, but whoever decides to do it in this location it will be fairly straight forward once you open up the trim in the cargo area and see how it all looks.
Thanks to everyone for all the info etc.