BigFishAllDay
New member
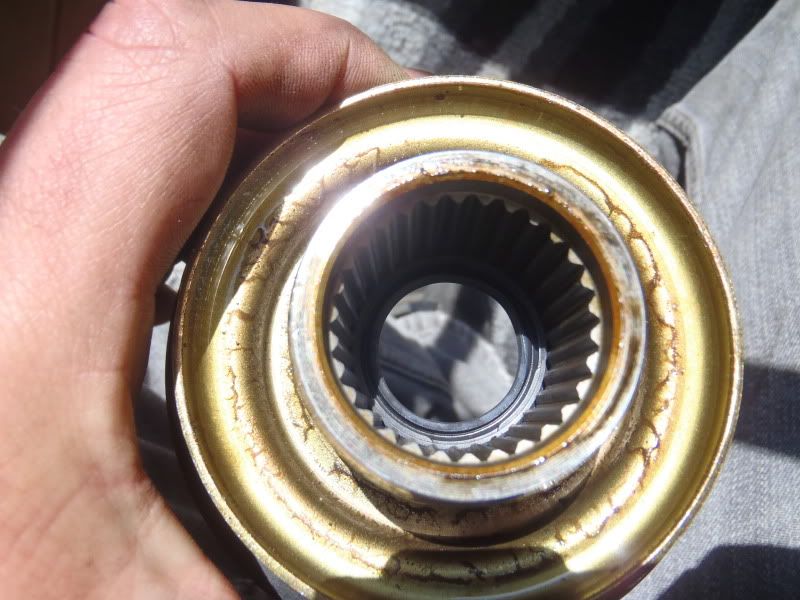
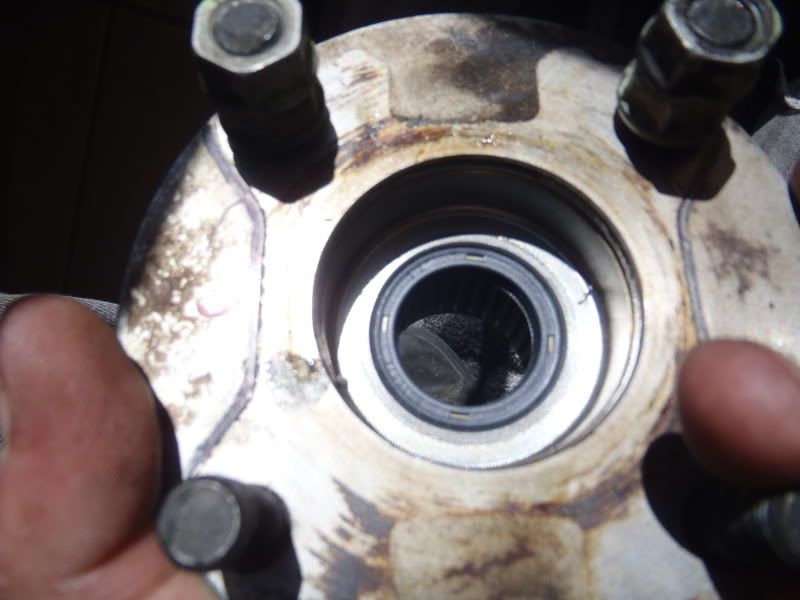
This is a write-up on how to replace the Output Shaft Seals on your Transfer Case. Gear oil leakage from these seals is a common problem on 3rd gen 4Runners, but there is not much information on the replacement procedure available on the web for DIY’ers. I decided since I was doing the job, I’d go ahead and write it up, especially since there doesn’t seem to be any other formal write ups available.
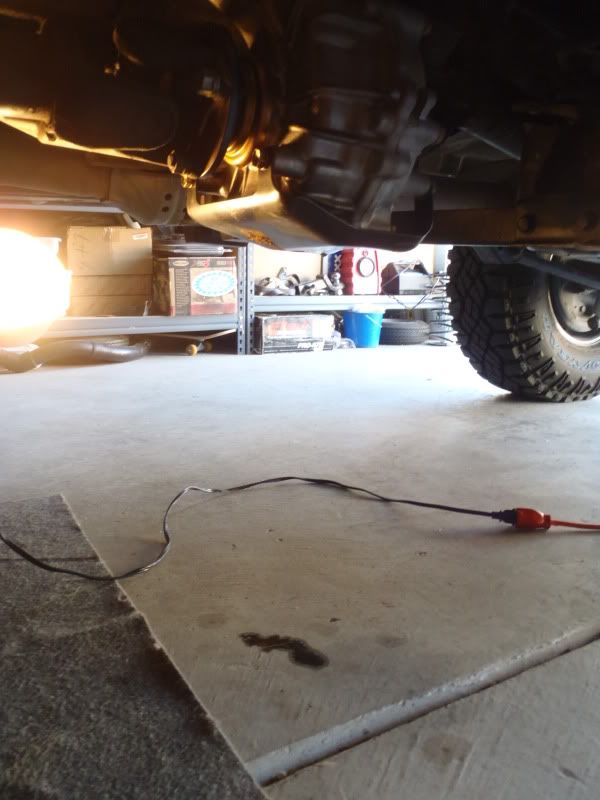
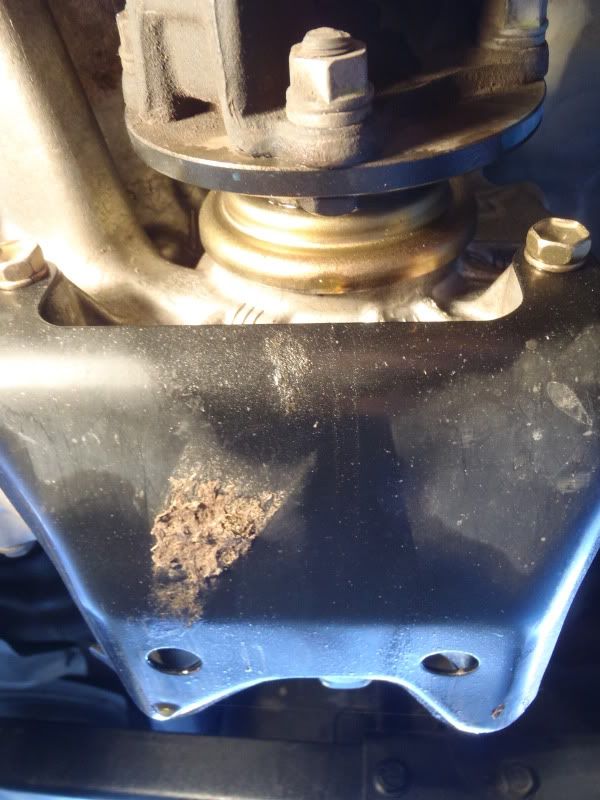
My 2001 4Runner recently developed a relatively fast leak from the Front Output Shaft Seal on the Transfer Case. My 1997 has had a slow leak from the Rear Output Shaft Seal for some time. I replaced the front output seal on the 2001 today, and the write up follows below. When I get around to replacing the rear output seal on the 1997, I will add that procedure to this write up, although it should be very similar to the front.
First, here’s the leak I’m describing:
Next, let’s start w/the details on what you’ll need and some links I found helpful:
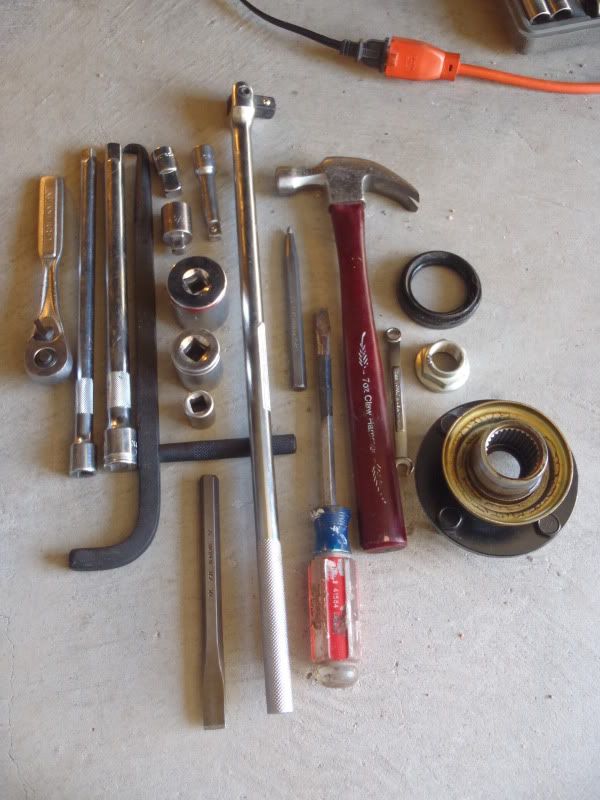
Tools:
3/8” Ratchet
3/8” 3 inch extension
3/8” 12 inch extension
3/8” to 1/2” drive adapter
1/2” to 3/8” drive adapter
1/2” drive breaker bar
Large Flathead Screwdriver
7mm Wrench
Seal Puller
Hammer
1/2” drive 30mm Socket (I used a 1 3/16”socket, it’s the same as a 30mm)
1/2” Drive 24mm Socket
3/8” Drive 14mm Socket
3/8” Drive 12mm Socket
1/2” Cold Chisel
3/8” Center Punch
1/2” Drive Torque Wrench
Fluid Pump
2 Quarts of 75w90 Gear Oil
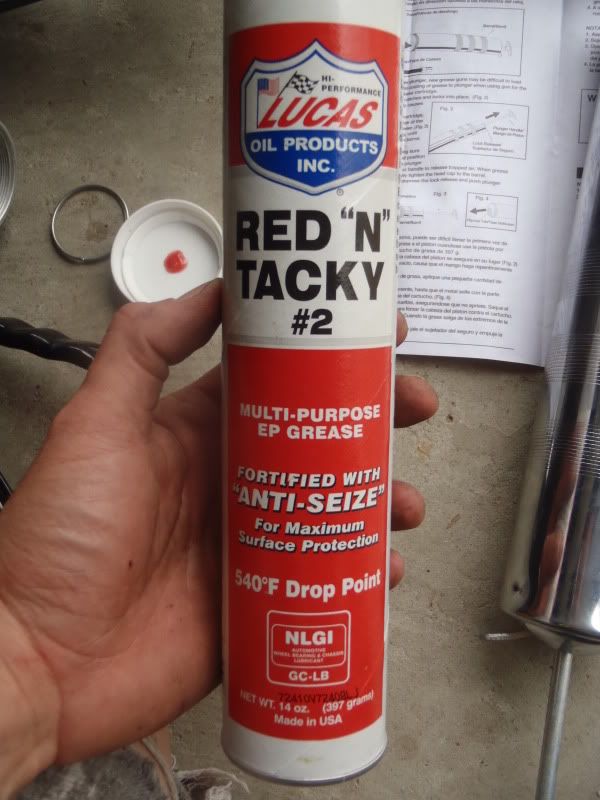
14 oz tube Lucas “Red N Tacky #2” Multi Purpose EP Grease or Equivalent
Grease Gun
Drain Pan
Paper Towels
Brake Cleaner
Toyota Parts:
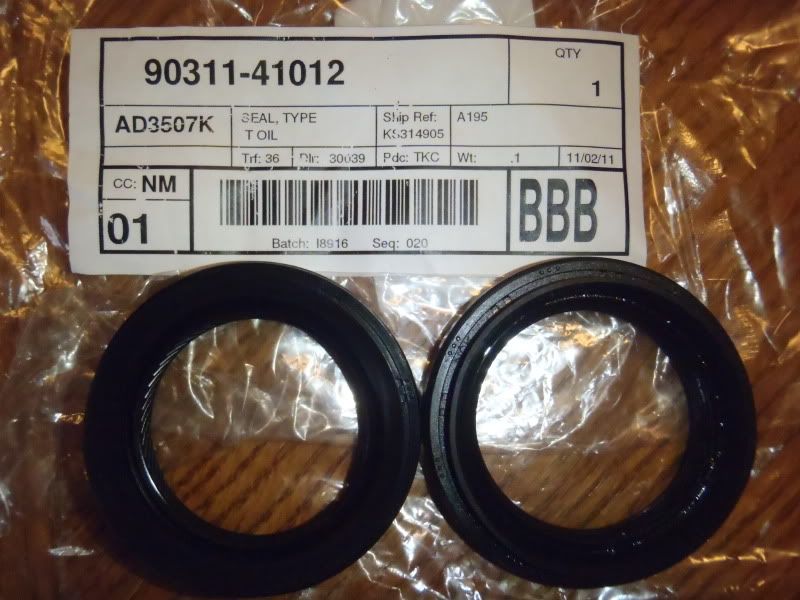
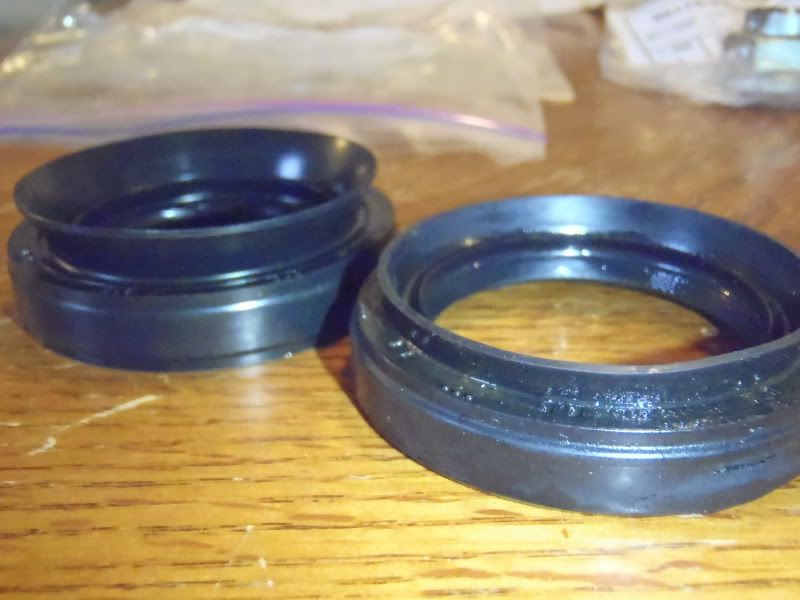
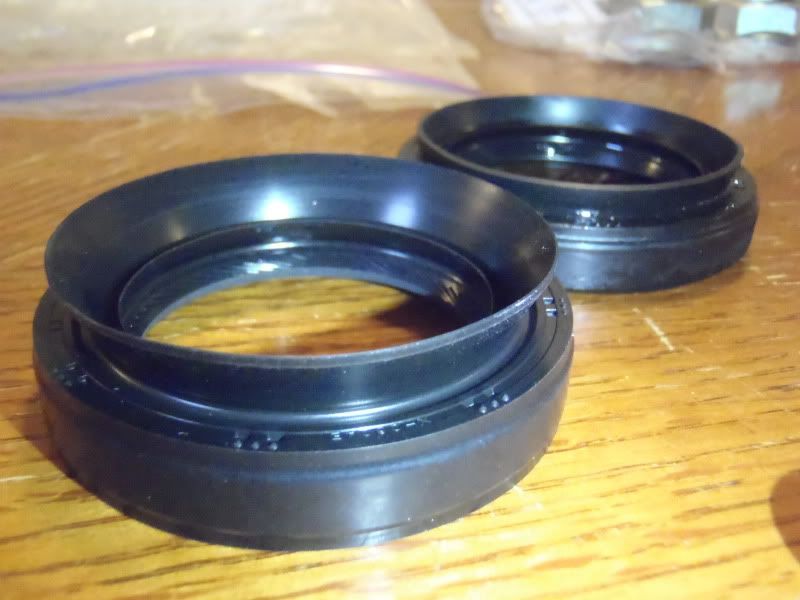
90311-41012, Seal Type T Oil ($10.27)
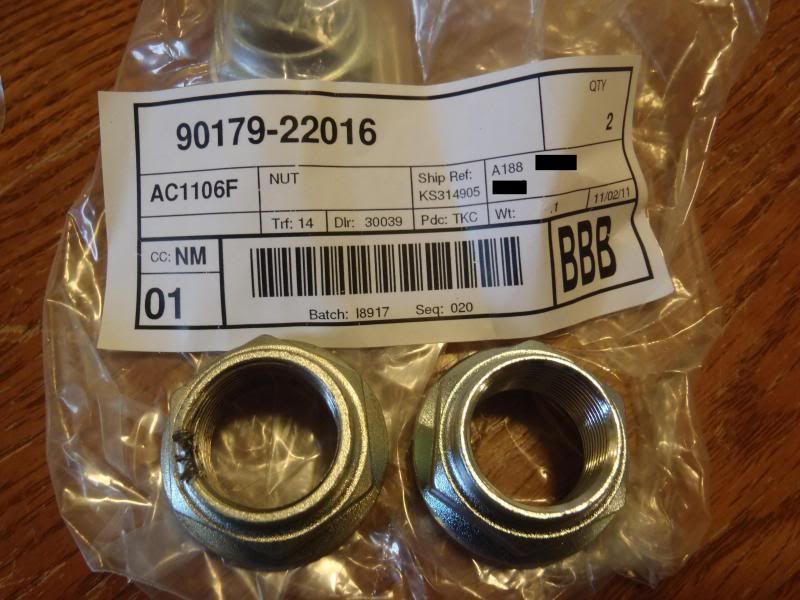
90179-22016, Nut ($2.95)
Torque Values:
Transfer Case Fill Plug -27 ft./lbs
Transfer Case Drain Plug - 27 ft./lbs
30mm Output Shaft Nut - 87 ft./lbs
Driveshaft to Companion Flange Nuts - 54 ft./lbs
Transfer Case Skid Mounting Bolts - 28 ft./lbs
Grease Fitting - barely tight, no value in FSM
FSM Links:
Transfer Unit Components - http://www.ncttora.com/fsm/1996/SIL...2rmsour/2002/024runne/trvf3am/trauni/comp.pdf
Transfer Assembly Components - http://www.ncttora.com/fsm/1996/SIL...2rmsour/2002/024runne/trvf3am/traass/comp.pdf
Oil Seal Components - http://www.ncttora.com/fsm/1996/SIL...2rmsour/2002/024runne/trvf3am/oilsea/comp.pdf
On to the work itself:
1. If equipped remove the plastic undercarriage cover beneath the driver’s side door using a Ratchet & a 12mm socket.
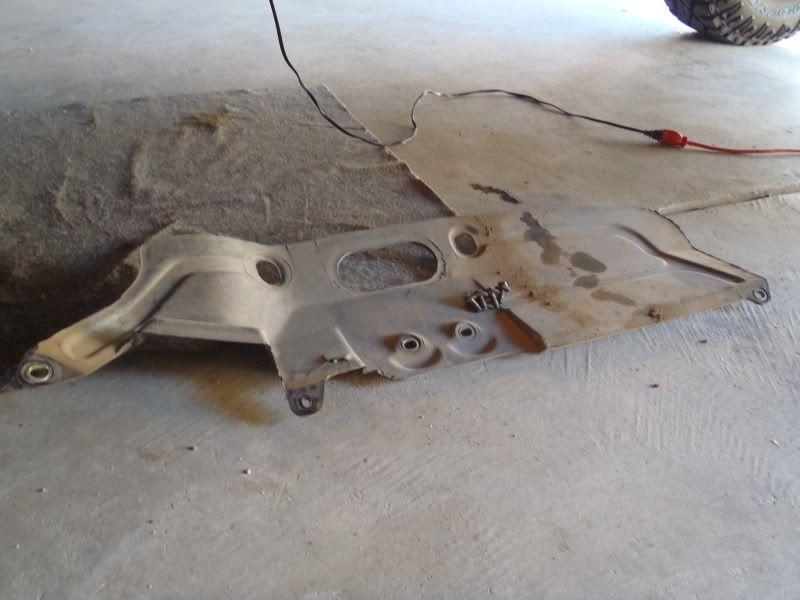
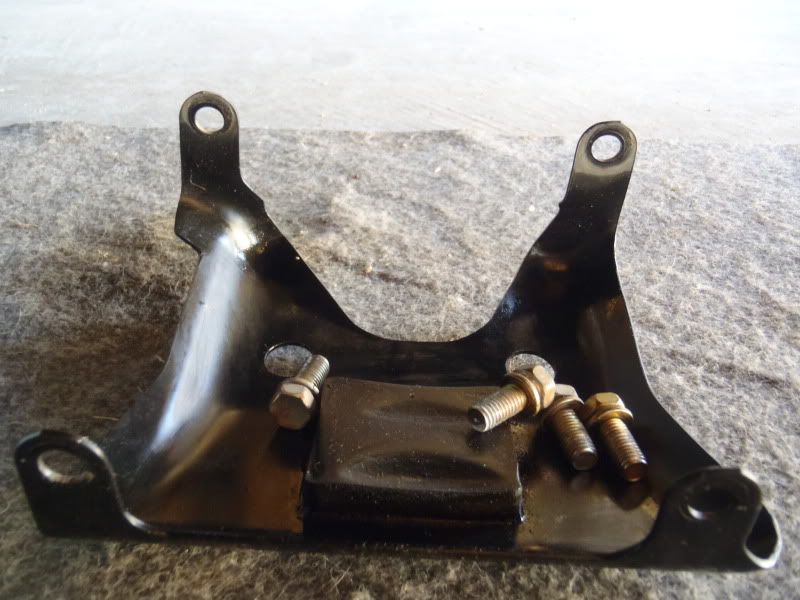
2. Remove the four bolts securing the Transfer Case Skid Plate using a Ratchet & a 12mm Socket.
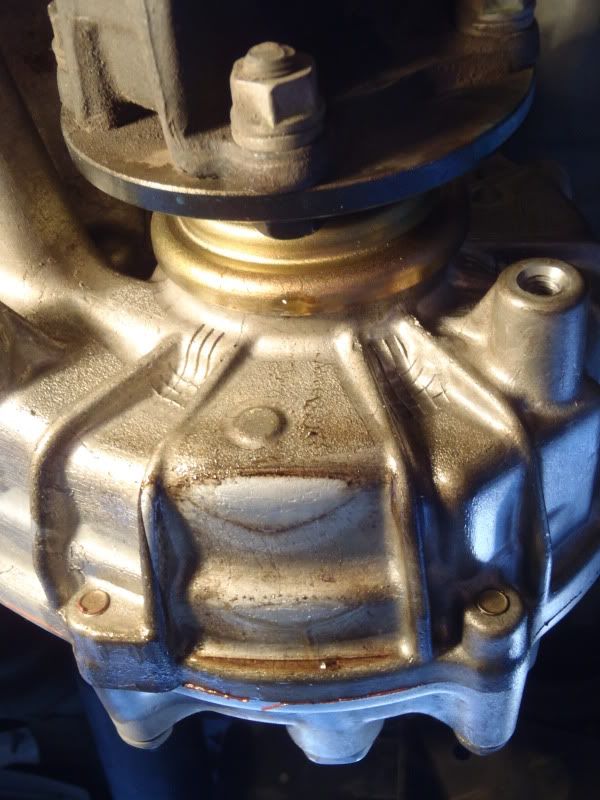
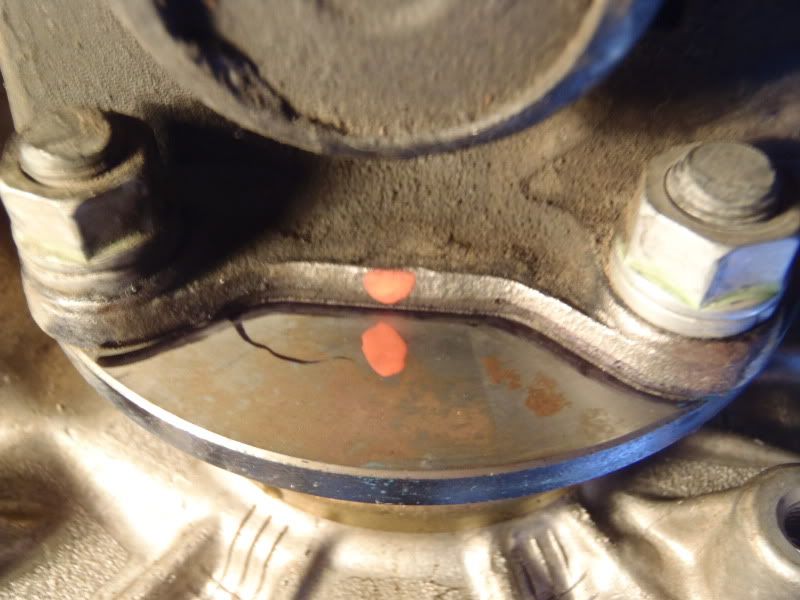
3. Clean the driveshaft where it meets the companion flange, and clean the companion flange itself. Then mark the relationship of the two so that you can re-assemble them exactly as they are.
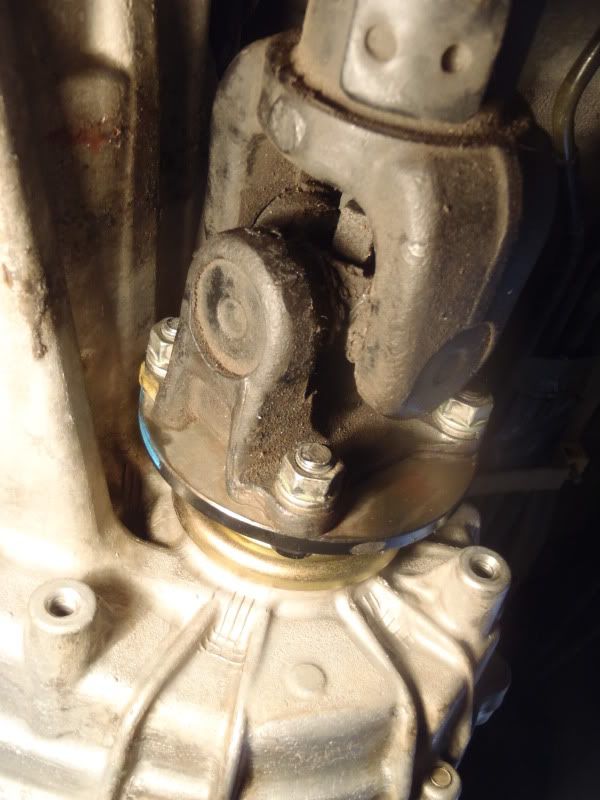
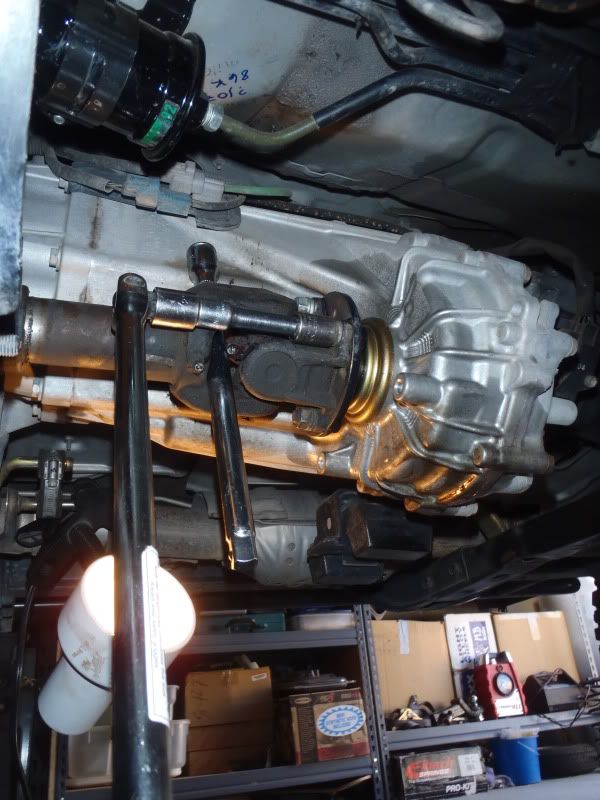
4. Use the 3/8” drive 12 inch extension to secure the driveshaft while you remove the four nuts holding the driveshaft to the companion flange using a Ratchet, 3” extension, and a 14mm socket (A breaker bar helps too). You secure the driveshaft by sliding the extension through the U-joint so that it hits the Transfer Case, preventing the assembly from rotating while you loosen the nuts.
5. Now that the driveshaft is unbolted from the companion flange, you will need to move it forward by telescoping the sleeve yoke over the front propeller shaft. There is pressurized grease between the two that will prevent you from doing so.
In order to relieve the pressure, and allow the driveshaft to collapse forward, you will need to remove the grease fitting pictured below using a 7mm wrench.
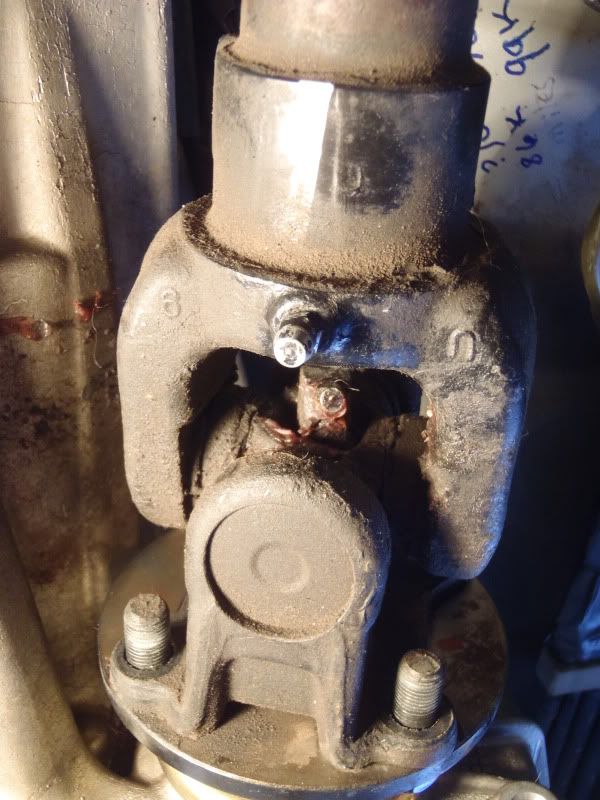
As you collapse the front driveshaft, thick grease will begin to spew from the hole where the grease fitting was installed.
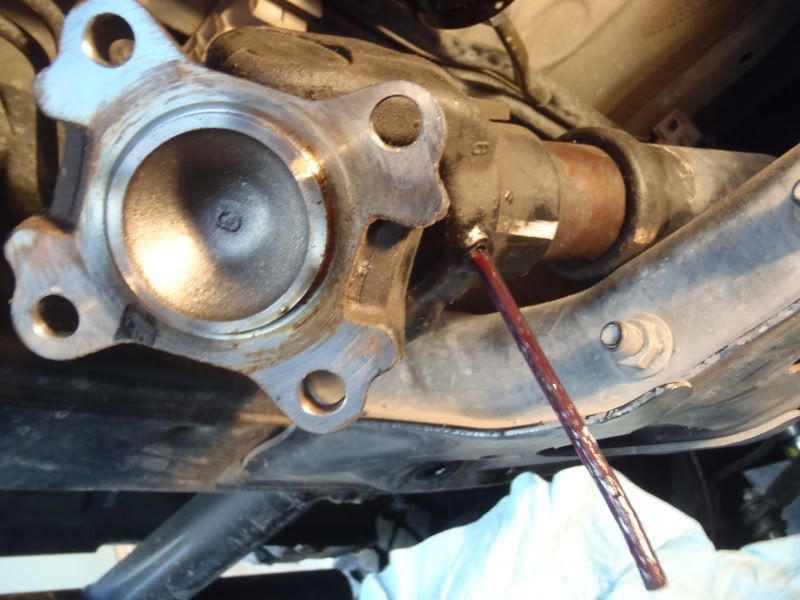
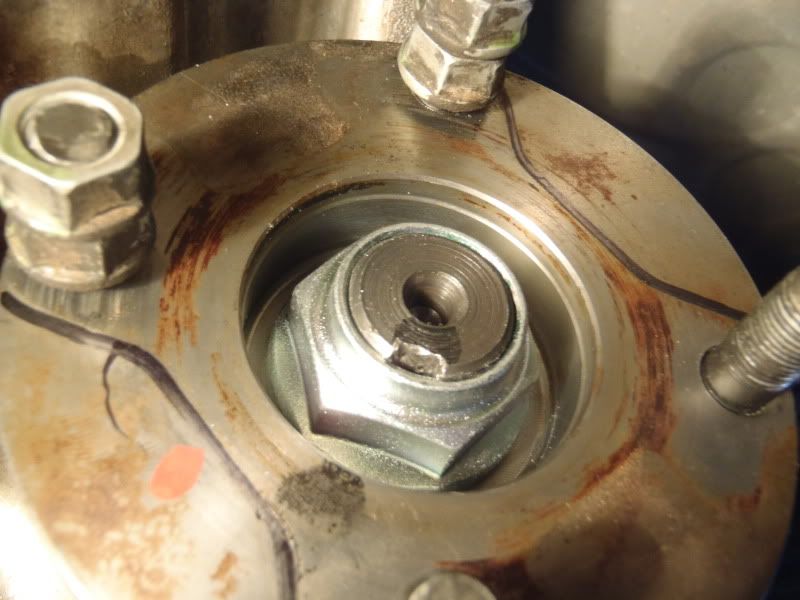
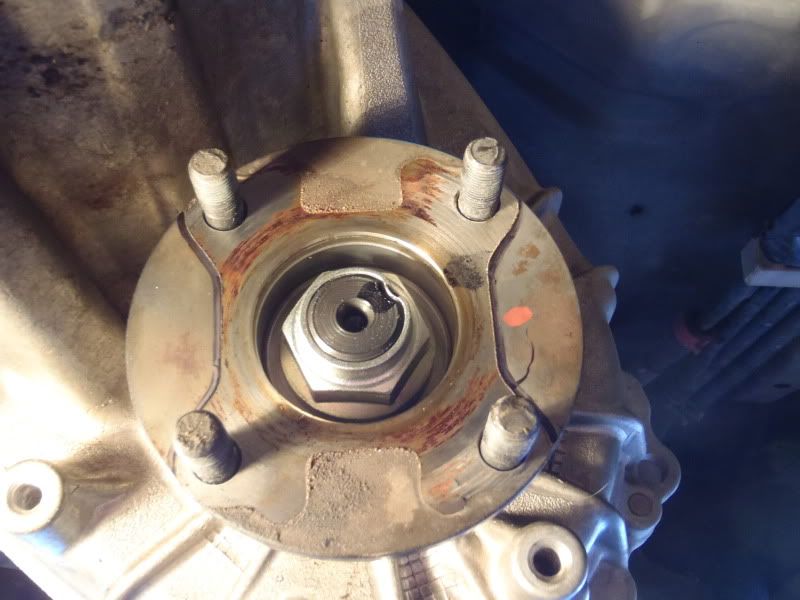
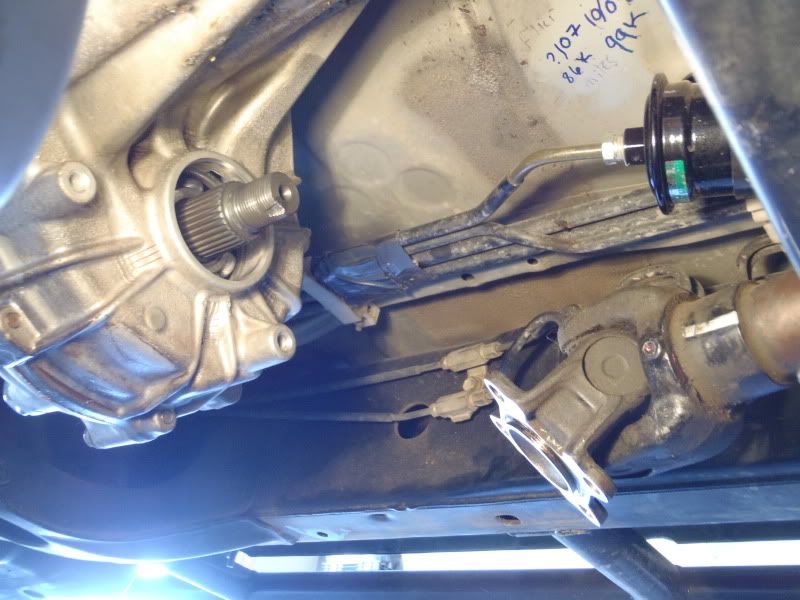
Collapse the driveshaft enough that you can get it off the bolts on the companion flange and allow it to rest on the cross member near the fuel filter. Once you have set the driveshaft aside, you should be seeing this on the transfer case, this is the 30mm staked nut, nestled inside the companion flange.
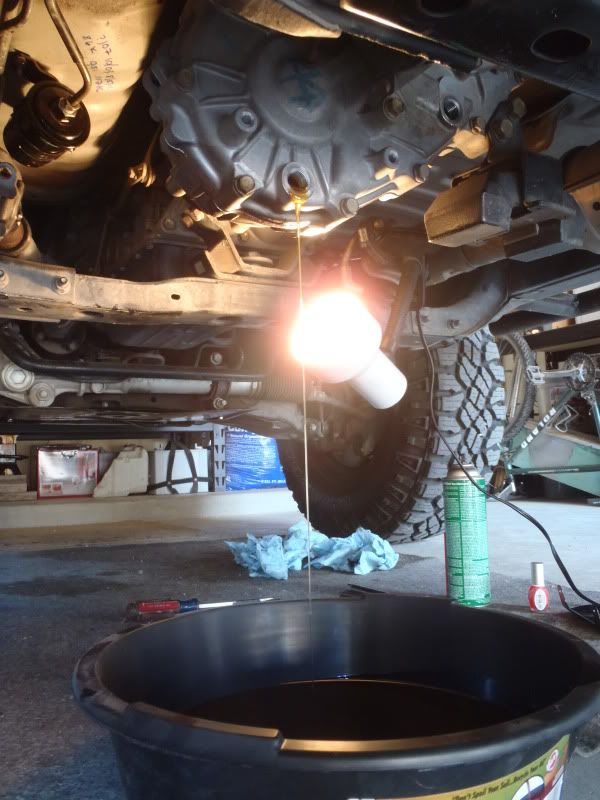
6. Using a 24mm Socket and a Breaker Bar, loosen the Transfer Case Fill Plug, but do not remove it completely. Situate your drain pan under the Transfer Case. Next, use the same socket to remove the Transfer Case Drain Plug. By leaving the fill plug in, you will prevent the gear oil from shooting out of the drain plug. It should drain smoothly into the drain pan. (Note: This step could alternatively be done first)
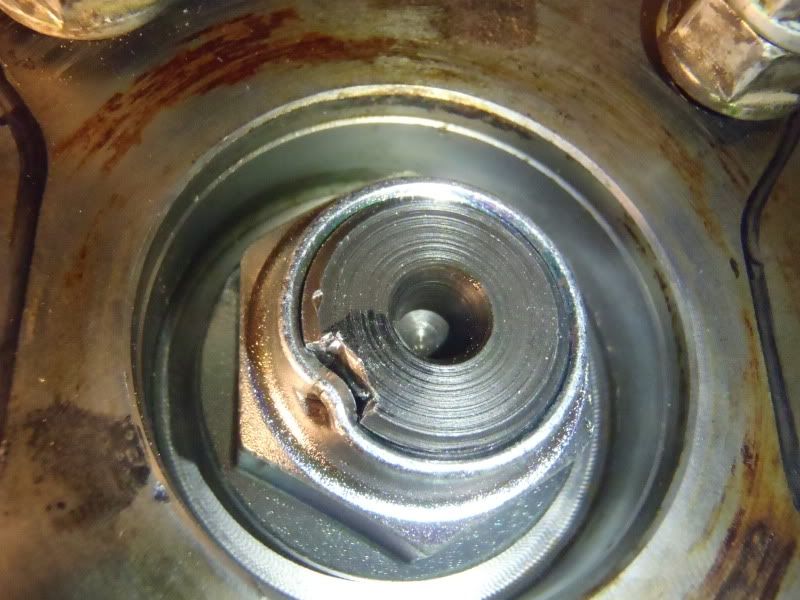
7. Un-stake the 30mm Staked Nut. This is the hardest part of the job. This involves hammering a punch or chisel into a small notch in the Transfer Case Output Shaft. I purchased a 3/8” center punch & 1/2" cold chisel to un-stake the nut, but they were causing damage to the Shaft, so I used an angle grinder to modify the center punch.
Modified like so I was able to easily un-stake the nut by driving the tip of the modified tool into the notch.
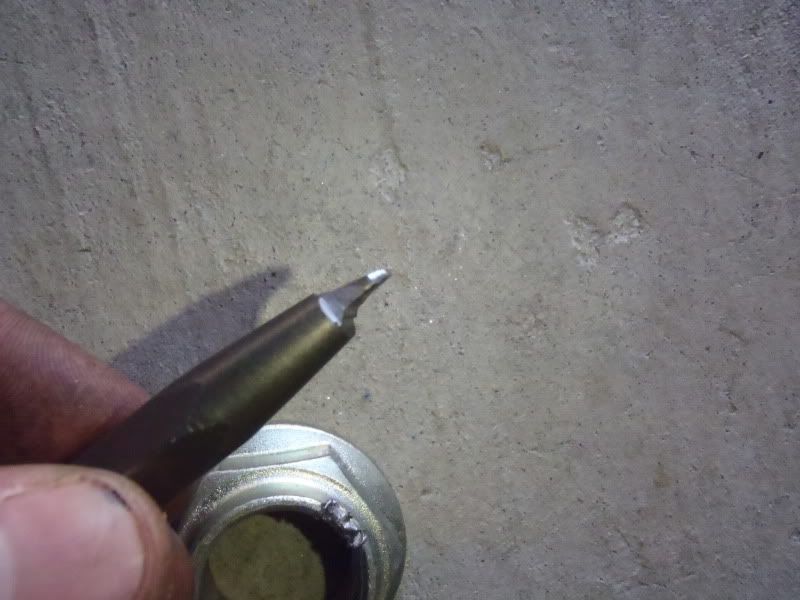
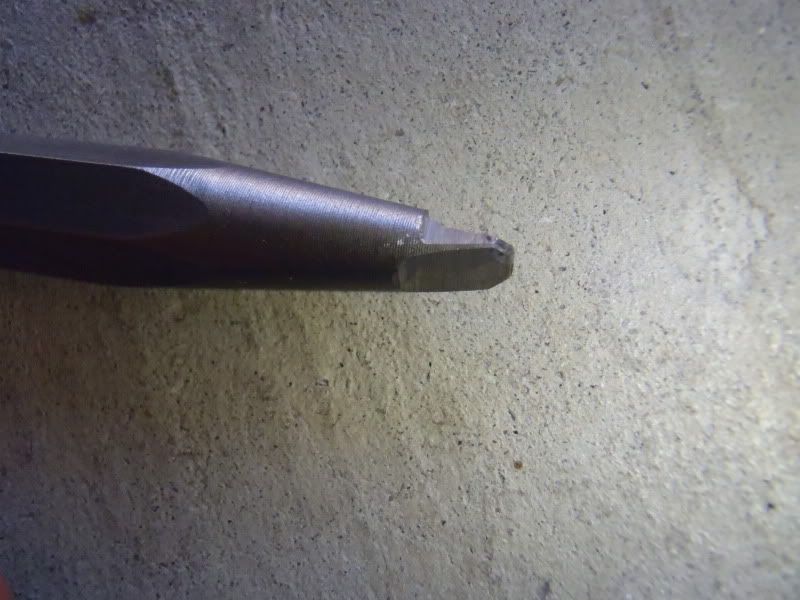
8. Remove the 30mm Staked Nut. First, take the 4 nuts that held the driveshaft to the companion flange, and thread them onto two neighboring studs on the companion flange. The purpose of this is to protect the threads on the studs while you break the 30mm nut loose.
Secure the companion flange as pictured below, by wedging the 12” extension between the protected studs, and against the Transfer Case. Using the 30mm (or 1 3/16”) 1/2” drive socket, and a 1/2” drive breaker bar, loosen the 30mm nut.
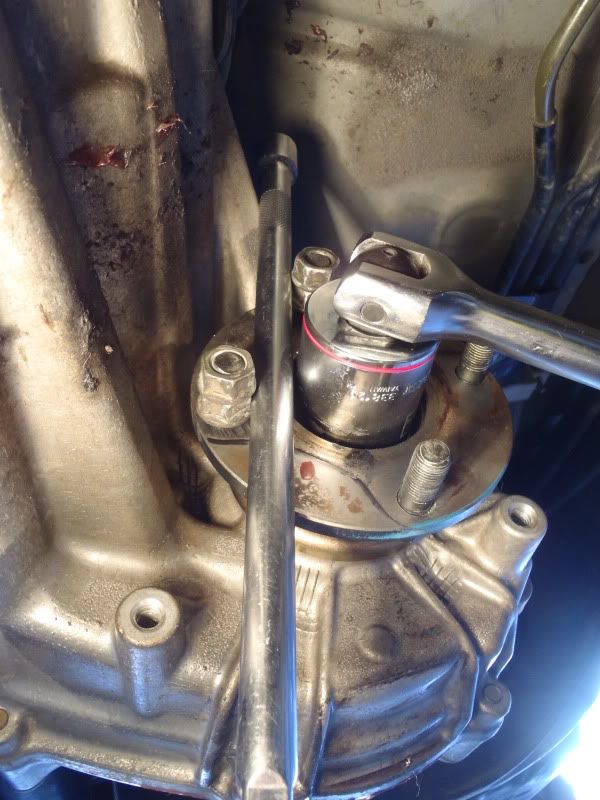
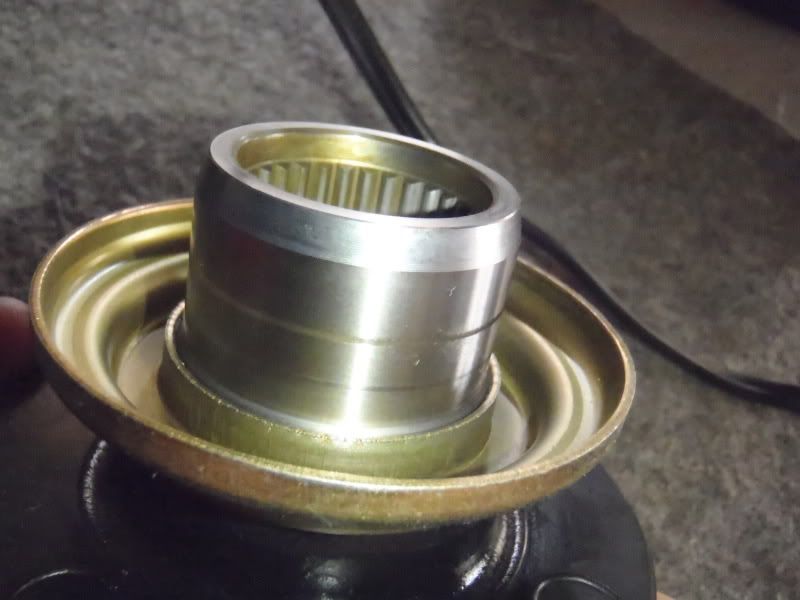
9. Grab ahold of the companion flange and pull it forward. It should pull right off the output shaft.
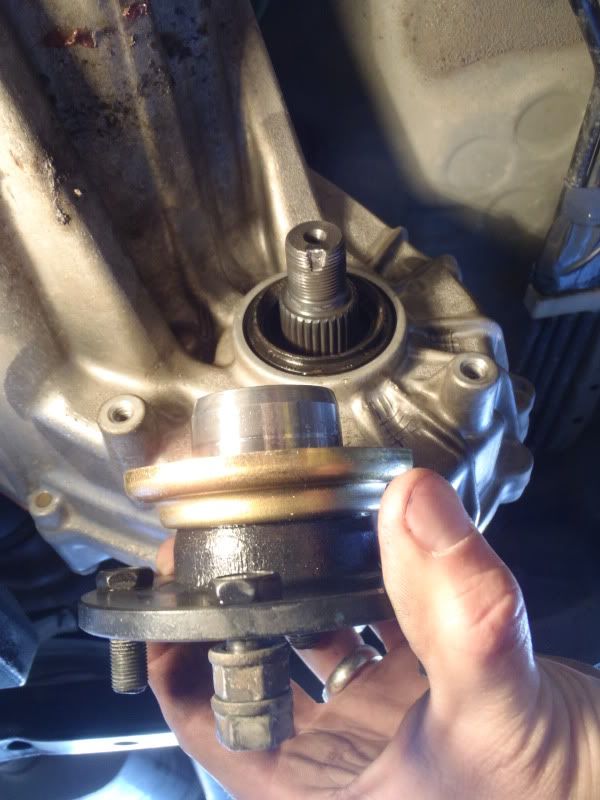
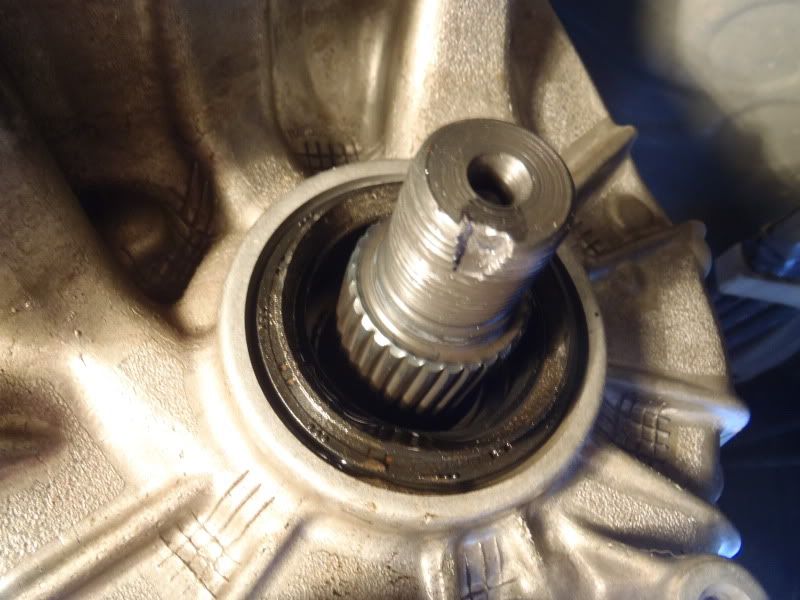
With the 30mm nut and the companion flange removed, you can see the damage I did to the output shaft. It was very minimal and did not affect the thread engagement of the 30mm nut. I’m not sure how to un-stake the nut without causing some small degree of damage.
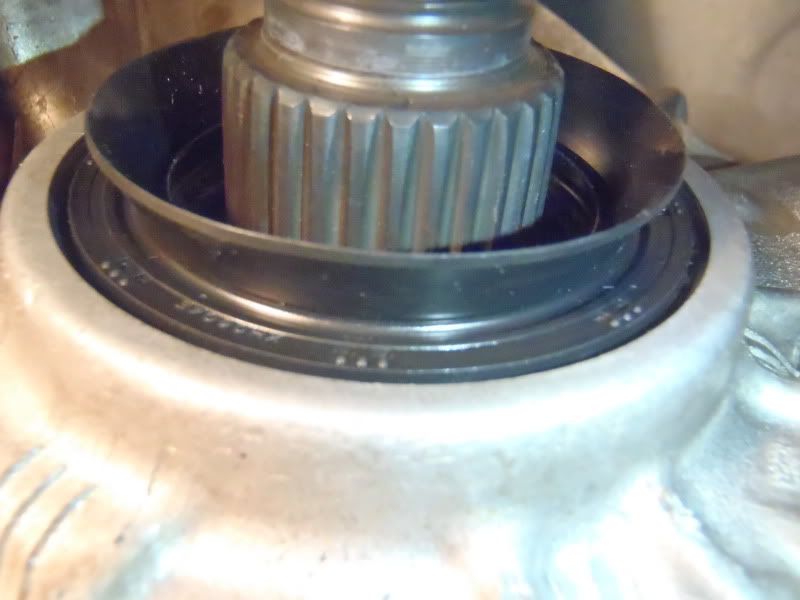
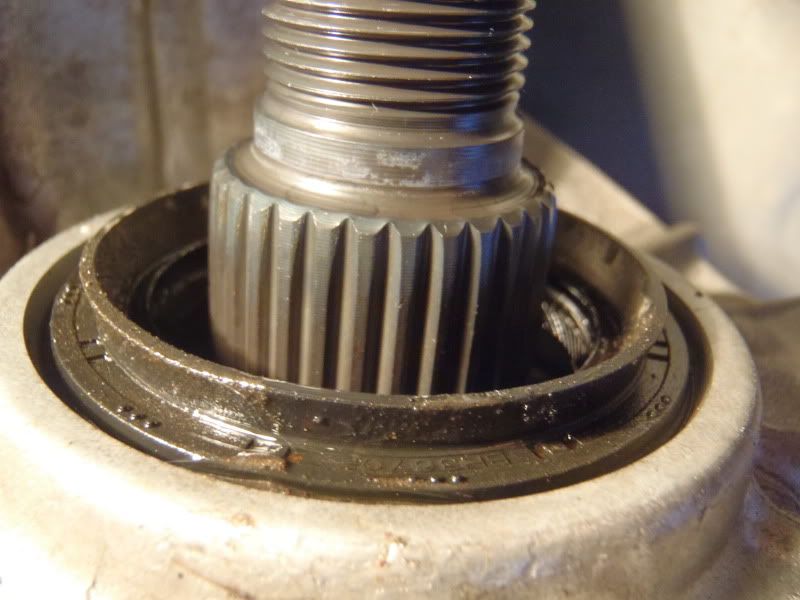
AND THERE’S OUR CULPRIT!!!
10. Take note of how deep the seal is installed into the Transfer Case housing. You want to make sure that you install the new seal at the same depth.
YOU’RE HALF WAY THERE!
My 2001 4Runner recently developed a relatively fast leak from the Front Output Shaft Seal on the Transfer Case. My 1997 has had a slow leak from the Rear Output Shaft Seal for some time. I replaced the front output seal on the 2001 today, and the write up follows below. When I get around to replacing the rear output seal on the 1997, I will add that procedure to this write up, although it should be very similar to the front.
First, here’s the leak I’m describing:
Next, let’s start w/the details on what you’ll need and some links I found helpful:
Tools:
3/8” Ratchet
3/8” 3 inch extension
3/8” 12 inch extension
3/8” to 1/2” drive adapter
1/2” to 3/8” drive adapter
1/2” drive breaker bar
Large Flathead Screwdriver
7mm Wrench
Seal Puller
Hammer
1/2” drive 30mm Socket (I used a 1 3/16”socket, it’s the same as a 30mm)
1/2” Drive 24mm Socket
3/8” Drive 14mm Socket
3/8” Drive 12mm Socket
1/2” Cold Chisel
3/8” Center Punch
1/2” Drive Torque Wrench
Fluid Pump
2 Quarts of 75w90 Gear Oil
14 oz tube Lucas “Red N Tacky #2” Multi Purpose EP Grease or Equivalent
Grease Gun
Drain Pan
Paper Towels
Brake Cleaner
Toyota Parts:
90311-41012, Seal Type T Oil ($10.27)
90179-22016, Nut ($2.95)
Torque Values:
Transfer Case Fill Plug -27 ft./lbs
Transfer Case Drain Plug - 27 ft./lbs
30mm Output Shaft Nut - 87 ft./lbs
Driveshaft to Companion Flange Nuts - 54 ft./lbs
Transfer Case Skid Mounting Bolts - 28 ft./lbs
Grease Fitting - barely tight, no value in FSM
FSM Links:
Transfer Unit Components - http://www.ncttora.com/fsm/1996/SIL...2rmsour/2002/024runne/trvf3am/trauni/comp.pdf
Transfer Assembly Components - http://www.ncttora.com/fsm/1996/SIL...2rmsour/2002/024runne/trvf3am/traass/comp.pdf
Oil Seal Components - http://www.ncttora.com/fsm/1996/SIL...2rmsour/2002/024runne/trvf3am/oilsea/comp.pdf
On to the work itself:
1. If equipped remove the plastic undercarriage cover beneath the driver’s side door using a Ratchet & a 12mm socket.
2. Remove the four bolts securing the Transfer Case Skid Plate using a Ratchet & a 12mm Socket.
3. Clean the driveshaft where it meets the companion flange, and clean the companion flange itself. Then mark the relationship of the two so that you can re-assemble them exactly as they are.
4. Use the 3/8” drive 12 inch extension to secure the driveshaft while you remove the four nuts holding the driveshaft to the companion flange using a Ratchet, 3” extension, and a 14mm socket (A breaker bar helps too). You secure the driveshaft by sliding the extension through the U-joint so that it hits the Transfer Case, preventing the assembly from rotating while you loosen the nuts.
5. Now that the driveshaft is unbolted from the companion flange, you will need to move it forward by telescoping the sleeve yoke over the front propeller shaft. There is pressurized grease between the two that will prevent you from doing so.
In order to relieve the pressure, and allow the driveshaft to collapse forward, you will need to remove the grease fitting pictured below using a 7mm wrench.
As you collapse the front driveshaft, thick grease will begin to spew from the hole where the grease fitting was installed.
Collapse the driveshaft enough that you can get it off the bolts on the companion flange and allow it to rest on the cross member near the fuel filter. Once you have set the driveshaft aside, you should be seeing this on the transfer case, this is the 30mm staked nut, nestled inside the companion flange.
6. Using a 24mm Socket and a Breaker Bar, loosen the Transfer Case Fill Plug, but do not remove it completely. Situate your drain pan under the Transfer Case. Next, use the same socket to remove the Transfer Case Drain Plug. By leaving the fill plug in, you will prevent the gear oil from shooting out of the drain plug. It should drain smoothly into the drain pan. (Note: This step could alternatively be done first)
7. Un-stake the 30mm Staked Nut. This is the hardest part of the job. This involves hammering a punch or chisel into a small notch in the Transfer Case Output Shaft. I purchased a 3/8” center punch & 1/2" cold chisel to un-stake the nut, but they were causing damage to the Shaft, so I used an angle grinder to modify the center punch.
Modified like so I was able to easily un-stake the nut by driving the tip of the modified tool into the notch.
8. Remove the 30mm Staked Nut. First, take the 4 nuts that held the driveshaft to the companion flange, and thread them onto two neighboring studs on the companion flange. The purpose of this is to protect the threads on the studs while you break the 30mm nut loose.
Secure the companion flange as pictured below, by wedging the 12” extension between the protected studs, and against the Transfer Case. Using the 30mm (or 1 3/16”) 1/2” drive socket, and a 1/2” drive breaker bar, loosen the 30mm nut.
9. Grab ahold of the companion flange and pull it forward. It should pull right off the output shaft.
With the 30mm nut and the companion flange removed, you can see the damage I did to the output shaft. It was very minimal and did not affect the thread engagement of the 30mm nut. I’m not sure how to un-stake the nut without causing some small degree of damage.
AND THERE’S OUR CULPRIT!!!
10. Take note of how deep the seal is installed into the Transfer Case housing. You want to make sure that you install the new seal at the same depth.
YOU’RE HALF WAY THERE!
Last edited: