Ripcord's 2002 4Runner Sport Ed.

Looks perfect.

I just measured my truck. 23" front, 21.75" rear. So, it sounds like if I JUST use the 890's, I'll get about 23" and it should sit perfectly level. Hepar said he has 24" though....so maybe I'll even get some rake. Hard to tell until I just do it.

I'll probably do the install without the spacers first, and then if I really feel like I want more rake, I'll put them in later.


EDIT: Oh yeah, and your first page looks awesome! Very helpful. I did the same thing to a different build thread of a turbo car my brother and I built. I caught a typo or two though...

"Thundercloud Metallic Grey
3.4L V6 FVZ-FE"


Grey is spelled with an E in england....but usually not in the US. And it's a 5VZ-FE. ;) lol
 
Last edited:
I just got back from going for a little drive. I seafoamed this morning! It was so cool and the procedure is so simple.

I took a video too. I'll put the video up along with everything else from the install on Sunday evening, so be looking forward to it!


She's going in the garage this afternoon after classes, and she's not coming out until Sunday.
 
Project SUPER TUNE-UP! Day 1

|August 26th, 2011|

Day 1: Tune-Up/Prep Day
Day 2: Supercharger Install
Day 3: URD 7th


==================================

Day 1: Tune-Up/ Prep day

I set aside 3 days to work on the Supercharger install, this post is on day one. Friday, after I got home from classes, was my tune-up day. I had all of my parts and tools set out waiting for me to get home.

Things I had to do on day 1:
Seafoam
Engine Oil- Mobil 1 full synthetic
Diffs/ T-case- Mobil 1 full synthetic
New OEM fuel filter
New Walbro 190 LPH fuel pump
New II step colder spark plugs
Clean MAF/TB/Air Filter

110_1024.jpg~original


============================

On the day before, Thursday, I stopped by BigFishAllDay's house and he helped me change the oil in the supercharger. We did this now because it is much easier to do when you can tilt it to get all of the oil out!

Thanks for all the help man! You were a great resource through all of this project.


This is the only picture I got that day:
2011-08-25_19-09-11_926.jpg~original


============================

SeaFoam


First up was the Seafoam treatment.
-Seafoam is a pure petroleum product designed for cleaning carbon and other particle build-up from crankcases and fuel injection systems. Seafoam is used in 3 ways. You pour some in the gas tank, crankcase, and after you start the engine, let the vacuum hoses suck up some into the intake. After letting the truck sit for a half hour, start it up and let the smoke fly. The smoke is all of the carbon build-up being cleared from the engine.

Resource threads:
http://www.toyota-4runner.org/maintenance/52971-seafoam.html?highlight=seafoam
http://www.toyota-4runner.org/3rd-g...seafoam-injection-port.html?highlight=seafoam

I did not take any in-progress pics, but I did get a video!


=================================

Fuel Filter/ Fuel pump

After the seafoam, it is important to go a step further and change the filter too. I also changed the fuel pump with a Walbro 190 Lph fuel pump that was supplied with the URD 7th injector kit.

I used this write-up, it was the best I could find and very helpful:
5VZ V6 4runner fuel filter write up with pics

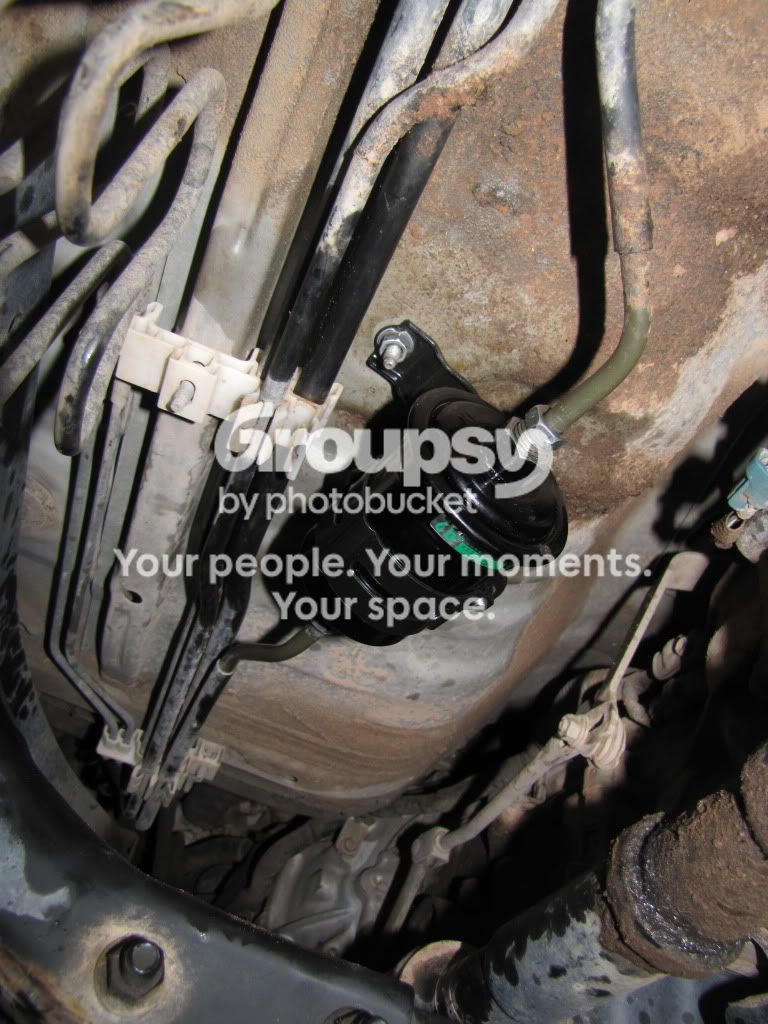
Old fuel filter:
IMG_0015.jpg~original


New one in:
IMG_0016.jpg~original


Fuel Pump:
Support the tank when you are unbolting it..
IMG_0045.jpg~original


With the tank down, changing the pump:
IMG_0047.jpg~original


==================================

Full Mobil 1 Sythetic fluids change

After the fuel stuff, it was oil time. I didn't take any pics of the engine process because.. who cares about that. I did take a few of the diffs though.

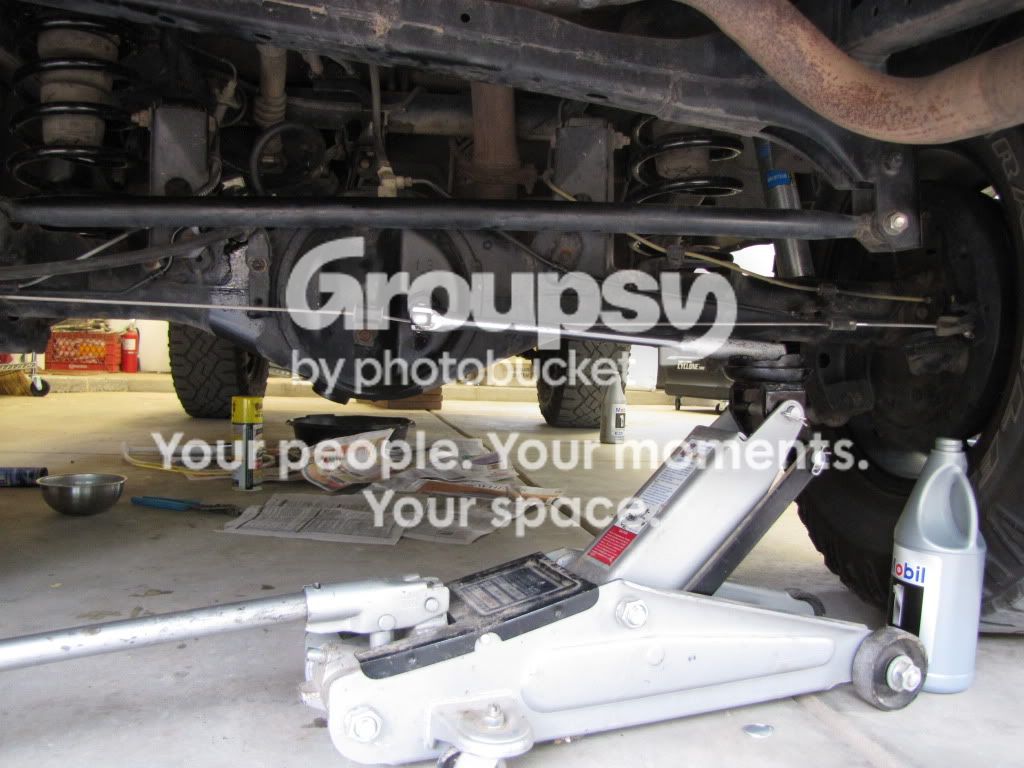
I had to go out and buy a $6 socket for the job. I needed a 1/2" drive- 15/16" 6-point socket to get the bolts off the diffs. I had a 12 point in that size, but that would have stripped the bolts.


I thought of a way to apply lots of force with little amount of effort :D

IMG_0049.jpg~original


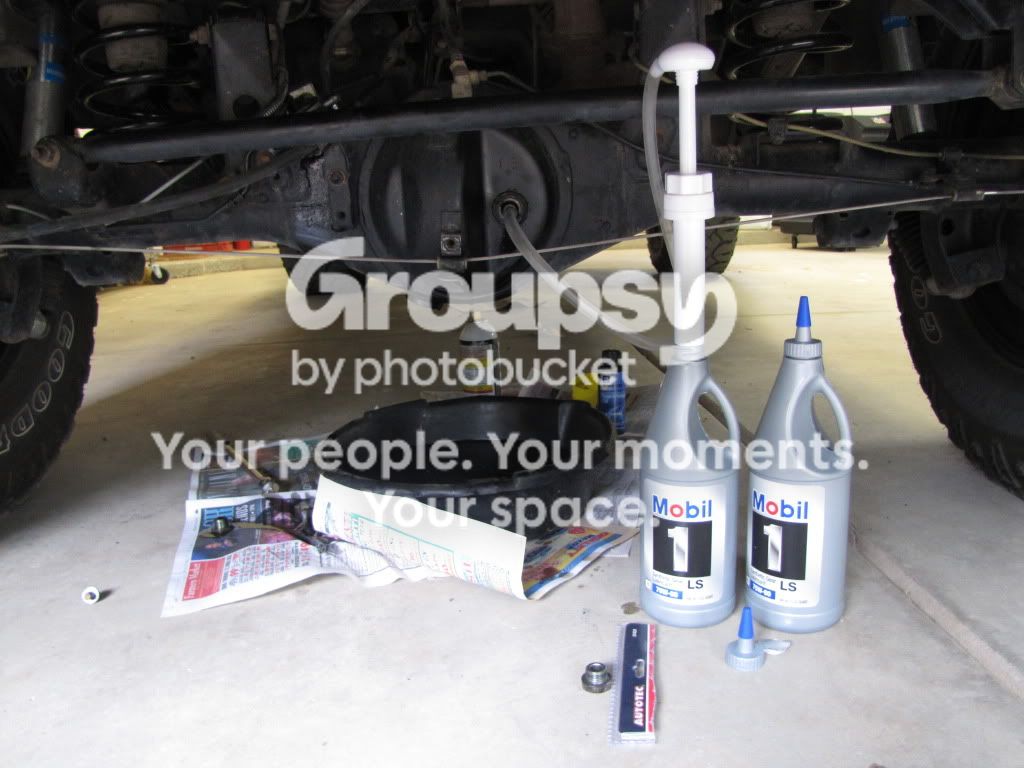
Filling the diff:
I also had to buy a new $8 hand pump for this part.

IMG_0048.jpg~original
 
Project SUPER TUNE-UP! Day 2

|August 27th, 2011|

Day 1: Tune-Up/Prep Day
Day 2: Supercharger Install
Day 3: URD 7th


==================================

Supercharger install:

Saturday was a very exciting day. I had loads of help too! ALBPM, BigFishAllDay, and two other friends of mine were there to lend a hand! Thanks so much guys!


Not much to say that hasn't been said already, so here's the pics:
First start video is at the bottom..


Before: Reference pics.
IMG_0023.jpg~original


IMG_0022.jpg~original


IMG_0019.jpg~original


IMG_0021.jpg~original


IMG_00242.jpg~original


Throttle Body off:
IMG_0031.jpg~original


Upper manifold off:
IMG_0032.jpg~original


Lower manifold off:
IMG_0033.jpg~original


Bolting up the Supercharger and hooking up hoses:
IMG_0036.jpg~original


IMG_0037.jpg~original


IMG_0043.jpg~original


.
.
.
.
And the moment of truth... The first start attempt!

 
Project SUPER TUNE-UP! Day 3

|August 28th, 2011|

Day 1: Tune-Up/Prep Day
Day 2: Supercharger Install
Day 3: URD 7th


==================================

URD 7th Injector


The URD 7th was the most intimidating part of the project for me, but it ended up being quite simple and strait forward.


First, I had to cut the fuel line and install the T-fitting to supply the 7th injector:

IMG_0050.jpg~original


IMG_0053.jpg~original


Installed the 7th and hook up the fuel supply and wiring to the URD PCU. I also put the T on the boost line to run to the URD PCU.

IMG_0054.jpg~original


Everything from then on was in the passenger area.. thank goodness for mini swamp coolers in New Mexico summers! I could have worked in there all day, it was so nice!
IMG_0056.jpg~original


If you look through my build, you will notice that anytime I am working on wiring in this area (driver or pass. side) I will remove the seat for more room. I highly recommend doing this!
IMG_0055.jpg~original


Wire connections for the 7th itself.
IMG_0058.jpg~original


Somewhere in the middle of splicing and soldering:
IMG_0059.jpg~original


Freshly finished splice:
IMG_0060.jpg~original


I taped off most of the wires and made it look all clean, but I did not take pics of that, I forgot.

Starting to re-assemble the interior..
IMG_0061.jpg~original


That's where I am as of right now, the install of the URD stuff took maybe 5 hours. Still have countless more hours of tuning though.. Oh joy.
 
That's where I am as of right now, the install of the URD stuff took maybe 5 hours. Still have countless more hours of tuning though.. Oh joy.

Hey dude, just an idea, but I have my URD box in the glove box... I only screwed in one side of it, so that it can pivot out for easy access to the serial plug. I would look into a more accessible mounting location if I were, going to be a PITA to get to that thing when you start tuning.

Drive up here for Saturday, a friend and I are going to hit the dyno =p

I don't know if I saw it anywhere, or missed it, but if you're going to get a wideband gauge (get a wideband gauge) I would go with the Innovate one URD has. The data logging capabilities of it are AWESOME. I HATE that my AEM UEGO is unable to data log with the r4 software. It makes tuning 20x more difficult (which is why I have spent close to $1000 on dyno runs).
 
Congrats on getting it all done Rip, it looks like the install of the 7th went pretty smooth. Have you taken it out for a drive yet? Did you guys get some epoxy or JB weld on that one problem area?

Also, RE what A.Wilson said... The spot where you mounted it is the same spot I mounted mine. What I plan on doing is buying a 6 foot serial cable (Female on one end, male on the other) and attaching it to the URD box, then running it under the carpet and out near the transmission shifters. That way when it comes time to tune, I just have to plug into the exposed cable rather than taking trim peices off to access the box. This gives you the advantages of having a "stealth" install and keeping full use of your glove box. It's up to you though.

And A.Wilson is right, you NEED a wideband. And I would also recommend the Innovate products. The LC-1 & DB Guage (which I'm running) are only $178 from URD.

I was glad I could be of some help along the way, and GOOD WORK! :bravo:
 
Driffter was right, the V6 is way simpler than mine.

It's scary how much faster your truck is, isn't it? I just wish I could afford the fuel mods like you've already gotten.
 
Thanks guys, its been a very fun weekend! Its so much faster now! Once I get a few things sorted out, ill take a driving video.

With the wideband, I am getting one, I just have to figure out how I want to do it. I was really hoping to just have the boost gauge on the A-pillar and keep the handle. But then where would I mount a wideband gauge? Do they have one that doesnt have a gauge and is just something I can plug into a laptop? Or is it really necessary to continue to monitor the wideband even after tuning? I can always watch the ratios on the scangauge after wideband tuning is done, but take that for what its worth.

On the broken rivet, that cylinder is riveted to a bracket that is rivited to the S/C. So if I were to get a new assembly, I would still need to redo the rivit to mount it back on the S/C. I'm not quite sure how to go about fixing it, its just zip tied right now, which works for the short term.
 
Last edited:
The whistling sound of the SC is sweet..

I have driven both my brothers SC'd 4runner's.......Power is always on standby, and when you need it, man it delivers.....and fast.

Congrats on having it installed!
 
Looks like you have been busy. I am totally jealous. Congrats man, you now have an even more awesome 4Runner than before, possibly my favorite.
 
wow! i wish i had your brain! i would be so nervous to attempt that. super jealous stuff goin on over here. its threads like yours that make me think about my 4runner more than any other thing i think ive got problems lol
 

Members online

No members online now.

Forum statistics

Threads
278,312
Messages
3,554,083
Members
248,016
Latest member
Advally Service

Trending content

Back
Top