Road Bull
Senior Member
ARB Twin Compressor mounted in the cargo cubby hole PART 2.
After you have all your supplies and favorite beverages at the ready, it is time to begin.
While this is not a complete step-by-step guide think of it more as a spirit animal that might help you along the way.
Remove the interior plastic panels.
Take your time or you will break more stuff.
Start by removing the middle roof plastic trim that the rear cargo light is on. You need to start by removing the plastic lenses cover for the light. Use a screwdriver to pry, from passenger side, the lense cover away to expose the four Phillips head screws that hold the light fixture in place. Remove the four screws and gently pull the light down and angle it so that it can go through the hole when you remove the plastic trim piece. Gently tug the plastic trim piece starting it either side and then guide the cargo light through the hole setting the trim piece aside. This will expose a tiny screw that anchors the large interior quarter panel piece to the roof.
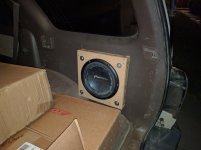
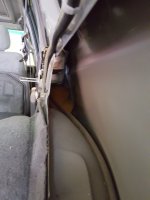
Once you remove that tiny screw, and removed both cargo cover mounting brackets, then you will be able to start gently tugging the interior quarter panel on the cubby hole side away from the body. Some of the cargo area panels and cubby holes very from year-to-year in their size and design. My 2002 has a small removable shelf type tray in the dark black plastic cubby hole portion. Remove this by pressing up from underneath once you have the panel slightly separated from the body. If you do not then this Trey will prevent you from pulling the panel away from the body as it sits behind the wheel well pinch weld lip. Once it is removed you have greater access to remove the panel. At this point we opted to take the seat belt off. It's a little bit more work but it would have been a righteous pain in the ass to try to mount the compressor with the panel still in side vehicle. Of course you could try, but why would you?
Mounting the unit.
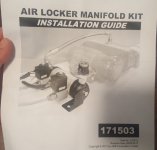
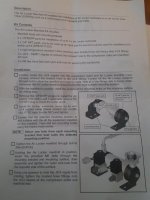
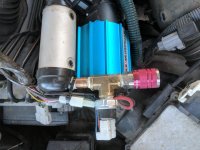
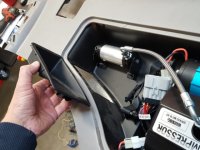
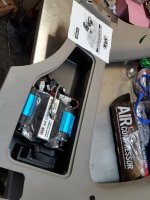
ARB does provide you with a sheet of paper to serve as a guideline for marking the holes for drilling. Note that cubby hole mounting surface is not perfectly flat, meaning that if you lay this piece of paper perfectly flat and draw and drill your holes they may not match up perfectly. You will want to mount unit so that the logo is upside down with the electrical connections facing the front of the vehicle unless you want to just make things hard for yourself. Give yourself enough room two awesome mount the manifold kit just to the front of the compressor.
Wire madness.
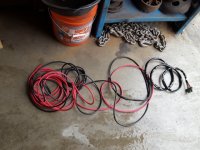
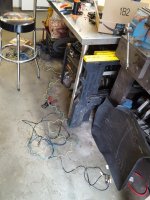
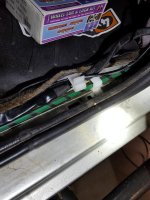
This is not my idea of fun. Trying to fit 10 lb of funk in a 5lb bag. To go the distance that we needed from the rear cargo area to the front battery was about 25 feet give or take. So after creating the extensions for the loom, we routed a hole in the removable tray portion of the cubby hole for the wires to pass through being careful to think where are the wires will have to run to not interfere with mounting surfaces and not have to make 90 degree turns with the 6 gauge wires and the control wires. We slightly bent an interior body piece of metal between two mounting post towards the outside of the vehicle somewhat to create a more agreeable surface for the wires to make their turn as opposed to a hard-edged that could get scrape or fray the wires if they rubbed.
Remove and route interior trim on passenger side to route wires. Take your time and remove both front and rear floor trim pieces. Then remove the three darker door transition pieces. ( if you're removing the rear quarter panel the rear transition trim molding piece should have already been removed.) Then remove the b-pillar trim piece that the passenger side seat belt routes through. Lastly remove the passenger front right kick panel right underneath the glove box.
Routing cables.
No fun. The control cables are fairly easy to manage and they can simply take a left turn once they get to the dash area and be routed under the dash / behind the dash to the on-off switch selector that will be on the driver side.
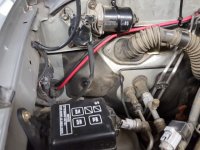
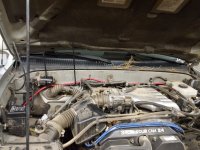
Once you get the power cables up to the front passenger seat area go to the front of the vehicle and locate The Grommet pass through that is about two to three inches in diameter. This is what I used to pass the power cables through to the engine bay. Unless you feel like removing a whole bunch of items I would suggest doing what I did. Have a friend take a small wire to pass through from the front of the vehicle on the engine bay side. If you're down by the floorboard shining a light towards that area you can locate The Wire and wrap the two power cables around the wire with electric wire making sure to get a good connection by folding the smaller wire back towards the area it will go after you've wrapped it up a few times with electrical tape finishing off the lead portion with a bit of coned electrical tape as to provide a smoother transition surface for it to guide through the grommet. Once your friend has hold of the power cables we found it easier to manage to pull one cable at a time black or red till they were fully fed through. We routed the cables along the firewall towards the driver side of the engine bay and then forward towards the battery terminals.
I will try to follow up a little bit further as we finish up this install. For all intents and purposes it is up and running however, I wanted to add a mega fuse to my winch and do a few other electrical items that we're going to tie it all together. We'll see how far I get. Amazon sent me the wrong Hardware for a mega fuse holder and I could not incorporate it into the mod at the time of installation.
Hope this helps somebody.
After you have all your supplies and favorite beverages at the ready, it is time to begin.
While this is not a complete step-by-step guide think of it more as a spirit animal that might help you along the way.
Remove the interior plastic panels.
Take your time or you will break more stuff.
Start by removing the middle roof plastic trim that the rear cargo light is on. You need to start by removing the plastic lenses cover for the light. Use a screwdriver to pry, from passenger side, the lense cover away to expose the four Phillips head screws that hold the light fixture in place. Remove the four screws and gently pull the light down and angle it so that it can go through the hole when you remove the plastic trim piece. Gently tug the plastic trim piece starting it either side and then guide the cargo light through the hole setting the trim piece aside. This will expose a tiny screw that anchors the large interior quarter panel piece to the roof.
Once you remove that tiny screw, and removed both cargo cover mounting brackets, then you will be able to start gently tugging the interior quarter panel on the cubby hole side away from the body. Some of the cargo area panels and cubby holes very from year-to-year in their size and design. My 2002 has a small removable shelf type tray in the dark black plastic cubby hole portion. Remove this by pressing up from underneath once you have the panel slightly separated from the body. If you do not then this Trey will prevent you from pulling the panel away from the body as it sits behind the wheel well pinch weld lip. Once it is removed you have greater access to remove the panel. At this point we opted to take the seat belt off. It's a little bit more work but it would have been a righteous pain in the ass to try to mount the compressor with the panel still in side vehicle. Of course you could try, but why would you?
Mounting the unit.
ARB does provide you with a sheet of paper to serve as a guideline for marking the holes for drilling. Note that cubby hole mounting surface is not perfectly flat, meaning that if you lay this piece of paper perfectly flat and draw and drill your holes they may not match up perfectly. You will want to mount unit so that the logo is upside down with the electrical connections facing the front of the vehicle unless you want to just make things hard for yourself. Give yourself enough room two awesome mount the manifold kit just to the front of the compressor.
Wire madness.
This is not my idea of fun. Trying to fit 10 lb of funk in a 5lb bag. To go the distance that we needed from the rear cargo area to the front battery was about 25 feet give or take. So after creating the extensions for the loom, we routed a hole in the removable tray portion of the cubby hole for the wires to pass through being careful to think where are the wires will have to run to not interfere with mounting surfaces and not have to make 90 degree turns with the 6 gauge wires and the control wires. We slightly bent an interior body piece of metal between two mounting post towards the outside of the vehicle somewhat to create a more agreeable surface for the wires to make their turn as opposed to a hard-edged that could get scrape or fray the wires if they rubbed.
Remove and route interior trim on passenger side to route wires. Take your time and remove both front and rear floor trim pieces. Then remove the three darker door transition pieces. ( if you're removing the rear quarter panel the rear transition trim molding piece should have already been removed.) Then remove the b-pillar trim piece that the passenger side seat belt routes through. Lastly remove the passenger front right kick panel right underneath the glove box.
Routing cables.
No fun. The control cables are fairly easy to manage and they can simply take a left turn once they get to the dash area and be routed under the dash / behind the dash to the on-off switch selector that will be on the driver side.
Once you get the power cables up to the front passenger seat area go to the front of the vehicle and locate The Grommet pass through that is about two to three inches in diameter. This is what I used to pass the power cables through to the engine bay. Unless you feel like removing a whole bunch of items I would suggest doing what I did. Have a friend take a small wire to pass through from the front of the vehicle on the engine bay side. If you're down by the floorboard shining a light towards that area you can locate The Wire and wrap the two power cables around the wire with electric wire making sure to get a good connection by folding the smaller wire back towards the area it will go after you've wrapped it up a few times with electrical tape finishing off the lead portion with a bit of coned electrical tape as to provide a smoother transition surface for it to guide through the grommet. Once your friend has hold of the power cables we found it easier to manage to pull one cable at a time black or red till they were fully fed through. We routed the cables along the firewall towards the driver side of the engine bay and then forward towards the battery terminals.
I will try to follow up a little bit further as we finish up this install. For all intents and purposes it is up and running however, I wanted to add a mega fuse to my winch and do a few other electrical items that we're going to tie it all together. We'll see how far I get. Amazon sent me the wrong Hardware for a mega fuse holder and I could not incorporate it into the mod at the time of installation.
Hope this helps somebody.
Attachments
-
 IMG_20171022_002009.jpg124.9 KB · Views: 893
 -
 IMG_20171022_002220.jpg123.9 KB · Views: 1,009
 -
 IMG_20171022_002100.jpg91.1 KB · Views: 980
 -
 IMG_20171022_002326.jpg105.2 KB · Views: 919
 -
 IMG_20171022_002407.jpg86.8 KB · Views: 987
 -
 IMG_20171022_002433.jpg114.5 KB · Views: 916
 -
 IMG_20171022_002302.jpg74.8 KB · Views: 990
 -
 IMG_20171022_002454.jpg126.7 KB · Views: 899
Last edited: