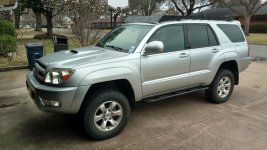
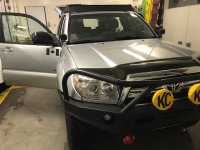
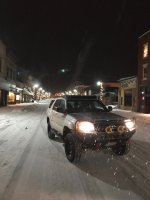
Sanmyaku build thread

getting ready for winter part 2...

So a few things I recently did include:

Bought 2 sets of chains....

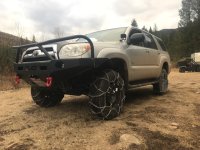
1st set: Is a diamond pattern chain, unsure the brand, but they look pretty decent. Got them for 5 loonies, so can't really complain. They were never used.
IMG_0724.JPG

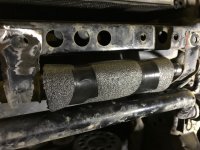
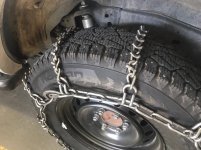
2nd set: I bought these on a off-road club group buy for 125 bucks or so. They are a crazy heavy duty v-bar chain with tensioning cams. They weight about 3x as much as the diamond chains.
IMG_0699.jpg

I'll run the diamonds on the front and the v bar on the rear. I still need to angle grind the excess chain on the v-bars and I want to get a few bungees for the chains as well, but I test fit them all and they look great.

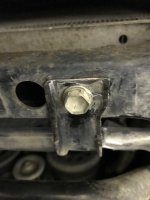
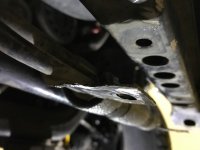
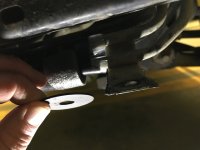
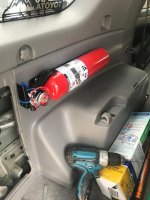
Another thing I thought I would do is mount a fire extinguisher to the rig somehow. I looked up what others have done and wasn't impressed. Most mount it to the spare jack and tool compartment cover, but I feel this is unsafe as that cover isn't really held in there by much. I decided to mount it to the large plast panel just in front of that cover. I test mounted and marked where the 4 holes would be, then pilot drilled with a small bit. I then drilled with one size smaller than the bolts I would be using. Then I reached my hand in behind (very tight space and difficult to do), and fastened washers and nuts on all 4 bolts. honestly without the nuts it was still very tight in there and probably wouldn't have come out, but I wanted to do it right. I did however, lose a small washer that fell down in a crevice. So far it hasn't rattled around. If it does I will have to use a magnet on an extension to get it out.
IMG_0621.jpg
View attachment 276849
IMG_0623.jpg

I also bought 2 gear bags from amazon. They are awesome. One holds all my tools and some recovery gear. The other bag holds my chains and snow shovel and gloves. They fit nicely on either side of my crate back there. I may actually pick up 2 more to stack on top of each other.

Future plans at some points:

I want to do an oil change by Nov 10th or so to put in Amsoil sig series 0W30. I definitely am not even over 2000kms since my last oil change but the zero weight oil will be better for our very cold winter.

At some point I need to do my tie rod ends, CV axle, and LBJ's. None of it compromises safety but the grease boots all look like they're slightly torn (pass. CV outer boot, L LBJ boot, and both outer tie rod end boots.) Might wait until spring to do that stuff, but we'll see. I also have decided I want to go with CVJ axles with their heavy duty boots, and prob OEM for the TRE's, and not sure about the LBJ's. Toyota doesn't offer any so I'd have to replace the whole LCA. decisions....

My dream list for mods next year, or if some crazy sale comes on, is:

Roof rack, and RTT (prob won't happen for a long time)
Rear steel bumper and swing outs
Because of above, upgrading my springs in rear to HD
VHF radio
Front and transmission skid plates (prob RCI).
bolt on sliders.
kinetic snatch rope.
 

Attachments

  • IMG_0621.jpg
    IMG_0621.jpg
    130.7 KB · Views: 697
  • IMG_0623.jpg
    IMG_0623.jpg
    45.1 KB · Views: 697
  • IMG_0699.jpg
    IMG_0699.jpg
    107.2 KB · Views: 710
  • IMG_0724.JPG
    IMG_0724.JPG
    110 KB · Views: 705
Last edited:
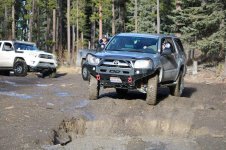
Hitting hard in the tires department, got me thinking about getting a 2nd set for summer or winter. Great looking 4runner!
 
November updates

Well it's been a busy few weeks here in Fernie.

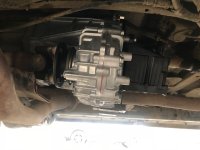
Just after my last update, I drove over some logs and branches, and unluckily they swung up and hit my transfer case actuator. I initially thought this might be an easy fix..... Let me tell you, it isn't. It is extremely expensive and labour-intensive. The part alone is 2500 CAD! Labour is estimated at 11.5hrs. This would put the bill to 4200 CAD.

I also had a bit of cosmetic damage to the body/skidplates. I ended up going through my insurance company as I have paid for and not used collision for 10 years of driving and decided I may as well put it to work for me.

I took a payout for the cosmetic damages which were around 1600 CAD and had them repair the transfer case. One thing that was nice, was they said it was cheaper to just put in a brand new transfer case because it would save on labour, so now I have a brand new tranfer case with AMSOIL synthetic oil in it.

xfer case.jpg

I tested it out thoroughly and it shifts beautifully between 2WD/4HI/4LO/center locker. I'm happy :)

Also happy because I used that money (plus a bit of my own) to place an order for Demello sliders, and Shrockworks skid plates (engine/tranny/xfer case).

Learn from me folks......buy skid plates....it will save you very expensive repairs


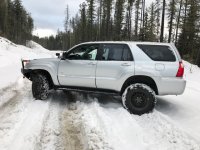
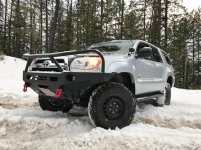
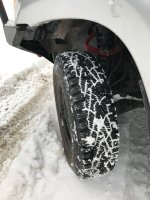
On another happy note.....snow has fallen in Fernie. Got to test out the tires....they perform awesome in the 235/80R17 size

snow in fernie.jpg
snow in fernie 2.jpg
snow tires.jpg
 

Attachments

  • xfer case.jpg
    xfer case.jpg
    71 KB · Views: 699
  • snow in fernie 2.jpg
    snow in fernie 2.jpg
    74.5 KB · Views: 679
  • snow in fernie.jpg
    snow in fernie.jpg
    108.9 KB · Views: 706
  • snow tires.jpg
    snow tires.jpg
    98.9 KB · Views: 686
Offroading with the YYC club!

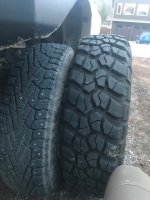
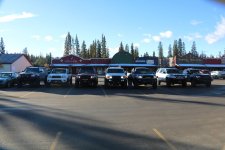
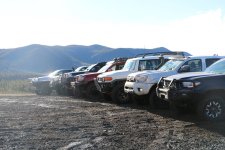
Well, a week after I got my vehicle back from the transmission shop, I accepted an invite to meet up with the YYC offroad club. These guys are awesome. What was also cool was the day I showed up 7 other rigs did as well, and all of them are toyotas. I did swap over to my MT's for the run as the guys said it would be really sloppy out there and not too icy.

switching over.jpg

I was, however, the only 4runner that day although they have a few in the group.

YYC meet parking lot shot.jpg
yyc meet nice view.jpg

I was very, very wary to not damage any of my undercarriage and took it pretty cautiously. The only damage I incurred was to the OEM side steps. I don't really care anyways as I should be getting the sliders any day now.

YYC meet mud shot.jpg
yyc stop.jpg

Afterwards, I spent like 20 dollars at the carwash cleaning every little nook underneath and vehicle and did a very thorough inspection and maintenance check.

cleaned up.jpg
greasing UCA's.jpg

Maintenance items I took care of:
Current kms.......72,800kms

Amsoil oil change with 0W30
greased all 6 points on driveshaft with Lucas red and tacky lube
greased JBA UCA balljoints (also cool is this company sends me reminders to grease them lol)
changed air filter with OEM filter
changed cabin filter with OEM charcoal filter
 

Attachments

  • YYC meet parking lot shot.jpg
    YYC meet parking lot shot.jpg
    92.8 KB · Views: 699
  • yyc meet nice view.jpg
    yyc meet nice view.jpg
    89.6 KB · Views: 692
  • switching over.jpg
    switching over.jpg
    86.6 KB · Views: 688
  • YYC meet mud shot.jpg
    YYC meet mud shot.jpg
    134.7 KB · Views: 707
  • cleaned up.jpg
    cleaned up.jpg
    66.6 KB · Views: 663
  • greasing UCA's.jpg
    greasing UCA's.jpg
    95.8 KB · Views: 674
  • yyc stop.jpg
    yyc stop.jpg
    94 KB · Views: 683
Last edited:
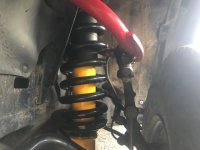
Demello sliders arrived

Happy happy day! Demello sliders arrived a few days ago to my address in the USA and I finally had a day off where I could drive down and pick them up.

First off I really wanna give a shout out to [MENTION=59079]jdemello[/MENTION] [MENTION=59079]jdemello[/MENTION], he makes a great product. It was between demello sliders and C4 sliders, and I was on the fence between the 2.

I still think the C4's are very nice and super stout. I also really like their top plate and the angle of their sliders. I am, however, very happy with the demello's and think they are probably some of the stoutest in the industry.

Reason's I went with them:

-4 legs with a solid 1/4" plate attaching to the frame! (most only have 3)
-4 cross braces on the sliders themselves
-come standard with DOM tubing (most you have to pay extra for upgrade)
-hardware is super crazy tough!
-There are about 12 fasteners on each side!
-customer service is on point!
-price was amazing with very reasonable shipping. (I did get their black friday sale price)


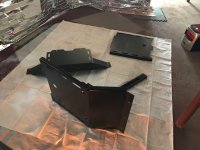
Here they are upon opening the packaging

demello sliders.jpg

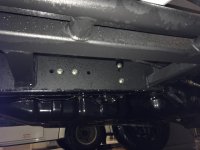
Installed 1/2 the bolts on each side (the M8's that use the factory pre-drilled holes) in about 40 minutes alone, using 2 jackstands and a couple 8" 2x4's to hold it up

Here you can see the holes for the 1/2" bolts, that I would later install
attachment points.jpg

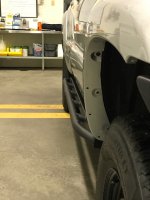
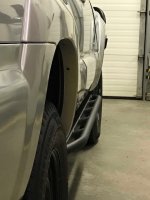
Here are the sliders after I had installed some of the additional bolts. I need to attach 2 more on the drivers side, and one more on the passenger side, but these 3 will require a bit of work. Namely taking off the gas tank skid, and drilling one small hole on each side. These are optional, and honestly I highly doubt I really need to do it, but I want it done right and buttoned off properly.

sliders front view.jpg
sliders rear view.jpg
 

Attachments

  • demello sliders.jpg
    demello sliders.jpg
    78.2 KB · Views: 673
  • sliders front view.jpg
    sliders front view.jpg
    73 KB · Views: 655
  • sliders rear view.jpg
    sliders rear view.jpg
    72.2 KB · Views: 655
  • attachment points.jpg
    attachment points.jpg
    75.6 KB · Views: 656
KC lights install

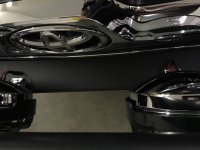
Picked up my KC lights as well and began the process of installing them. I already had the AOB "sasquatch lights" switch in the center console that I want to use.

The KC lights came with a pre-wired harness so this install should be pretty easy. I'm just hoping that the switch can handle whatever "current/amps/voltage or whatever it's called) that the harness is sending to it. I believe there's a 3A fuse in line to the switch so hopefully the harness and swtich work well together. These lights have 130watt bulbs, so they take lots of power.

If you can't tell, I don't know much about electrical or lighting lol

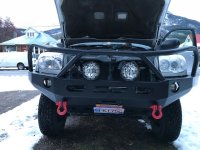
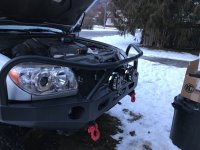
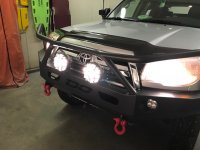
I started by physically mounting the lights to my demello bumper. This was pretty easy. I just measured the center line of the bumper and measured out 8" on either side of that line so the lights are spaced 16" apart. I may have gone 14" apart (7" on either side) because I think they looked better that way.

IMG_1116.jpg

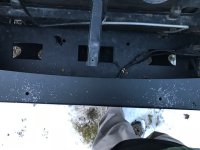
I drilled the holes 1" in from the outside of the bumper so my hood can open and close without interfering with the lights. I started by drilling a pilot hole with a 1/16" drill bit and went up in incremental sizes until a 1/2" hole was drilled.

IMG_1117.jpg
IMG_1118.jpg

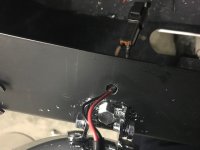
I then test fitted the lights and tightened them up. I just left the wire tails hanging down and plan on finishing the wiring tomorrow. I did however, test to make sure the lights worked by hooking them up directly to the battery with the switch provided. I also ran the 2 wires through the firewall to the center console. Excited to continue this project tomorrow.
 

Attachments

  • IMG_1116.jpg
    IMG_1116.jpg
    81.9 KB · Views: 656
  • IMG_1117.jpg
    IMG_1117.jpg
    80.1 KB · Views: 650
  • IMG_1118.jpg
    IMG_1118.jpg
    80.2 KB · Views: 663
  • IMG_1119.jpg
    IMG_1119.jpg
    94.5 KB · Views: 648
  • IMG_1120.jpg
    IMG_1120.jpg
    101.5 KB · Views: 643
Last edited:
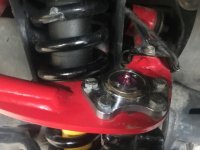
KC lights install pt 2

I work as a paramedic in Fernie, BC. The nights are usually very slow with on aveage only a call a night, which leaves lots of time to work on personal projects. Before anyone says "how lucky I am," you should know that I actually don't get paid my full wage until I get called out. I make about 1/3 my wage as a stipend to be at the station ready to go. Therefore, I don't feel the least bit guilty working on personal projects lol

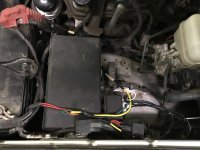
The wiring install took about 3 hours, but that's going pretty slow and making it as neat a job as I can make it. I roughly wired everything up to make sure it all worked, then started trimming/splicing wires together and routing it cleanly. I'm sure there are electricians out there cringing at my work though.

First thing I did was drill 2 additional holes in the bumper for the wires to cleanly route through.

IMG_1124.jpg
IMG_1127.jpg

This is pretty much the end result of cleaning up the engine bay. I do have a few things that I'll be able to tidy up, now that I'm more confident in my electrical ability. I also wanna tidy up all the excess wiring from the black oak LED lights that I did back in October of last year.

IMG_1126.jpg

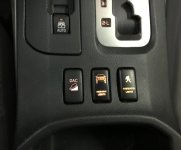
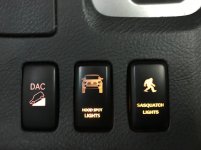
Here are the switches lit up with the dash lights

IMG_1128.jpg

Here is the AOB Sasquatch switch lit up, powering the KC lights.

IMG_1131.jpg

Lastly, here are the KC lights (130watt spot beams). I still need to aim them the next night I have off, but right away I can tell, they are BRIGHT!

IMG_1132.jpg
 

Attachments

  • IMG_1124.jpg
    IMG_1124.jpg
    55.2 KB · Views: 781
  • IMG_1127.jpg
    IMG_1127.jpg
    65 KB · Views: 766
  • IMG_1126.jpg
    IMG_1126.jpg
    80 KB · Views: 764
  • IMG_1128.jpg
    IMG_1128.jpg
    61.7 KB · Views: 766
  • IMG_1131.jpg
    IMG_1131.jpg
    65.9 KB · Views: 763
  • IMG_1132.jpg
    IMG_1132.jpg
    72.4 KB · Views: 772
Shrockworks skid plates part 1 (prep and prime)

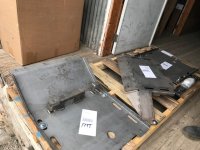
So I picked up my skid plates the other day in Montana. I ordered this about a month ago and I am very impressed with the lead time from Shrockworks. Also impressed with their customer service. Their website only allows you to order the full package including the gas skid for the 4th gens, so I placed the order on the 5th gen page, and just made notes that it was for a 4th gen 4runner (as per instructions from Mark). They got the order right and packaged the skids very well.

Only thing is, it came on a massive pallet and the shipping receiver charged me double what a normal pallet is, because it was so large.

Here's a pic of the package when i picked it up.

picked up at MSO.jpg

Brought the skid plates back to Fernie, and went to the hardware store and bought some red-oxide primer and black semi-gloss spray paint. The brand is home hardware's brand called "rust coat," but it's apparently the same stuff as rustoleum or tremclad and should work the exact same.

I began prepping the skids by:

1) first cleaning with Citrosolve (which is a degreaser).
2) sanding off the label stickers.
3) using an SOS pad to scrub the skids
4) cleaning a second time with citrosolve and drying.

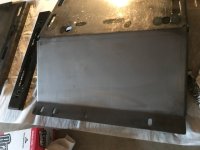
Here you can see only half the skid has been cleaned. This shows the film that you need to remove from the skids.

cleaning with citrosolve.jpg

After they were all cleaned I swept and vacuumed the floor in my basement. I then laid out clean paper sheets and set up a space heater. I laid out the skids on the paper.

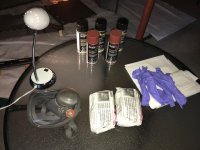
Supplies used:

supplies for the job.jpg

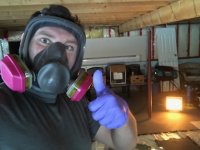
Don't forget a respirator! This stuff is extremely toxic. I wasn't in a ventilated area as my windows had to be closed as it's about -9 celcius outside! Note that I'm working in an unfinished basement suite separate from our living quarters.

respirator.jpg

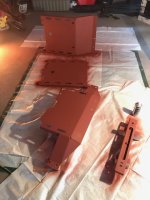
Used exactly 1 340g can to do 1 side of the 2 skids and crossmember and both sides of the engine skid. I would have liked to do a slightly thicker coat but didn't want to open a new can.

End result:

after primer.jpg

Here's my plan going forward:

Primer (will use 4-5 cans *edit: used 5 cans)

it's Dec 9th and I've done my first coat of primer (engine skid and side A)
Dec 11th- flip and prime 3 pieces (on side B)
Dec 12th- engine skid for 2nd coat
Dec 13th- flip and prime 3 pieces (on side A) for 2nd coat
Dec 15th- engine skid for 3rd and last coat
Dec 15th- flip and prime 3 pieces (on side B) for 2nd coat

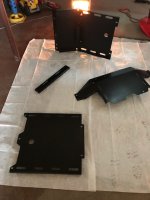
Top Coats (will use 4-5 cans *edit: needed 6 cans)

Dec 18th- First top coat (engine skid and side A)
Dec 20th- First top coat (side B)
Dec 21st- 2nd top coat (engine skid)
Dec 22nd- 2nd top coat (side A)
Dec 24th- 3rd top coat (engine skid)
Dec 24th- 2nd top coat (side B)

Wait 3 days to fully cure and install on Dec 27th/28th
 

Attachments

  • picked up at MSO.jpg
    picked up at MSO.jpg
    96.8 KB · Views: 733
  • cleaning with citrosolve.jpg
    cleaning with citrosolve.jpg
    69.2 KB · Views: 738
  • supplies for the job.jpg
    supplies for the job.jpg
    95.7 KB · Views: 729
  • respirator.jpg
    respirator.jpg
    94.9 KB · Views: 732
  • after primer.jpg
    after primer.jpg
    109.8 KB · Views: 727
Last edited:
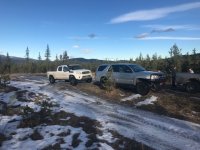
Looks good!

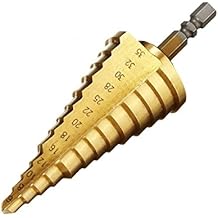
i noticed on your spot light install you used multiple drill bits to drill the holes in the bumper; it might be worth picking up a step drill bit for future projects. Great tool.

41xbysUM6CL._AC_US218_.jpg
 
Looks good!

i noticed on your spot light install you used multiple drill bits to drill the holes in the bumper; it might be worth picking up a step drill bit for future projects. Great tool.

41xbysUM6CL._AC_US218_.jpg

Thanks buddy. I thought about purchasing one of these sets as Canadian Tire had a sale on them; 18 dollars for 2 different sized step-bits. I just don't see myself doing enough drilling to warrant it. But I definitely agree, it would have helped with the lights install.

Next up on my install list are tie-rod-ends. I ordered an OEM pair from Toyota and will attempt the install tonight at work. It should be pretty easy as per some youtube videos. The boots on the ones currently installed look pretty badly torn and it will be piece of mind knowing they're out of there.

Update on the skid plates: The last top coat will be sprayed on Christmas day, and I will install them on the 28th! Super stoked. I'll take off the OEM skids tonight at work, and do a good undercarriage cleaning to get ready for that :)

IMG_1230.jpg
IMG_1231.jpg

Stay tuned.
 

Attachments

  • IMG_1230.jpg
    IMG_1230.jpg
    68 KB · Views: 691
  • IMG_1231.jpg
    IMG_1231.jpg
    85.5 KB · Views: 686
Tie Rod Ends

Tonight I did the outer Tie rod ends (TRE's)

I'll do a little write-up on how to do this job.

1) Loosen lug nuts on side you'll be working on with breaker bar.
2) Jack up your vehicle. I just used the factory bottle jack (which actually extends super high. I'm impressed).
3) Support with jackstands.
4) Remove lug nuts and wheel
5) Spray bolts/nuts you'll be taking off with PB blaster or WD40.
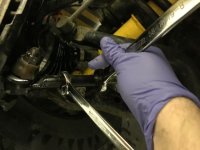
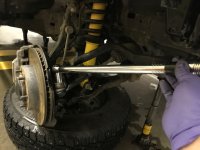
6) Using a 22mm open end wrench (while using a 19mm open end wrench holding the TRE), loosen the jam nut.

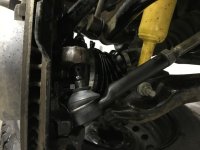
IMG_1237.jpg

7) Remove cotter pin on castle nut.
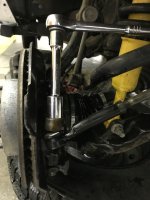
8) Remove castle nut using a 19mm socket.

IMG_1239.jpg

9) Reinstall castle nut upside down a few turns.

IMG_1240.jpg

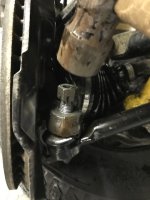
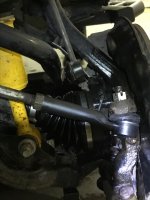
10) Hit Castle nut with a hammer to break the TRE free.

IMG_1244.jpg

11) Count number of turns to remove TRE.
12) Install new TRE by counting number of turns.
13) Install new castle nut and cotter pin (Torque to 67 ft lbs)
PS: Look how high that jack goes!!

IMG_1245.jpg

14) Tighten jam nut tight.

IMG_1236.jpg

15) Reinstall wheels and torque to 82 ft lbs


Took maybe 20 minutes a side going slowly.

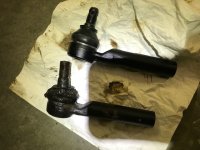
Here's a shot of the old TRE vs the new one.

IMG_1235.jpg
 

Attachments

  • IMG_1237.jpg
    IMG_1237.jpg
    66.2 KB · Views: 693
  • IMG_1239.jpg
    IMG_1239.jpg
    79.9 KB · Views: 706
  • IMG_1240.jpg
    IMG_1240.jpg
    71.5 KB · Views: 709
  • IMG_1244.jpg
    IMG_1244.jpg
    70.1 KB · Views: 697
  • IMG_1245.jpg
    IMG_1245.jpg
    78 KB · Views: 688
  • IMG_1236.jpg
    IMG_1236.jpg
    79 KB · Views: 691
  • IMG_1235.jpg
    IMG_1235.jpg
    83.2 KB · Views: 682
Skid plate install pt 1

Yesterday I installed my Shrockworks skidplates.

In short, they are awesome!!! I can not believe the quality of these skids and the perfect fitment. The install was relatively easy and turned out great. Highly highly recommend these guys.

I'll post a little write-up of the install because I feel it might help someone down the road. These skids are not popular with 4th gens. As of right now, I only know 2 rigs that run their skids. One guy I met on facebook and one a few years ago that had an account on this forum, but doesn't appear to be active anymore. I searched for hours and could find noone else. In fact, even Shrockworks doesn't have pics of the 4th gen on their site. They just say "similar" to the 5th gen, so show those pics.

Here goes:

1) Remove all factory skid plates, if equipped.
2) You'll see the radiator support cross-member. There are 2 brackets that attach to this cross-member that hold 2 hard lines in place (I think they are the power steering and AC lines). The brackets are attached with a 12mm bolt in each. Undo 1 bolt from 1 bracket. The bracket will still be held more or less in place from the other bracket, because the brackets are fixed to the lines that they hold.

Here's the bracket after I started grinding the flanges off. Also note I wrapped my lines with a vinyl tubing. I cut off a strip and used an ofal knife to cut lengthwise to wrap around each line, then taped, then wrapped another time with pipe insulation foam from the plumbing isle, in the same manner.
IMG_1259.jpg

3) Now that the bolt head is out of the way on the one bracket, use an angle grinder and grind off the flange on either side of the bracket, so the bracket is only 1/16" thick or the thickness of a fender washer. Be VERY careful not to grind anything you shouldn't! lol

Most of the grinding done in this picture
IMG_1263.jpg

4) Bolt that bracket in place, and do the same thing on the other bracket.

IMG_1264.jpg

Now, place the engine skid plate on a 2x4 covered with a towel, and wheel into place. Raise with jack and roughly line up the holes. Using the hardware provided, screw the bolt in the far right hole a few turns, with the bracket (that you ground down) between the skid plate and the radiator cross-member. Bolt in the 2nd hole from the left in the same manner. Screw in the bolts into the remaining 2 holes (which the factory skid used), use a fender washer between the cross-member and the skid, to mimic the thickness of the brackets. Leave all these bolts quite loose.

IMG_1262.jpg

Bolt in the rear of the skid plate (slightly longer bolts provided); Shrockworks provides a spacer for between the skid plate and the rear A arm crossmember. This allows the engine skid to sit perfectly level with the transmission skid. Now you can bolt in the 2 remaining bolts in the middle of the skid. Tightly everything up.

IMG_1265.jpg.
IMG_1272.jpg
 

Attachments

  • IMG_1259.jpg
    IMG_1259.jpg
    64.9 KB · Views: 674
  • IMG_1263.jpg
    IMG_1263.jpg
    54.8 KB · Views: 679
  • IMG_1264.jpg
    IMG_1264.jpg
    54.4 KB · Views: 678
  • IMG_1265.jpg
    IMG_1265.jpg
    100.3 KB · Views: 692
  • IMG_1262.jpg
    IMG_1262.jpg
    97.9 KB · Views: 674
  • IMG_1272.jpg
    IMG_1272.jpg
    65.3 KB · Views: 680
Last edited:
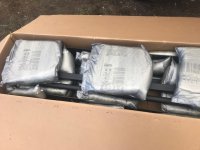
Shrockworks skid install (pt 2)

Transmission skid

1) Remove the tubular support brackets.
2) Using the 4 holes that the braces used on the cross-member, bolt the Shrockworks cross-member spacer into place loosely.
3) Place tranny skid on cloth-covered-2x4 and onto jack. Wheel into place.
4) Bolt in the front 2 bolts using the supplied hardware. These are the long bolts with large fender washers, lock nuts, and nuts on the top of the rear A-arm cross-member. Leave loose.
5) Install the 3 rear bolts into the spacer that you just installed.
6) You can now install the 5 bolts tightly, so the transmission skid is firmly attached to the spacer in the rear and in the front. Don't tighten the 4 spacer bolts tight yet though

Xfer Case Skid

This was slightly more difficult for me, because I have Demello sliders and they cover the hole you need to access to get the stick nut into the frame, but still wasn't too bad.

1) Wheel the xfer case skid into place.
2) lightly bolt in the 2 bolts in the front of the skid into the spacer.
3) Line up the rear holes to the frame rail hole.
4) Carefully (without dropping it), bend the stick nuts so as to line it up with the hole. You fish the stick nut through a square hole on the inside of the frame rail. This was actually surprisingly easy. Loosely screw the bolt (with washer and lock-nut) into this washer while holding the stick. Leave loose.
5) Repeat on the other side.
6) Now that everything is lined up, uninstall the 4 bolts (Careful with the stick nuts again!)
7) tighten up the 4 spacer bolts.
8) Re-install xfer case skid.

You're done!

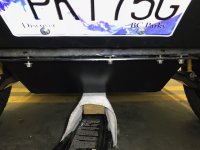
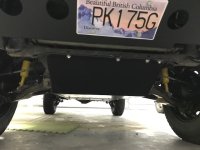
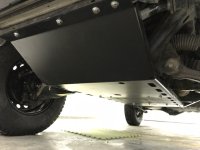
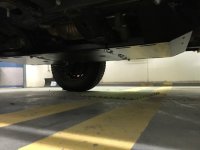
PS When I did this, I found that the parts list on the instructions provided by shrockworks wasn't accurate. I also received more hardware than I needed. Also the instructions were not as complete as I would have liked, which I why I wrote this little write-up. This, coupled with the instructions from shrockworks should make perfect sense. I did things a bit out of order and spent probably twice as long as I should have on this project (took me about 2.5hours). Super solid product from Shrockworks and amazing customer service. Maybe I lucked out but my wait time from the day of ordering to receiving was less than a month.

PPS..... Looking back I wish I had have just gotten them to powdercoat them. I spent an incredible amount of time prepping and painting, and over 120 dollars on spray paint and materials. My family and I had to deal with a smelly house (fumes leaking up through work shop in basement) for a few weeks). After all that the paint is already slightly marked up from installing them. Lesson learned!

Final pics and Last thoughts

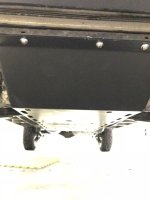
Someone was mentioned these are similar to the RCI skids..... I couldn't disagree more. I can't comment on RCI skids but will say this about these.

-Quality and stoutness is impeccable.
-Design is very unique. It was 8 attachment points for the engine skid, wheres RCI only has 6.
-Engine has flat faced design which I like.
-All the skids interlock like a puzzle piece. NO OVERLAPPING like most others, including RCI
-bottom is completely flat, instead of each piece overlapping
-Xfer case skid is one piece, instead of using a separate xfer case crossmember like RCI.
-Last main difference is Shrockworks has you remove the tubular brackets whereas RCI and most others work around these which I believe gives less clearance. Looks like that's the case anyways.

Not bashing any other brands, I like RCI a lot from what I've seen, just really like the points I mentioned as a plus for Shrockworks. I'm sure there as pros for the RCI ones as well such as:
-Price point, and I think powder coat is included in prices listed.
-No exposed bolt heads. RCI welds a lip on the bottom I believe to protect the bolt heads. Kinda smart.
 

Attachments

  • IMG_1271.jpg
    IMG_1271.jpg
    72.2 KB · Views: 649
  • IMG_1266.jpg
    IMG_1266.jpg
    54.9 KB · Views: 654
  • IMG_1273.jpg
    IMG_1273.jpg
    60.6 KB · Views: 658
  • IMG_1269.jpg
    IMG_1269.jpg
    55.2 KB · Views: 639
  • IMG_1275.jpg
    IMG_1275.jpg
    79.5 KB · Views: 652
Winter shenanigans and new purchases!

Well it's 2018 and I have a feeling its going to be a good year for the runner!

I already went ahead and bought a few things:

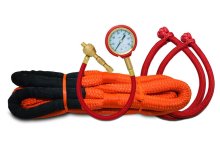
-Gemstone offroad recovery pack

includes: kinetic recovery rope, soft shackles, and tire deflator

gemstone offroad starter pack.jpg

-2 more Rothco heavy duty tool bags

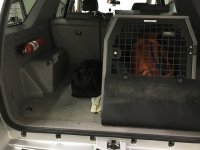
-these are about $25.00 a bag on amazon and are really good quality. They measure about 19" long by 9" wide and 6" tall. I have them organized so 2 are tool bags, one is a recovery bag, and one is a roadside emergency kit.

Here you can see the black rothco case. 2 side by side perfectly fill the gap between the body panel and the crate, which keeps everything tight.
storage bag and crate.jpg

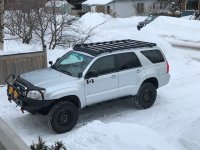
-Prinsu roof rack!!!!
-jumped on a really last minute group buy an offroad shop in Calgary, called Krave automotive, was putting on and couldn't really say "no." Should arrive on or before March 1st

another member's picture (sorry don't know who, found pic online). Stoked for my runner to look like this with the roof rack!
prinsu roof rack.jpg

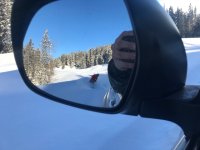
I went snowboarding with my girlfriend, and my best friend. We took turns being towed behind the 4runner snowboarding in the beautiful powder, jumping the berms and plowed snow. So much fun!!! I think it was fun for them to drive the 4runner as well.

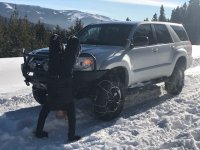
Emily doing a handstand on the bumper lol
emily doing handstand.jpg

snowboarding!
snowboarding in mirror.jpg


On a sidenote, it's nice running the skinnier 235/80R17 tires because there's tons of clearance between the UCA's and tires allowing chains to safely be used on the front. I'm sure this greatly helped traction.

IMG_1424.jpg

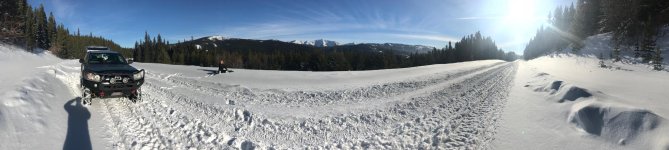
Got to truly test out the chains. They did wicked. The snow was very deep, We didn't penetrate through the hardpack, but there was probably about 10-12" of soft snow that we were plowing through. The 4runner did amazing.

backcountry snowy roads.jpg

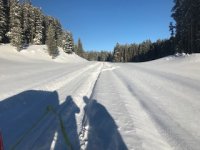
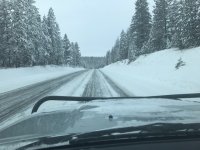
The drive home was very icy, and the skinnier hakkapeliitta LT2's did great. The temps were probably around -25 degrees celcius, so very cold. In these road conditions I usually throw the 4runner in 4Hi without the diff locked and take er easy. Better safe than sorry right.

icy roads.jpg
 

Attachments

  • prinsu roof rack.jpg
    prinsu roof rack.jpg
    128.9 KB · Views: 642
  • gemstone offroad starter pack.jpg
    gemstone offroad starter pack.jpg
    93.4 KB · Views: 604
  • icy roads.jpg
    icy roads.jpg
    93.3 KB · Views: 619
  • IMG_1424.jpg
    IMG_1424.jpg
    149.5 KB · Views: 632
  • snowboarding in mirror.jpg
    snowboarding in mirror.jpg
    60.9 KB · Views: 629
  • storage bag and crate.jpg
    storage bag and crate.jpg
    66.4 KB · Views: 620
  • backcountry snowy roads.jpg
    backcountry snowy roads.jpg
    27.9 KB · Views: 610
  • emily doing handstand.jpg
    emily doing handstand.jpg
    103.4 KB · Views: 636
Prinsu rack install

I ordered a Prinsu rack from Krave Automotive in Calgary as part of a group buy. The rack came in within 4 weeks, shipped to Canada. The order was correct, it was packaged really well, and even came with some extra hardware.

I drove from Fernie to Calgary to pick it up and install it in the parking lot of Krave. They wouldn't let me use their shop for liability reasons, but were super helpful by sectioning off an area of parking lot for me to work in, and loaning me a torx bit, as I forgot mine at home!

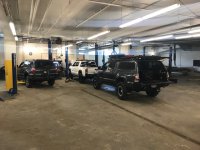
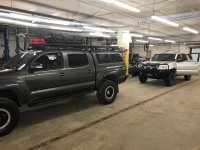
On a side note, these guys are legit, they are have beautiful rigs, (mostly toyotas), and are passionate about what they do. Here's a pic of part of their shop....

IMG_1782.jpg

IMG_1784.jpg

Setting up my parking spot, makeshift shop lol

IMG_1785.jpg

IMG_1787.jpg


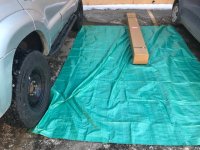
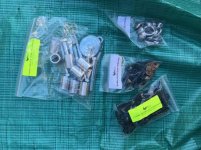
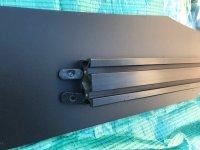
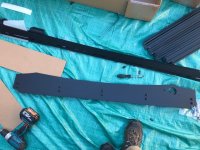
First thing I did, after verifying I had all the correct hardware and parts, was assemble the wind fairing. This was VERY easy, but there's an easy and hard way of doing it......First, install the philips screws, lock washer, and washer loosely from the front of the wind fairing, and spin on the T slotted piece loosely on the back....Do this for all 10 of the screws...

IMG_1789.jpg

Now simply slide the backing crossmember along the back of the fairing adjusting the "T-slots" to fit into the channel...Slide it until it's flush with the fairing and tighen up all the screws by hand......I used a drill to make the process easier, but always tightened the last couple turns by hand so as to not damage anything by over-torquing.

IMG_1790.jpg

After the fairing was assembled, I started putting together the frame of the roof rack. I left everything loose and squared it up with a tape measure.....this was the toughest part of doing it myself. It was hard to "twist" the frame to make it perfectly square. It settled for 1/8" out between diagonal corners. I lifted it onto my roof with just 3 crossmembers tightened. I laid it on some towels, and shirts to protect my paint.

My vehicle never came with a roof rack, so it was a very easy install to the factory mounting points, that had a protective plastic corner that just pops off, and had factory bolts in the holes, that came out very easily by hand.

I "dry fit" the rack first to make sure everything lined up and fit perfectly. Then I undid the bolts, and installed with silicone, as per the instructions. I bolted everything down, then installed the remaining 6 crossmembers (9 total).

I then went around and verified everything was tightened properly and took some pictures. Total install time, doing it alone, and going slow, was 1hr 40 min.

IMG_1794.jpg

IMG_1796.jpg
 

Attachments

  • IMG_1782.jpg
    IMG_1782.jpg
    92.7 KB · Views: 590
  • IMG_1784.jpg
    IMG_1784.jpg
    93.2 KB · Views: 594
  • IMG_1787.jpg
    IMG_1787.jpg
    89.2 KB · Views: 580
  • IMG_1789.jpg
    IMG_1789.jpg
    79.6 KB · Views: 576
  • IMG_1790.jpg
    IMG_1790.jpg
    124.4 KB · Views: 591
  • IMG_1794.jpg
    IMG_1794.jpg
    87.4 KB · Views: 579
  • IMG_1785.jpg
    IMG_1785.jpg
    119.6 KB · Views: 584
  • IMG_1796.jpg
    IMG_1796.jpg
    36.9 KB · Views: 669
Some more pics, minor updates, and exploring the hotsprings

Not too much exciting stuff:

1) installed a Canadian Flag decal. I think it makes it look slightly more badass and gives it another 5 HP

IMG_1828.jpg

2) bought light covers for my offroad lights (now I'm legal in BC, as it's illegal to drive with auxiliary lights uncovered on public roads).
**update.....I accidentally turned my switch on for the KC 130watt lights, and burnt through my light covers, and also ended up with a dead battery**

IMG_1842.jpg

IMG_1834.jpg


3) I went with a friend from BCtoyota4wd to explore Lussier hotsprings. Beautiful hotsprings near Inveremere.

IMG_1915.jpg

IMG_1920.jpg

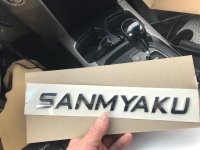
4) Received a name badge that toyota sent me. This came 3 months after they told me they were sending me one for free, as part of a facebook giveaway where they featured my vehicle. I don't know if I want to install it, and if so, where.....I don't want my vehicle to look too cluttered. Any suggestions??

IMG_1907.jpg

IMG_1842.jpg

beautiful Fernie, BC....I'll only be here another 2 weeks, then I'm moving to Chilliwack, BC, which is near Vancouver to upgrade my practice, to become an ACP.

IMG_1902.jpg
 

Attachments

  • IMG_1828.jpg
    IMG_1828.jpg
    78 KB · Views: 593
  • IMG_1834.jpg
    IMG_1834.jpg
    83.9 KB · Views: 567
  • IMG_1842.jpg
    IMG_1842.jpg
    107.2 KB · Views: 572
  • IMG_1902.jpg
    IMG_1902.jpg
    71.1 KB · Views: 593
  • IMG_1915.jpg
    IMG_1915.jpg
    105.3 KB · Views: 576
  • IMG_1920.jpg
    IMG_1920.jpg
    98.5 KB · Views: 586
  • IMG_1907.jpg
    IMG_1907.jpg
    71.9 KB · Views: 569

Members online

Forum statistics

Threads
278,310
Messages
3,554,079
Members
248,016
Latest member
Advally Service

Trending content

Back
Top