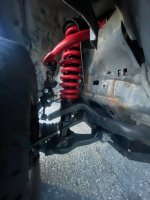
Sanmyaku build thread

This is one of the best builds I have seen. I really want to do this, if you don't mind, what will be your total investment$$$ Gives me an idea what to look forward too....

Thanks buddy!! Appreciate the compliment. It's been a fun build, and I've enjoyed learning how to work on vehicles and taking pride in doing all the work myself. It would be hard for me to give you an accurate total cost. At this point I would say roughly maybe 8000 dollars. That's honestly a rough estimate and it may be slightly more or less. I have done almost all the work myself, but the cost would probably be over 12000 if you're paying someone else labour. Last major mod for me will be the rear swing-out bumper, but I'm currently in school practicing Advanced Life Support paramedicine for the next 2 years, so not sure when that'll happen. Looking at either a custom built bumper locally, or 4x4labs, or if Expedition One creates a 4th gen rear bumper.

Check out the first post in my build for the list of mods. Have fun!!!
 
all cleaned up

Cleaned her all up. Here's a good picture of the tires, if anyone else is contemplating pizza cutter winter tires.
 

Attachments

  • winter tires.jpg
    winter tires.jpg
    126.3 KB · Views: 748
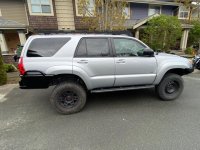
After the daystar lift, I quickly sourced out what I wanted for wheels and tires. I had originally thought of getting the 265/75R16 BFG KO2's but started seeing more posts of people running 255/75R17's and 235/85R16. I quickly grew to love the tall/skinny look. I also quickly decided on the TRD pro wheels because I wanted a wheel that was hub-centric, and only 7" wide for my skinny tires. All the aftermarket wheels I liked were 8" and wider like the pro-comps and mickey thompson. Very happy with the TRD's. I bought 1 tire in a 235/80R17 to test fit on the 4runner. I liked it however I thought it might be too skinny and after more research thought the 255/85R17 at 32.1" and 10" wide was perfect and a little better than 9.3" wide and 31.8" tall. Very happy with the combo. Attached are some pics of both the 235/80R17 and 255/75R17's that I settled with. I ended up still keeping the 235 tire/wheel combo and use it as my spare as I sits higher up under the vehicle and allows more ground clearance while being more or less the same diameter.

So this is with the Daystar 2.5/1.5, and Goodyear 255/75R-17 on the TRD wheels?

This is the exact set up I am looking for on my '08 to lose the "soccer Mom" look.


Any rubbing? Did you have XREAS?
 
So this is with the Daystar 2.5/1.5, and Goodyear 255/75R-17 on the TRD wheels?

This is the exact set up I am looking for on my '08 to lose the "soccer Mom" look.


Any rubbing? Did you have XREAS?


Sorry for the late reply, sometimes I don't get on here too often:

1) yes this is the daystar with 2.5/1.5 lift and BFG KO2's in that size
2) I had very slight rubbing when reversing at full lock
3) no i did not have the xreas system. My 4runner is an SR5 model
 
Great build!!! Excited to start modding my 03 v8! 885's etc on the way!! Any updates on yours?


First time on here in quite a long time. It's funny you should ask about the 885's. I'm just looking at replacing them. They've been on more than 5 years now and they've been squeaking pretty bad the last 8 months or so. Driveability is still fine, but they're pretty rusted and worse for wear, so I feel like it's time to replace them.

I think I'm actually going to go with the exact same setup up front. I loved the way it handled and felt both on and off-road and the lift amount was perfect. They're also very budget friendly.

I also need to replace my fox rear shocks. To be honest, there's a lot of work that I need to do on this vehicle right now. My driver's side CV axle is broken, and the seal needs replacing on the passenger side CV, so I'll just do them both and have an extra CV axle in case I break one in the future.

For the last 4 years or so, all I've done to the vehicle is maintenance religiously, and full brakes front and rear, but nothing else. It needs some $$$ and work right now to get her perfect again.

I might wait until after winter to replace a lot of the stuff but the CV's need to be done ASAP.

Here's a list of the stuff I will likely replace:

-CV axles and diff seals
-replace all diff gear oils

Spring:

-Front strut assemblies (Wheeler's offroad- same exact OME setup)
-outer TRE's
-replace LCA's with OEM
-upper ball joints (JBA replacements)
-rear Fox shocks (maybe upgrade to 2.5"?)
-replace rear springs
-replace rear 2nd gen sway bar links
 
How has the rear 2nd gen links been treating you? Are they the right length for your lift height? I'm debating between a 1.5 or 2 inch rear lift and using the rear 2nd gen links.

Nice ride btw!
 
How has the rear 2nd gen links been treating you? Are they the right length for your lift height? I'm debating between a 1.5 or 2 inch rear lift and using the rear 2nd gen links.

Nice ride btw!

They have been treating me super well. Bolted right up like the stock ones, but just longer. Definitely recommend. As a matter of fact, I just ordered some new ones from rock auto, seeing as it's time to replace my old suspension. A lot of my suspension is 6-7 years old with nearly 150,000kms on it (90,000 miles), so it's all getting a revamp.

I also see Dobinson's makes some for the 4th gen but they're about 3x the money as rockauto's stock 2nd gen, but that's always an option.
 
December update

Well I'm happy to say I've got a good start on getting on top of my vehicle again. I spent a day working on my vehicle and got the following done:

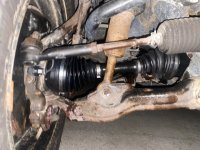
Both Left and Right CV axles replaced with OEM ones
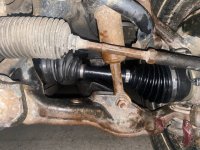
new driver's side CV.jpg
driver's side OEM CV axle
new passenger side CV.jpg
passenger side OEM CV axle

Both Left and Right CV axle seals (dust seals) replaced
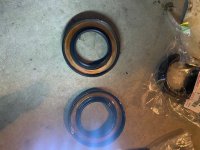
new vs old seal passenger side CV axle.jpg
new vs old passenger dust seal

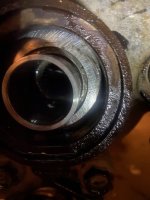
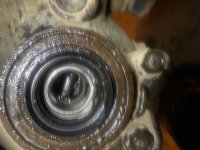
driver's side needle bearing replaced with ECGS bearing
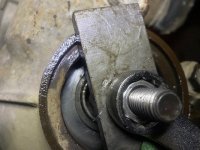
removing needle bearing.jpg
removing old needle bearing

inserting new ECGS bearing.jpg
driving new ECGS bearing in

driver's side new oil seal and ECGS bearing.jpg
new bearing and axle dust seal

Front differential oil drained and filled with new crush washers.

I did have a nasty grinding noise only when turning left at full lock. Upon investigating the noise I discovered it was the dust shield cover hitting the rotor. I must have bent it slightly when replacing the axle. Thank goodness it was an easy fix. I thought it might be the wheel bearing or a bad CV axle, but this was the best case scenario LOL

I also replaced my rear liftgate shocks as the original ones were fading pretty bad and in winter weren't holding up the liftgate half the time. I also replaced my gas cap which fixed the check engine light issue (MIL code P0441, and P0455). Disconected battery to reset the check engine light. Also replaced my side marker lights, rubber liftgate botton cover, and license plate lights. I want to get brighter reverse lights, as the OEM ones suck, especially reversing offroad. Looking at picking up some amazon LED ones which have pretty good reviews.

So on to more fun jobs in the near future!

I ordered my suspension!

Dobinsons IMS kit! I know I said I would be getting the OME setup again, but Dobinsons had a black friday sale on, and it looks like their kit might be a nice little step up. I didn't feel I needed the MRR kit with the fairly big increase in price so I just picked up the:

IMS59-50220 struts
IMS C59-352 Front springs at 226mm (extra 1" height)

Rear C59-701V
Fox 2.0 series shocks
Part number: 980-24-679
These are the same ones I have been running for 6 years and love them length: 15.55" collapsed X 24.65" extended

The rear springs are heavy dual rate springs, but I've commited to a steel dual swingout rear bumper which I estimate will weight at least 300lbs with tire and jerry cans, bringing my total to approx 450-500 with the partial weight of the roof rack, sliders, accessories, and cargo equipment. Hoping the fox shocks and keep up to the increased weight. If not I'll upgrade them when/if they fail.

I have also ordered and received:

new JBA UCA's
new OEM LCA's
SPC cam kit for LCA's
new inner TRE's (aftermarket)
new outer TRE's (aftermarket)
new 2nd gen 4runner rear sway-bar end links (aftermarket)

The Dobinson's suspension is backordered until February-ish, so I' think I'll just tackle this whole project after winter.

I'm going to contact my local fabrication shop (Big Country Customs in Abbotsford BC) and see about getting a custom rear bumper fabricated by them. I've also tossed around the idea of getting the 4x4labs rear bumper and just having them fab up the dual swingout. I don't like 4x4labs design for the swing out, but love how much clearance they have with their rear bumper design. It's the only one that actually cuts out the rear crossmember which drastically improves departure angle, as well as removes about 100lbs of stock weight. Not sure how to play this one......

 

Attachments

  • driver's side new oil seal and ECGS bearing.jpg
    driver's side new oil seal and ECGS bearing.jpg
    77.8 KB · Views: 234
  • inserting new ECGS bearing.jpg
    inserting new ECGS bearing.jpg
    66.5 KB · Views: 288
  • new driver's side CV.jpg
    new driver's side CV.jpg
    110.6 KB · Views: 291
  • new passenger side CV.jpg
    new passenger side CV.jpg
    98.2 KB · Views: 296
  • new vs old seal passenger side CV axle.jpg
    new vs old seal passenger side CV axle.jpg
    89.8 KB · Views: 236
  • removing needle bearing.jpg
    removing needle bearing.jpg
    87.7 KB · Views: 292
Update

Time flies. It feels like spring here in British Columbia. So unfortunately, I'm STILL waiting on the Dobinsons suspension. I emailed Mike for an update, and it sounds like it was just unloaded off the ship, and they now have to build them and then ship them out. I'm hoping to get them by April, because I have May camping plans and a lot of work needs to be done before then. It'll have been 5 months since ordering, but in their defence they did let me know they were backordered, so I can't be too mad.

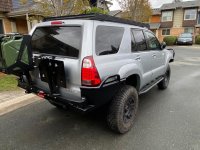
...The best news!!! I ordered a fully custom rear swingout bumper from 4x4labs. I was going to get the shell from them and have my local fab shop build the swingouts, but they were very dishonest about the price, and only after asking numerous times for a firm quote, in writing, did they tack on an extra $2000, bringing the total to around $5000 for just mounting their standard dual swingout to the flat top of the 4x4labs bumper which would have been fully built and installed on the vehicle already for them. Anyways, it's buyer beware for BCC (Big Country Customs) in Abbotsford. I also have a friend who got work done by them that was originally quoted at $8000 and they ended up charing him $12000.


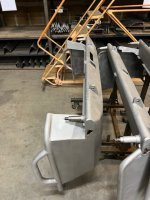
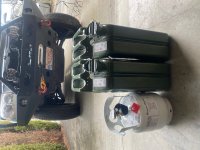
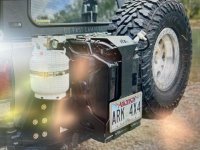
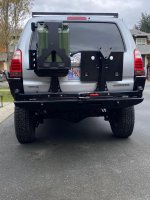
Luke from 4x4labs has been great to work with. I emailed him photos and drawings of what I wanted added to the bumper and he's been working with me to get it done. I ended up shipping a dual jerry can holder from Backwoods Adventure Mods and a propane tank mount from Power Tank, that I would like them to attach to the one swingarm, and the other swingarm will hold the spare tire. They also added kickers on the rear bumper, and a cutout and mounting plate for a rear winch. This will be a very unique rear bumper and I'm excited to see how it turns out. I was originally quoted an 8 week lead time and it's been over 10 weeks now, but I'm hoping it'll get built and shipped in a week or so.


I also have knocked a few other items off the mod list:

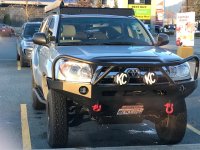
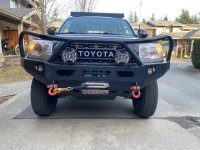
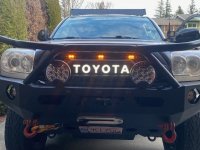
-TRD pro grill with raptor lights
-LED TOYOTA grill insert
-KC LED slimlites install (need to clean up wiring still)
-Finally bought Weathertech floor mats. Should have done this years ago!
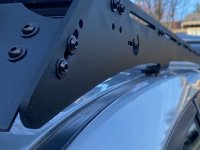
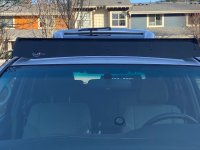
-replaced rusted and corroded Prinsu rack hardware and painted wind fairing
-cleaned engine bay
-bought and filled the 5lb propane tank
-cleaned winch rope, and sanded and painted winch roller drum. Still need to properly spool winch line under load.
 

Attachments

  • 4x4labs progress pic.jpg
    4x4labs progress pic.jpg
    80 KB · Views: 234
  • Jerry can holder and propane tank.jpg
    Jerry can holder and propane tank.jpg
    95 KB · Views: 193
  • KC LED lights and front TRD grill.jpg
    KC LED lights and front TRD grill.jpg
    102.9 KB · Views: 195
  • LED TOYOTA letters.jpg
    LED TOYOTA letters.jpg
    83.2 KB · Views: 267
  • new prinsu rack hardware.jpg
    new prinsu rack hardware.jpg
    90.3 KB · Views: 256
  • painted wind fairing.jpg
    painted wind fairing.jpg
    73.1 KB · Views: 244
  • jerry can holder.jpg
    jerry can holder.jpg
    98.7 KB · Views: 249
Last edited:
New paint

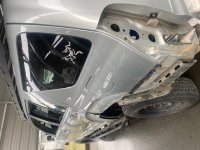
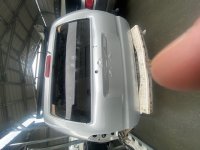
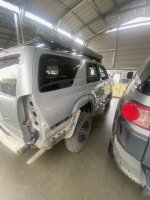
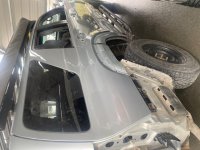
Also due to some vandalism while my vehicle was parked, she got a new paint job. The paint was really good anyways, but now it's absolutely mint. They sanded and repainted all 4 sides and the hood, but left the roof alone. I touched up my own roof at home so it's shiny and matched the new paint.

The shop did a pretty good job. No complaints. There wasn't an option to repaint a different colour, even if I paid the difference or I would have gone with something cool like underground, trail dust, heritage blue, or some cement tone.

I also ordered new mirrors that have the defroster (Toyota calls them defogging mirrors) in them. Ordered off Ebay for super cheap and they are completely plug and play with my 2009 SR5 model that didn't come with them. Tested them out and they get nice and hot.
 

Attachments

  • new paint.jpg
    new paint.jpg
    97.6 KB · Views: 271
  • new paint 2.jpg
    new paint 2.jpg
    71.7 KB · Views: 246
  • new paint 3.jpg
    new paint 3.jpg
    78.5 KB · Views: 255
  • new paint 4.jpg
    new paint 4.jpg
    95 KB · Views: 258
Last edited:
Great! Now its as good as new with the fresh paint done. I have always liked 4th Gen 4Runner in Silver color. Did you go through insurance for the paint job or paid it from your pocket? How much did it cost?
 
I went through my comprehensive insurance. They covered the bill. I’d have to check but I believe the total was between $11,000 and $12,000!! That is Canadian though, so approx $8000 US. I’m pretty sure the shop tacked on some fees I wouldn’t be ok with paying if it were me. There were admin fees, paperwork fees, and some other odds and ends I’m pretty sure they just reused my parts for. But anyways, that’s besides the point.
 
Christmas in April

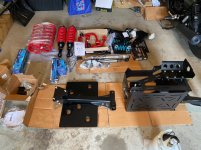
Well, there's so much to say! All the parts I had ordered finally arrived and I spent 4 FULL DAYS working on the truck. I'll elaborate on the install and the products but here's the list of parts I installed:

Front suspension:

-JBA upper control arms
-Toyota OEM lower control arms
-inner TRE's
-outer TRE's
-sway bar end-links
-Dobinsons strut assembly
-C59-352 springs with IMS struts at 26mm height
-driver's side 1/2" spacer to correct lean
-SPC cam bolts

Rear suspension:

-C59-701V rear coils
-Fox 2.0 performance shocks
-sway bar end-links

Rear 4x4labs bumper:

-rear bumper with kick outs and winch mount
-Backwoods Aventure Mods jerry can holder
-all pro 5lb propane mount
-Hi-lift jack mount


After installing all the parts and torquing everything down I took the vehicle to the Toyota dealership to have it aligned. I also had them perform:
-transmission drain and fill
-power steering flush
-coolant drain and fill
-checked brake fluid, but they didn't recommend changing it as it tested good
 
Receiving the 4x4labs rear bumper

First of all I have to say that Luke and the 4x4labs team are amazing to work with. The only slight knock I'd have to say, was that they didn't communicate any delays to me, and I was always initiating the communication, however, they were very responsive when I enquired for updates and the lead time ended up being about 12 weeks instead of 8 which is still reasonable to me, expecially because my order was very customized.

They seemed enthusiastic to do a custom build and really went the extra mile to make sure everything was perfect. And I'm very satisfied with it. 95% I'd say. There are only 2 minor gripes which I'll elaborate on below, but I'd still give them an A+++ and 5 star review any day! They're the best.

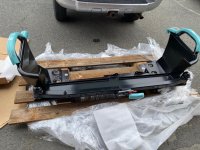
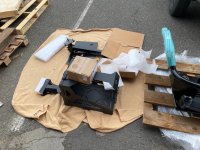
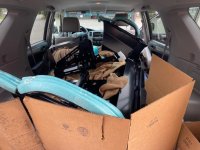
This is how I received the bumper. It was on an oversized pallet and packaged extremely well. Zero damange to the products or the powdercoat. Excellent job!!
 

Attachments

  • bumper on pallet.jpg
    bumper on pallet.jpg
    138.4 KB · Views: 307
  • accessories.jpg
    accessories.jpg
    137.9 KB · Views: 296
  • all fit barely.jpg
    all fit barely.jpg
    128.6 KB · Views: 289
installing the 4x4labs bumper

So first of all, I thought this would be much quicker than it actually was. It's not hard at all, but I have some tips to make it easier for you guys.

No instructions came with the bumper, but I emailed Luke and he emailed me the instruction document. It's pretty good but a few things could have been more clear.

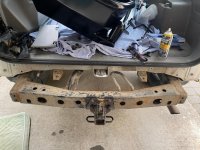
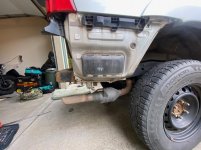
After you remove the mud flaps, bumper cover, rear resonator/pipe, and trim pieces, you have to remove the vent cover. There are some holes that will be left exposed after removing the top trim pieces. I just used gorilla tape to cover these holes so water wouldn't get into the vehicle. The best thing to do would be to get automotive body clips and RTV seal them in place. If I ever have to remove the bumper I will do this. I also don't like the idea of the vent cover being off but with mud flaps installed I can't see much getting in there. The vents themselves are just soft rubber flaps that can move freely to allow cabin pressure to vent. They're angled down so shouldn't allow water to enter easily, but still doesn't make my OCD happy.

Also, it wasn't explicitely stated in the instructions but I had to cut about 1/2-3/4" off of the lower portion of the body seam below the vent (where the bumper would first contact on the sides). This was hitting the inside of the bumper and not allowing it to be lifted high enough to bolt in place. I also had to cut a corner of the rear fender flares on both sides to clear that kick outs. If you don't order this with kick outs you won't have to do this, but because of the angle they attached the kickouts I had to. Not a big deal, but I had to borrow a dremal to make it a clean cut.

I then masked around the paint areas and painted everything behind the bumper, including the hatch area, and the frame where I had to cut it. I did 2 coats of automotive satin black paint. I think this makes it look much cleaner. I painted right over the tape I had installed to cover the holes above the vent cover. Hopefully this helps seal it and hold the tape on. Guess we'll find out.

I highly recommend you tap out your holes and preinstall the bolts to make it smoother and easier when actually holding the bumper up. It probably weights a good 200lbs without attachments and my buddy and I did it ourselves by each lifting a side, and resting it on our knees while we reached down with one hand each to start the bolts about 5-6 turns. It's doable but you'll probably be sweating. LOL

Once it's test fit and you mark where you have to drill out the holes to the 3/4" diameter, you have to uninstall it, drill out the holes, spray paint them, install the sandwich plate and then reinstall it. In the instructions they suggest to pack some foam or cardboard behind the sandwich plate before reinstalling. We were able to not have to do this, but it was about 10 frustrating minutes a side while we maneuvered the sandwich plate with curved pliers and an allen key to get the other nut to line up with the bolt and carefully thread it on a few turns. Because I have the winch plate the passenger side was even more "fun." But we got it.

Lastly, I tapped the smaller M8x1.25 bolt holes in the front of the bumper to clean out the threads and installed them. Only 1 wasn't lining up properly, even with the bumper "loose" so I had to drill and file a small section. I also found that the washer's they included for these were too large a diameter to function properly so I bought a larger but smaller diameter hole'd washer to secure these up. I also added 2 washers between the bumper and the frame to space down the bumper slightly, because upon flexing it would hit the body at the fender. It still will hit the body if flexing a ton I think, but much less now. I wish there was about another 1/4" clearance at the front of the bumper to mitigate this. It would also help the bumper avoid that "sagging" look. It doesn't sag at all and it super strong, but the way the lines are it almost looks like it.
 

Attachments

  • rear crossmember to be cut.jpg
    rear crossmember to be cut.jpg
    137.7 KB · Views: 279
  • cutting rear crossmember.jpg
    cutting rear crossmember.jpg
    127.7 KB · Views: 295
  • no going back.jpg
    no going back.jpg
    135.9 KB · Views: 273
  • old bumper cover off.jpg
    old bumper cover off.jpg
    129 KB · Views: 295
  • rear bumper installed with lift gate opened.jpg
    rear bumper installed with lift gate opened.jpg
    136.5 KB · Views: 251
swingouts

After the bumper was installed I installed the swingouts. At first I wasn't sure how strong the 4x4labs design would be for attaching swingouts, but I'm impressed. The square tubing has a sleeve fit inside and the bolts just barely go through the attachment and the arm. It's super tight and there's zero movement. It will definitely hold up to abuse.

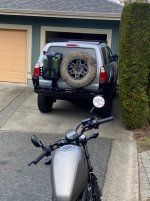
They did a phenomenal job incorporating the Backwoods Jerry can holder and All Pro propane tank mount. They reinforced areas that seemed weak to them on those mounts, and also installed a Hi-lift mount behind the propane tank mount that fits on a stud on the swing arm itself. The passenger swing arm only holds the spare tire.

The only things I'll say that I wish was different is that the tire carrier should be 1" to the right. My spare right now is a 32" and it barely clears (with maybe 3/8") between the jerry can holder. This is only for mine because they had to shift so many things around to incoroporate all my customizations. I can move the jerry can holder though by re-drilling 2 holes in the bottom, so when I upgrade my tire size, I'll move it 1/2" to the left. The only reason I'm mentioning it is because there's more clearance on the other side to have the most view of the taillights, so Ideally they should have mounted the right swing arm slightly to the right. But I still give them 5 stars. I'm just being nitpicky.

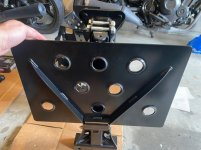
I also had them install the rear table. It's super cool that it's a very strong magnet that holds it up when stowed or not in use. You just have to give it a hard tug down and it will drop down. Another very minor gripe is that it's not level when down. Even when my vehicle is level it's a bit off. Not even for your coffee cup to spill but anything round would definitely not stay on. Maybe there's a way to adjust this. I'll play around with it later.
 

Attachments

  • first look at rear bumper passenger side clearance.jpg
    first look at rear bumper passenger side clearance.jpg
    137.9 KB · Views: 247
  • first look at rear bumper passenger side.jpg
    first look at rear bumper passenger side.jpg
    137.4 KB · Views: 233
  • first look at rear bumper.jpg
    first look at rear bumper.jpg
    136.2 KB · Views: 282
  • magnetic folding down table.jpg
    magnetic folding down table.jpg
    128.7 KB · Views: 253
  • spare tire on 32.jpg
    spare tire on 32.jpg
    139 KB · Views: 281
Rear suspension

Parts removed:

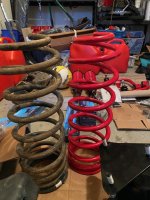
5 year old dobinson's C59-677V coils
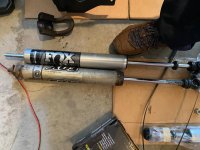
7 year old leaking Fox performance series 2.0 sthock for 2-3" of lift.
7 year old 2nd gen 4runner sway bar end links

Parts installed:

Dobinsons C59-701V coils
Fox performance series 2.0 sthock for 2-3" of lift.
new 2nd gen 4runner end links

I already have the extended rear brake lines, which are a must for this lift. I opted not to get extended bump stops or a panhard correction kit, but may opt for the bolt-on panhard extended kit depnding how it drives the next few weeks.

We'll see how long the shocks last with the weight of the truck now. If they fail I'll upgrade to 2.5" shocks with a longer length and probably get bump stops. But this setup lasted me 150,000kms including a few pretty good offroad trips so I'll give it a go again. The fox shocks were so inexpensive and had the longest extended length and range of travel even against some much more expensive ones, so it was an easy decision for me until it fails.

The rears are pretty easy to install so I won't go over much. I will say, I definitely wish I had ratcheting wrenches! Would have probaby saved me 45 minutes of resetting the bloody wrenches!

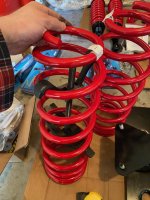
Getting the long travel springs in was the most "exciting' part. I had to rent a spring compressor and they only had the stupid design that goes insdie the spring. This obviously interferes with our coil isolater so the compressor had to be on an angle and tended to slip which took off some of my powdercoating on the springs. After about 45 minutes a side, I got them in.

**PRO TIP** Use the stock bottle jack between the bump stop and the axle to force it down to make it easier. Just be careul of all your lines and everything. At full droop without the shocks in my springs were hitting my gas tank skid, but when everything is buttoned up there's tons of clearance. Had my worried for a second though that something was wrong.

Onto the shocks:

The shock top studs I just angled grinded off to save time, since they were garbage anyways. This made it so much easier to remove.

The lower shocks were seized pretty good on the lower shock mounting stud. They came off with some good whacks and left the bushings behind which I got off with some vice grips.

Getting the new shocks and bushings on was the real challenge. I had to go to the hardware store for a heavy deadblow hammer. My 20oz carpenters hammer wasn't going anywhere. Once I got the propper tool it was easy and the rest of the job was easy.
 

Attachments

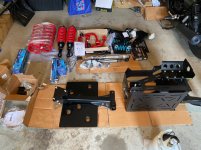
  • all the parts!.jpg
    all the parts!.jpg
    136.4 KB · Views: 276
  • old vs new rear springs.jpg
    old vs new rear springs.jpg
    133.8 KB · Views: 269
  • new rear fox shocks.jpg
    new rear fox shocks.jpg
    133.6 KB · Views: 286
  • new rear coils.jpg
    new rear coils.jpg
    131.9 KB · Views: 288
Front suspension

I remember from doing it before that the front would be more difficult so I left it for last.

Parts to uninstall

-7 year old JBA upper control arms (5 year old BJ's)
-7 year old OME 885/medium nitrocharger strut assemblies
-inner tie rod ends
-outer tie rod ends
-original lower control arms and BJ's
-original sway bar end links

Parts to install:

-JBA 2.0 upper control arms and BJ's
-Dobinson's C59-352/IMS shocks strut assembly (with 1/2" driver's side top spacer)
-aftermarket inner tie rod ends
-aftermarket outer tie rod ends
-OEM Toyota lower control arms
-aftermarket sway bar end links


Everything was soaking in PB blaster for 2 days.

First thing I did was replace the UCA's. This was super easy. Old ones cam out super quick. I did have to quickly loosen some hard lines under the hood on the passenger side (think they were AC lines) to pass through the long bolt but other than that was super quick.

On the driver's side I had to remove the battery and some hose brackets quickly to pass the bolt through.

I also used my wife to help hold the washers between the bushings and the mount as I passed the bolt through of the driver's side from the hood. A second person is really handy for this.

The strut assembly on the driver's side came out without a hitch. Again, ratcheting wrenches would have been so nicer for this. You can get a socket with a couple extensions from the inside to get to the inner strut mount nut. So much easier.

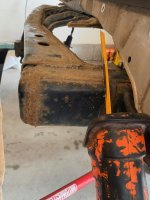
The strut assmebly on the passenger side though!!!!! .... My inner strut mount bolt broke off and just was spinning with the nut. No way to get an angle grinder in there or sawzall to cut it out and i didn't have my buddies dremal anymore. I spent HOURS!! on this thing. The only thing I could do was drill right through the bolt until I was past the nut and then hammer it off. I tried holding it with my vice grips and spinning the nut but the grips kept slipping no matter what I tried. The stud and nut were so rusty. This was awful. After that, all was good.
The lower control arms were so much easier than I thought...after I went and got a pickle fork to remove the ball joints. No way around this folks. Trust me!!

The only other thing I'll say is take pictures of all your cam bolt positions before taking it off. I didn't do this because I thought, oh well, I'm getting an alignment anyways. But the camber was so off and was awful to drive the 10kms to the dealership.

New cam bolts from SPC. They work fine, but I think the OEM ones are so much better. I just couldn't stomach the steep cost of them, and wanted new ones. In hindsight my OEM weren't seized so I could have reused them but already had these ones and they're shiny and new.

Sway bar end links went on easy. I already have a sway bar relocation kit so they line up nicely and allow better articulation. I will probably remove the sway bar, but have to keep it on for now because I'm moving provinces and when you register your vehicle in a new province you need a full inspection and I'm sure I'd fail if I didn't have it on.
 

Attachments

  • all the parts!.jpg
    all the parts!.jpg
    136.4 KB · Views: 291
  • Old front suspension.jpg
    Old front suspension.jpg
    130.7 KB · Views: 274
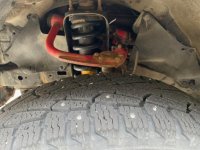
  • all installed front suspension.jpg
    all installed front suspension.jpg
    124.8 KB · Views: 239

Members online

Forum statistics

Threads
278,310
Messages
3,554,080
Members
248,016
Latest member
Advally Service

Trending content

Back
Top