
After almost a year of being afraid to install the SSS Hybrid bumper, I finally got the guts to dive in and get it done. I was really afraid of cutting or messing up the front valence. But after reading a lot of posts on this forum and talking it over with the guys at SSS, I decided to do it.
This ended up being a very cool and enjoyable project. Hats off to the guys at SSS for the incredible workmanship and attention to detail. The quality control was incredible. I did not have a single issue with any of the bolts not lining up or the bumper not fitting/ installing correctly. In the end, the bumper looks incredible!
This is not a step by step, but just a few photos of my install. I did deviate from the install instructions and installed the bumper first, then reinstalled the valence. Very glad i did it this way. Way easier to deal with! Send me a note if you have any questions....
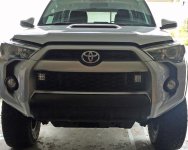
Where I started (note the lower bumper was wrapped in black vinyl):
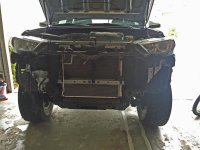
Truck with the valence and cross member removed Note, I did not have a torque wrench but thought my 1/2" drive wrench would have enough torque to remove the bolts. Ended up investing in a torque wrench to get the bolts off:
Bumper with the lower valence cut off. I had read about the dremel tool melting the plastic during cutting. I made sure I had cutting discs, not grinning discs. Didn't matter, it still melted as it cut. What I really did not realize though, the dremel also throws small pieces of hot plastic in your face. Good thing I had glasses on. In the end, the cutting was pretty easy. The Trail Edition lower valence helped keep the cut straight. Lots of residual plastic on the bumper that I remove with my work gloves and smoothed out.
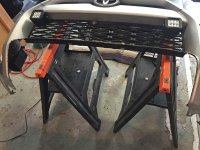
Rubber liner on the bumper to hide any imperfections in my cutting process:
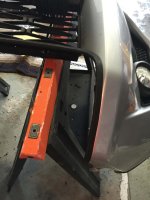
After I got everything off and was ready to install the bumper, I decided to deviate from the recommended reassembly instructions. To make sure I got proper torque on the various bolts, I chose to install the bumper first. I figure that installing a 60 pound bumper, then dealing with a 15 pound valence might be a little easier. It worked out perfect. I also wanted to see if I do it this way, if I can remove the valence and install the winch in a few weeks when I get it. So far, I think I can. Even if I have to disconnect the bumper, it is much easier to hang the bumper first then the valence. IMHO...
Bumper hanging but not bolted yet (this gave me a chance to make sure everything lined up correctly):
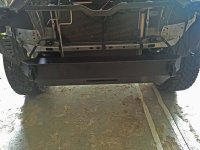
Bumper bolted on with proper torque on the bolts:
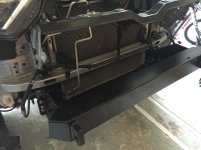
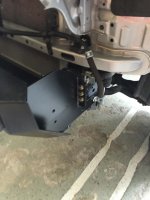
Finished product :clap2: :
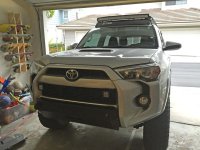
I will be installing a winch in the next few weeks to a month. I wanted to get the bumper on first, make sure I could do it, then install the winch with the bumper. Over all, I am incredibly happy with how it turned out. Again, hats off to the guys at SSS for incredible workmanship!
This ended up being a very cool and enjoyable project. Hats off to the guys at SSS for the incredible workmanship and attention to detail. The quality control was incredible. I did not have a single issue with any of the bolts not lining up or the bumper not fitting/ installing correctly. In the end, the bumper looks incredible!
This is not a step by step, but just a few photos of my install. I did deviate from the install instructions and installed the bumper first, then reinstalled the valence. Very glad i did it this way. Way easier to deal with! Send me a note if you have any questions....
Where I started (note the lower bumper was wrapped in black vinyl):
Truck with the valence and cross member removed Note, I did not have a torque wrench but thought my 1/2" drive wrench would have enough torque to remove the bolts. Ended up investing in a torque wrench to get the bolts off:
Bumper with the lower valence cut off. I had read about the dremel tool melting the plastic during cutting. I made sure I had cutting discs, not grinning discs. Didn't matter, it still melted as it cut. What I really did not realize though, the dremel also throws small pieces of hot plastic in your face. Good thing I had glasses on. In the end, the cutting was pretty easy. The Trail Edition lower valence helped keep the cut straight. Lots of residual plastic on the bumper that I remove with my work gloves and smoothed out.
Rubber liner on the bumper to hide any imperfections in my cutting process:
After I got everything off and was ready to install the bumper, I decided to deviate from the recommended reassembly instructions. To make sure I got proper torque on the various bolts, I chose to install the bumper first. I figure that installing a 60 pound bumper, then dealing with a 15 pound valence might be a little easier. It worked out perfect. I also wanted to see if I do it this way, if I can remove the valence and install the winch in a few weeks when I get it. So far, I think I can. Even if I have to disconnect the bumper, it is much easier to hang the bumper first then the valence. IMHO...
Bumper hanging but not bolted yet (this gave me a chance to make sure everything lined up correctly):
Bumper bolted on with proper torque on the bolts:
Finished product :clap2: :
I will be installing a winch in the next few weeks to a month. I wanted to get the bumper on first, make sure I could do it, then install the winch with the bumper. Over all, I am incredibly happy with how it turned out. Again, hats off to the guys at SSS for incredible workmanship!
Attachments
-
 before.jpg134 KB · Views: 1,696
 -
 no cross member.jpg132.3 KB · Views: 1,089
 -
 cut bumper.jpg132.9 KB · Views: 1,127
 -
 bumper cut with edge.jpg120.9 KB · Views: 1,085
 -
 bumper hanging.jpg135.4 KB · Views: 1,052
 -
 bolted on bumper.jpg130.8 KB · Views: 1,041
 -
 bolt on close up.jpg128.1 KB · Views: 1,028
 -
 done.jpg133 KB · Views: 1,065


