Stone618
New member
I would like to start by saying thank you to this forum and its members. You all have inspired me down this path and I am loving it! I bought my first 3rd gen about 5 years ago when the kids where on the way. I needed more room for twins!:bravo: Soon after I bought the 3rd gen I started kicking myself because I wanted the 4x4. It was a good truck for 5 years until it got totaled out.
It as been in interesting start to this 4th gen story. When I bought this truck, the deal was that the dealer would fix the not working 4wd and check engine light. Well, it turned out to be more than both the dealer, previous owner, and I thought. The 4wd drive was about 3,000 dollars of a fix the dealer paid for. The check engine light, which was a evap code, has still yet to be fixed after a new gas tank, filler neck, gas cap, charcoal canister, and bad electrical connection. All that is just what the dealer told me. Who knows what else they did.
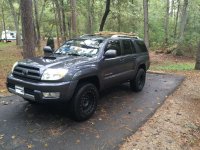
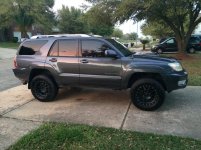
I bought the truck with the lift and tires already installed. I've had several people ask me what lift I have. I don't know. I do know it is a spacer lift. I called the shop that i think did the work. They think it is a Daystar 2.5 inch kit. That's all I know.
What's been done so far:
Engine.
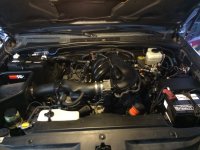
-K&N air intake system.(Came with truck)
-Cleaned MAF sensor.
-Evap system overhaul.(new gas tank, charcoal canister, gas cap, filler neck, at the end it was a faulty electrical connection, dealer paid all. Over 1,000)
-Power Steering flush( that shit was dirty as hell!)
Suspension.
-Unknown Spacer Lift(Came with truck)
-Method Wheels
-P265/70/17
Drive train.
-$3,000 worth of 4wd work. Actuators, etc. (all dealer paid)
-Greased driveshaft
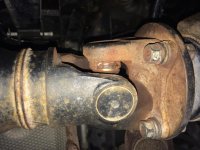
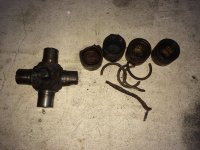
-New Moog rear u-joint install 4-3-16 147,800
Electrical.
-Dual Battery
-Custom cell phone mount
-Fog light "on" mod
-Custom Mounted CB radio and speaker
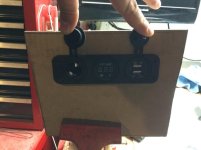
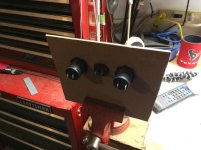
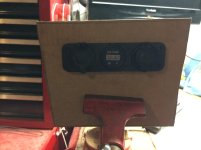
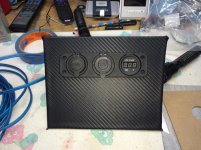
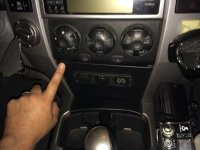
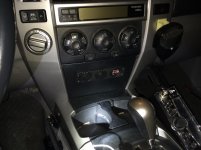
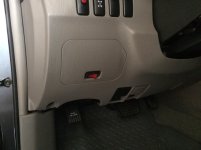
-Custom Panel with USB, 12volt socket, and 12volt meter(replacing pocket door under a/c controls)
Interior
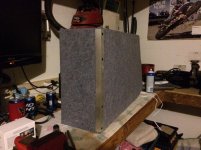
-Custom cargo box over driver side wheel hump
Future plans include:
-fix drag to the left when braking. Liking stuck caliper.
-build custom roof rack without welding
-build custom cargo box over second back wheel hump passenger side.
-installing power inverter inside cargo box with additional power outlets.
-install backup camera
-transmission fluid change/flush
-rear diff fluid change
-coolant flush
-diff breather mod
-replace sway bar and end link bushings
-replace as many bushing as possible
-install back up lights
If you cant tell, I'm on a pretty tight budget. So keep an eye out for creative projects at low cost. You'd be surprised what i can do with stuff lying around.
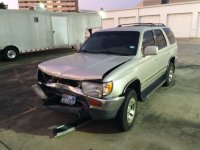
The first pic is my old rig after the accident.
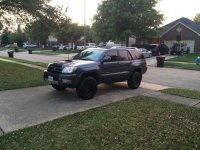
The second pic is my new rig the day after I bought her.
It as been in interesting start to this 4th gen story. When I bought this truck, the deal was that the dealer would fix the not working 4wd and check engine light. Well, it turned out to be more than both the dealer, previous owner, and I thought. The 4wd drive was about 3,000 dollars of a fix the dealer paid for. The check engine light, which was a evap code, has still yet to be fixed after a new gas tank, filler neck, gas cap, charcoal canister, and bad electrical connection. All that is just what the dealer told me. Who knows what else they did.
I bought the truck with the lift and tires already installed. I've had several people ask me what lift I have. I don't know. I do know it is a spacer lift. I called the shop that i think did the work. They think it is a Daystar 2.5 inch kit. That's all I know.
What's been done so far:
Engine.
-K&N air intake system.(Came with truck)
-Cleaned MAF sensor.
-Evap system overhaul.(new gas tank, charcoal canister, gas cap, filler neck, at the end it was a faulty electrical connection, dealer paid all. Over 1,000)
-Power Steering flush( that shit was dirty as hell!)
Suspension.
-Unknown Spacer Lift(Came with truck)
-Method Wheels
-P265/70/17
Drive train.
-$3,000 worth of 4wd work. Actuators, etc. (all dealer paid)
-Greased driveshaft
-New Moog rear u-joint install 4-3-16 147,800
Electrical.
-Dual Battery
-Custom cell phone mount
-Fog light "on" mod
-Custom Mounted CB radio and speaker
-Custom Panel with USB, 12volt socket, and 12volt meter(replacing pocket door under a/c controls)
Interior
-Custom cargo box over driver side wheel hump
Future plans include:
-fix drag to the left when braking. Liking stuck caliper.
-build custom roof rack without welding
-build custom cargo box over second back wheel hump passenger side.
-installing power inverter inside cargo box with additional power outlets.
-install backup camera
-transmission fluid change/flush
-rear diff fluid change
-coolant flush
-diff breather mod
-replace sway bar and end link bushings
-replace as many bushing as possible
-install back up lights
If you cant tell, I'm on a pretty tight budget. So keep an eye out for creative projects at low cost. You'd be surprised what i can do with stuff lying around.
The first pic is my old rig after the accident.
The second pic is my new rig the day after I bought her.