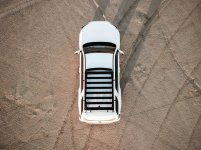
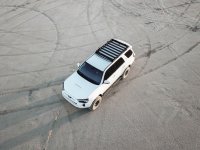
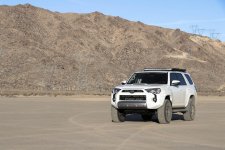
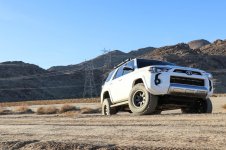
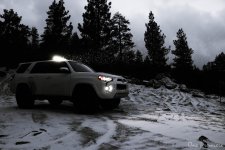
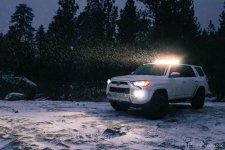
T.U.G.G. - 17 OF-Prem Super White

What a great writeup on your suspension trials. Thanks for taking the time.

Being that you have KDSS, I'm curious if you measured all/any of the shocks for their overall length when compressed and extended? If memory serves me right, some of the OME stuff is able to add overall travel, without hindering compressed length. Not a concern for non-kdss trucks as more travel is more travel.

Basically, did any of the shocks provide more droop without limiting up travel? I'm hoping there is a shock that can max kdss droop without giving up compression...
 
Last edited:
Whats your opinion on the 5100 vs the 5160 in the rear? From what I can gather the valving is close to the same for both shocks. You just get the benefit of the better cooling with the 5160.

From what I've read, the 5160 has more rebound valving vs. the 5100. The 5160's feel slight better on the fast, sharp bumps. They get better as they warm up. Over large (speed bumps) bumps they feel matched to the front end. I went with the 5160 because the valving was different, if different valving was available in the 5100 body I would have run those. I don't think I will ever get the shocks hot enough to benefit from the remote reservoir.

I added about 50lbs to rear end over the weekend, and the rear feels slightly better. I will be adding another 50lbs to the cargo area (storage drawers, re-purposed workbench drawers):bravo:

Putting them in the dirt in 2 weeks, will report back.
 
What a great writeup on your suspension trials. Thanks for taking the time.

Being that you have KDSS, I'm curious if you measured all/any of the shocks for their overall length when compressed and extended? If memory serves me right, some of the OME stuff is able to add overall travel, without hindering compressed length. Not a concern for non-kdss trucks as more travel is more travel.

Basically, did any of the shocks provide more droop without limiting up travel? I'm hoping there is a shock that can max kdss droop without giving up compression...

I did not have a chance to measured compressed lengths. If I spent a minute more in the garage I risked having large sharp objects thrown at my head by a 5'2" female, I think her eyes glowed red a one point.

I can tell you with the 5100 at full droop the upper arm was kissing the spring. So there was definitely droop gains, as far as up travel I couldn't tell you. Typically more droop equals more travel. I don't think there is a loss of droop with any of these setups, the coils will bind before you reach max up travel.
 
From what I've read, the 5160 has more rebound valving vs. the 5100. The 5160's feel slight better on the fast, sharp bumps. They get better as they warm up. Over large (speed bumps) bumps they feel matched to the front end. I went with the 5160 because the valving was different, if different valving was available in the 5100 body I would have run those. I don't think I will ever get the shocks hot enough to benefit from the remote reservoir.

I added about 50lbs to rear end over the weekend, and the rear feels slightly better. I will be adding another 50lbs to the cargo area (storage drawers, re-purposed workbench drawers):bravo:

Putting them in the dirt in 2 weeks, will report back.

It may be to early to tell but would you say the price difference between the 5100 vs the 5160 is worth the upgrade? I've decided on the 6112's but keep going back and forth between the 5100 and 5160, due to the $250 price difference between the 2 rear shocks if you get the billet reservoir mounts.
 
Garmin sells what they call a “parking cable” it is hardwired to the accessory circuit. It also allows the camera to recorder 30 second clips while the vehicle is parked when motion is detected.

Sorry, I should have been more specific.

Did you hard wire the Garmin to the rear view mirror? Ive heard of that done before.
 
It may be to early to tell but would you say the price difference between the 5100 vs the 5160 is worth the upgrade? I've decided on the 6112's but keep going back and forth between the 5100 and 5160, due to the $250 price difference between the 2 rear shocks if you get the billet reservoir mounts.

Man that's a tough question. My initial thought is 5100 with cost savings in mind. But then I think about the way the 5160's feel over big bumps and I can tell its a different shock than the 5100. So if you can swing the $250, I'd say it's the 6112's best mate, if not- the 5100 is still legendary, and will do what it's suppose to do.


Sorry, I should have been more specific.

Did you hard wire the Garmin to the rear view mirror? Ive heard of that done before.


No worries, thats's a great idea. I am using a BlueSea fuse block under the hood, so I ran the power and ground there, and attached the accessory wire at the fuse box under the dash. Parking cable has a control box that I stashed behind the kick panel next to the parking brake. I didn't even remove the a-pillar cover, just used a wire fish. Garmin gives you a ton of wire to work with, so you can wire it up practically anywhere.
 
Update:


Been busy adding the following -


1. Front Runner Roof Rack


This was a fun one, I originally ordered the 1255mm x 1560mm Slimline II Tray without the mounting legs. I did this because I wanted to try and mount the tray to the factory roof rack. I understand the load carrying is reduced by not utilizing the Front Runner Legs, but I was ok with that. Once I got the rack I realized this wasn't the look I was going for. The pictures I had been going off were of a 4th Gen 4Runner. I wanted the rack to follow the lines of the factory rails. Because Front Runner has the best customer service I've ever dealt with, I was able to swap the tray for the 4th Gen Tray which is narrower, 1165mm x 1560mm. This was perfect and the exact look I was going for. Happy.


How I mounted the rack to the factory rails: If you visit 8020.net, they make an endless supply of brackets and mounting hardware for t-slotted aluminum framing extrusions. So I am using a corner bracket from them, along with some large t-slot nuts that fit perfectly in the factory rails. I will post photos when the rack is back on the truck.

Oh, and my sharkfin got a flat top hair cut.

5bd90f6823281e308250b1c0dfdf3c1e.jpg

8ea600b1970bea798bebf361692d1dc0.jpg

25c12d8e181c3720de5a0f9fd4436946.jpg

bffe25d4212aae94b19fc1250e45102e.jpg


2. Lights: I love lights. Too much.


I added a pair of Rigid SRM's to existing bolts on the trailer hitch. I wired these into the "trigger" switch on the Switch-Pros panel. This allows the lights to come on when in reverse, and allows me to turn them on by pushing the switch.


I also added a pair of 6" Rigid SR-Series PRO lights behind the upper grille. I built up the framing using extrusions from 8020.net.


Right now I am finishing up wiring for the roof rack which will have a 40" RDS Light Bar and (6) Rigid Ignite lights (2 Left, 2 Rear, 2 Right).


For the roof rack wiring, I decided to run the wires through the roof at one of the factory roof rack mounts. Drilling was required and was the scariest thing I've done. Added a Deutsch connector to the end which will be hidden when the rack is on.

fdd9a1fbb9ae2d4087259280d3ee2a81.jpg

3b1b1f35ee24af59132bb88fcc3664af.jpg

7769d49276adbcc058daaef444ef9714.jpg

7aaea45b462fca3bbc8631bc15455b3f.jpg

c57955db0dc165689b75fde9c310ba09.jpg

4c883bef815f864ab788b3697c76d533.jpg

b3a70424e4cc362102771f273abb6715.jpg

f7f337e59360cb3322130839f232968d.jpg

013a0e0eb9ae735c906a92a555dbe18d.jpg

5099f4b2e32ad2841a30ad2e68bb429d.jpg
 
Last edited:
Nice Rig...I might look at the dash cam. Just got hit with a speeding camera ticket. Maybe this could have alert me :)
 
Update: Photos Coming Soon

So I went on quite the suspension venture with this one. This 4Runner really tested my knowledge. Being a stubborn *******, I dismissed the advice of those who know there stuff (aka Scott @ Camburg). So below, I am going to share my experience so others dont have to spend 5 or 6 weekends in a row swapping shocks and springs. I've gotten my time down to 1.5 hours to swap front shocks and springs, including spring compression. Level: Master Builder.

I decided against coilovers because this thing is a pavement princess and will only see dirt 1% of the time. And when it does see dirt, I am not trying to keep up with a trophy truck through 3 foot holes where I have to worry about shock fade ect. I really question those who claim they are experiencing shock fade, because it takes a lot of speed for an extended period to get shocks hot enough to fade. Dont get me wrong though, coilovers out of the box are the best solution for these trucks, just a whole lot of overkill. I ran the first set of Fox Extended Length Resi Coilovers with an Upper Arm on a 2010 Tundra and they thing was like a boat on the morning glass.

1.
Front: Dobinsons 302 Coil / 700 Strut
Rear: Dobinsons 723 / Stock Shock

Lift Gains: 2.75"+ Front / 2.25"+ Rear (The rear sat about 1.5" higher than the front, measuring hub to fender)

The stuff from Dobinsons is heavy-duty. There coils have a few extra turns than most other products on the market. The wire is 17mm, and you can tell. The springs are heavy. I have no doubt in my mind that these would hold up over a very long time. If you beat the S out of your rig, you may want to give there stuff a shot. Especially the guys hauling a ton of extra weight. The on road feel was solid, not as comfortable as I had hoped for, but it definitely handled like a sports car. Low speed "sharp" bumps were a little rough, which is understandable considering how burly these springs are.

1A.

Front: Dobinsons 302 Coil / 700 Strut
Rear: Dobinsons 599 / Stock Shock

Lift Gains: 2.75"+ Front / 1.5"+ Rear (The rear sat about .5" higher than the front, measuring hub to fender)

I swapped the rear 723 Springs for the 599 Springs. Gave me a very even lift.

2.

Front: Dobinsons 302 Coil / OME 90010
Rear: Dobinsons 599 / OME 60080

Lift Gains: 2.75"+ Front / 1.5"+ Rear (The rear sat about .5" higher than the front, measuring hub to fender)

This time around, my general thought was shocks. The ride felt stiff with the previous set-up. I couldn't feel the suspension working. My thought was the stock rear shocks could not keep up with the new rear coil springs, and larger heavier tires. So I installed the OME 90010 up front and they 60080 out back. This was the set-up I ran on my Tacoma (Different Shock Numbers Obviously) and it rode like a dream. Not the case for the 4Runner. The front end felt more controlled paired with the Dobinsons 302 Coil Spring, the rear felt like I was running 2x4's in place of shocks. I thought my rig was going to buck me out. The rear OME shocks are definitely designed to haul 200+ lbs of extra weight. So those were out.

3.

Front: Dobinsons 302 Coil / Bilstein 5100 Set @ 0.
Rear: Dobinsons 599 / Bilstein 5100

Lift Gains: 2.75"+ Front / 1.5"+ Rear (The rear sat about .5" higher than the front, measuring hub to fender)

I will say this I was nervous about running the 5100. I used these on a 2014 Tundra and they didn't ride the way I had hoped. However, these worked the best thus far in my quest to find the ride I was looking for. They sharp bumps in the road were still there, but generally the ride dynamics had improved.

4.

Front: OME 2884 / Bilstein 5100 Set @ 0.
Rear: Wheelers T13 / Bilstein 5100

Lift Gains: 2.75"+ Front / 1"+ Rear (The rear sat a little less than .25" higher than the front, measuring hub to fender)

Still not satisfied, I tried the OME 2884 Spring and added the T13 spring out back. I was a lot closer at this point. The ride was really good for the amount of lift I was getting. The T13 is an excellent spring, felt like stock just with more lift. Really happy with these, Wheelers nailed it. Now I know with past Toyota trucks, they really dont like anything over 2.5" without an upper arm. They like a lot of droop! Knowing this, I knew the amount of lift I was getting in the front was too much and this was contributing to a pogo-stick like ride. Rather than the suspension moving the body was moving. NEXT.

5.

Front: OME 2883 / Bilstein 5100 Set @ 0.
Rear: Wheelers T13 / Bilstein 5100

Lift Gains: 2"+ Front / 1"+ Rear (The rear sat a little less than .5" higher than the front, measuring hub to fender)

So I swapped the 2884 for the 2883. I felt like this was it. The end of the road. The ride was the best it had been through out all of the suspension changes. It felt good. Stable at speed, cornering and braking all felt great. Thought there was still apart of me that thought "it could be better". At this point my neighbors were beginning to wondering if I was running an auto shop out of my garage. 5 Weekends of the worlds loudest air compressor and the sound of an impact grinding up a harbor freight spring compressor. (Note: If you are using a threaded rod spring compressor, get some High Pressure Lube used in machining applications, it will prolong the life of the tool. You only need a little amount, about the size of a pearl right at the nut on the threaded rod. Makes everything butter smooth and helps with the heat.)

Now prior to picking up the 4Runner, I had planned on running the Bilstein 6112 from the start. This was based off my research and the advice of those who had direct experience with them. However, Dobinsons was a new name and a new approach to dialing in Toyota suspension. I was hooked and wanted to give it a shot. The Dobinsons stuff is great, I think they are going to bring some killer products to the market in the future. You can tell they've put in a lot of R&D into their springs to bring a no-bullshit product to market. I was not given a discount, or anything for free I paid the same price anyone else would pay and I am saying this to add some integrity to my opinion. Though it didn't work for me, I really wanted it too! Those springs look really cool under the 4Runner.

So even though I was pleased with the 2883/5100 and T13 combo, I was still very curious about the 6112. Long story short, impulse kicked in and I had a box of the 6112's 24 hours later. The rear shocks 5160's are on order. I had to give them a shot.

6.

Front: Bilstein 6112 w/Included Spring Set @ 6th Perch (2.2") on bothsides
Rear: Wheelers T13 / Stock Shocks (5160's are on order)

Lift Gains: 2.2"+ Front / 1"+ Rear (The rear sat a little less than .5" higher than the front, measuring hub to fender)

This is the finish line. I made it. Holy guacamoley. The 6112 is the pinnacle of a non-coilover solution for the 4Runner. I was very skeptical because I've always created lift using longer springs, never by compressing the shit out of the stock spring. So the fact that Bilstein was using this method with a 600lbs spring I was having a lot of doubt. I was wrong. 110% Wrong. The ride is exactly what I was looking for. Like others have said, the ride is very controlled. It almost eliminates all of the sharp road bumps. There is no bounce (commonly felt among 5100's), the handling is perfect. Stable at speed and eats up any road imperfections with ease. Still a little brake dive but thats to be expected on a short wheel base, coil sprung rear rig like the 4Runner. I am only mentioning brake drive once in this post because honestly brake dive is normal for properly functioning suspension geometry. So the guys getting all crazy about brake dive need to understand what it is, and why it's happening before trying to eliminate it. Take a stock 4Runner to an alignment guy who uses a tape measure and not a laser and ask him to fix the brake dive, because a lot of it is in the geometry.

Bottom line: Happy, very happy. I invited those local to OC that are on the fence about suspension to come drive my 4Runner.

I know I am going long here, but I want to try and provide everything I learned in this process.

KDSS:

Now this is my first experience with KDSS and I am really impressed with it. I know there a lot of mixed reviews out there but if you looks at the engineering behind it, it's a really cool system.

I was a little troubled by all of spacer talk to correct the "lean" since there is a way to correct it without spacers. I have the 6112's set evenly. They are on the same perch side to side.

Each time I put the front end on jack stands I opened the KDSS valves 3 full turns. Now in order for this to be effective, you need to have all 4 wheels off the ground. Since I was too lazy to jack up the rear end, the KDSS rams are still hard to move. However, I was going to need to open them anyways to correct the lean. Once the 6112's were on, I dropped it back on the ground and it was leaning to the driver side. Before closing the valves I went over to the passenger side and stood on the running board evening out the stance. Yes, that's all it took. I closed the valves and drove it. As of writing this the stance is perfectly even side to side. So you can throw spacers at your truck all day long because every situation is different (added weight, ect.) I am just giving you my solution and results.

So tips for reinstalling the swaybar with KDSS:

(Note: this may not be the proper way, but it was the fastest easiest way for me)

1. Attach the passenger side or side opposite the ram first.

2. Use (2) speed clamps to pull the swaybar towards the arm.

3. Bolt the lower hole first.

4. Use a screw driver to align the braket with the top hole. (There are holes for a screw driver on the mounting surface and on the bracket for exactly this purpose)

5. Profit.

Last note:

This is likely a placebo, but I did a zero point calibration after all of this for good measure. I swear it helped. I was not having any traction control issues, just thinking about the change in ride height and how it affects the yaw sensor.

That's what I've got for now. I will likely add to this post as I find my grammar and general writing mistakes.

This has got to be one the BEST, thought out, descriptive write-ups I've seen on the forum thus far. For a newbie on the forum and to "modding rigs" (motorcycle guy in my past life) this is super helpful. I'm looking to get a little extra height without destroying the ride or other components without shelling out thousands of dollars for the UCAs and the panhard kits and the blah blah blahs. The information on the set ups, height gain and ride are very informative. Thanks for taking the time. Now if someone could kindly point me in the direction of a minimally secured bank so I can afford some parts :spy:
 
Interesting to see all the different iterations of shocks and springs, and good to see that you ended up where you did. I have a '16 TEP, and I ended up with TRD suspension both set on the upper perch, with Toytec 1" spring seats (pretty much the same as your setting). T13s in back have been perfect for me w/275s, as the frame sits nearly perfectly level (I personally am not into evening the space of front/rear wheel wells). The thing drives like a race car on the road (except for the lack of power ;), and great offroad, despite many saying KDSS sucks for washboard.
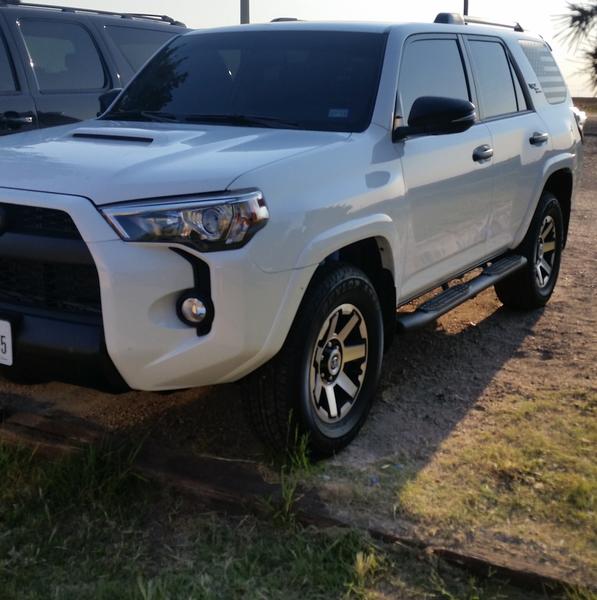
Nice rig.
 
Nice Build! I plan on doing some of the mods you already done. So jealous!

chamberstrd+orp-albums-2017+trd+orp-picture47967-4runner-handles.jpg


We recently purchased a 17' TRD ORP in super white so far blacked out the badges, roof rails, front grill, rear bumper section, door handles, and the mirror caps. We love it

Do you mind sharing where you got the mirror caps? Those look really nice!
 
Update: Photos Coming Soon

So I went on quite the suspension venture with this one. This 4Runner really tested my knowledge. Being a stubborn *******, I dismissed the advice of those who know there stuff (aka Scott @ Camburg). So below, I am going to share my experience so others dont have to spend 5 or 6 weekends in a row swapping shocks and springs. I've gotten my time down to 1.5 hours to swap front shocks and springs, including spring compression. Level: Master Builder.

I decided against coilovers because this thing is a pavement princess and will only see dirt 1% of the time. And when it does see dirt, I am not trying to keep up with a trophy truck through 3 foot holes where I have to worry about shock fade ect. I really question those who claim they are experiencing shock fade, because it takes a lot of speed for an extended period to get shocks hot enough to fade. Dont get me wrong though, coilovers out of the box are the best solution for these trucks, just a whole lot of overkill. I ran the first set of Fox Extended Length Resi Coilovers with an Upper Arm on a 2010 Tundra and they thing was like a boat on the morning glass.

1.
Front: Dobinsons 302 Coil / 700 Strut
Rear: Dobinsons 723 / Stock Shock

Lift Gains: 2.75"+ Front / 2.25"+ Rear (The rear sat about 1.5" higher than the front, measuring hub to fender)

The stuff from Dobinsons is heavy-duty. There coils have a few extra turns than most other products on the market. The wire is 17mm, and you can tell. The springs are heavy. I have no doubt in my mind that these would hold up over a very long time. If you beat the S out of your rig, you may want to give there stuff a shot. Especially the guys hauling a ton of extra weight. The on road feel was solid, not as comfortable as I had hoped for, but it definitely handled like a sports car. Low speed "sharp" bumps were a little rough, which is understandable considering how burly these springs are.


Front: Dobinsons 302 Coil / 700 Strut
Rear: Dobinsons 599 / Stock Shock

Lift Gains: 2.75"+ Front / 1.5"+ Rear (The rear sat about .5" higher than the front, measuring hub to fender)

Did the Dobinsons 302 Springs really give an extra 1” over what was listed (1.75” per the Dobinsons thread)? Just curious as I haven’t seen that discrepancy before in any of the other threads listed. Same with the 723’s which are listed as a 1.25” increase.
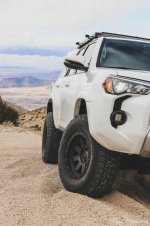
 
More detail shots of the rack.

I am going to install a pair of heims and threaded rod to the second hole on the light bar for more rigidity.

The surprising part, even at 80 mph, there is NO noise from the rack, and I don't even have the Front Runner diffusers on.

Install took twice as long because I under sized my wire gauge for the light bar and had to run new wires. Used some Marine Grade 12 AWG, and surprisingly didn't get much voltage drop over nearly 24ft of wire. (Wires run towards the back, drop down near the rear hatch, then run under the truck to the front)

0b06df959815876141859ffa210854ce.jpg

a61b958d0aa3d50459804c9344889b82.jpg

4b71651fe4c181ca69604280da261076.jpg

641d873fcd1148e207be53f8a52aaf90.jpg

35acdf6d078f1aa17a0d6eefb309d226.jpg

3875f8f26afcf03ebd8268816df015a6.jpg

272840e712877754d968982776f6cdc9.jpg

b5e30f3f092c7da69796f6c1e1cdb7a2.jpg


Sent from my iPhone using Tapatalk
 
Last edited:
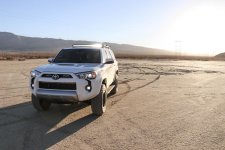
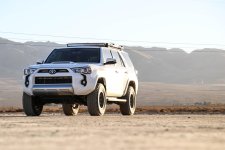
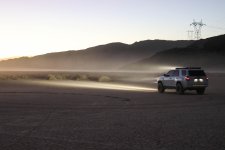
Some photos from the weekend.
 

Attachments

  • DJI_0481.jpg
    DJI_0481.jpg
    134 KB · Views: 911
  • DJI_0484.jpg
    DJI_0484.jpg
    135.7 KB · Views: 957
  • IMG_2960.jpg
    IMG_2960.jpg
    137.5 KB · Views: 946
  • IMG_3028.jpg
    IMG_3028.jpg
    140.9 KB · Views: 952
  • IMG_3084.jpg
    IMG_3084.jpg
    139.1 KB · Views: 954
  • IMG_3123.jpg
    IMG_3123.jpg
    129.3 KB · Views: 967
  • IMG_3185.jpg
    IMG_3185.jpg
    128.5 KB · Views: 956
Finally got to use the 4Runner. Since myself and my lady had never seen the Grand Canyon, we decided to go see it. But not the normal tourist spots. We decided to go check out the Toroweap Overlook. We both knew it was going to be a ton of driving, but in the end, it was worth it.


Left Orange County at 7pm Friday and headed to Saint George, UT. Checked in to our hotel at 1:30am. Woke up at 8am at hit the road. Headed North on the I-15 and got onto the 9 toward Hurricane, UT. From there we got onto the 59/389 into Colorado City, AZ. Hit the 289, and we were on the dirt. This road turns into the 5, and then the 115. The roads were long and straight for the first hour. Typical wash board road, averaging between 40-50mph. After about 2 hours of driving, stopping to take photos we hit the ranger station. This is about 6 miles from the Overlook. From here on in, it was pretty rough. Only driving 15-20mph. The final 2 miles are a crawl. Lots of rock. Never needed 4WD on the way in. Finally made it to the Overlook and parked 50ft from the edge. Had lunch. Took a lot of photos. As sun began to set, we packed up and started to roll out. This was when 4WD was needed to get out. Climbing up some of the rocks we navigated coming in. Northing crazy, but definitely requires some ground clearance and 4WD. On the way out, we turned onto the 5 at the ranger station, and to the 5 all the way home. The 5 runs through a nearby mountain. Mt. Trumbull. This drive was awesome. Elevation changes, snow. You really got a sense of how remote this spot it. We could not see any signs of civilization for the next 2 hours. The sun had fully set about an hour after we got rolling. Having the 40" Light Bar really helps when it's pitch black. We were able to average 40mph on the way out. 4Runner did awesome. Those 6112's/5160's did awesome, so comfy most of the time (not much you can do with aggressive wash board). Even over some big g-out's, with a lot of weight on board, never bottomed out.

25a272637ae00a7fc08e6672ee8eab9c.jpg

c7f4a0b5afeb4468d3374238a3b463e9.jpg

489df525a3c00934a33497bb2b13b07c.jpg

32bfd1d8b0a1e7103bcd441c65534755.jpg

8a23dfa0b95cc0f7309f2fc8b3ec5143.jpg

2bfe8b117b0c2b815b2b6f4b16b1479e.jpg

aa79d25cbe475163d58b2ab830c5c62c.jpg

fd86adfb57398e244544cb4794890b6f.jpg

2510b6daafc32d5ed4b55e0108002fee.jpg

b1ad10f856e54098e3169a2bbbcc11de.jpg


Used a rifle case as a weather proof low profile roof box. These are $69 on amazon. Plano Molding 42” All Weather Rifle Case.

cc178354140a0dbaef28dff01babf227.jpg

c40e1e221d8ad9726a8748425481182d.jpg
 
Last edited:
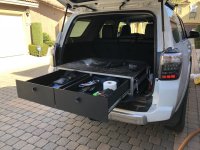
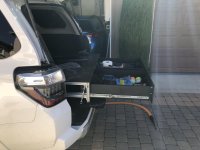
Built a drawer system from scratch using t-slotted framing and a HDPE plastic. It is mounted to the rear sliding tray. Came out way better than expected.
 

Attachments

  • IMG_6992.jpg
    IMG_6992.jpg
    133.4 KB · Views: 890
  • IMG_6993.jpg
    IMG_6993.jpg
    129.5 KB · Views: 860
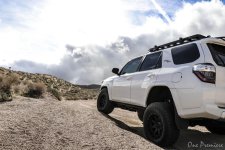
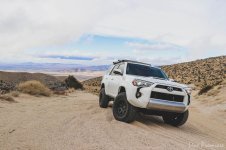
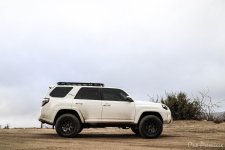
Some glamor shots from a trip to Big Bear via Grapevine Canyon to Coxey, then into town.
 

Attachments

  • IMG_3627.jpg
    IMG_3627.jpg
    139.8 KB · Views: 822
  • IMG_3658.jpg
    IMG_3658.jpg
    137.6 KB · Views: 832
  • IMG_3756.jpg
    IMG_3756.jpg
    131.9 KB · Views: 820
  • IMG_3858.jpg
    IMG_3858.jpg
    138.6 KB · Views: 824
  • IMG_3875.jpg
    IMG_3875.jpg
    140.4 KB · Views: 857
  • IMG_3667.jpg
    IMG_3667.jpg
    139.7 KB · Views: 811

Members online

No members online now.

Forum statistics

Threads
278,317
Messages
3,554,129
Members
248,016
Latest member
Advally Service

Trending content

Back
Top