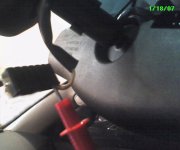
tapping the wire into map light assy for overhead navigation system

Thanks for the pics. As soon as I'm done with month-end-close, I'll direct-wire my Valentine 1 to that location. I just need a bit of free time.

Ben
 
If I finish my other chores early, I'm gonna try and crack mine open to hard-wire my Garmin GPS V to it. Unfortunately, I don't have a digital camera at my disposal.
 
folks,
take your time to do this.
i was lucky to find the a-pillar that i believe it is for auto-dimming rearview mirror. since i am not planning to get one (auto-dimming), so it is perfect for this project.
my original thought is to wire a 12V DC extension from map light assembly to sunglass holder. by doing so, you will get one additional 12V DC output underneath roof for nav, radar detector, or anything you can think of.
i am happy with what i have now.
i will take another picture when it is warmer.

good luck, folks, on your project.

 
i would like to put my sirius satelite radio (starmate) in the sunglass holder and wire into the map lights. the latest post used the red and white wires-where would i tap a nuetral? if i tapped into the red for power, would it always be on? how can i make it turn off w/ the ignition? (no sunroof, yes homelink (mod)) when you mention a pillar, you mean the trim that rides from the dash to the headliner? if using mini add a circuit, what slot did you use? (between x and y response).

thanks for your help!!
rob
 
Well, I finally got around to hardwiring my V1 last night before the Heat game. It was a success, and only took about 15 minutes. For right now I'm turning the unit on/off each time I get in/out, but tonight I'll time it to see how long the unit stays on after exiting the vehicle. If it is only 15-20 minutes, as noted earlier in this thread, then it should be ok to just leave the unit on. I don't think 20 minutes of the V1 on would drain enough battery power so that I wouldn't be able to start her up afterwards. We'll see.

Ben
 
Followup question on this for Abin and Benk777

OK, I am planning same setup as this for my Nuvi360 and my V-1 both from the map light assembly area.

My questions for Abin are...

1. Early in the thread there was talk about tapping the moon roof power as an ideal solution for power off within 45 seconds of ignition off or door open. Yet it seems you decided to tap map light power which stays on much longer after ignition is off. Why?

2. Which power cord for your garmin did you use? Did you cut up the DC power cord that came with the unit and splice it directly to the map light power wires or did you use another cable? For example, the V-1 radar det. can use a normal RJ-11 phone cord by using the two middle wires for power and neutral.

My questions for Benk777...

1. Did you also tap map light power like Abin or did you try to find moonroof 12v power?
2. Did you ever test how long it takes for the V-1 to lose power?

I like the idea of this install and think the regular 12v adapters in the center console should have constant power without needing to remove a relay in the fuse panel (i.e. to charge a cell phone overnight while car is in garage), but for these overhead units, switched access. power would be better.

-JC
 
Updated info - Did this mod as well

I also pulled out the overhead controls this weekend to hardwaire my Garmin Nuvi and Valentine V-1. If anyone cares how to hardwire either of these units with Garmin stock mobile charger and regular rj11 cord for V-1, let me know and I will take time to post process. Only warning would be not to cut the stock Garmin charger otherwise won't work, instead just get a female adapter socket from radio shack and fuse protect the assembly.

I did have an addition to the install notes previously posted in this thread. I actually tested the middle two (Green and Grey) wires which also show +12v on the voltmeter and cut with ingnition switch. I took time to try and splice into these wires only to find that it screwed up the sunroof operartion (i.e. sunroof would open and shut when I plug in the Garmin or Valentine). as such I patched back up the sunroof cables and ended up just tapping the red maplight +12v.

One additional note is that the power to the Garmin and V-1 ceases some 40 minutes after leaving the car with the doors unlocked vs. only a few minutes if I lock the doors when I leave the car.

One final note is a pointer to pull straight down on the back (closest to winshield) of map light asseembly to release two clips before pulling outward toward the windshield to remove it.

Let me know if you want pictures of this or the Ipod integration I did with the USA spec PA11-TOY or the power socket I relocated to large compartment in center console.

JC
 
Last edited:
Remember for those of you in California, it is illegal to mount anything onto the front window, I got a $250 ticket for putting my radar detector in a similar place just below the rear view mirror.:bash: I'll see if I can find the statute that was placed on my ticket.
 
Last edited:
That's right r/e California and Minnesota too....

Good thing I live in Seattle. Warning excerpt from Garmin Nuvi manual says...

"State law prohibits drivers in California and Minnesota from using suction mounts on their windshields while operating motor vehicles. " They have to be mounted to the dash instead. I would have been very aggrivated if I spent $$$ on the Nuvi in either of those states not first knowing those laws. California statute (as Spider5 noted) is 26708(a) and Minnesota statute is 2005 sec. 169.71.

For any of the rest of you not in those states who may be interested, I am working on a quick writeup.

JC
 
The wire powering the compass/rear view mirror is another good power source without having to tear anything apart. I wired my v1 there and it works with the key the same as the compass in the mirror.
 
icsfsedod can you post more details/pictures from your install?

I would like to see where you tapped the compass rearview power and how it looks.

JC
 
I'll try to take some photos. The connector to the mirror is on the left side of the mounting arm. Don't remember which pins I tapped. A multimeter will help. Standy by...
 
Last edited:
any progress on this icsfsedod?

icsfsedod said:
I'll try to take some photos. The connector to the mirror is on the left side of the mounting arm. Don't remember which pins I tapped. A multimeter will help. Standy by...

Any info would still be interesting. thanks - JC
 
icsfsedod said:
I'll try to take some photos. The connector to the mirror is on the left side of the mounting arm. Don't remember which pins I tapped. A multimeter will help. Standy by...

Do you happen to know what wires you have to tap? Looking to do the V1 install.
 
I'll check tonight

Ghostrider4450 said:
Do you happen to know what wires you have to tap? Looking to do the V1 install.


Had to have the windshield replaced and the crackhead yanked the V1 cord out. I'll reinstall tonight and take notes & photos.
 
Last edited:
Photo and notes

Do this at your own risk.

Ok, re-installed the Valentine this evening. I forgot how easy it was. The mirror has only two wires going into it. The yellow/white one is the 12v + pos and the grey/black 12v - neg.

The Valentine One doesn't care about polarity (it takes care of adjusting the polarity internally so there is no concern with postive or negative on the wiring harness) , other detectors might, so make sure you know your device and verify the positive and negative wires before connecting anything.

I just cut a short piece of telephone wire(about 6 inches, tinned the ends with solder, then sandwich the wires in with the connector and snap in back into the mirror.

Done in about 5 minutes without tearing the truck apart.

Enjoy!
 

Attachments

  • t4rmirror.jpg
    t4rmirror.jpg
    134.1 KB · Views: 874
Wanted to say thanks for the instructions was able to install the V1 in no time at all on my limited runner - thanks,
 

Members online

Forum statistics

Threads
278,310
Messages
3,554,076
Members
248,016
Latest member
Advally Service

Trending content

Back
Top