The Grey Ghost Build Thread

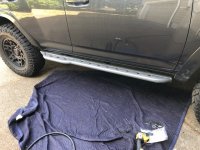
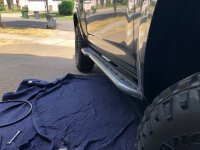
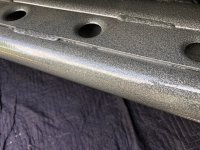
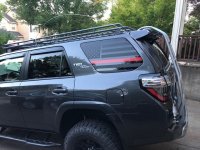
I've started powder coating everything in a dark hammered silver textured finish. The hammered finish will help hide scratches and scuffs better than a solid color.

Passenger slider mounted still need to do the drivers side one.
 

Attachments

  • pass slider coated2.jpg
    pass slider coated2.jpg
    113.4 KB · Views: 2,236
  • pass slider coated3.jpg
    pass slider coated3.jpg
    99.4 KB · Views: 2,272
  • pass slider coated4.jpg
    pass slider coated4.jpg
    115.7 KB · Views: 2,234
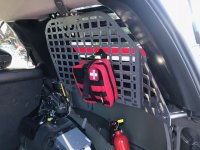
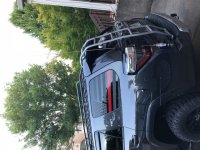
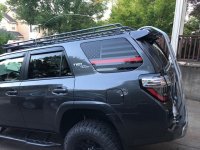
Had the Rago Fabrication Molle panels powder coated the same as my rack and stuff on the outside. A hammered silver. Alsp took the plastic C pillar trim out and painted them black as I hate the TAN colored interior trim, stupid for black leather interior.

So mounted the molle panels tonight. Still have the lower plastic trim out while I do some wiring over the next week for my CB etc.
 

Attachments

  • molle panel.jpg
    molle panel.jpg
    128.1 KB · Views: 2,196
I've started powder coating everything in a dark hammered silver textured finish. The hammered finish will help hide scratches and scuffs better than a solid color.

Passenger slider mounted still need to do the drivers side one.

Nice work and good find
 
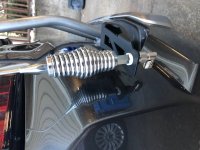
So tonight I started the Rago Fabrication antenna mount install and my 102 inch whip antenna.

The Rago mount went on easy, mounted the antenna and a 90 degree fiting on bottom to prepare for the cable to go thru the plastic when the coax cable arrives.

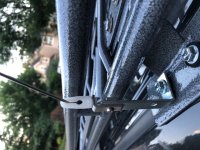
of course when around town and maybe sometimes in the bush I don't want the 8 foot antenna sticking up I wanted to be able to tie it down.

Found a standard whip antenna tie down bracket but needed to find a way to actually mount that bracket. I took a standard L-bracket from the hardware store, screwed the whip tie directly to it. Then drilled a hole in the bottom part of bracket and cut off the excess length and mounted it directly under the bolt holding the roof rack on. Simple and elegant. Later I will probably powder coart or paint the bracket to match the roof rack a bit.
 

Attachments

  • rago bracket installed.jpg
    rago bracket installed.jpg
    89.9 KB · Views: 2,097
  • front bracket.jpg
    front bracket.jpg
    111.1 KB · Views: 2,146
  • curved sideview.jpg
    curved sideview.jpg
    121.6 KB · Views: 2,185
  • extended.jpg
    extended.jpg
    124.9 KB · Views: 2,145
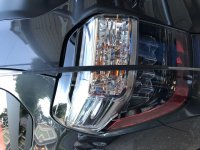
I noticed when the antenna is whipping around or when tied down it hit the tailight a bit. I slid on some thick heat shrink tubing and shrunk it, then did that 2 more times for 3 layers of heavy wall heat shrink which will add some cushioning.
 

Attachments

  • shrinkwraped.jpg
    shrinkwraped.jpg
    105.9 KB · Views: 2,040
  • curved sideview.jpg
    curved sideview.jpg
    121.6 KB · Views: 2,069
Next, I installed a Kenwood 994s headunit, it is "dashcam ready" and has two inputs for rearview and frontview cameras also.

Using the integrated dashcam I can easily look at videos or just turn on front facing camera at anytime and best of all it plugs directly into headunit and I dont have to fiddle with stupid little buttons directly on a dashcam and remember how to use them. I can just easily watch the videos directly on the headunit and change settings etc...

Oh and once you use a Garmin GPS headunit you will wonder how you got by with the factory one. Factory one has so much lag, is not intuitive.

KENWOOD 994S

DNX994S | eXcelon | CAR ENTERTAINMENT | KENWOOD USA

Kenwood DRV-N520 dashcam

https://www.amazon.com/Kenwood-DRV-N520-Recorder-select-receivers/dp/B0711CB4M1

Very cool build. I like this head unit but that bezel surround leaves something to be desired, maybe it's just the angle of the photo. How does it look after you wrapped it?
 
This is a nice build! Quick question, do you have KDSS? Love the TRD PRO tire look with the spacer lift, but I have KDSS on mine and not sure if that would work...
 
Very cool build. I like this head unit but that bezel surround leaves something to be desired, maybe it's just the angle of the photo. How does it look after you wrapped it?

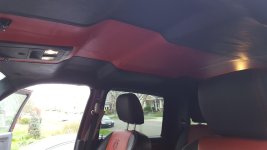
I havn't done any vinyl wrapping yet. Focused right now on getting things functional. I will be going thru the vinyl wrapping in a few weeks so stay tuned. I think I'm also gonna wrap all the A, B, and C pillar trim too. Then also covering the headliner in upholstery vinyl or leather. I did that on my Dodge Ram in black and red leather and it looked badass. I hate the tan interior pieces.

I know there is a lot of space on both sides of the radio. I have seen somewhere where somebody put some of their light switches and things on each side to break it up. I personally think its fine and will look a lot better once it is covered in carbon fiber or something to match the shifter console.
 

Attachments

  • leather headliner installed.jpg
    leather headliner installed.jpg
    124 KB · Views: 2,053
This is a nice build! Quick question, do you have KDSS? Love the TRD PRO tire look with the spacer lift, but I have KDSS on mine and not sure if that would work...

I don't have KDSS so not sure. I wouldn't think KDSS would dictate what wheels and tires you installed?

I just ordered the KING front struts with resi's and adjusters. So waiting a few weeks for those to arrive and will be posting pics.
 
This is a nice build! Quick question, do you have KDSS? Love the TRD PRO tire look with the spacer lift, but I have KDSS on mine and not sure if that would work...

I have been debating powder coating the TRD wheels either in the same hammered silver as the other accessories or in a bronze. Might look stupid in silver I can't decide. dark bronze might look cool though. Wish I was better at photoshop lol
 
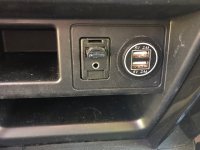
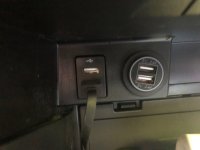
We needed more USB ports for charging phones etc. I piggybacked the wiring off the cigar lighter under radio to install a port in place of the cigar lighter on dash and to the ports in the glovebox.
 

Attachments

  • dash.jpg
    dash.jpg
    81.2 KB · Views: 1,899
  • glovebox.jpg
    glovebox.jpg
    50.8 KB · Views: 1,896
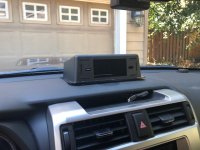
Im trying (like many others) to figure out where to mount the CB radio. I bought the Uniden 980SSB which is a little bigger but had the features I wanted.

I debated installing a bracket behind headliner and mounting it to the roof? Or on top of the dash. Can't decide.

I'm open to any ideas from people
 

Attachments

  • possible dash install.jpg
    possible dash install.jpg
    82.4 KB · Views: 1,890
  • possible roof install.jpg
    possible roof install.jpg
    78 KB · Views: 1,934
So I had my wife sit in the passenger seat while I moved the CB radio to different spots and made sure it wouldnt be in her way or an eyesore. I finally decided on the roof being my favorite spot of the choices I had to choose from.

So roof it is. I was planning to take headliner out anyway to cover it in leather or something and get rid of the ugly ass tan.

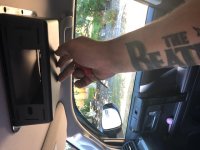
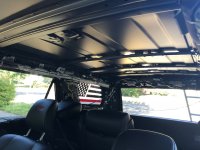
So here it is with the headliner out, bit of a pain but doable just takes a lot of time to remove every pilllar trim piece and grab handles etc.
 

Attachments

  • headliner out1.jpg
    headliner out1.jpg
    116 KB · Views: 1,855
  • headliner out2.jpg
    headliner out2.jpg
    89.5 KB · Views: 1,842
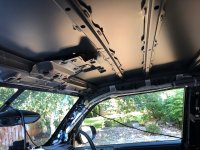
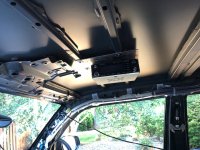
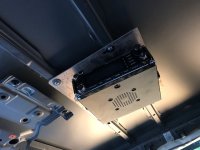
I found a piece of sheet aluminum at work and screwed that with self tapping screws to the roof braces. I then mounted the radio bracket to that. Later when the headliner is installed that gives a solid mounting surface to screw the radio bracket to.
 

Attachments

  • CB roof1.jpg
    CB roof1.jpg
    117.6 KB · Views: 1,865
  • CB roof2.jpg
    CB roof2.jpg
    71.4 KB · Views: 1,843
this headliner wrapping will take me a couple weeks probably to get the material etc. so I will just be using duct tape to stick various wires to the roof for now out of our way. Thinking I should lay sound deadner on the roof while Im at it.

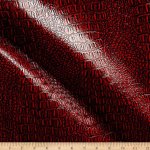
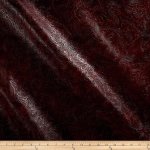
It would be a lot of black with just solid black leather. Been contemplating doing something different with the interior that nobody else has done. I'm kinda leaning towards this red alligator pattern for the headliner. Crazy huh? lol

Well I like to customize and I think it would look good and break up all the black while still getting rid of the ugly tan color.
 

Attachments

  • red gator vinyl.jpg
    red gator vinyl.jpg
    142.2 KB · Views: 1,867
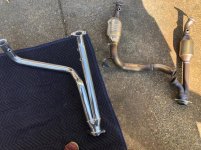
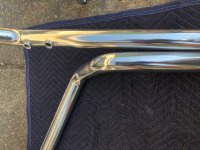
Got my URD Y-pipe finally. Some have questioned if it creates heat soak into the transmsission pan since it goes so close to it. Im not sure but to be safge and cover all my bases in the future I went ahead and had it ceramic thermal coated. That reduces the temp by at least 100 degrees. the side effect it looks nice even though noone will ever see it.

The new pipe comes with an extra 02 sensor plug in case you want to add something later. I plugged it for now with the provided plug.
 

Attachments

  • new pipe side by side.jpg
    new pipe side by side.jpg
    72.3 KB · Views: 1,805
  • new pipeclose.jpg
    new pipeclose.jpg
    130.5 KB · Views: 1,797

Members online

Forum statistics

Threads
278,307
Messages
3,554,050
Members
248,016
Latest member
Advally Service

Trending content

Back
Top