McNally Gen2 Oil Catch Can Install
7Apr18 71,680mi
References:
Air-Oil Separator About to Install My Oil Catch Can
I spent many long hours doing research and was going to skip doing one. But then figured if I was going to do a CAI and exhaust, might as well make an attempt to keep it clean.
Basically a catch can is a remotely mounted reservoir to delay the gases collected from the crankcase from reaching the intake manifold. They both roughly filter the air, and add time for the air to cool and the atomized oil, blow-by gases, and water vapor to condense. Why not just vent this pleasant mixture overboard and not worry about it? They used to actually, until a study realized that it's these crankcase gases that were causing about half of the automotive air pollution.
During WWII, a scientist had to invent a way for these gases to remain within a partially submerged tank should the need arise for it to ford a water crossing. Obviously venting into the cabin was a bad idea. The crankcases at the time had a small filtered fresh air intake, and a draft tube. The draft tube basically used the low pressure area behind the vehicle to draw the crankcase gases into the slipstream. Moving the draft tube to feed into the intake manifold, the vacuum of the engine would draw the gasses out, include them in the intake mixture, and pass them into the engine where they would be burned. Thus is Positive Crankcase Ventilation, the PCV system. A one-way check valve prevents air & gasses from flowing back into the crankcase, your PCV Valve. The catch can is inserted into the system between the PCV valve and the intake manifold. Of course there's pros and cons to any mods, here's some that I found in my research:
Pros: Less oil & crankcase gases circulated into the intake manifold, Less deposits in manifold, Marginally increased fuel economy, Longer catalytic converter life
Cons: Cans can freeze, Cheap cans don't do actually separate anything, Have to empty (more often for smaller cans), Can be messy, Practically required for forced air induction
So I started trying to decide which catch can to source and install. I spent even more time trying to decide, basically ruling out anything from eBay or Amazon due to uncertain quality. As I don't tend to pop the hood very often, I wanted a can big enough I didn't have to empty it every week. So there went everything that was smaller than 8oz. In the end I got tired of looking for the right catch can and just bought the one I thought would separate the best. Hence the
McNally Gen2 Oil Catch Can, although
42DD Ultimate Catch Can was strongly considered. In the end it was the centrifugal design and easy clean drain of the McNally that sold me. Buy once, Cry once. I regret not going with the 42DD.
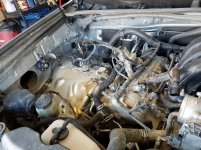
Today was just supposed to be a test fitting, or mounting only. But once I got started I couldn't help myself. Holy crap this catch can is big, probably too big. But it was paid for, in hand, and I was ready to finally install it. However, finding a place for that large of a can was a bit of a challenge. The options were pretty much limited to somewhere in front of the radiator, below the headlights behind the plastic bumper, or behind the air box on the passenger side. I did consider mounting it on the front right post on the intake manifold, but the existing tubing in that area wasn't very movable. Our PCV system is on the driver's side, but at least there was a ton of tubing in the kit.
Actually I was actually VERY disappointed that a $400 kit. The outer can feels like thin aluminum, and it didn't even include everything I needed to mount the catch can. Seriously I had to take the catch can to Lowes to buy hardware the secure the can to the provided mount..WTF?! I should have just sent the damn thing back at that point, but I didn't want the hassle. So $30 worth of stainless metric (so much for made in the USA) hardware later, I was able to mount the can to the provided mount. I grabbed a few bolts to secure the mount to the truck, and some needed tubing adapters. The long tube in the kit was 1/2", 4Runner PCV tube is only 3/8". There was a small piece of 3/8" in the kit, but not enough to complete an install. The provided drain tube is cheap vinyl fishtank type tubing, not suitable to dropping down near the exhaust manifold to get under the truck.
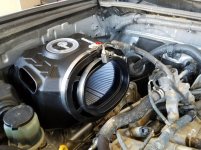
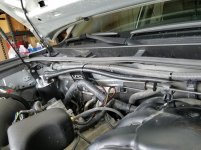
I went for the behind the airbox location, it was the simplest to get to, and I didn't feel like removing the bumper again. The can is rather tall, so just mounting to an existing OEM threaded hole wasn't going to work, I pretty much needed it on the firewall. I did have to move one of the electrical connectors, and associated mounting bracket from the truck in order to get it to fit. At least in this location I don't have to worry about the can freezing as the engine should keep it warm enough in the winter. The only guys I found with freezing problems had mounted it in the air flow in front of the A/C condenser, another reason to avoid the front of the truck. It won't work as well in the summer heat, but there's always a trade off.
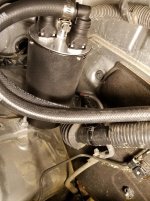
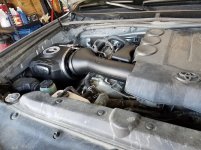
My mounting bolt of choice was one of the two on the hood lift arm mount, and I grabbed a longer one with my hardware run. Sadly when you remove that bolt, the arm pivots down, and in order to thread it back again you have to simultaneously lift the corner of the hood and tighten the bolt. Interesting, but not impossible alone. Some barb connectors, pipe clamps, zip-ties, and it was mostly mounted. I did end up cutting the OEM PCV tube so that the OEM bends worked to my advantage, and it kept most of the foam heat wrap. Sorry bad pic, from above intake manifold, not easy to photograph those connections.
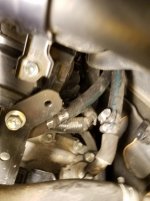
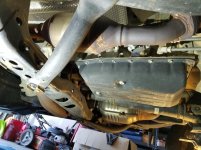
I tried to keep the lines high away from the engine and the heat on the firewall, using zip-ties to hold them to the existing wiring harness. I did leave the pieces too long, but I also didn't plumb the easy drain with that cheap waiting-to-melt tubing out the bottom of the truck either. So when I go back to finish this project properly (in warmer weather and better light), I'll shorten the lines up to a more appropriate length. The provided 90-degree quick detach mounts were a royal PITA to get into the tubes, I spent an hour just putting 2 of the connectors on. They didn't even get all the way to the flange, even with some Dawn lubricant.
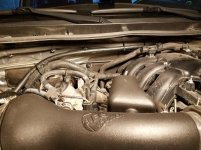
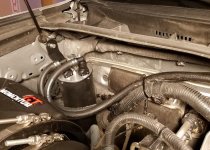
No vacuum leaks that I could find, although the revs did stay high (1000-1500rpm) longer than normal on initial start. Subsequent starts were normal. Had a test drive, ran normal driving conditions, and smashed WOT until I hit ~80mph (top of second gear). The only noise I heard was the CAI. We'll see just how much crud it collects. Next time I'm into the dealer for service I'll probably have them do an intake manifold cleaning as well, hoping that it stays clean now.
EDIT: 11Jun18
I received an updated version of the McNally catch can, with a much nicer and reinforced can. However, I also received an email from the designer, Tom at The Catch Can Guys. Tom basically said that McNally didn't properly execute his design, and he's abandoning their effort, starting anew with his own Vortex design. I'm on the fence about sending back both McNally cans (meaning I have to uninstall all of it), and letting him send me the properly manufactured design. I've not even drained the can after the initial install as of yet.
I also added a new decal to the truck, a little subtle, but if you know....