The Idiot Thread

10Feb11 70310mi
[MENTION=139789]RagoFabrication[/MENTION] 5th Gen 4Runner Modular Factory Rail Support System

Thanks to help from: [MENTION=135421]Ohio_Steve[/MENTION], [MENTION=166962]4RN4FUN[/MENTION], [MENTION=154178]OhioJeff[/MENTION], @JFMP, [MENTION=120994]SalsaRed[/MENTION], and a couple others


I drove up to 4RN4FUN's place and started helping with his Gobi Stealth install. After a taco party (real tacos, not Tacomas), and some fun in the snow for a photo op, we pulled my truck into his garage. Part of the crew helped finish his Gobi & ladder, while we started on the RagoFab crossbeams for my truck.


View attachment 285150

View attachment 285151


The install actually went pretty easily. I had watched the install video a couple times, so I had a good idea of what to do. [MENTION=139789]RagoFabrication[/MENTION], we actually found it simpler to install the Rago crossbars into the OEM side rails by installing the brackets to the crossbars, then sliding them into the OEM side rails. We tried a couple with the brackets already in the side rails and then getting the crossbars in became troublesome. I could see doing as in the video if you're doing all of one side and then the other, but it really was simpler to just slide the crossbars into the rails with the brackets attached and finger tight (just getting into the nylon). Actually the most difficult part was keeping the sockets on the nuts to tighten the brackets to the crossbars, they aren't very deep so there wasn't much for the socket to grip to. I managed a dent in the roof when a socket let go and went flying out of my hand, thankfully not smashing in my sunroof. The truck got another character mark and small story proving my screen name is still applicable.


View attachment 285152

View attachment 285153


I was a little worried about increased wind noise, but even with the radio and heater/fan off at 80mph I couldn't hear anything more than the road noise and engine. I'll check it with windows down once it is warmer and not dropping freezing rain! Very happy an impressed with the rails. There was very little flex even with my large frame kneeling on them, and weren't close enough to touch the roof. From ground level you can't tell there's a serious mounting system up there, but from above it's impressive and low profile. I didn't realize the Toyota crossbeams only had plastic ends, which explains their weight restriction. I would have no qualms putting some serious weight up on the Rago crossbars.


View attachment 285154


[MENTION=122201]Friggin Idiot[/MENTION] I was super impressed with how these turned out! Great looking truck!


Sent from my iPad using Tapatalk
 
This has got to be the smartest idiot thread i've ever seen. If you had to pick one mod as your favorite, what would it be?

Honestly the HID conversion has been the most practical. Even though it took me way beyond my comfort zone at the time, the SSO bumper with BD lights has probably been my favorite.


Thanks for the tag!

Glad you like them. Email customer service [email protected] and let them know Melissa said to send you a free 4Runner patch for including us in your build write-up. :-)

Thanks I'll do that! Everything about RagoFab has impressed me, customer service before/during ordering, updates and info during lead time, packaging, and product. I just have to find some accessories to mount up top now!
 
Last edited:
27Feb18 70,898 mi
aFe MomentumGT Pro DryS Cold Air Intake
Install time: About 90 mins
Tools: Philips & Standard Screwdriver, 10mm box wrench, short handle socket driver, Torx20 driver, 10 12 13mm sockets, 11mm deep well socket

EDIT: 11Jun18 The aFe MomentumGT CAI was removed because it was not compatible with the URD/Whipple SC

I wasn't particularly looking for a CAI, but was doing research on them in conjunction with the URD exhaust I am planning on. Then I read where [MENTION=160384]cw360[/MENTION] posted this thread and a very helpful installation video. Don't worry, I read The Truth About CAI. I decided if I was going to do an exhaust, that an intake would be a natural pairing. I briefly considered the Magnuson Supercharger Intake, but quickly ruled it out for financial concerns.... my tax return wasn't that big!

Having watched the installation video above, I figured this would be easy. I was low on gas yesterday so filled up with premium, some people claim better mileage with it so I thought I'd give it a try. Then when I got home for the day, I disconnected the negative battery terminal so the ECU would reset.

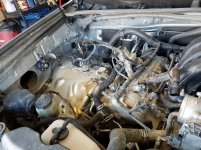
Today I started the install after lunch. Most things were simple, but I had the hardest time trying to remove the clips for the factory wiring harness from the OEM intake. Once I found out there wasn't anything on the underside to break, they came right out with a standard screwdriver. That was honestly the hardest part of removing the factory intake. Then I had to clean up a little mud.

aFe - stock removed.jpg

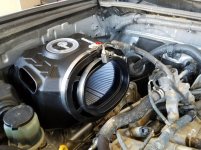
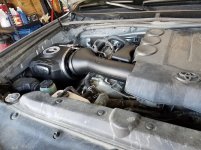
Installation of the aFe was simple, and well explained in their instructions. Install spacer beneath air box, install air box, install filter, install reducer on throttle body ensuring all clamps were in place but not tightened. Install MAF sensor and crankcase intake nipple to tube. Install tube, tighten all clamps, reconnect crankcase vent and fuel rail vacuum line. I didn't have any issues, everything went together as advertised. There is the one exception that the air box does not sit flush against the inside fender, there's about a finger width gap. So even with the plug in there's surely some air drawn from the engine compartment, albeit pretty far away and from a different direction than most of the heat sources.

aFe - box and filter.jpg
aFe - completed.jpg

More than a few people have said that the truck died after they started the first time, mine didn't. Before starting I turned the truck to ON and waited until the fuel pump stopped running before attempting to start. It ran a long time too, at least 20 seconds. I'd wager to guess that removing that vacuum line for the pressure regulator allowed the fuel to gravity feed back down the lines leaving a large amount of air in the fuel rail.

There were some things to note though.
The replacement MAF sensor screws are Torx20... WHY?! What's wrong with philips or hex?
There's a small note near the end of the instructions that power gains are computed without the plug in place. Having driven with the plug in and out, I can absolutely say that out is the way to go for power.
The truck now growls. Below 3000rpm it's slight, though noticeable with the windows down and radio off. With the pedal smashed to the floorboard this thing sounds much more pronounced and almost feral. It actually impressed me, I didn't think it would be so prominent. I'm sure to lose some gas mileage with the ear-brain-foot-noise issue.

I previously had ideas of making the hole in the fender bigger for better intake, not going to happen. I'll probably eventually find a way to feed the plug intake hole from a tube source routed near the grill, but I don't think I'm willing to tinker with it enough to use the factory hood scoop. I might eventually get it to work, but it wouldn't look very nice without a 3D printer, laser cutter, or other exotic equipment I don't have access to. Maybe aFe will come up with something.

I also ordered my URD Exhaust parts tonight!
 

Attachments

  • aFe - stock removed.jpg
    aFe - stock removed.jpg
    110.6 KB · Views: 2,373
  • aFe - box and filter.jpg
    aFe - box and filter.jpg
    88 KB · Views: 2,346
  • aFe - completed.jpg
    aFe - completed.jpg
    104.3 KB · Views: 2,345
Last edited:
Love the look of the Rago crossbeams. Have you had a chance to strap stuff down to it and use it as a rack? It is so close to the roof I worry about clearance issues strapping stuff down.
 
Love the look of the Rago crossbeams. Have you had a chance to strap stuff down to it and use it as a rack? It is so close to the roof I worry about clearance issues strapping stuff down.

I've not loaded anything up top yet, but I did climb up there myself just after the install. My hefty weight on just my knees on only two of the crossmembers wasn't enough to flex them to the roof. You'd need a mighty heavy load with a small footprint in the center to flex them enough to touch the roof, at which point you're overloading the rack anyway. Think 8+ft steel girder.
Any distributed load will have no problem up there.
 
I've not loaded anything up top yet, but I did climb up there myself just after the install. My hefty weight on just my knees on only two of the crossmembers wasn't enough to flex them to the roof. You'd need a mighty heavy load with a small footprint in the center to flex them enough to touch the roof, at which point you're overloading the rack anyway. Think 8+ft steel girder.
Any distributed load will have no problem up there.

Thanks for the feedback. You mentioned no flex earlier which is good, I was more worried about how easy it is to strap something down with low clearance. I think bungies would probably go in nice enough, but I assume getting a bolt to come up through a hole requires removing the side rails to lift everything up.

I have never used a roof rack, and don't anticipate using one often, which is why I really like the rago bars. They seem like they are way less in the way and obtrusive than a regular rack, but for the few times when I need to throw some stuff up top I want to know if I can actually secure it easily.

Thanks again for your feedback, not trying to jack your thread.
 
[MENTION=139789]RagoFabrication[/MENTION] The Modular Factory Rail Support System is exactly what I've been looking for. I'm in. It's perfect for my needs.

Thanks to the Friggin Idiot for the photos and the write up.
 
Last edited:
Just wanted to thank the [MENTION=122201]Friggin Idiot[/MENTION]. I used your Airlift 1000 write up as my instruction manual. I've worked on many an airbag in the past but your install thread was perfect for the 4Runner specifics. The only thing I did differently was remove the springs and cut the bump stops with my sawzall. Thanks.
665245921bf7f90fd7b938bdede0798e.jpg


Sent from my SM-G920P using Tapatalk
 
McNally Gen2 Oil Catch Can Install

7Apr18 71,680mi
References: Air-Oil Separator About to Install My Oil Catch Can
I spent many long hours doing research and was going to skip doing one. But then figured if I was going to do a CAI and exhaust, might as well make an attempt to keep it clean.
Basically a catch can is a remotely mounted reservoir to delay the gases collected from the crankcase from reaching the intake manifold. They both roughly filter the air, and add time for the air to cool and the atomized oil, blow-by gases, and water vapor to condense. Why not just vent this pleasant mixture overboard and not worry about it? They used to actually, until a study realized that it's these crankcase gases that were causing about half of the automotive air pollution.
During WWII, a scientist had to invent a way for these gases to remain within a partially submerged tank should the need arise for it to ford a water crossing. Obviously venting into the cabin was a bad idea. The crankcases at the time had a small filtered fresh air intake, and a draft tube. The draft tube basically used the low pressure area behind the vehicle to draw the crankcase gases into the slipstream. Moving the draft tube to feed into the intake manifold, the vacuum of the engine would draw the gasses out, include them in the intake mixture, and pass them into the engine where they would be burned. Thus is Positive Crankcase Ventilation, the PCV system. A one-way check valve prevents air & gasses from flowing back into the crankcase, your PCV Valve. The catch can is inserted into the system between the PCV valve and the intake manifold. Of course there's pros and cons to any mods, here's some that I found in my research:
Pros: Less oil & crankcase gases circulated into the intake manifold, Less deposits in manifold, Marginally increased fuel economy, Longer catalytic converter life
Cons: Cans can freeze, Cheap cans don't do actually separate anything, Have to empty (more often for smaller cans), Can be messy, Practically required for forced air induction

So I started trying to decide which catch can to source and install. I spent even more time trying to decide, basically ruling out anything from eBay or Amazon due to uncertain quality. As I don't tend to pop the hood very often, I wanted a can big enough I didn't have to empty it every week. So there went everything that was smaller than 8oz. In the end I got tired of looking for the right catch can and just bought the one I thought would separate the best. Hence the McNally Gen2 Oil Catch Can, although 42DD Ultimate Catch Can was strongly considered. In the end it was the centrifugal design and easy clean drain of the McNally that sold me. Buy once, Cry once. I regret not going with the 42DD.

Today was just supposed to be a test fitting, or mounting only. But once I got started I couldn't help myself. Holy crap this catch can is big, probably too big. But it was paid for, in hand, and I was ready to finally install it. However, finding a place for that large of a can was a bit of a challenge. The options were pretty much limited to somewhere in front of the radiator, below the headlights behind the plastic bumper, or behind the air box on the passenger side. I did consider mounting it on the front right post on the intake manifold, but the existing tubing in that area wasn't very movable. Our PCV system is on the driver's side, but at least there was a ton of tubing in the kit.

Actually I was actually VERY disappointed that a $400 kit. The outer can feels like thin aluminum, and it didn't even include everything I needed to mount the catch can. Seriously I had to take the catch can to Lowes to buy hardware the secure the can to the provided mount..WTF?! I should have just sent the damn thing back at that point, but I didn't want the hassle. So $30 worth of stainless metric (so much for made in the USA) hardware later, I was able to mount the can to the provided mount. I grabbed a few bolts to secure the mount to the truck, and some needed tubing adapters. The long tube in the kit was 1/2", 4Runner PCV tube is only 3/8". There was a small piece of 3/8" in the kit, but not enough to complete an install. The provided drain tube is cheap vinyl fishtank type tubing, not suitable to dropping down near the exhaust manifold to get under the truck.

I went for the behind the airbox location, it was the simplest to get to, and I didn't feel like removing the bumper again. The can is rather tall, so just mounting to an existing OEM threaded hole wasn't going to work, I pretty much needed it on the firewall. I did have to move one of the electrical connectors, and associated mounting bracket from the truck in order to get it to fit. At least in this location I don't have to worry about the can freezing as the engine should keep it warm enough in the winter. The only guys I found with freezing problems had mounted it in the air flow in front of the A/C condenser, another reason to avoid the front of the truck. It won't work as well in the summer heat, but there's always a trade off.
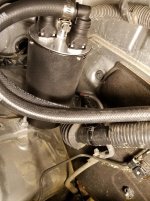
bracket removed.jpg

My mounting bolt of choice was one of the two on the hood lift arm mount, and I grabbed a longer one with my hardware run. Sadly when you remove that bolt, the arm pivots down, and in order to thread it back again you have to simultaneously lift the corner of the hood and tighten the bolt. Interesting, but not impossible alone. Some barb connectors, pipe clamps, zip-ties, and it was mostly mounted. I did end up cutting the OEM PCV tube so that the OEM bends worked to my advantage, and it kept most of the foam heat wrap. Sorry bad pic, from above intake manifold, not easy to photograph those connections.
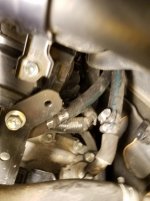
PCV Tube.jpg

I tried to keep the lines high away from the engine and the heat on the firewall, using zip-ties to hold them to the existing wiring harness. I did leave the pieces too long, but I also didn't plumb the easy drain with that cheap waiting-to-melt tubing out the bottom of the truck either. So when I go back to finish this project properly (in warmer weather and better light), I'll shorten the lines up to a more appropriate length. The provided 90-degree quick detach mounts were a royal PITA to get into the tubes, I spent an hour just putting 2 of the connectors on. They didn't even get all the way to the flange, even with some Dawn lubricant.
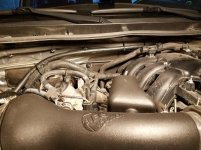
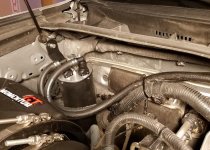
firewall tubing.jpg
Installed.jpg

No vacuum leaks that I could find, although the revs did stay high (1000-1500rpm) longer than normal on initial start. Subsequent starts were normal. Had a test drive, ran normal driving conditions, and smashed WOT until I hit ~80mph (top of second gear). The only noise I heard was the CAI. We'll see just how much crud it collects. Next time I'm into the dealer for service I'll probably have them do an intake manifold cleaning as well, hoping that it stays clean now.

EDIT: 11Jun18
I received an updated version of the McNally catch can, with a much nicer and reinforced can. However, I also received an email from the designer, Tom at The Catch Can Guys. Tom basically said that McNally didn't properly execute his design, and he's abandoning their effort, starting anew with his own Vortex design. I'm on the fence about sending back both McNally cans (meaning I have to uninstall all of it), and letting him send me the properly manufactured design. I've not even drained the can after the initial install as of yet.


I also added a new decal to the truck, a little subtle, but if you know....

decal.jpg
 

Attachments

  • decal.jpg
    decal.jpg
    50.2 KB · Views: 1,998
  • bracket removed.jpg
    bracket removed.jpg
    92.6 KB · Views: 2,001
  • firewall tubing.jpg
    firewall tubing.jpg
    95 KB · Views: 2,015
  • Installed.jpg
    Installed.jpg
    95.1 KB · Views: 2,036
  • PCV Tube.jpg
    PCV Tube.jpg
    52 KB · Views: 2,074
Last edited:
17Apr18 71,800mi
Install: URD Off-Road Y-Pipe Stainless 3" Mk3 Cat-Back MAF Calibrator
It took me some time to line up friends to help install. [MENTION=168818]Ghost120[/MENTION] came over along with the co-worker who I helped install the lift on his Taco last year. What I thought should just be a bolt on kit, wasn't exactly that. In retrospect I would have been better off to let someone install it for me, than spend as much time and effort as I did. Some before pictures:

OEM Y-pipe.jpg
OEM Mid Muffler.jpg

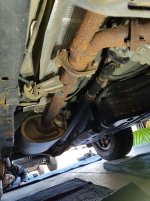
Removing the factory exhaust was interesting. The nuts on the flange between the muffler and tailpipe were rusted solid. No amount of PB Blaster was going to get them off. We left this alone initially and decided to see just how much of a problem the remainder of the nuts were going to be. Thankfully, with a breaker bar and my new Milwaukee impact wrenches everything else came off just fine. There's a bracket bolted to the top side of the frame beneath the driver's seat that held the cat in place there. It took some wriggling and swearing, but after clearing the mud from the bolt heads we got it off, and the OEM y-pipe free.
Behind the spare tire, there's a bracket which protects the spare from the tailpipe heat which required removal. After that it took the sawzall to cut both ahead of and behind the stuck muffler/tailpipe connection to free it. We also used a liberal amount of Dawn/water solution to lube up the rubber hangers, those weren't exactly easy to move. Eventually we got it all out.

removed y-pipe.jpg
Removed mid muffler.jpg

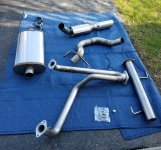
Time for shiny and new!
shiny.jpg

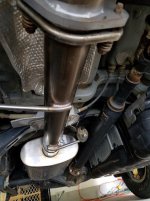
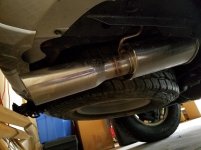
We started at the rear, intending to work out way forward. The muffler is the midpoint of the system, being slip-fit on both ends. The tailpipe was simple being two pieces instead of OEM one, so it went right up. The muffler (Magnaflow) was pretty hefty and required helping hands. Since it has no hangers of its own it's supported by the tailpipe and the mid-pipe. I don't know if it was intentional by design or accidental but my mid-pipe was a little too long. A little time with the angle grinder and it was the appropriate length. Now to the y-pipe, it has to be put in place from the front over the frame crossmember. And here's where things really find trouble, the holes on the flanges which bolted to the OEM manifold/cats seemed too narrow. Well shit, we only cut the OEM exhaust because this was supposed to be a bolt on! We got the idea to drill out the holes a little bigger. Remove the y-pipe and set it in the drill press. It worked for 3 of the 4 holes, which turned out to be enough to get it to fit.


EDIT:
Response from URD Gadget said:
What happens on some trucks, is that the flange on the cats bow and the that causes the studs to splay outward. We do oval shape the holes to account for this, but sometimes it is more than others.
So the problem was my truck, especially being higher mileage with lots of hot/cold cycles.


However, in trying to fit it up the first time we had destroyed the threads on the outside bolts on each side of the OEM manifold/cat. DOH! Well at least it was all in place and we could get one nut tight on each side. We tightened everything we could and cleaned up. It started up, but with a pretty bad exhaust leak. We kind of figured that given the lack of pressure on the manifold to y-pipe connections. But it would be enough to get it all together and limp it to a shop who could fix it for me properly. Except the shop couldn't work on it until Monday. I ended up with a Hyundai Elantra as a rental for the weekend so I could get to and from work. So today I got back, the shop having replaced 3 of the 4 bolts on the OEM manifold/cat and tightening up everything for me.

URD Y-pipe.jpg
URD Mid Muffler.jpg
URD Tailpipe.jpg
 

Attachments

  • OEM Y-pipe.jpg
    OEM Y-pipe.jpg
    83.9 KB · Views: 1,956
  • OEM Mid Muffler.jpg
    OEM Mid Muffler.jpg
    84.6 KB · Views: 1,879
  • removed y-pipe.jpg
    removed y-pipe.jpg
    82.8 KB · Views: 1,870
  • Removed mid muffler.jpg
    Removed mid muffler.jpg
    88 KB · Views: 1,873
  • shiny.jpg
    shiny.jpg
    135.9 KB · Views: 1,883
  • URD Y-pipe.jpg
    URD Y-pipe.jpg
    62.4 KB · Views: 2,132
  • URD Mid Muffler.jpg
    URD Mid Muffler.jpg
    68.6 KB · Views: 1,876
  • URD Tailpipe.jpg
    URD Tailpipe.jpg
    54.1 KB · Views: 1,831
Last edited:
URD Install Continued....
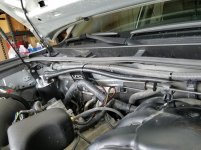
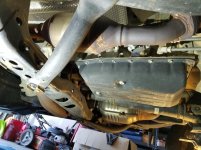
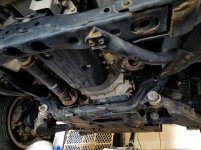
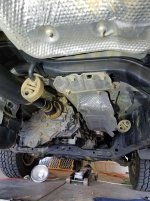
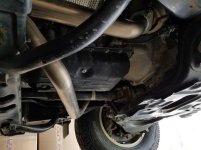
The URD Y-pipe doesn't seem to subtract from the ground clearance, and looks as if it should be compatible with skid plates as well.

URD clearance.jpg

The MAF Calibrator install was simple plug and play... kind of. It is to be installed between the OEM harness and the MAF sensor, easy enough. Except it also goes between the harness and the passenger side center cylinder coil pack. In order to access that connector I had to remove some sort of regulator or pump from the top of the head (3x 12mm nuts, 2x 10mm bolts). Once the connections have been made it's easy enough to reinstall. I used the supplied heavy duty velcro to mount the black box on the firewall.
EDIT: 11Jun18 The MAF Calibrator has been removed because it wasn't compatible with the URD/Whipple SC


I also took some time today to shorten up the tubes for the oil catch can, and added the drain tube down inside the passenger wheel well. I haven't gone for a spirited drive yet as it was school bus hour by the time I cleaned up today. I'll post more thoughts on the exhaust performance and sound later.
URD MAF calibrator.jpg
Catch Drain.jpg
 

Attachments

  • URD clearance.jpg
    URD clearance.jpg
    51.7 KB · Views: 2,034
  • URD MAF calibrator.jpg
    URD MAF calibrator.jpg
    88.2 KB · Views: 1,977
  • Catch Drain.jpg
    Catch Drain.jpg
    48.9 KB · Views: 2,009
Last edited:
URD Install Continued....
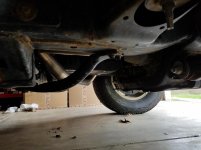
The URD Y-pipe doesn't seem to subtract from the ground clearance, and looks as if it should be compatible with skid plates as well.

View attachment 293673

The MAF Calibrator install was simple plug and play... kind of. It is to be installed between the OEM harness and the MAF sensor, easy enough. Except it also goes between the harness and the passenger side center cylinder coil pack. In order to access that connector I had to remove some sort of regulator or pump from the top of the head (3x 12mm nuts, 2x 10mm bolts). Once the connections have been made it's easy enough to reinstall. I used the supplied heavy duty velcro to mount it on the firewall.

I also took some time today to shorten up the tubes for the oil catch can so things look a little cleaner. I also added the drain tube down inside the passenger wheel well. I haven't gone for a spirited drive yet as it was school bus hour by the time I cleaned up today. I'll post more thoughts on the exhaust performance and sound later.
View attachment 293674
View attachment 293675

Nice ! How does the exhaust sound with the y-pipe ? Got any videos ?
 
How close is the engine pipe to the transmission pan? Seems there would be a lot of extra heat soak into the transmission which is of course not a good thing. Also, did you notice any real difference in performance or economy?
 
URD Y-pipe, Mk3 3" Exhaust, & MAF Calibrator Initial Follow-up

Fuel mileage over the last several months - BP brand unless otherwise noted, results calculated not computer display
87 octane 10% ethanol: City 14.5mpg, Mixed 16.5mpg, Highway 17.2 mpg

ECU Reset, aFe MomentumGT Intake
93 octane 10% ethanol: City 14.6mpg, Mixed 16.9mpg, Highway ????

ECU Reset & Install URD Y-pipe, Mk3 3" Exhaust, & MAF Calibrator
93 octane 10% ethanol City ????, Mixed 17.3mpg, Highway 18.1mpg
Brand ? 90 octane ethanol-free Highway 20.5mpg

I didn't reset the ECU before the ethanol free run, because it's not something I have access to on a regular basis. The government subsidized corn farmers of Ohio have basically eradicated the ethanol free gas anywhere but at the marinas of the area lakes. It's kind of difficult to fill a truck on shore from a pump that's 30+ feet out on a floating dock, not to mention you'd have to pay an arm and a leg for it. I'm beating a dead horse, but I'll post it again:
276440d1511934442-idiot-thread-mr-mackey-ethanol-bad-mmmkay.jpg


This is louder than I expected, to the point of actually being loud when accelerating. Oddly it's almost stock quiet when cruising <70mph. With cruise set 70+mph you'll get some drone. It did get a little quieter after being broken in for about a week after install. While extremely slight and only heard with windows down outside of the city, I do like the low level rumble/pop when letting off the throttle for braking. For those who were concerned about heat transfer from the Y-pipe to the transmission, I don't think it's an issue. There's enough space for a good amount of airflow above and below the pipe. I did consider and research wrapping that section of the Y-pipe with header wrap, however concluded that it would only end up holding water and road salt against the exhaust causing it to rust more quickly. I would be wary of restricting the airflow by installing a skid plate below the new y-pipe, although can see the need for it as I added a few dents to the y-pipe last week in TN.

EDIT: The reason the exhaust seemed loud was because of an exhaust leak. See these posts for initial fix, and permanent fix.
 
Last edited:
03May18 Holston Mountain TN

For vacation I ran down to my folks' place near Watauga Lake TN. I did some research ahead of time and found the Forest Service Maps, specifically Motor Vehicle Use Maps (MVUM), for the area. In looking at the Google map for the same area, Blue Hole showed up near road 56. Apparently it's a local waterfall and swimming hole that that's about 1/2mi from the parking area. It was pretty, though the water was still pretty cool as it's mostly mountain springs. That didn't stop me from wading out barefoot to relax for a while. We didn't get pictures of the lower waterfall and swimming hole area as there were a few people down there, but it was a fair size.

mom.jpg
luke.jpg


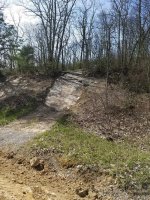
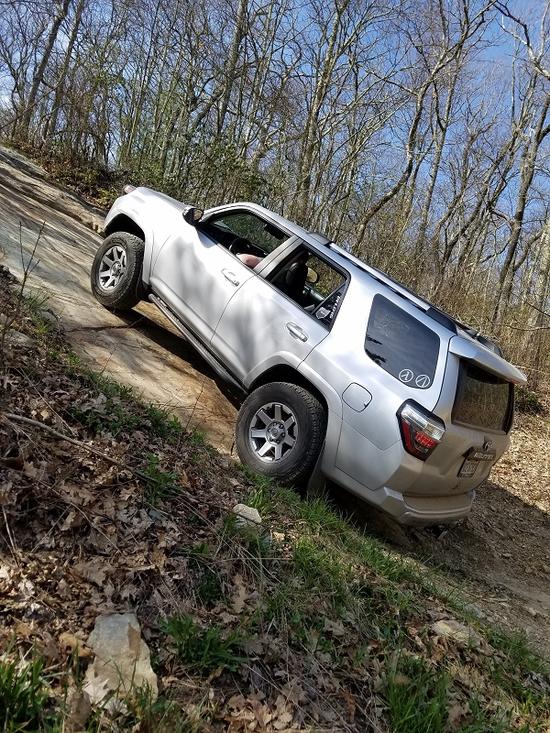
After getting back to the truck we crawled a leisurely 10mph up the rest of the mountain to the top driving mostly graded gravel and enjoying the peace and quiet of the woods and scenery. While driving up there was a nice little climb that I wanted to try. But we were alone, and the area at the top looked pretty narrow to turn around without falling off the other side. So I decided just to climb a bit and then let the truck coast back down.

hill.jpg
climb.jpg
295956d1525403926-what-did-you-do-your-5th-gen-today-ups.jpg


Eventually we made it to the top of the mountain noted by several radio and tv towers, an FAA radio transmitter, the end of the gravel road, and some spectacular views through the trees. The MVUM showed that road 202 continued all the way down the mountain back towards town and I wanted to give that a try. We found the entrance and started down, finding the ride a little bouncy as I didn't air down because I didn't think we'd get very far and initially it looked pretty sedate. We had fun and made it past a couple trail markers. But after the second marker the further we worked our way down, the more into the shadow of the mountain we got, the trail got narrow to the point of folding in the mirrors, mom wasn't familiar enough with the vehicle to drive or spot properly, we didn't have much in the way of recovery gear (no winch, come-along, or hi-lift), no other vehicles, and no way to call for help outside of cell phones with no signal. :yield: But we made it about 1.5 miles before turning around, and probably another 4+mi to go to hit pavement again.
We tried to turn around in a creek bed, which I thought was a little too narrow. It was, and I backed into a stump hidden behind other vegetation. I hit it hard enough that I heard a pop instead of a crunch, but mom said it was ok. We found another place to turn around, and worked our way back out. Here's the dashcam video, no music so I don't have to deal with copyright issues. Uphill starts about 21:25 and is much faster than downhill.


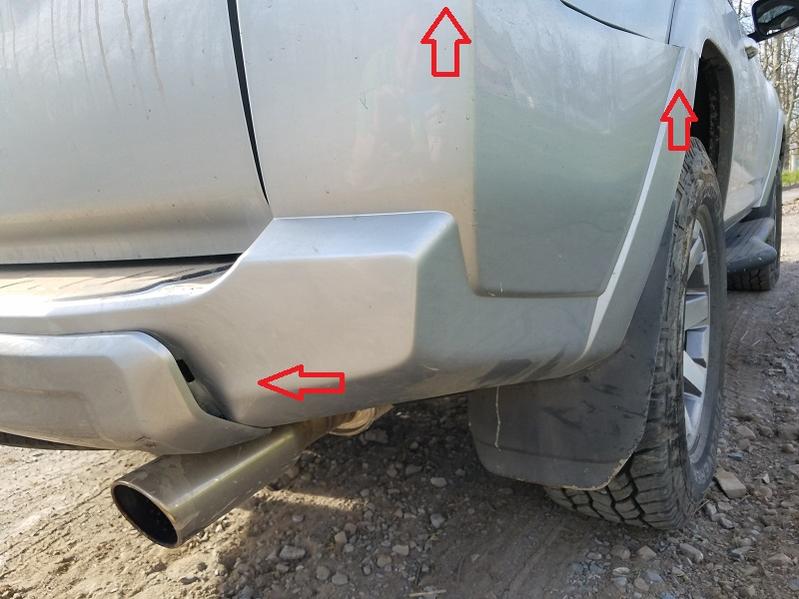
Once we got back to the gravel road I inspected for other damage, found a couple dents in the new URD Y-pipe, and the passenger side rear bumper out of place from the stump which hit just to the right of the trail valence.

295957d1525403934-what-did-you-do-your-5th-gen-today-bumper.jpg


So I broke out the tool kit, removed all the connectors right of the trailer hitch, got everything back into place best I could, and reinstalled the connectors. It's securely attached, but I broke at least 2 of the clips, and there's a small gap around the taillight housing.

Lessons learned:
There's no such thing as too much recovery gear.
Always have a tool for clearing trees/branches from the trail.
If you aren't sure you can fit, you can't.
Have a radio so that you're not reliant only on cell phones for help.
Even if you don't think you need to, air down.
Carry a compressor that can handle adding 10+psi to all 4 tires before requiring a cool down.
 

Attachments

  • mom.jpg
    mom.jpg
    136.6 KB · Views: 2,744
  • luke.jpg
    luke.jpg
    137.4 KB · Views: 2,735
  • hill.jpg
    hill.jpg
    134.6 KB · Views: 2,672
  • climb.jpg
    climb.jpg
    134.6 KB · Views: 2,729
Last edited:
URD Y-pipe, Mk3 3" Exhaust, & MAF Calibrator Initial Follow-up

Fuel mileage over the last several months - BP brand unless otherwise noted, results calculated not computer display
87 octane 10% ethanol: City 14.5mpg, Mixed 16.5mpg, Highway 17.2 mpg
ECU Reset
93 octane 10% ethanol: City 14.6mpg, Mixed 16.9mpg, Highway ????
ECU Reset & Install URD Y-pipe, Mk3 3" Exhaust, & MAF Calibrator
93 octane 10% ethanol City ????, Mixed 17.3mpg, Highway 18.1mpg
Brand ? 90 octane ethanol-free Highway 20.5mpg

I didn't reset the ECU before the ethanol free run, because it's not something I have access to on a regular basis. The government subsidized corn farmers of Ohio have basically eradicated the ethanol free gas anywhere but at the marinas of the area lakes. It's kind of difficult to fill a truck on shore from a pump that's 30+ feet out on a floating dock, not to mention you'd have to pay an arm and a leg for it. I'm beating a dead horse, but I'll post it again:
276440d1511934442-idiot-thread-mr-mackey-ethanol-bad-mmmkay.jpg


This is louder than I expected, to the point of actually being loud when accelerating. Oddly it's almost stock quiet when cruising <70mph. With cruise set 70+mph you'll get some drone. It did get a little quieter after being broken in for about a week after install. While extremely slight and only heard with windows down outside of the city, I do like the low level rumble/pop when letting off the throttle for braking. For those who were concerned about heat transfer from the Y-pipe to the transmission, I don't think it's an issue. There's enough space for a good amount of airflow above and below the pipe. I did consider and research wrapping that section of the Y-pipe with header wrap, however concluded that it would only end up holding water and road salt against the exhaust causing it to rust more quickly. I would be wary of restricting the airflow by installing a skid plate below the new y-pipe, although can see the need for it as I added a few dents to the y-pipe last week in TN.
If I had to do again I'd absolutely do the Y-pipe and MAF converter without question. The cat-back exhaust would give me pause. It's a nice design and quality work that bolts right up and the only 3" option for our trucks. But 3" is probably overkill and I think I would have liked something a little quieter for my daily driver. I may eventually go back and swap out that muffler, or see if I can get a shop to weld a 3" high flow cat into the mid-pipe if I decide to do long tube headers and an O2 simulator.

Sorry if I missed this but did they send the MAF converter with a map for the Y-pipe and exhaust?
 
Sorry if I missed this but did they send the MAF converter with a map for the Y-pipe and exhaust?

When I ordered it, the website asked for a list of performance mods, so I listed the intake, y-pipe & exhaust. Gadget emailed me and said that he didn't have the new aFe Momentum intake mapped yet, but it would ship as soon as he did. I got it a couple weeks after the Y-pipe & exhaust. In later discussions I discovered that the exhaust doesn't matter for the MAF Calibrator, so I could have installed it with the intake.
 
Last edited:

Members online

Forum statistics

Threads
278,307
Messages
3,554,050
Members
248,016
Latest member
Advally Service

Trending content

Back
Top