The Idiot Thread

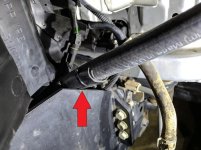
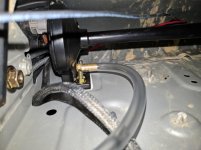
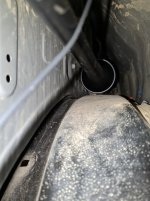
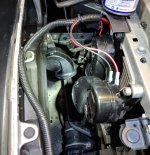
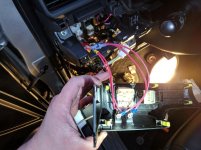
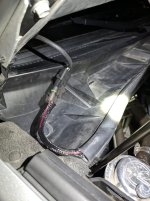
Oh wow, you smashed yours up against the fenderwell on the inside? I fed mine through to the outside like this

img_20190502_183746_c22e52ee6c7fc9ad0e6edbaa1a240ccdecd9367d.jpg

DOH! I bet it's supposed to go through the hole like that, it really was pretty difficult to line up the bolts to re-secure the lower air box my way.
I removed mine after only 3 days because of the noise level. I'm pretty sure the intake was resonating in the fender, making it much louder, and not really tolerable as a daily driver. I already have enough noise with the 3" exhaust, but at least that is all behind me as I drive. The noise on this with any sort of acceleration was a rumble that couldn't be ignored. Since I have lots of stop-lights and such, I decided just to remove it. So I'm back to sucking air through the fender, and some from the engine compartment.

EDIT: Well maybe that small intake temperature difference isn't so small. Today in rush hour stop-n-go traffic I noticed the intake temp 35F above ambient temp. Guess I need something to ensure air is drawing from the fender area. Guess I might have to reinstall this or the OEM scoop.
 
Last edited:
Great thread Luke! Quick question, now that its been close to a year with the URD, have you had any issues with the supercharger? Debating on whether or not to charge my runner, but I am leaning towards the Magnuson if I end up doing it. I have heard that there have been issues with the URD, and by choosing the kit with slightly less boost, I am hoping that any inherent issues will be less also. Plus the fact that they did R&D for Toyota puts me at ease. Thanks again for the detailed write up, you've definitely added to my list of mods.
 
Great thread Luke! Quick question, now that its been close to a year with the URD, have you had any issues with the supercharger? Debating on whether or not to charge my runner, but I am leaning towards the Magnuson if I end up doing it. I have heard that there have been issues with the URD, and by choosing the kit with slightly less boost, I am hoping that any inherent issues will be less also. Plus the fact that they did R&D for Toyota puts me at ease. Thanks again for the detailed write up, you've definitely added to my list of mods.

Has it been a year already? Close enough, ~11 months. No issues with the supercharger. I can't speak to the install as I had it professionally done. I had the same shop change out the oil after the first 5kmi, unnecessary but didn't hurt. I topped off the intercooler system a couple times, but while it looks low, it generally will even itself out when left alone. I've not noticed any leaking around the reservoir as some of the other threads have mentioned.
URD did find an issue with one of their pulley arms, and sent out a replacement free (though I did pay to have it installed). The new kits should have been updated though.
The sound of a million tiny dwarfs with hammers is normal, and only noticeable outside the vehicle at idle. Inside I just hear a small amount of whistle/hum or whine under acceleration or cruise above 60mph, and next to nothing at idle.

I have to keep my foot light on the throttle through sharp corners else traction control kicks in or tires spin, I've experienced both. I've also spun tires/kicked in traction control going uphill in the rain on wet pavement under heavy acceleration (#$!%$#! Prius drivers). Of course more power means more fuel consumption (mixed ~17mpg, hwy 19-20mpg). Mine seems to run best on BP 93 octane, and I'm an occasionally aggressive driver. It does have a slight power loss when I have to run it on 91 down in KY or eastern TN. URD says use highest octane available, and it shows when you don't have 93 in there. Stopping takes a little longer at slow speed as the truck continues to produce power even at idle throttle, only really noticeable when braking to a stop downhill.

The only real noteworthy drawback I've found is interference with the OBD-II system. For a while I was clearing codes frequently because of the elimination of the front cats with the headers. When doing so the codes would be erased, however, the reader would usually get an error about unable to erase. This happened with a couple different readers. There is a mode to temporarily disable the UCON-EMS computer, however, I've not found it to make any difference (or I've not been doing it correctly).
Given the choice of waiting for Magnuson to flash the ECU and send it back, or the piggyback ECU, I like the idea of a self adjusting ECU (URD's UCON-EMS). Most of my driving is flatland central Ohio, but every few months there's a week or more down in the mountains and it adjusts behavior accordingly.

Personally I keep my truck on Toyota's Severe Maintenance Schedule, which means oil changes every 5kmi and driveline fluid changes every 30kmi. While this certainly adds up, I figure it's worth the peace of mind given the extra power & torque I'm asking the driveline. I can say that the truck no longer notices the extra 3000lbs of boat/trailer I have for fishing. It doesn't drag down the truck climbing hills like it did when stock. And that was the entire reason behind me getting the supercharger, get the power the truck should have had with the missing V8 option. There's no replacement for displacement! While I seriously doubt I'm using anywhere near the full 2.3L capability of the URD/Whipple kit, what I'm getting is certainly making enough of a difference to make me happy.

It's very unexpected on a vehicle like this, so when the hood is up people are looking and asking questions. I've surprised a couple pony-cars, a Boxster, and a souped up Impreza. The office has a HP Ranking, they all laugh at my SUV in with their muscle cars (ZL1, Daytona 392, Mustang GT). But they all want to drive it too!
 
Last edited:
19Jul2018 64,778 mi

Kenwood DNX-995S
iDataLink Maestro RR
New Maestro Radio Solution Thread - Very Helpful!


This upgrade was so fun, I had to do it twice! Actually I attempted a modded install, then went back and used the proper kit. I liked the latter more, but the former worked just fine too.

Parts List including Crutchfield Suggested Install Kit (14+)
Kenwood DNX-995S CD/DVD/NAV/Wireless Android Auto
Metra 40-LX11 Antenna Adapter
Metra AX-TOYUSB OEM USB Port Adapter
Scosche TA2106B Dash Kit (It's Silver, NOT Black)
iDataLink ADS-MRR Interface Module
iDataLink HRN-RR-TO2 OEM Integration Adpater

Additional Parts
iDataLink ACC-SAT-TO2 - Allows use of OEM GPS antenna with aftermarket head unit
Kenwood CA-C3AV A/V Cable - Allows retention of OEM Aux Input Port
Metra 99-8227S Dash Kit - Not recommended

Install Prep
Lots of wiring to figure out here, I called Crutchfield tech support not less than 3 times. Admittedly twice were to see if we missed something, and they hadn't told me I needed a couple harnesses. They made good on customer service and sent them to me. Over the course of several hours, I soldered the connections together between the harnesses, and used heat shrink for a safe and clean connection. It's still a huge bundle of wires to deal with, and plastic connectors all over the place. Once I had both dash kits I removed the lower trim piece below the passenger side temperature knob, and took them all to a local auto body & paint shop. They did really well matching the paint, though it was $100 per dash kit!
EDIT 28Jul18: Paint code used by shop Bentley, LR9V Diamond Black Metallic

View attachment 305311

The biggest pain I hadn't planned on was the dash kit. No matter which one you use, it requires some work. The vents, vent adjustment wheel trims, and hazard light switch, and center display lower trim all need to be transferred over. A long handled jewler's philips is invaluable here.
It's easiest to remove the center display lower trim panel (screws on back and slide out), then the vents (tabs in each corner first, then top and bottom tabs), then the vent adjustment wheel trims (screws on back, come off the front), and hazard switch (tabs on back, comes out through front). Reverse order for the install into the new dash kit.

Installation #1 - Metra Kit
I liked the clean lines of the Metra kit from the start. Looking at how everything mounted up, I wanted to try something. The OEM radio mounts to metal brackets held in place by the 4 10mm bolts along the bottom, in addition to the metal bracket on the backside of the main panel (where all the large buttons and knobs are). It always felt nice and secure, so I wanted to keep as much of that as possible. The Metra kit allows of this possibility, but you have to grind down a locating nub on each side of the OEM brackets to mount them to an aftermarket double-DIN radio (the arrow).

View attachment 305315

Once those nubs are ground off, you can reinstall the OEM brackets to the aftermarket radio. Make all the connections, install the radio in the dash, and install the Metra kit over top of the radio. Add the trim piece around the end, and it's set. It actually worked better than I thought. I was in a rush to finish before work so I didn't get to tuck everything away as neatly as I liked.

Sadly at the end of the day, I have to agree with the others I've read here: The Metra dash kit is crap. The plastic and finish are cheap, and the fitment is poor. There's gaps left between dash sections, including center display lower trim, and on both sides of the kit where it meets the dash. While it might be good enough for someone, I'm a perfectionist so it had to come out.

View attachment 305314
View attachment 305316

Round #2 - Scosche Kit
In addition to not liking the fitment of the Metra dash kit, some Friggin Idiot forgot to install the included microphone to the Kenwood. So I had to use speakerphone while running errands today because bluetooth doesn't work without a microphone!. The USB cable I wired for Android Auto was too long for it actually to work, so I also needed to change that. So I had to pull everything out, and while I was at it wanted to see how the Scosche kit looked.

View attachment 305312

OEM brackets won't work with the Scosche kit without some major modification to the back side of the dash kit which would ruin it for it's intended instructions. I wasn't up for this, so just decided to put it in following the instructions. I used the prescribed Kenwood USB extension cable along with the Samsung cable, it was enough to get Android Auto to work. Yes this has wireless Android Auto, but my current phone doesn't support it. Instead of leaving the wire flopping around when not in use, I ran it under the loom for the X-Grip stand so it's held in place when not in use.

View attachment 305313
View attachment 305317

I am installing a pioneer head unit this weekend with the metra kit (I prefer the look of the metra kit). This post was a huge help. Thanks legend.
 
27Mar2019 82,521 mi
I kind of like my DRL in the daytime, so I wanted to keep them. However, when I want to run parking lights and fog lights only during white-out or heavy fog conditions. After reading the DRL Disable Thread, [MENTION=4160]KDCane[/MENTION] posted some diagrams that got me thinking. Since I still want the ability to run DRL's, bending the pin in the relay wouldn't cut it. I needed a switch somewhere in the circuit.

:director: WARNING: This mod involves cutting and splicing into your factory harness. If you are not comfortable doing so or competent in electronics and wiring, then get someone who is. I take no responsibility for any action you or your associates take with your vehicle even using this information as a guide.
I encourage you to read this through several times before deciding to continue with this mod. I mean, you're literally reading a thread written by a "Friggin Idiot"

According the the diagrams the easiest place would be from the driver's side junction box, connector 2C, wire 37 (light green). Unfortunately it took me about 90 minutes to locate said connector, and easy is a very relative term. As in it's easier to access than say the wiring that's under the fuse box next to the battery. If [MENTION=65614]Antman[/MENTION] gave up on the hood fuse box, then it must be really bad!

Step 1: Disconnect the battery negative terminal.
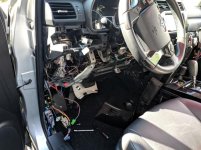
To get at this connector you need to remove quite a bit of the lower driver's dash. Start with the step plate at the bottom of the driver's door, it pries up easily with a body panel removal tool. Unscrew the cap left of the foot rest & pop off the lower left kick plate. Pop the middle center console loose (the part with the HVAC controls). You don't need to remove it just get it loose on the driver's side. Open the cover for the lower dash bolt nearest the center console, remove the bolt and the one on the other side (10mm). Then pop off the lower dash on both sides, disconnect any switches as well as the hood release.
The hood release is a little tricky: pull the cable sheath towards the front of the truck then to the side to free it from the holder. Slide the piston out of the latch and you should be able to remove the entire lower dash. Set aside the lower dash. There are some wires in my pictures which you may not have. They are for my remote start, dashcam, light bar, UCON-EMS, Maestro-RR/Kenwood, and other electronic accessories.

View attachment 329950

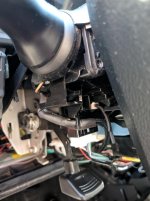
Remove the 4- 10mm bolts holding the airbag bracket in place (red diamonds). I didn't waste time figuring out how to disconnect the airbag, and just let it dangle.

View attachment 329956

Now saddle up and disconnect all of the harnesses on the front of the Body ECU. The ones with the black retainers have a tab at the top you need to depress then pull the end of the retainer out so that it rotates freeing that connector. Then remove the 3- 10mm bolts holding the Body ECU in place (top, left side - red diamonds, bottom - orange diamond can only see from under the dash behind the interior fuse block).
Pop the bracket off the ECU at the top plastic pin. Now you should be able to drop the Body ECU down and access the harnesses on the rear.

View attachment 329953


You're after the bigger of the two connectors under the yellow locking latch. In order to unlock that latch you need to remove the smaller connector, slide the latch, and then disconnect the larger connector. Near the yellow latch is the small light green wire you've spent the last hour trying to get to!

Cut it & wire in your switch. The switch harness from AOB of course isn't long enough to reach back behind the Body ECU from the front of the dash, so I had to wire in some extensions. While I usually prefer the twist and solder method with heat shrink covering, but there's no room for that so crimp connectors are about the only option.

View attachment 329954

Reassembly in reverse order. Don't forget to reconnect the battery to test it before you completely reassemble the dash.

Expected Result! The button works as a toggle to enable/disable the DRL in all lighting modes (DRL & Parking)

Unexpected results: The AOB switch has 2 LEDs, one behind the "DRL" & one behind the light logo. When the vehicle is off the light logo stays lit constantly. When vehicle is ON or running, the logo is lit only when the DRL's are off. I figure this is easily reversible by swapping the leads. Don't know if this would fix the always on issue. The "DRL" on the switch never lights, but I didn't connect the blue illumination wire since just getting a working switch was hard enough.

When starting the truck the TPMS light flashes, then stays lit. I figure when the battery was disconnected, then I disconnected everything from the Body ECU it lost the addresses of the TPMS sensors and they need paired/synced back to the truck.
EDIT 18Jun2019: I was poking around in the 5th Gen TPMS Disable Thread and seeing some pictures jogged my memory. Apparently in my rush to finish getting everything back together, I had failed to reconnect the harness to the TPMS module. DOH! Reconnected it tonight and started it up, no TPMS light.

View attachment 329957


This is not for the feint of heart. If you can live without DRL completely, just bend the pin in the relay. Bending the pin would take less than 5 minutes. Splicing into the harness and reassembling everything took me the better part of 3 hours.

Did you lose the high beam functionality? I believe the highbeam/DRL are the same bulb? I have a 2015 SR5 (Canadian), the DRL's are always on for us. I am looking to add a DRL switch but don't want to lose the highbeams. If you did not lose the highbeams, do they still function normally? Thanks!
 
Did you lose the high beam functionality? I believe the highbeam/DRL are the same bulb? I have a 2015 SR5 (Canadian), the DRL's are always on for us. I am looking to add a DRL switch but don't want to lose the highbeams. If you did not lose the highbeams, do they still function normally? Thanks!

Nope, high beams still work just fine. The 4Runner runs power to the high beam lights through 2 different circuits, one through the high beam circuit at 12v, the other through the DRL circuit at a pulsed 12v. I don't see how the Canadian models would be much different except they might lack the on/off/auto switch on the stalk. All I did was wire the switch into the DRL circuit, you should be able to do the same.
The day after I did this Aiden James Customs released a much easier location to wire in the switch, behind the left side kickboard. Their instructions are here. Instead of removing the wire from the harness for a permanent disable, you could wire into that location and up to the dashboard for the switch. It would be much easier than trying to get behind the Body ECU buried in the dash!
 
Nope, high beams still work just fine. The 4Runner runs power to the high beam lights through 2 different circuits, one through the high beam circuit at 12v, the other through the DRL circuit at a pulsed 12v. I don't see how the Canadian models would be much different except they might lack the on/off/auto switch on the stalk. All I did was wire the switch into the DRL circuit, you should be able to do the same.
The day after I did this Aiden James Customs released a much easier location to wire in the switch, behind the left side kickboard. Their instructions are here. Instead of removing the wire from the harness for a permanent disable, you could wire into that location and up to the dashboard for the switch. It would be much easier than trying to get behind the Body ECU buried in the dash!

Great! Gonna add this to the list of things to do! So to wire up the switch, just tap the power source wire from the switch to the DRL wire, then ground to bare metal? The grounding part confuses me... (assuming dash illumination optional)
 
Great! Gonna add this to the list of things to do! So to wire up the switch, just tap the power source wire from the switch to the DRL wire, then ground to bare metal? The grounding part confuses me... (assuming dash illumination optional)

Not exactly, you're adding an in line switch to disrupt/complete the circuit. You're the wire and adding the switch in the middle as a toggle.
I assume you're using the normal 4-wire OEM style switch that is prevalent from AOB, CaliRaised, or similar.
Source Wire - Wire to the the Body ECU
Accessory Wire - Wire to the DRL/High Beam
Ground - Ground
Illumination - Optional - I left it off, but can find info here.

You can swap the source/accessory wire and it will still work, however, the indicator light in switch will work opposite of intended.
 
Last edited:
17Apr2020 95,3xx mi

It's been a while since I've posted, but 6-day weeks will kill any ability to do anything but spend money on the truck! I finally got back under the hood for a bit. Sure it wasn't much, but it's a start.
I'd noticed in early winter that my XenonDepot HID kit didn't seem quite at bright, it no longer washed out the city lights. Over several weeks, I manged a small conversation with XD. Between us we figure the bulbs were nearing the end of their life, as I drive dark hours at least half of my work commutes. They explained the bulbs are only supposed to be good for about 2500 hours, even the Philips (which I've heard last longer than the XenonDepot brand). So I ordered a replacement set, installed 1 bulb (1 arrived damaged), and drove it to work the next morning. I didn't even make it out of the subdivision before I decided it wasn't going to work. The new bulb, even though was a Philips V2 wasn't anywhere near as bright (5000k vs 4300k), and for some reason the hot spot was aimed at the road directly in front of the truck. I fiddled with it thinking that I hadn't gotten the bulb fully seated, tried switching to the other side (similar results), and even installed the damaged bulb (which appeared functional, though not durable) and got the same result. Maybe they got a bad batch or I'm just the unlucky guy, but at $175 for a pair of bulbs I wasn't willing to tolerate disappointment! The new bulb came back out, along with the 7443 Switchback LED I tried on driver front parking light/turn signal that wasn't as bright as a much older DDM Tuning. After some effort I got a hold of XenonDepot's customer service, and they did right by me. Customer service win, although I wish it had been much faster as there was usually a week to 1.5 weeks between responses unless you managed to get them on the phone. This process completed sometime in February, and I was researching options.

Going back to halogen was out, not bright enough for backwoods TN, though the least expensive option. Another HID bulb could be an option, but which one to try? Most of the connectors were different, so it would mean replacing the entire kit. Then 3-4 years down the road I'd be right back at the same place, bulbs slowly dimming and expensive converted bulbs. I considered the fancy triple projector LED whole headlight replacement only as long as it took to find people having trouble with it and complaining about output. Real conversion to HID seemed possible and not terribly expensive, however, without time to really work on the truck, and a need to order a 2nd set of headlights to accomplish it, it wasn't so affordable any more. And that left just a regular LED replacement. This was the most appealing, and ultimate choice for cost and longevity. Fifteen times the rated lifespan of the HID at about the same cost for a premium set. I'm very much the buy once, cry once type. Better to pay for quality and not have to do it all over again. So back to the all in one lighting company, XenonDepot, Headlight Revolution, Morimoto, GTR Lighting, and several others (now all owned and operated as the same). I also browsed some of the DDM Tuning options, but they seemed too big to fit in the housing with the dust seal. The new GTR Ultra2's were highly rated, fit the housing, and were soon to be available. I also found a thread here that verified fitment of the later generations. While hesitant to order from the all-in-one company with frustrating customer service delays, I eventually pulled the trigger. I also ordered new dust/weather caps from Toyota for about $20 as I had drilled mine for the XD HID kit.
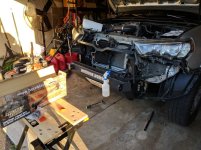
I actually spent more time removing the old HID kit given how hidden, tucked, and zip-tied it was installed. I didn't get every bit of the double sided adhesive up, but will go back and attack it later. The GTR Ultra2 installation was straight forward, even made easy by the fact that polarity was marked on the connector! It's always the little touches like this that impress me.

EDIT 21May20 95,9xx mi: It's been a couple of months driving with these, and it's time for a follow up. My weekly mileage is down due to the COVID panic and a reduced work schedule, but I'm still driving mostly night time. They are in a 3/9 orientation so that the chips are facing directly forward and rearward in the housing. I haven't attempted to reorient them and see if I get better results. I had to aim the headlights back up some, I think because the focal point shifted in the projector between the HID & LED. I quickly realized the Ultra2 are not as bright down the road as the HID kit was due to color temp and intensity. I do like the instant on to full brightness, no waiting for the bulbs to warm up in cold weather temperatures. I was mostly sold on the longevity of these, though now I can't find any published lifespan for them. But I shouldn't need a replacement unless something better comes along.

HID/LED comparison. XenonDepot Xtreme HID w/Philips 4300k vs GTR Ultra 2
Color: HID 4300k, LED 6000k. Though most don't like the lower color temperature, it does have a higher CRI, and appears brighter. Point HID.
Intensity: Side by side at close range against the garage door you can see the intensity is pretty close. Down a dark wet road and at a distance of 300-500ft the HID were more intense. Point HID.
Beam Pattern: Full and wide with no hot spots on either. Draw.
Startup: Even with the relays, the HIDs could take anywhere from 5 seconds to 2 minutes to reach full brightness, longer the later into their lifespan they get or colder it was outside. The LED are instant on, and will be until they fail. Point LED.
Lifespan: HID 2500, LED no specs published. Most quality LED will run 40,000 hours. Theoretically the point should go to LED.
Cost: HID Kit $150+, Ultra2 $200. Draw. By the time you pay for the significantly better upgrade to the Philips HID bulbs you're at the $200 mark on either. I've installed the XD bulbs that come standard and they just aren't as full or as bright as the Philips.
Installation: LED plug & play, fits entirely inside dust covers. HID, remove battery, drill dust covers, mount ballasts, install relays, wires all over need zip tied, be careful not to touch the bulbs. Philips though the original 4300k v1 bulbs have a right angle base, the newer 5000k v2 bulbs don't which makes required torque application extremely difficult. Point LED.
Fitment: HID has a thick rubber collar which makes installation difficult. LED twist in without difficulty. Point LED.
Tally: Color - HID, Intensity - HID, Pattern - Draw, Startup - LED, Lifespan - LED, Cost - Draw, Install - LED, Fit - LED.

Honestly if you're looking for the brightest installation out there and recurring bulb costs don't bother you, HID should be your choice. I got almost 4 years out of my HID install before it started getting dimmer, and even sent the old bulbs along with the kit to the new buyer who said they are still working in his install. At least half of my drive time is night, and I estimate the bulbs were closer to 3000 hours of use before I removed them. If you're looking for significant improvement over OEM, and a simple install with a "buy once, cry once" attitude then go LED. /Edit


Here's the GTR Ultra2 LED on the driver with the old XD HID 35w w/Philips 4300k on passenger for a side by side.
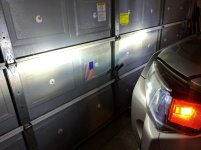
Side by side.jpg


And GTR Ultra2 LED on both sides. I've not taken it out for a drive yet. I feel like I need at least a semi legitimate reason to leave the house nowadays with COVID19. I don't expect issues, and love the instant on at full bright that LED has over the bulb warm up on the HID's.
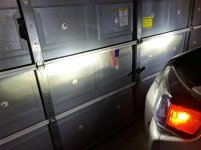
GTR Ultra2.jpg


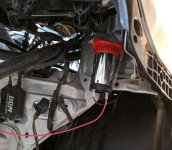
A while back I had a shop fab me up a mount for the fuse block. I didn't get to wiring it today, but started moving things around to make it easier when I do. It's now much simpler to get the battery in and out. Although with the supercharger and intercooler, there's not any room left between the factory fuse box and the inner fender to go running wires. I might be running some up where I had the HID ballasts stuffed, on top of the inner fender under the plastic supporting the rubber hood seal. But that's to come later. There is more wiring for me this week, but it will be doing a full LED conversion and re-wiring the boat trailer. The only good thing about COVID (aside from not getting it), has been the reduced work schedule which is allowing me to catch up on all these projects. Hopefully there will be more posts in the near future!
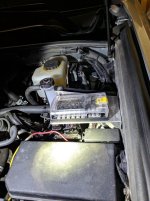

Fuse box.jpg
 

Attachments

  • Side by side.jpg
    Side by side.jpg
    105 KB · Views: 986
  • GTR Ultra2.jpg
    GTR Ultra2.jpg
    123.2 KB · Views: 1,362
  • Fuse box.jpg
    Fuse box.jpg
    135.2 KB · Views: 995
Last edited:
Delayed posting from 03Aug2019
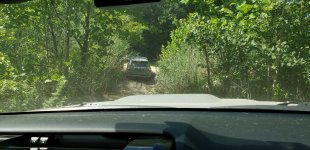
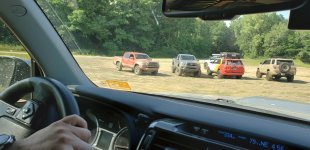
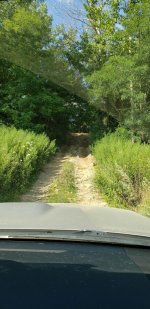
Got the day off, grabbed my buddy who was in town visiting and road tripped up to the off-road park. We met up with the Ohio 4Runner Facebook Group at Summit Racing in Tallmadge then continued on to Southington Off-Road. I was driving so didn't get many pictures, but my buddy was just cleaning up his phone and sent me the ones he took.

The first obstacle was a water logged sand pit. The truck before us got bogged down. I saw her tires slipping on roots at the bottom of the pit and elected not to follow through that one instead joining the ones watching the rescue.
Sand trap.jpg
Rescue observers.jpg


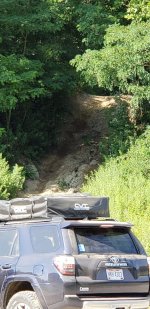
We did wait to climb the hill because it looked fun. Those who were nearby when I did it got to hear the supercharger work a little!

First video is the guy who was immediately before us.
Hill.jpg

This video is us, though started about halfway up.
Going up.jpg

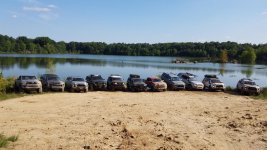
Group photo by the lake before splitting up. Some of us had a 3 hour drive home!
Group.jpg
 

Attachments

  • Sand trap.jpg
    Sand trap.jpg
    134.4 KB · Views: 1,537
  • Rescue observers.jpg
    Rescue observers.jpg
    136.4 KB · Views: 1,537
  • Hill.jpg
    Hill.jpg
    122.3 KB · Views: 1,513
  • Going up.jpg
    Going up.jpg
    138.4 KB · Views: 1,481
  • Group.jpg
    Group.jpg
    139.5 KB · Views: 1,487
28Jul2020 98,460mi

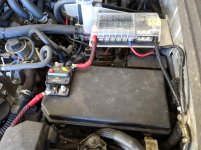
I finally had a chance to get out and work on the truck! Since it was holding up other mods, getting power to the aux fuse block was the first thing that needed fixed. I debated about how I wanted to wire it, whether to include a relay so that it would only be on with ignition, or if direct battery power would suffer too much parasitic drain when the truck sits. I thought hard about the latter, in the end decided the relay was too much work for little concern. Being essential public safety personnel, my truck never sits for more than a week between running. With the DC Power & Engineering 270A alternator installed, the battery should be getting a full charge even from my 20 minute commute. Though the fuse block is full of fuses, it's not fused itself. I decided to put a 100A circuit breaker in the positive line, it just took me forever to decide where to mount it. I had concerns about allowing water into the underhood fuse box, but ended up mounting on top of it anyway because it just made the most sense with routing. My first attempt at making heavy duty cables last week didn't come out very professional looking, so I took another swing at it, this time without soldering the connectors on. I used some SimPull 6AWG, should be more than enough copper for the max draw.

aux fuse block.jpg


Being the last parts I ordered, the horns were the next upgrade at the top of the pile. I had intended to add a PA speaker and some cool sound effects like this guy. I even bought most of what I needed for it, I decided it was going to be a little more wiring involved than I would like. I think the 4Runner horns are ok, but I really wanted something more truck like. My stupid COVID purchase was a HornBlasters Tug 37 air horn. Thankfully I failed to figure out a place to mount that 37" monster, as it would have required me to add an on-board air compressor and pressure tank. I was ready to go that route, until I realized that there's just not much left room in or near the engine compartment for things of such size. Since I never put a winch in the SSO bumper, I had room for the compressor and tank there, but that still left the horn. Hornblasters was nice, and got a chuckle that I had ordered the Tug to install on an SUV without doing a spare tire delete mounting.

So I decided to look into something more size appropriate, and in the direct drive category because at the end of the day I just can't justify on board air. My portable SmittyBilt is working just fine. Still wanting a low tone, I picked up the biggest/longest direct driven horn I could find, Hornblasters Musket. Since I'm a gun guy, the Musket just seemed right in a karma sort of way too! When I found out the OEM horns are 400 & 500 hz I decided to go lower on them too, and picked up a set of PIAA Superior Bass at 330 & 400 hz.

When I need the horn, I want it loud enough people notice. Although full on train horns are not required or appropriate for most situations, the direct drive air horns aren't as powerful. I'm also not a big enough A-hole to go around startling people just for kicks, remember the original intention was "Nicest Car Horn." I used the factory mounting location for the PIAAs, decided to move the OEM horn to the center bumper support, and just had to find a place for the Musket. Again there wasn't room in the engine compartment. So I removed the grill and bumper for better access to the center bumper and winch area of the SSO. In doing so I saw the line from the coolant pump on the intercooler loop chafing against the SSO bumper. I zip-tied a double layer of wire sheathing from the boat trailer project around it as a sacrifice instead of the line.

bumper off again.jpg
chafing.jpg

Long and straight is more difficult to mount than you'd expect! There aren't a ton of places that even the 18" Musket would fit nicely, and not be in a position which could be submerged. I also wanted to keep it on the driver's side so that the wiring would be shorter. I must have spent 90 minutes before getting the idea to mount it inside the fender above the wheel well. While this would not be an easy place to mount it, it had plenty of room, was out of the way, on the driver's side, dry, and available. While I would have liked to mount it forward facing, getting the wheel well liner off was turning out to be impossible. Even with body panel removal tools, I fought for an hour just getting 2 of the plastic plugs out, removing the other 4 to mount it forward facing wasn't going to be worth it. So It faces back towards me as the driver, but that made mounting the compressor easier and closer to the relay too. The compressor went into an existing hole between the headlight and fog light behind the bumper cover. If I ever have a problem with it, I can at least get at it easily again. The horn would be a different matter.

horn base.jpg
horn musket.jpg
compressor.jpg


I read at least one thread where aftermarket horns eventually caused a failure of the K-block in the under hood fuse/relay box, so I wanted all the aftermarkets run through a relay and from the newly working aux fuse block. I realized that removing both factory horns could leave me without a horn if the fuse blew or the breaker tripped. Since I only needed one of the factory connectors as a trigger for the relay, I decided to keep the 400 hz horn and just mount it differently.


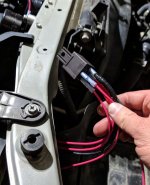
The PIAA instructions said to cut off the OEM connectors and use factory wiring. Already decided that wasn't an option, and all they had included was a ground wire connection. There was no wiring included with the Musket either, so I cut everything to length with rolls of 14AWG that I bought for reasons like this. While I prefer to solder the connectors on, again I decided it would be too much work and mess. Thinking about it revealed the utility of the small handheld torches though, and I might have to add one to my tool box. In the mean time I ensure that everything was VERY well crimped. I tied both the PIAAs and the Musket into the same relay, adding a special switch or toggle for the Musket just seems like more hassle than it would be worth. I hid the relay under the upper front cross beam with some double-sided Gorilla tape. Then added wire loom and zip ties to clean everything up.

relay mount.jpg
PIAA.jpg


Hear them in these videos.
OEM 400HZ ONLY
OEM 400HZ + PIAA 330HZ & 400HZ + Musket
 

Attachments

  • aux fuse block.jpg
    aux fuse block.jpg
    132.4 KB · Views: 1,512
  • chafing.jpg
    chafing.jpg
    97.8 KB · Views: 1,460
  • compressor.jpg
    compressor.jpg
    102.3 KB · Views: 1,483
  • horn base.jpg
    horn base.jpg
    82.5 KB · Views: 1,465
  • horn musket.jpg
    horn musket.jpg
    84.7 KB · Views: 1,452
  • PIAA.jpg
    PIAA.jpg
    129.6 KB · Views: 1,438
  • relay mount.jpg
    relay mount.jpg
    90.3 KB · Views: 1,434
  • bumper off again.jpg
    bumper off again.jpg
    128.9 KB · Views: 1,473
Last edited:
20Aug2020 99,543 mi
The long awaited time finally came, and I checked off 2 more mods off my to-do list.

Mod #1 [MENTION=65614]Antman[/MENTION]'s Fog Light Mod (Start at post #22)
This has been on my list ever since I had to drive in white-out conditions with the HID low beams. Just parking lights and fog lights is all I wanted, and there was no way to do it without modding the vehicle. Of course every vehicle and need is different so I skewed from Antman's instructions, but they were a great help and influence. I elected not to complete the upgrade to the dashboard as it seemed unnecessary. With the Baja Design Squadron Sport fog lights, the only time you don't know they're on is full bright day light, and even then you can see the reflection on any road sign.

Step #1 - Ensure proper supervision.
supervision.jpg

Disassemble Dash. That's a lot of wires, and I'm still adding more!
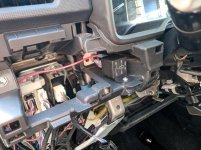
disassemble dash.jpg

I wasn't tapping into the OEM fuse box, but just adding to the aux fuse block that I have under the hood. It meant fishing wires through the firewall grommet, but I've gotten pretty decent at it. While occasionally useful, I also don't like using body grounds for things that can be turned on while the vehicle is off, so add another line to the negative side of the fuse block.
I tried to decide on wiring ahead of time, but wasn't sure exactly how I wanted it until I could get the dash apart. It was also based on where I mounted the relay. My relay terminal 86 is wired to the brown wire on the OEM switch. Then OEM switch goes to fuse block negative. I skipped the IGN-ON circuit option Antman presented, so fuse block positive provides to both terminals 30 & 85. Terminal 87 runs to the White/Silver wire depicted in Antman's thread.

Wiring for the OEM stalk switch
stalk switch wiring.jpg

Relay mount location. This came in really handy and wasn't being used for anything while still being hidden behind the dash.
relay mount.jpg


Mod #2
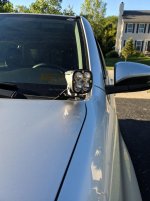
While I had the dash apart, all the supplies out and a mess made of the truck I decided to finally get around to put wiring behind those switches I drilled into the dash for my ditch lights. I've only had the ditch lights sitting on the work bench since 2018, but my reduced work schedule meant I had the time to finally install them. No time like the present.
There were 2 big issues with ditch lights:
A) Baja Designs wiring harness isn't long enough
B) I wanted each light switched individually
The reason for Issue B was that I often drive in mountainous areas, where one side can be a sheer cliff, and the other side a nice pasture full of deer. I don't want dazzled from the light on one side while missing the deer on the other. This meant making my own harness, somewhat intimidating for someone who's not done it. But when I realized it was just running wires where I needed them and adding connectors it became much simpler. The hard part was figuring out how I wanted it wired. In the end I decided several things which really made this more simple.
Each BD Squadron light can draw a max of <3A. With that low of a draw, I could wire directly through the switches, no relays required. I did ensure the switches I purchased were rated for up to 12v 25A, so they shouldn't have issues. In wiring directly through the switch, I can run positive from the switch to each light individually, and leave the negative shorter by running direct to each light.
So there's a single power run from the aux fuse block to a quick disconnect behind the dash. The quick disconnect makes it so that the dash can still be removed without removing the switches. I decided this was important and worked to my advantage to serve as a point to split to each switch close to them. Then each switch runs back through a quick disconnect, the firewall grommet, and out to each light.

Behind Switches/Dash
behind switches.jpg

I debated about running the passenger side across inside the cabin then out closer to the light, but the HVAC system really makes that look difficult. Tearing apart the passenger side of the dashboard also was not appealing. I tried to run along the main harness at the top back of the firewall, but had trouble getting through any but the first retainer. So I cheated, and ran both wires to the passenger side light through the seal under the top of the hood. I don't think the hood puts enough pressure on that seal to smash the wires let alone wear on them.

Driver's Side Wiring
driver side wiring.jpg

Passenger Side Wiring
passenger side wiring.jpg
 

Attachments

  • supervision.jpg
    supervision.jpg
    106.5 KB · Views: 1,331
  • disassemble dash.jpg
    disassemble dash.jpg
    122.9 KB · Views: 1,346
  • relay mount.jpg
    relay mount.jpg
    113.1 KB · Views: 1,366
  • stalk switch wiring.jpg
    stalk switch wiring.jpg
    80.7 KB · Views: 1,317
  • behind switches.jpg
    behind switches.jpg
    101.5 KB · Views: 1,312
  • driver side wiring.jpg
    driver side wiring.jpg
    89 KB · Views: 1,324
  • passenger side wiring.jpg
    passenger side wiring.jpg
    102.8 KB · Views: 1,329
Last edited:
Ditch Lights Continued

The switches completed and dash reassembled
dash switches.jpg

Ditch lights
passenger.jpg
driver.jpg
ditch lights.jpg

And now I can finally signal the International Space Station from my truck! (All lights can be on simultaneously)
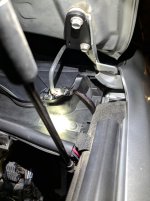
signal.jpg
 

Attachments

  • dash switches.jpg
    dash switches.jpg
    86.4 KB · Views: 1,311
  • ditch lights.jpg
    ditch lights.jpg
    124.8 KB · Views: 1,327
  • driver.jpg
    driver.jpg
    80.7 KB · Views: 1,323
  • passenger.jpg
    passenger.jpg
    91.6 KB · Views: 1,314
  • signal.jpg
    signal.jpg
    86.1 KB · Views: 1,333
Last edited:
17Sep2020 99,575 mi
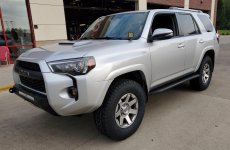
Finally got the new tires installed. Went with Toyo Open Country AT3 P285/70R17. I debated about the sizing for months, along with P vs LT C loads. In the end, my off-roading is limited, I wanted to reclaim a bit of a smoother ride without losing even more MPG because of the larger size. I can tell you the ride home was noticeably smoother and taller.
I trimmed about 1/2" of the bottom of the bumper in the wheel well, and had to push the fender liner forward some (new holes). The driver's front seems to be rubbing on the mudflap, but it could be rubbing the body mount. I'm going to be watching it carefully. I'll probably end up ordering a BMC kit in a week or so if only for peace of mind.

IMG_20200917_172823 - Copy.jpg
 

Attachments

  • IMG_20200917_172823 - Copy.jpg
    IMG_20200917_172823 - Copy.jpg
    135.7 KB · Views: 7,681
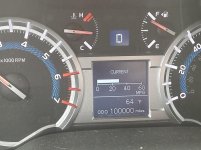
29Sep2020 100,000mi
I finally reached the end of the break-in period!

IMG_20200929_132222.jpg
IMG_20200929_143851 - Copy.jpg
 

Attachments

  • IMG_20200929_132222.jpg
    IMG_20200929_132222.jpg
    125 KB · Views: 1,086
  • IMG_20200929_143851 - Copy.jpg
    IMG_20200929_143851 - Copy.jpg
    138.7 KB · Views: 1,448
20Jan21

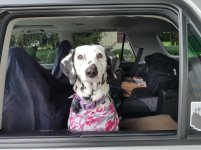
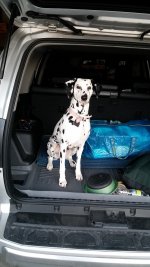
My co-pilot and long time best friend Piper passed on today. She'll always have a place in my heart and dog hair in the truck.


141520706_10223188353671683_8603755925852072138_o.jpg
141091029_10223188351231622_2249197441919925879_o.jpg140671344_10223188353311674_2665228528986697867_o.jpg
 

Attachments

  • 140671344_10223188353311674_2665228528986697867_o.jpg
    140671344_10223188353311674_2665228528986697867_o.jpg
    100.8 KB · Views: 920
  • 141091029_10223188351231622_2249197441919925879_o.jpg
    141091029_10223188351231622_2249197441919925879_o.jpg
    123.6 KB · Views: 863
  • 141520706_10223188353671683_8603755925852072138_o.jpg
    141520706_10223188353671683_8603755925852072138_o.jpg
    61.9 KB · Views: 873

Members online

No members online now.

Forum statistics

Threads
278,307
Messages
3,554,050
Members
248,016
Latest member
Advally Service

Trending content

Back
Top