The Official 3rd Gen Dual Case, Dual Locked Thread

I'll also add a post (need those 15, sorry), to say that I think I've finally cracked an issue I was having with the dual case set up.

I have MC09 0029 (saw someone here with #5, thats awesome!). It puked oil every time it got on the highway, which was seriously annoying.

Well, the bearings were getting a bit worn, so back to Marlin it went this january (They don't sell the bearings for the early ones anymore, so it had to be machined).

Talked for a long time with the guys there (fantastic people, I love Marlin). They realized that the early rear adapters don't have an upper breathe hole between the sealed rear case, and the crawl box. So the only connection between the crawl box and the rear case is the shifter hole (plugged with the shift rail) or the bearing (in oil). So the air space in the back builds pressure and forces the oil up into the input/output shaft gears, which slings the oil up and out of the shifter itself, despite a brand new oil slinger.

Anyway, they machined a new hole next to the shift rail hole, and presto! no more oil pumping out of the cases.

Probably not super relevant to most, but if you have an older one, may be worth drilling a hole.
 
I'll also add a post (need those 15, sorry), to say that I think I've finally cracked an issue I was having with the dual case set up.

I have MC09 0029 (saw someone here with #5, thats awesome!). It puked oil every time it got on the highway, which was seriously annoying.

Well, the bearings were getting a bit worn, so back to Marlin it went this january (They don't sell the bearings for the early ones anymore, so it had to be machined).

Talked for a long time with the guys there (fantastic people, I love Marlin). They realized that the early rear adapters don't have an upper breathe hole between the sealed rear case, and the crawl box. So the only connection between the crawl box and the rear case is the shifter hole (plugged with the shift rail) or the bearing (in oil). So the air space in the back builds pressure and forces the oil up into the input/output shaft gears, which slings the oil up and out of the shifter itself, despite a brand new oil slinger.

Anyway, they machined a new hole next to the shift rail hole, and presto! no more oil pumping out of the cases.

Probably not super relevant to most, but if you have an older one, may be worth drilling a hole.

Glad you found your way over here...

Where in Utah is that? Also, that SD trail looks fun. ?

And, glad you got to the bottom of your oil leak and Marlin took care of you.

BTW, I posted a question for you on Expo.:heh:

Durwin
 
Glad you found your way over here...

Where in Utah is that? Also, that SD trail looks fun. ?

And, glad you got to the bottom of your oil leak and Marlin took care of you.

BTW, I posted a question for you on Expo.:heh:

Durwin

Thanks Durwin! I'll go check Expo. (got 1.5 y/o at home, so time is limited these days for forum cruising :D)

The Utah trail is Minor Threat, Area BFE near Moab. I also ran Greenday there as well. Those were the main two trails that were doable without taking major body damage.

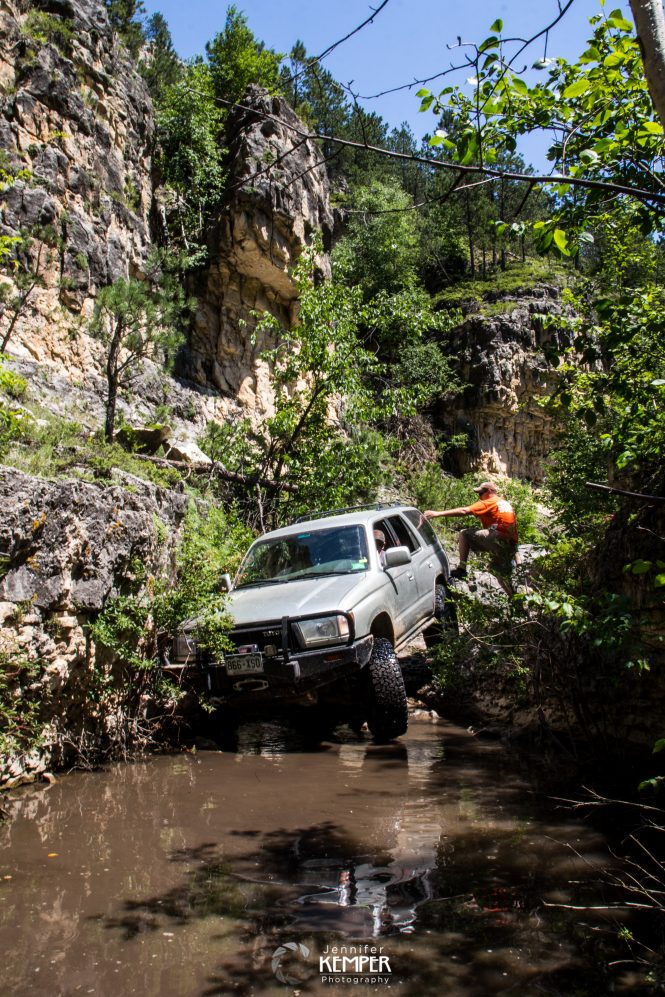
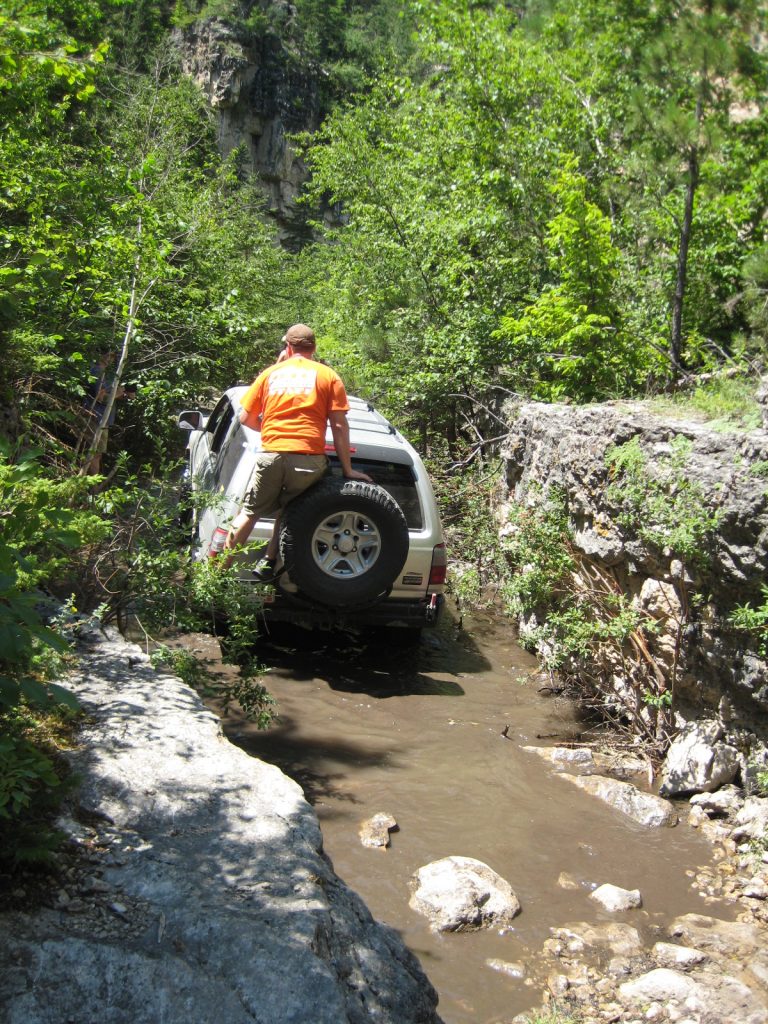
The south dakota trail was fun, its called Iceman. This is from the bottom (its an out and back)

BHCC-4624-665x997.jpg


The guy climbing on the truck wanted a ride across the water crossing.

IMG_0231-768x1024.jpg
 
Iceman is a good trail. Suprised your are in there with that water. Was that at the Dakotas Territory Criuser Classic? You 4Runner looks a bit like mine. Sorry for the thread hijack. Love double cases

Sent from my SM-S765C using Tapatalk
 
Iceman is a good trail. Suprised your are in there with that water. Was that at the Dakotas Territory Criuser Classic? You 4Runner looks a bit like mine. Sorry for the thread hijack. Love double cases

Sent from my SM-S765C using Tapatalk

Yup. BHCC. Don't know how it is year round, but they told us the water was generally there, and that there wasn't a problem doing the water crossing. There were no FS closures, so to my knowledge, it was totally legal.
 
New guy here. Need more posts before I can start a build thread, so I figured I could post up in this thread.

Here's my take on lockers and cases:

Dual cases:

I first just lost a cup holder like is common, but that was annoying, so I fabbed up linkages and kept it all stock-ish. Someone talked about stock early on in this thread, so that was a common element for me. Used a factory automatic boot and boot cover, and just bent some 1/2 solid bar in my press brake to make the handle curve up and over for the front case. Still needs stickers to get the high low pattern correct.

Basically, loads of work to satisfy OCD tendencies.


For lockers, I'm not a fan of carling switches, so I again did the idiotically difficult method and wired everything up all stock like. Spent several hours in the back of the local dealership with wiring books and found all of the pin leads to wire everything up using factory plugs in the dash, so it wasn't a cut and paste job.

Welcome!! Always great to have another dual case brother here. I've added you to the list in post #2 :welcome:
 
Love seeing these dual cases! Hoping to find out today or tomorrow if i'm working Friday or not. If I end up with it off, I'm finally going to stab mine in! Picked up the new rear driveshaft last week. Can't wait!!
 
Love seeing these dual cases! Hoping to find out today or tomorrow if i'm working Friday or not. If I end up with it off, I'm finally going to stab mine in! Picked up the new rear driveshaft last week. Can't wait!!
How much did you shorten it? Need to get back going on mine.

Sent from my SM-G930R4 using Tapatalk
 
How much did you shorten it? Need to get back going on mine.

Sent from my SM-G930R4 using Tapatalk

8.5 inches is the short answer, the exact amount I'm adding in drive line length of the crawler.

I bought a junk yard drive shaft from a standard J-shift 99, which is the case I'll be putting in mine to replace the multi-mode case. If I was going to shorten my drive shaft it would have been shorter. The multi-mode case is longer than the J-shift case.
 
How much did you shorten it? Need to get back going on mine.

Sent from my SM-G930R4 using Tapatalk

Mine was 8 3/8". It will depend upon your components used. The shop I used, did it in 1 day, and did a great job.

BTW, I really like the pic in your avatar.

Good luck with install.

Durwin
 
Mine was 8 3/8". It will depend upon your components used. The shop I used, did it in 1 day, and did a great job.

BTW, I really like the pic in your avatar.

Good luck with install.

Durwin

Thanks. That was a fun day.

Finally getting some feeling back in my finger so I think I will get going on it as soon as I get my rear swingout wrapped up.
 
Yup. BHCC. Don't know how it is year round, but they told us the water was generally there, and that there wasn't a problem doing the water crossing. There were no FS closures, so to my knowledge, it was totally legal.
I sure it was fine then. My brother is a part of that club and always at the event. He keeps up on closures and whats legal. I go almost every year. Last year was one of the few I missed. Plan to go this year.

Sent from my SM-S765C using Tapatalk
 
New guy here. Need more posts before I can start a build thread, so I figured I could post up in this thread.


Here's my take on lockers and cases:


Dual cases:


I first just lost a cup holder like is common, but that was annoying, so I fabbed up linkages and kept it all stock-ish. Someone talked about stock early on in this thread, so that was a common element for me. Used a factory automatic boot and boot cover, and just bent some 1/2 solid bar in my press brake to make the handle curve up and over for the front case. Still needs stickers to get the high low pattern correct.


Basically, loads of work to satisfy OCD tendencies.


For lockers, I'm not a fan of carling switches, so I again did the idiotically difficult method and wired everything up all stock like. Spent several hours in the back of the local dealership with wiring books and found all of the pin leads to wire everything up using factory plugs in the dash, so it wasn't a cut and paste job.


I got an automatic switch board from the junk yard, and wired up the ECT switch to the compressor and had a little decal made from the ARB compressor switch.


Used the security LED as an indicator:


On:


Followed someone elses lead on the webs and cut and pasted a modified taco screen print into the dash, but its wired in using the factory plugs on the back of the combo meter, so the bulb is factory and there are no extra solder points on the combo meter itself. Shoulda used a 4runner one, didn't realize it would be a different shade of red. Will have to redo that someday :D


Tried to do a bit of artwork on the switch, but really not happy with it. Someday I'll redo it.


I also wanted the big compressor from ARB, so re did a bunch of stuff under the hood and built new brackets for the ABS relays, the cruise unit, and of course the compressor.


Been beating on it in various states:


SD:


Blanca, CO:


attachment.php


Utah:


How did you attach your linkage???


Sent from my iPhone using Tapatalk
 
How did you attach your linkage???


Sent from my iPhone using Tapatalk

Used a ball joint for the rear case handle pivot, and then bent and welded solid bar to clear the floor. Using pins and fixed joints like so,

IMG_2565_1.jpg~original


the original j-shift pattern is retained. I'll try to get some pictures of the front set up (have to find them, they aren't on my phone). As soon as I have enough posts, I'll start a build thread.
 
Last edited:
Used a ball joint for the rear case handle pivot, and then bent and welded solid bar to clear the floor. Using pins and fixed joints like so,


IMG_2565_1.jpg~original


the original j-shift pattern is retained. I'll try to get some pictures of the front set up (have to find them, they aren't on my phone). As soon as I have enough posts, I'll start a build thread.


That's amazing!


Sent from my iPhone using Tapatalk
 
Getting there, cases mounted and first shifter in its general location. Two more to go.


Finish the shifter tomorrow, mount the driveshafts, then start rewiring the front diff.
 
Haha, thanks, :D

I came up with it on a trans swap I am trying to do. More on that when I do my build thread.

Better get started on that build thread, I want to see more of this sleeper. And if you need more posts, just post some pictures in the picture sticky at the top of the page... :D
 
I'm currently trying to put a gear reduction box on my 3rz manual trans. it took a few hits of the hammer to get the coupler on the 23spline input gear and basically had to use bolts on the trans/adapter to press the crawl box on. It was TIGHT!!! I can't imagine this is normal.
Almost as tight as the factory coupler on the chain transfer case.

I don't think I could possibly have the coupler on backwards. [emoji1317] I even cleaned the antitrust crap off the coupler and put a little antiseize on splines

The trans and crawl box seem to be together, I just don't like how tight it was. Hope to god I never have to separate the two.

Was everyone else's this tight?


Sent from my iPhone using Tapatalk

It will break the tail housing ears off the trans before it'll pull on with the coupler backwards. Ask me how I know.

Mine is tight too. I just took everything apart for inspection on my setup and the splines look great but separating the crawler from the trans is an exercise in patience. It's loosened up a little from the from when I first built it but it's still pretty tight.
 

Members online

Forum statistics

Threads
278,316
Messages
3,554,107
Members
248,016
Latest member
Advally Service

Trending content

Back
Top