You are using an out of date browser. It may not display this or other websites correctly.
You should upgrade or use an alternative browser.
You should upgrade or use an alternative browser.
The Tank ~ My Build
- Thread starter ADK Explorer
- Start date
ADK Explorer
New member
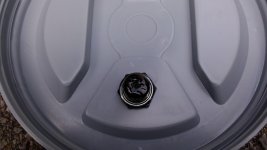
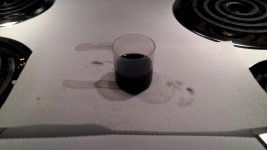
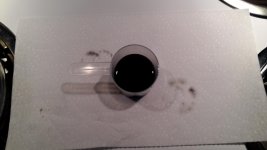
Rear Differential Oil Change
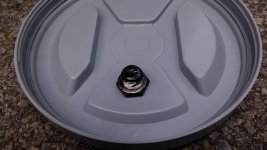
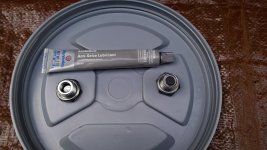
Cleaned up the plugs and put new crush gaskets on, flat side seated against plug head, rounded side against housing. Also put anti seize on threads to prevent unnecessary cursing and anger in future.
The left plug with hole is fill, the right with magnet is drain.
Cleaned up the plugs and put new crush gaskets on, flat side seated against plug head, rounded side against housing. Also put anti seize on threads to prevent unnecessary cursing and anger in future.
The left plug with hole is fill, the right with magnet is drain.
Attachments
ADK Explorer
New member
ADK Explorer
New member
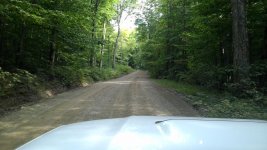
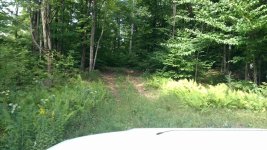
Play time
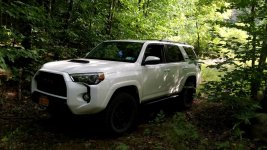
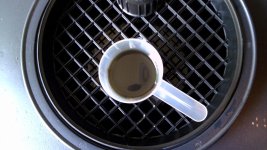
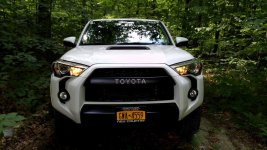
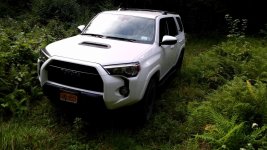
Took the Tank out for some 4 wheel exercise. 4 high, low and locked diff. Smooth as butta !
Took the Tank out for some 4 wheel exercise. 4 high, low and locked diff. Smooth as butta !
Attachments

BlackWorksInc
New member
[MENTION=140174]ADK Explorer[/MENTION]
I used to freak out when I did differentials and the oil came out black and full of shiny metal bits, particularly the newer vehicles. It's actually pretty normal.
I've seen some slivers of metal and flecks that would make me cringe at the thought of a brand new barely 30k old SUV needing a rear Diff. It's usually "wear-in" from the factory as the differential naturally wears-in.
Now if the fluid came out like that with metal flecks on the 3rd or 4th differential fluid as consistently as it did the first I'd be a bit concerned.
But having moved up to an area where customers regularly change their differential fluid, the amount of "sludge" that magnet picks up in 30k is a lot more than I had assumed.
I used to freak out when I did differentials and the oil came out black and full of shiny metal bits, particularly the newer vehicles. It's actually pretty normal.
I've seen some slivers of metal and flecks that would make me cringe at the thought of a brand new barely 30k old SUV needing a rear Diff. It's usually "wear-in" from the factory as the differential naturally wears-in.
Now if the fluid came out like that with metal flecks on the 3rd or 4th differential fluid as consistently as it did the first I'd be a bit concerned.
But having moved up to an area where customers regularly change their differential fluid, the amount of "sludge" that magnet picks up in 30k is a lot more than I had assumed.
ADK Explorer
New member
[MENTION=140174]ADK Explorer[/MENTION]
I used to freak out when I did differentials and the oil came out black and full of shiny metal bits, particularly the newer vehicles. It's actually pretty normal.
I've seen some slivers of metal and flecks that would make me cringe at the thought of a brand new barely 30k old SUV needing a rear Diff. It's usually "wear-in" from the factory as the differential naturally wears-in.
Now if the fluid came out like that with metal flecks on the 3rd or 4th differential fluid as consistently as it did the first I'd be a bit concerned.
But having moved up to an area where customers regularly change their differential fluid, the amount of "sludge" that magnet picks up in 30k is a lot more than I had assumed.
That's reassuring and good to know. I originally wanted to check my fluid for water but going through this whole process and learning from everyone's input has taught me alot about the truck. At least now I know I have a quality fluid in there and don't have to worry about it for a while. Thanks for allaying my concerns.
ADK Explorer
New member
How locking differential & transfer case work -YouTube University
I'm a tech geek and like to know how things work. I put together some links to videos I watched that were interesting and informative.
How Eaton's E-Locker Technology Works: Summit Racing
https://m.youtube.com/watch?v=-VPPGsYq6TE
ELockerMovie: mmuthart
https://m.youtube.com/watch?v=xoniaipOCdU
Testing toyota E-locker wiring.: NMShredder1080
https://m.youtube.com/watch?v=B0eanqCD4gw
Toyota eLocker for a BJ42: dkroth
https://m.youtube.com/watch?v=a7NjYUhd9to
Understanding Limited Slip Differential: Learn Engineering
https://m.youtube.com/watch?v=WeLm7wHvdxQ
Transfer Case - Explained: Engineering Explained
https://m.youtube.com/watch?v=K1qj8dHTmP4
E128 F-250 Transfer Case: sudokuplr456
https://m.youtube.com/watch?v=0gUSaNryioI
Transfer Case Operation: WeberAuto
https://m.youtube.com/watch?v=4UoBCIjWIoU
I'm a tech geek and like to know how things work. I put together some links to videos I watched that were interesting and informative.
How Eaton's E-Locker Technology Works: Summit Racing
https://m.youtube.com/watch?v=-VPPGsYq6TE
ELockerMovie: mmuthart
https://m.youtube.com/watch?v=xoniaipOCdU
Testing toyota E-locker wiring.: NMShredder1080
https://m.youtube.com/watch?v=B0eanqCD4gw
Toyota eLocker for a BJ42: dkroth
https://m.youtube.com/watch?v=a7NjYUhd9to
Understanding Limited Slip Differential: Learn Engineering
https://m.youtube.com/watch?v=WeLm7wHvdxQ
Transfer Case - Explained: Engineering Explained
https://m.youtube.com/watch?v=K1qj8dHTmP4
E128 F-250 Transfer Case: sudokuplr456
https://m.youtube.com/watch?v=0gUSaNryioI
Transfer Case Operation: WeberAuto
https://m.youtube.com/watch?v=4UoBCIjWIoU
ADK Explorer
New member
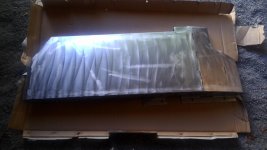
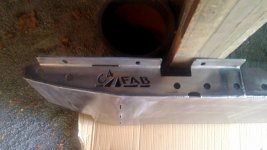
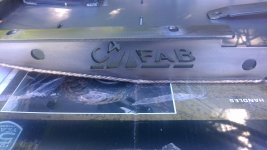
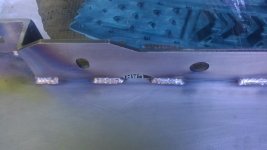
C4 Fabrication Gas Tank Skid Plate
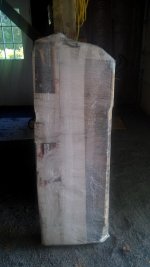
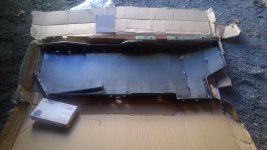
After siix weeks my C4 Fab tank Skid arrived. A big slab of 3/16" steel. About 50" x 16" x 3". 63 lbs. Some damn pretty welds too.
After siix weeks my C4 Fab tank Skid arrived. A big slab of 3/16" steel. About 50" x 16" x 3". 63 lbs. Some damn pretty welds too.
Attachments
ADK Explorer
New member
C4 Fabrication Gas Tank Sid
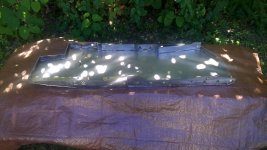
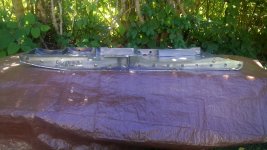
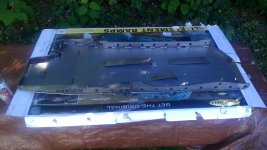
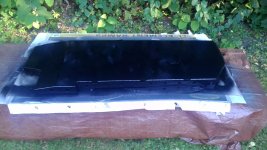
Cleaned and and preped it for paint same as my sliders. Scrub it good with soap and water, wipe it with solvent to remove oils, then wet sand with 400 grit. All ready for paint in my sun dappled work space. lol
Cleaned and and preped it for paint same as my sliders. Scrub it good with soap and water, wipe it with solvent to remove oils, then wet sand with 400 grit. All ready for paint in my sun dappled work space. lol
Attachments
ADK Explorer
New member
C4 Fabrication Tank Skid Paint
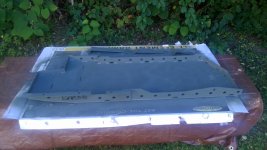
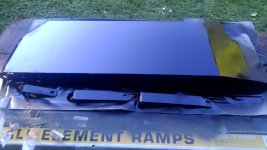
Used Rustoleum self etching primer and acrylic enamel semi-gloss black paint. 2 coats primer , 2 coats paint. It's going to get dragged over rocks so I'll be respraying underneath often. Right now it just needs to prevent rust.
Used Rustoleum self etching primer and acrylic enamel semi-gloss black paint. 2 coats primer , 2 coats paint. It's going to get dragged over rocks so I'll be respraying underneath often. Right now it just needs to prevent rust.
Attachments
ADK Explorer
New member
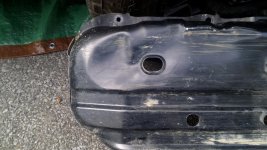
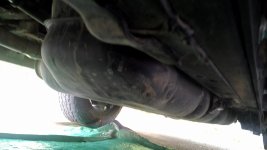
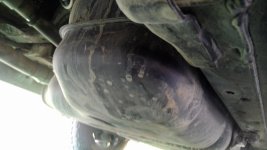
Stock gas tank skid with dent
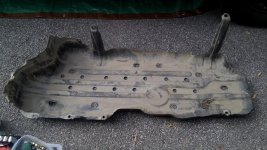
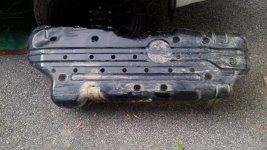
Pulled stock tank skid. As you can see it's pretty thin. Just good for light duty protection. I put a nice dent in it bouncing along a rocky, muddy trail. Despite the dent the gas tank was not effected. Not even a dimple. It's made out of some pretty thick poly ethylene something or other.
Pulled stock tank skid. As you can see it's pretty thin. Just good for light duty protection. I put a nice dent in it bouncing along a rocky, muddy trail. Despite the dent the gas tank was not effected. Not even a dimple. It's made out of some pretty thick poly ethylene something or other.
Attachments
ADK Explorer
New member
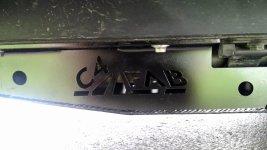
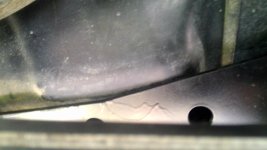
C4 Fab Tank Skid Install
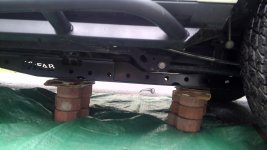
I do not have a floor jack or stands yet so used hillbilly engineering to prop the skid up. One brick each side at a time. lol Worked out really well. Used tools and guidance as posted in C4's instructions.
http://www.toyota-4runner.org/c4-fabrication/214228-install-instructions-c4-fab-fuel-tank-skid.html
Despite being very aware of clearance issues and using a thin piece of cardboard to check clearance between the upper edge of the skid side walls and the tank, when I tightened the last three bolts the skid tweeked and a 1" section on the drivers side just about 2" forward of the rear L bracket seated up against the tank. I loosened several bolts and pulled the skid over but could not regain the clearance. I will have my brother come down and push on the opposite side of the skid with the bolts loosened up while I re-tighten the bolts to see if that will do it. If not I will put some plastic shims in there.
I do not have a floor jack or stands yet so used hillbilly engineering to prop the skid up. One brick each side at a time. lol Worked out really well. Used tools and guidance as posted in C4's instructions.
http://www.toyota-4runner.org/c4-fabrication/214228-install-instructions-c4-fab-fuel-tank-skid.html
Despite being very aware of clearance issues and using a thin piece of cardboard to check clearance between the upper edge of the skid side walls and the tank, when I tightened the last three bolts the skid tweeked and a 1" section on the drivers side just about 2" forward of the rear L bracket seated up against the tank. I loosened several bolts and pulled the skid over but could not regain the clearance. I will have my brother come down and push on the opposite side of the skid with the bolts loosened up while I re-tighten the bolts to see if that will do it. If not I will put some plastic shims in there.
Attachments
ADK Explorer
New member
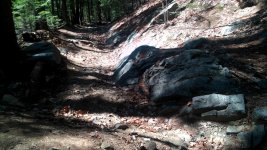
Success ! With my brothers help I lowered the skid down on the brackets and with him pushing on the passenger side I re-tightened the bolts and we got clearance all the way around.
Now I can attempt a narrow, rocky mountain trail I've been dying to get into all summer.
Now I can attempt a narrow, rocky mountain trail I've been dying to get into all summer.
Attachments

Scramble
New member
I changed my rear diff oil because before I did my breather mod I went through several washouts at least up to a foot deep, one was back in March when the water was full of ice chunks. I have just 4950 miles but want to be sure.
I tried to check the oil but the fill plug would not budge. I used a 12 point 24mm socket adapted to a small 3/8" rachet. I read alot of various vehicle forums where evidently this is a notorious problem. Solutions ranged from breaker bars, pipe plug sockets, heat and hammers. Notably most warned against pneumatic wrenches for fear of cracking the housing.
Sprayed WD40 on it yesterday and today, tapped on it with a hammer and put a larger 1/2 " ratchet with a 6 point 15/16" socket on it. Pulled down with everything I had (and I weigh 200 lbs) but no movement. I feared rounding the bolt head so went in and had lunch. Later I tried again, more WD40 and tapping, I put the ratchet on to push up and it gave. I thought, Shit I've rounded the head but tried again and it came right out with no damage.
LOL, you 5th Gen guys have it easy. You dont have any rust yet.
You should Fluid Film everything underneath BEFORE it starts to rust.
I just changed all of my gear oil 2 weeks ago after not doing so for 11 years & 70,000 miles. WD40 a week before on all drain & fill plugs. Then again the night before. Surprisingly all came off pretty easy. A 1/2" ratchet & 6pt metric sockets only. I bought all new plugs but unbelievably I didn't destroy any of the old ones taking them off.
Thanks for the mats & I love your truck.
ADK Explorer
New member
LOL, you 5th Gen guys have it easy. You dont have any rust yet.
You should Fluid Film everything underneath BEFORE it starts to rust.
I just changed all of my gear oil 2 weeks ago after not doing so for 11 years & 70,000 miles. WD40 a week before on all drain & fill plugs. Then again the night before. Surprisingly all came off pretty easy. A 1/2" ratchet & 6pt metric sockets only. I bought all new plugs but unbelievably I didn't destroy any of the old ones taking them off.
Thanks for the mats & I love your truck.
Thanks man. Your ride is looking pretty sweet as well. Yeah I figured I'd get on top of things before the rust sets in. Anti seize on all of the bolts and rust prevention spray goo underneath. I crawled under it just the other day to sand out some small rust spots and hit them with a few coats of Rustoleum. Hopefully I can make it last a little while. I'm digging it so far. Very comfortable and capable. You should have the mats by Thursday. Enjoy.
ADK Explorer
New member
Moose River Wild Forest
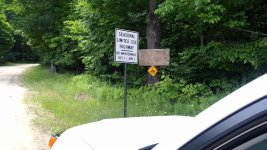
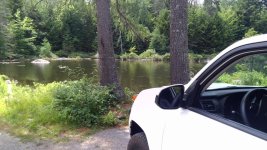
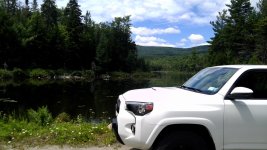
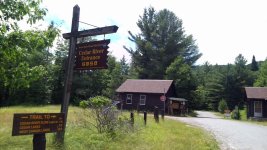
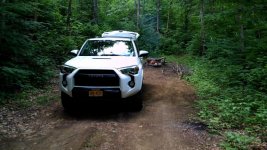
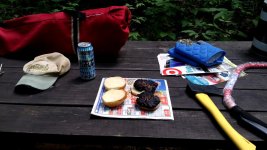
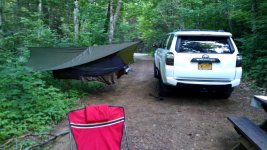
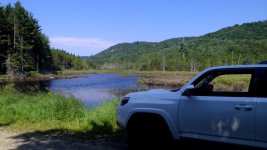
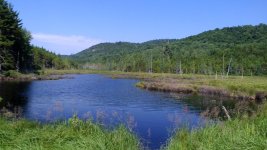
I figured I'd throw in some pics of my camping trip in the Moose River Wild Forest in the Western Adirondacks I did back in July. About 30 miles of dirt access roads with some fun side trails. There are over 100 primitive camp sites along it. Very peaceful.
I figured I'd throw in some pics of my camping trip in the Moose River Wild Forest in the Western Adirondacks I did back in July. About 30 miles of dirt access roads with some fun side trails. There are over 100 primitive camp sites along it. Very peaceful.
Attachments
-
 IMG_20160711_134850.jpg143.7 KB · Views: 1,138
 -
 IMG_20160711_135904.jpg146.4 KB · Views: 1,144
 -
 IMG_20160711_140046.jpg150.8 KB · Views: 1,147
 -
 IMG_20160711_140218.jpg137.9 KB · Views: 1,169
 -
 IMG_20160711_140614.jpg144 KB · Views: 1,127
 -
 IMG_20160711_164021.jpg147.4 KB · Views: 1,141
 -
 IMG_20160711_164111.jpg138 KB · Views: 1,119
 -
 IMG_20160711_190410.jpg144 KB · Views: 1,144
ADK Explorer
New member
Moose River Wild Forest
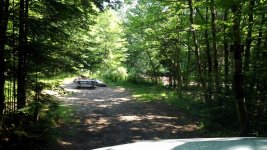
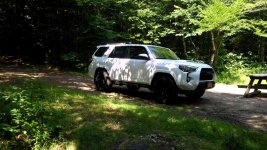
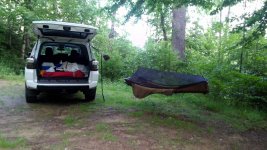
Surprisingly very few sites were occupied.
Surprisingly very few sites were occupied.
Attachments
-
 IMG_20160713_102157.jpg133.2 KB · Views: 1,124
 -
 IMG_20160713_102301.jpg141.5 KB · Views: 1,128
 -
 IMG_20160713_103711.jpg152.3 KB · Views: 1,154
 -
 IMG_20160713_103855.jpg155.9 KB · Views: 1,123
 -
 IMG_20160713_111004.jpg149.5 KB · Views: 1,126
 -
 IMG_20160713_144436.jpg147.8 KB · Views: 1,390
 -
 IMG_20160714_093236.jpg136.5 KB · Views: 1,126
 -
 IMG_20160714_093705.jpg139.4 KB · Views: 1,136
ADK Explorer
New member
The Gatekeeper
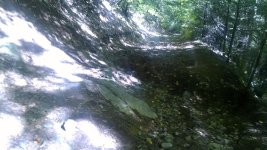
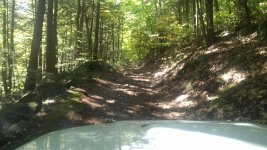
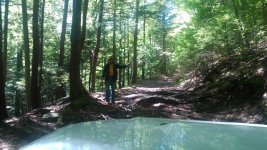
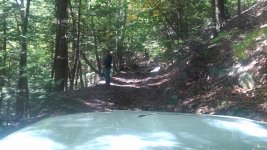
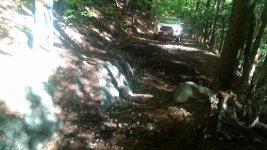
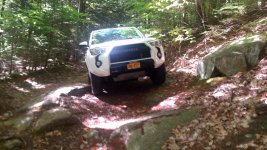
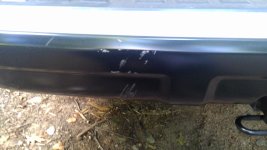
Couldn't do it. The trail I've been dying to try all summer proved too gnarly for The Tank.The largest rock outcropping (I'm now calling the Gatekeeper) denied us. It wasn't as bad in the spring when I scouted the trail but now it is dug out deeper from other vehicles and erosion. I measured the pitch with an pitch tilt app on my tablet and it would have been at least 45°. I was not willing to risk my 45k truck to placate my ego. As it was my brother and I had an exciting moment on the way down when the front passenger wheel dipped into a hole while coming over a boulder on a slope and the ass end teeter tottered up into the air. (Sorry no pics of that we were too busy scrambling to back out and set a new line.) I'm kind of bummed because just beyond the Gatekeeper the trail levels out and becomes an easy drive up over the mountain. Oh well, live to fight another day. There are back door trails on the other side to explore. Only superficial trail damage. My brother is in the pics spotting. Nice technical drive though, 4 lo, A-Trac and occasionally locked rear dif.
Couldn't do it. The trail I've been dying to try all summer proved too gnarly for The Tank.The largest rock outcropping (I'm now calling the Gatekeeper) denied us. It wasn't as bad in the spring when I scouted the trail but now it is dug out deeper from other vehicles and erosion. I measured the pitch with an pitch tilt app on my tablet and it would have been at least 45°. I was not willing to risk my 45k truck to placate my ego. As it was my brother and I had an exciting moment on the way down when the front passenger wheel dipped into a hole while coming over a boulder on a slope and the ass end teeter tottered up into the air. (Sorry no pics of that we were too busy scrambling to back out and set a new line.) I'm kind of bummed because just beyond the Gatekeeper the trail levels out and becomes an easy drive up over the mountain. Oh well, live to fight another day. There are back door trails on the other side to explore. Only superficial trail damage. My brother is in the pics spotting. Nice technical drive though, 4 lo, A-Trac and occasionally locked rear dif.
Attachments
-
 IMG_20161005_133133.jpg143.6 KB · Views: 1,088
 -
 IMG_20161005_133336.jpg148.5 KB · Views: 1,092
 -
 IMG_20161005_133759.jpg151 KB · Views: 1,079
 -
 IMG_20161005_134312.jpg147.5 KB · Views: 1,085
 -
 IMG_20161005_134514.jpg143.5 KB · Views: 1,096
 -
 IMG_20161005_135212.jpg142.2 KB · Views: 1,081
 -
 IMG_20161005_143325.jpg147.8 KB · Views: 1,098
 -
 IMG_20161005_150627.jpg128.6 KB · Views: 1,117