The Tank ~ My Build

Eastwood Rust Protection

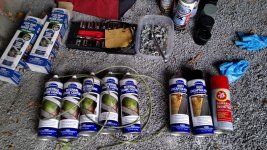
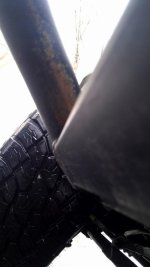
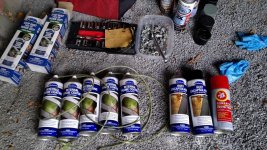
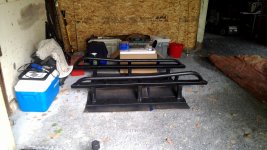
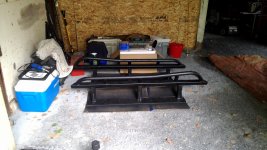
Pulled sliders to grind out rust and repaint and sprayed inside frame rails, cross members and lower A arms with Eastwood Internal Frame coating. (Six cans for 2 coats) Necessary Northeast maintenance.

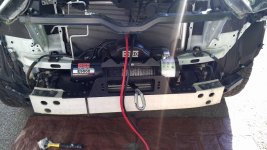
P.S. Bought an Engo 9000S winch. Saving for a Pelfreybilt HWM.
 

Attachments

  • IMG_20170619_131623.jpg
    IMG_20170619_131623.jpg
    142.7 KB · Views: 741
  • IMG_20170619_131614.jpg
    IMG_20170619_131614.jpg
    154.2 KB · Views: 725
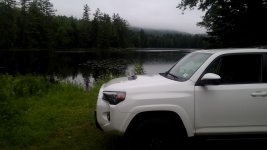
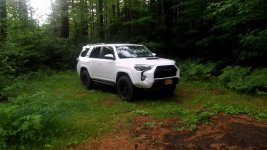
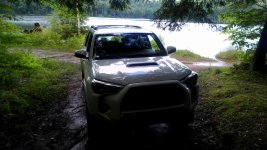
I call it the Tank. lol ...
That's what I call mine too (even though it's mostly stock, it's a Tank compared to anything else I've ever owned or driven).

Congrats on your ride and a cool thread. Always nice to see what others have done to their rides :-)
 
Last edited:
That's what I call mine too (event though it's mostly stock, it's a Tank compared to anything else I've ever owned or driven).

Congrats on your ride and a cool thread. Always nice to see what others have done to their rides :-)

The first time I drove it off road I thought, " Man, this thing is a tank!". So I guess that's it's name.

Thanks.
 
Plastidiped my roof rails black. Looks much better than the silver. I had some grey Plastidip left over so put on two coats as a base and then sprayed two coats of black. It was very humid out so the finish is a bit uneven and I had to touch up several spots where the grey showed through but they turned out pretty good.

Hung the rails from a couple of trees out back. Worked out well.

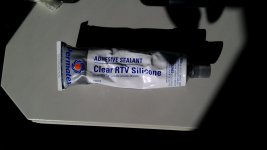
I used medium loctite on the rail bolts when putting them back in and put silicone around bolt heads for weather tight protection.

Here is a good video showing how to remove plastic covers and rails. The plastic bike tire removal tool worked great.

https://youtu.be/HVeuXVOmKbw

Sorry to dig this up, going to plastidip my rails as well. What sort of silicone did you use when resetting the bolts?
 
Last edited:
Sorry to dig this up, going to plastidip my rails as well. What sort of silicone did you use when resetting the bolts?

That's ok. It's what these threads are for. I used some basic stuff I got at the auto parts store. Pretty straight forward.
 

Attachments

  • IMG_20170730_173348.jpg
    IMG_20170730_173348.jpg
    126.6 KB · Views: 582
Budbuilt Hidden Winch Mount on 5th gen TRD Pro

Might as well update the thread while I'm here.

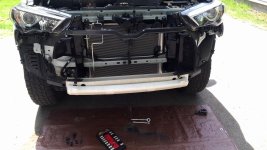
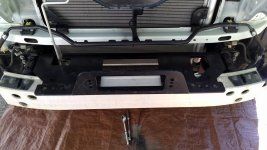
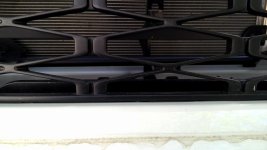
For the record: the Budbuilt HWM will NOT work with the TRD Pro grill. Due to the fact that the mount sits on top of the stock bumper, the vertical fairlead mount plate sets too high in the grill mesh. The fairlead mount needs to be in the license plate area on the Pro and I believe also for the Trail Premium.

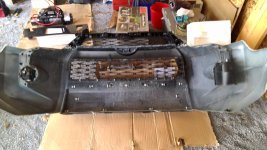
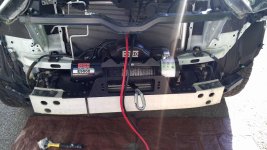
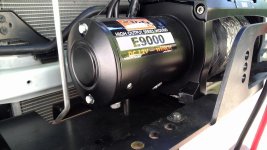
I bought an Engo 9000S winch and got a great deal on the Budbuilt mount from a member. Pulling the front end off was a matter of following all of the bolts, screws and clips to get everything to come loose. Pulling the side panels out over the wheel wells is nerve wracking first time but they pop out in one piece with a little persuasion. If I remember correctly all of the bolts and screw heads are 10mm. Just keep track of which goes where when reinstalling. I waited a day before putting it back on and had a brief Oh Shit moment when looking at all of the connectors piled in the tray. A little patience and common sense got each one back where it belonged.

Also the connectors for the fog lamps have a little nub which when squeezed in alows the connectors to slide right out.
 

Attachments

  • IMG_20170515_180238.jpg
    IMG_20170515_180238.jpg
    143.6 KB · Views: 571
  • IMG_20170516_140855.jpg
    IMG_20170516_140855.jpg
    141.3 KB · Views: 1,237
  • IMG_20170516_140836.jpg
    IMG_20170516_140836.jpg
    136.2 KB · Views: 586
Budbuilt Hidden Winch Mount install

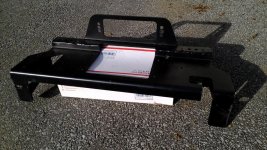
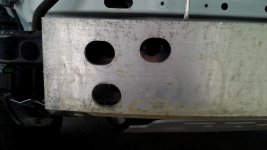
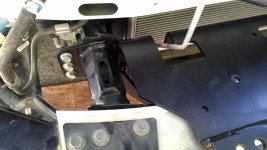
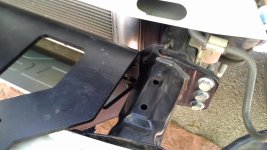
Mounting the Budbuilt on the frame and bumper was fairly easy. The mount bolts onto the two inner bolts only. Pull those two bolts out but leave the six outer bolts alone. In order to get the mount to slide in behind the bumper you have to pull the styrofoam off the front of the bumper and loosen the six bumper mounting bolts inside the bumper. 3 each side. Just loosen them an inch or two. Do not completely remove them. You will need a 14mm deep socket to do so. Once you do this the mount slides into place behind and on top of the bumper.

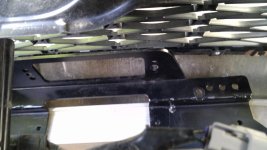
I test fit the whole set up by just setting the winch in place after removing the AC line brackets and moving the line back a bit. Everything fit fine. When I loosely hung the front end on to determine the fairlead placement I found the Budbuilt would not work with the TRD Pro grill. It sits too high and lands right where the plastic cross brace supports the lower grill. To make it work would require hacking up the grill, comprising strength and making the whole thing look like crap.

I was able to sell the Budbuilt mount to another member and am now saving for a Pelfreybilt HWM which is the correct mount for the Pro. This mount replaces the entire bumper assembly putting the fairlead lower where it belongs. Chalk it up to a learning experience.
 

Attachments

  • IMG_20170516_163504.jpg
    IMG_20170516_163504.jpg
    133.5 KB · Views: 569
  • IMG_20170516_164042.jpg
    IMG_20170516_164042.jpg
    135.4 KB · Views: 573
  • IMG_20170516_164048.jpg
    IMG_20170516_164048.jpg
    133.1 KB · Views: 552
  • IMG_20170516_164033.jpg
    IMG_20170516_164033.jpg
    138.8 KB · Views: 561
  • IMG_20170516_170400.jpg
    IMG_20170516_170400.jpg
    139.3 KB · Views: 548
  • IMG_20170516_174202.jpg
    IMG_20170516_174202.jpg
    125.2 KB · Views: 539
  • IMG_20170516_174241.jpg
    IMG_20170516_174241.jpg
    130.1 KB · Views: 545
Last edited:
Good Info for the crowd...

Another note, Don't recall asking but I lived in Central NY, How's the salt roads treating the rig and if you did preventative measures..do tell please
 
Last edited:
Budbuilt Hidden Winch Mount

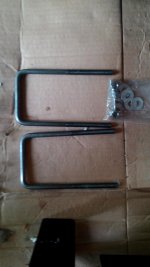
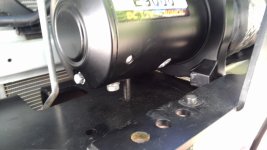
I did have a clearance issue with the ubolts supplied by Bud. In test fitting the inner bolts ran into the bottom housing of the winch. I was going to cut an inch and a half off those arms which still would have left plenty of thread to nut on to. Don't know if anyone else has had this problem. Just a heads up.
 

Attachments

  • IMG_20170521_132350.jpg
    IMG_20170521_132350.jpg
    126.9 KB · Views: 543
  • IMG_20170516_170317.jpg
    IMG_20170516_170317.jpg
    136.9 KB · Views: 549
  • IMG_20170516_170310.jpg
    IMG_20170516_170310.jpg
    126.9 KB · Views: 549
Last edited:
Rust Prevention

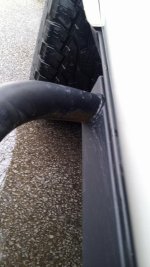
After it's first real winter the sliders which I painted with Rustoleum had quite a bit of rust on them so I decided to pull them off, grind out the rust and repaint them using Eastwood Rust Encapsulating Paint. I was planning on spraying inside the frame rails with Eastwood Internal Frame Coating so I had to pull the sliders to gain access to all of the holes in the frame anyway.

It took me 4 hours with my rotary tool and several sanding drums to get all of the rust patches ground out. It was much more extensive than I thought. Needless to say I'm disappointed with the Rustoleum.

I put a coat of the Eastwood paint on and because I had left over Rustoleum and black Plastidip I put coats of those on too. I figure the rubberized component of the Plastidip may be an effective barrier. The Plastidip is not a good outer coat because everything sticks to it and cannot be wiped off so I finished with two coats of Rustoleum matte black. Lets hope this does it. I also plan on spraying lots of Fluidfilm on them before winter.

I sprayed Eastwood Internal Frame Coating (green) inside my frame rails, cross members and lower A arms. It took eight cans to do 3 coats. Access was plentiful with all of the holes in the rails. You will want to straighten the spray lines that come with it ahead of time. They come curled up. I laid them out flat and put some heavy objects on them for a couple of days. The process is messy so put a tarp down to catch the excess that comes out the other holes, wear nitrile gloves and eye protection.

I also sand out any surface rust underneath as I find it and repaint with Eastwood Rust Encapsulating paint. Along with the Fluidfilm I plan on spraying extensively underneath before winter I hope this will buy more time for the frame. Love snow. Hate rust!
 

Attachments

  • IMG_20170208_192316.jpg
    IMG_20170208_192316.jpg
    53.5 KB · Views: 1,197
  • IMG_20170208_192335.jpg
    IMG_20170208_192335.jpg
    29.2 KB · Views: 1,203
  • IMG_20170619_131614.jpg
    IMG_20170619_131614.jpg
    154.2 KB · Views: 1,211
  • IMG_20170619_131623.jpg
    IMG_20170619_131623.jpg
    142.7 KB · Views: 1,217
Last edited:
Minor adventures

I suppose I should include some excursions.

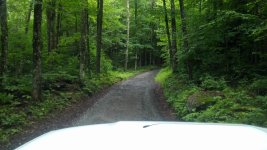
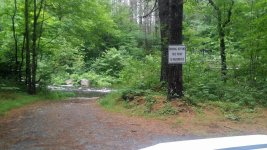
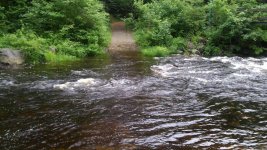
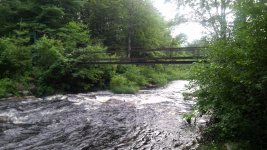
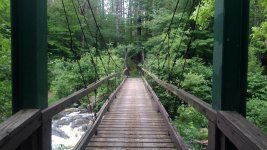
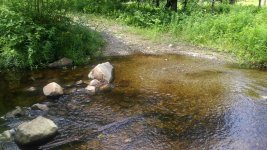
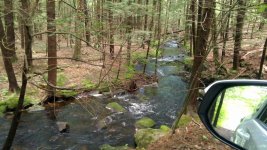
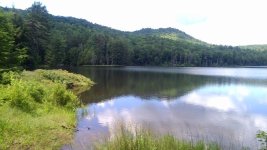
Scouted out a (new to me) remote area for backpacking and camping. Wilcox Lake Wild Area. Was able to drive quite a ways in but a swollen creek forced me to park and hoof it the rest of the way. Ran into a couple of guys on quads who have a hunting camp nearby, they said it's prime moose and bear country. I'll definitely be returning.
 

Attachments

  • IMG_20170713_140956.jpg
    IMG_20170713_140956.jpg
    141.7 KB · Views: 947
  • IMG_20170713_141919.jpg
    IMG_20170713_141919.jpg
    146.8 KB · Views: 956
  • IMG_20170713_180551.jpg
    IMG_20170713_180551.jpg
    150.6 KB · Views: 947
  • IMG_20170713_180607.jpg
    IMG_20170713_180607.jpg
    148.7 KB · Views: 956
  • IMG_20170713_142153.jpg
    IMG_20170713_142153.jpg
    146.9 KB · Views: 968
  • IMG_20170713_135930.jpg
    IMG_20170713_135930.jpg
    128.9 KB · Views: 960
  • IMG_20170713_180638.jpg
    IMG_20170713_180638.jpg
    142.1 KB · Views: 985
Had time to kill before a drs apt up north so found another access trail to explore. Found another water crossing but this one was manageable. lol I also found a rock which I did not see that made alot of disturbing noise on my skid plates. I will have to crawl under it tomorrow to assess the carnage.

That rock left some nice gouges down my front skid, factory mid skid, cross member, tank skid and rear dif housing. I've been planning on getting a set of aluminum skids down the road but now may have to bump them up the list and consider steel instead. My front aluminum skid is holding up but has several gouges and a dent and the trails I drive are full of rocks. The cheesy factory oil pan skid is earning it's keep. That poor thing is taking a beating and hanging in there, lol. I'm also going to get a dif skid asap, it's getting pretty banged up. The C4 Fab steel gas tank skid is bullet proof. Rocks just polish that sucker. Love it!
 

Attachments

  • IMG_20170718_133146.jpg
    IMG_20170718_133146.jpg
    149.5 KB · Views: 952
  • IMG_20170718_133147.jpg
    IMG_20170718_133147.jpg
    144.1 KB · Views: 949
  • IMG_20170718_133328.jpg
    IMG_20170718_133328.jpg
    144.7 KB · Views: 942
  • IMG_20170718_133903.jpg
    IMG_20170718_133903.jpg
    150 KB · Views: 943
  • IMG_20170718_134609.jpg
    IMG_20170718_134609.jpg
    138.5 KB · Views: 931
  • IMG_20170718_134733.jpg
    IMG_20170718_134733.jpg
    143 KB · Views: 940
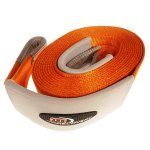
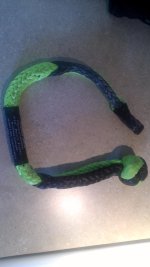
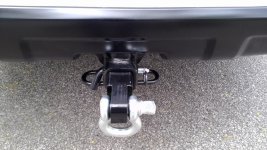
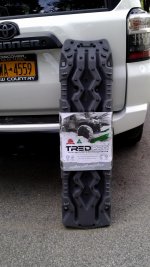
Since I got my Tred Pro recovery boards today I figured I'd add some of my recovery stuff.

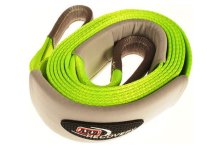
ARB Snatch Strap 24000 lbs ~ ARB Tree Strap 26500 lbs ~ Gator Jaw Soft Shackle 32000 lbs ~ Bestop HighRock Recovery Hitch & D Ring 9500 lbs ~ Tred Pro Recovery Boards ~ Engo 9000 Synthetic Winch (which I do not have mounted yet because I'm waiting for the Pelfreybilt HWM holiday sale. Eventually I will also get more soft shackles and a load equalizing bridle.
 

Attachments

  • R1 ARB Snatch Strap 24000 lbs.jpg
    R1 ARB Snatch Strap 24000 lbs.jpg
    118 KB · Views: 861
  • R2 ARB Tree Strap 26500 lbs.jpg
    R2 ARB Tree Strap 26500 lbs.jpg
    101.2 KB · Views: 849
  • R4 Gator Jaw Soft Shackle.jpg
    R4 Gator Jaw Soft Shackle.jpg
    129 KB · Views: 861
  • R5 Bestop HighRock Recovery Hitch & D Ring 9500 lbs.jpg
    R5 Bestop HighRock Recovery Hitch & D Ring 9500 lbs.jpg
    143.7 KB · Views: 861
  • R8 TredPro Recovery Boards.jpg
    R8 TredPro Recovery Boards.jpg
    139.3 KB · Views: 876
  • IMG_20170516_170400.jpg
    IMG_20170516_170400.jpg
    139.3 KB · Views: 854
Plastidiped my shiny rear emblem and letters gunmetal grey. I wanted them to somewhat match the front TOYOTA emblem which came grey.


How is your plastidip holding up overall? Mine is pretty much shot on both front and back emblems after 2-3 car washes... not the side emblems tho nor bottom front/back trim. Looks ghetto now. Really dreading the scrape off and re-spray


Sent from my iPhone using Tapatalk
 
You should make a weekend trip north of the border and I could show you around some trails. Only a couple hour drive for you!
 
How is your plastidip holding up overall? Mine is pretty much shot on both front and back emblems after 2-3 car washes... not the side emblems tho nor bottom front/back trim. Looks ghetto now. Really dreading the scrape off and re-spray

My plastidip is holding up very well. I do not go through automatic car washes. I pressure rinse after offroading to get the mud off but am careful not to spray too close on the dipped areas. I handwash about once a month. I want to remove the pseudo air scoop to recoat because the air turbulence has roughed it up a bit. I may try the Plastidip clear coat over that. Otherwise I am happy with it.


You should make a weekend trip north of the border and I could show you around some trails. Only a couple hour drive for you!

That would be great. I am thinking of doing some longer road trips next year so will definitely give you a shout. Right now all my extra cash is going into getting my rig wrapped up. I've been to Montreal a couple of times. Beautiful country up there.
 
My plastidip is holding up very well. I do not go through automatic car washes. I pressure rinse after offroading to get the mud off but am careful not to spray too close on the dipped areas. I handwash about once a month. I want to remove the pseudo air scoop to recoat because the air turbulence has roughed it up a bit. I may try the Plastidip clear coat over that. Otherwise I am happy with it.


That would be great. I am thinking of doing some longer road trips next year so will definitely give you a shout. Right now all my extra cash is going into getting my rig wrapped up. I've been to Montreal a couple of times. Beautiful country up there.


That's unfortunate! Never understood why people build their vehicles but don't use them. A stock 4runner with good tires could get you through a lot. And a weekend of camping and wheel doesn't cost much more than food and gas.
 

Members online

Forum statistics

Threads
278,316
Messages
3,554,111
Members
248,016
Latest member
Advally Service

Trending content

Back
Top