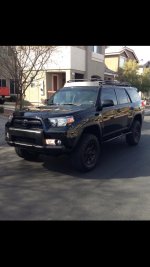
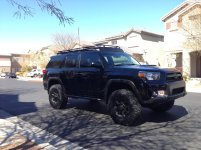
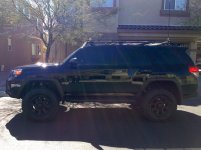
Vegas: 2012 Trail build thread

No Mikey, slight trim was sarcastic....if you look at a few post ago I posted pics on how much you need to cut out... It's not crazy just time consuming, doing a little dremel'ing at a time till the face plate becomes flush.

Lol. Ok I thought you were saying you did not need to do all that but copy lots of trimming.
 
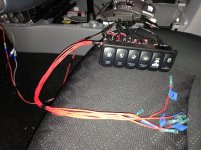
wiring 2.0 switches... they all light of this time...
2013-02-16 17.01.03.jpg
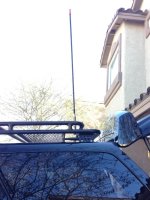
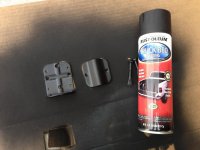
Cb antenna mount... have to black it out to match the truck...
2013-02-16 15.21.49.jpg
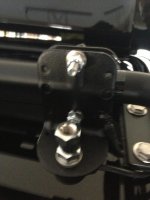
still no clue where to mount it though... trying to stay in the rear driver side so that the cord doesn't have far to travel... kind of wish I had a machine shop in the garage to fab up a custom bracket to fit it.
maybe here?
2013-02-16 08.26.43.jpg

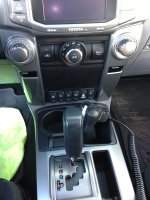
as soon as I find a spot to mount the antenna I will be able to finally throw the trim panels back on and put the center console on... you will never know how much you miss having two cup holders until you get Starbucks for two.
 

Attachments

  • 2013-02-16 17.01.03.jpg
    2013-02-16 17.01.03.jpg
    138.5 KB · Views: 2,469
  • 2013-02-16 15.21.49.jpg
    2013-02-16 15.21.49.jpg
    135.4 KB · Views: 1,975
  • 2013-02-16 08.26.43.jpg
    2013-02-16 08.26.43.jpg
    134.4 KB · Views: 2,265
So MOD-MANIA comes to an end... (for now)

Been a crazy two weeks... I knew it had to come to an end when the neighbors walked past and said "So you're still working on your car? You need some help or something?"

So I accomplished everything I wanted to...(within my budget)

Installed the Painless Aux fuse panel.
Kappas in dash and all doors.
Infinity Powered sub woofer (still need to strap down and tune it)
sound deadening through doors and cargo floor
Otrattw switches mounted.
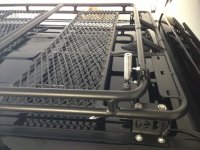
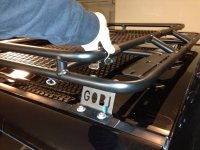
Gobi rack installed.
CB Cobra in arm console.
Fire stick antenna mounted on gobi.( and SWR tuned to 1.1 thanks Okie)
Also ran wires for future roof lights and under the hood compressor and behind grill lights.

Still to come...
Kappas in tailgate and also sound deaden in there.
New stronger tailgate struts (thanks to SoCaltrail for finding them)
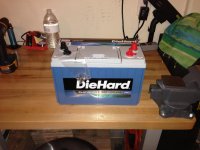
Dual Die Hard batteries (and possible IBS management system)
Viair compressor under the hood.
285's!!! (some day)
rigid lights... 6in-20in-6in in front and two 6in in rear.
Gobi Ladder (whenever they decide to ship it to me)
Powder Coat the rims permanent black instead of plasti-dip.

It never ends... I wish I never found this website I was so happy with my Stock TE in the before time!

Thanks to the folks that helped guide me along the way and always a big thanks to anyone whoever stops what they are doing to take pics and do a write-up of an instal.

I was so happy that all the panels popped back together so easy.
2013-02-17 13.35.13.jpg

2013-02-16 10.15.51.jpg

2013-02-17 10.57.27.jpg

2013-02-17 09.37.40.jpg

2013-02-17 10.46.01.jpg

2013-02-17 09.48.04.jpg

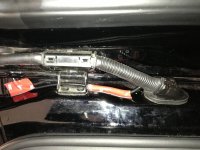
Still really nervous about the small hole i had to put in the rear tailgate wire loop gromment thing.. I closed it off with Liquid electric tape but I will be keeping a very close eye on it to make sure I don't have a leak.

Please feel free to look through and see if there is anyway to improve what I have done or if you notice I left a tire off or something.

 

Attachments

  • 2013-02-17 13.35.13.jpg
    2013-02-17 13.35.13.jpg
    129.9 KB · Views: 1,705
  • 2013-02-16 10.15.51.jpg
    2013-02-16 10.15.51.jpg
    80.1 KB · Views: 1,608
  • 2013-02-17 10.57.27.jpg
    2013-02-17 10.57.27.jpg
    135.1 KB · Views: 1,586
  • 2013-02-17 09.37.40.jpg
    2013-02-17 09.37.40.jpg
    135 KB · Views: 1,637
  • 2013-02-17 10.46.01.jpg
    2013-02-17 10.46.01.jpg
    134.2 KB · Views: 1,682
  • 2013-02-17 09.48.04.jpg
    2013-02-17 09.48.04.jpg
    134 KB · Views: 1,613
So first sprinkle of rain yesterday since I installed the Gobi and "stabbed" a hole in the rearhatch wire grommet... Only a sprinkle so not enough to know if I sealed around the bolt holes and grommet... I was driving and yelling at the GF "babe look for any signs of water coming through the headliner!" That conversation went over well...

Also got the 285's coming in today... Pics posted soon... I am guessing I'll have to redo the plasti-dip on my rims since I am assuming the edges will get pulled off when installing it. Time to redo my badges anyways starting to get little bumps and lint stuck it... Maybe ill try a little clear coat after the plasti-dip this time to seal and protect it...?
image.jpg
 

Attachments

  • image.jpg
    image.jpg
    137.4 KB · Views: 2,717
I think someone else tapped into that same rubber grommet on the rear and had water enter as well.
yeah it was Mebe4running post that scares me...
http://www.toyota-4runner.org/5th-gen-t4rs/130316-live-update-mebe4runnings-cave-operation-2.html
At least he had the know how to be able to remove the headliner and panels to fix the leak and dry the car out... I would be lost if it happened to me.. it would be lots of PMs all around to figure out how remove the headliner and put it back.
 
Plasti-Dip + Clearcoat = Headache

So first sprinkle of rain yesterday since I installed the Gobi and "stabbed" a hole in the rearhatch wire grommet... Only a sprinkle so not enough to know if I sealed around the bolt holes and grommet... I was driving and yelling at the GF "babe look for any signs of water coming through the headliner!" That conversation went over well...

Also got the 285's coming in today... Pics posted soon... I am guessing I'll have to redo the plasti-dip on my rims since I am assuming the edges will get pulled off when installing it. Time to redo my badges anyways starting to get little bumps and lint stuck it... Maybe ill try a little clear coat after the plasti-dip this time to seal and protect it...?
View attachment 82098

Clearcoating over the plasti-dip removes its plasti-dip qualities. It will no longer peel off easily. Unfortunately I learned the hard way :frusty:

It does make it easier to clean...just don't plan on peeling it off. I did my wheels a while back with a fresh coating of plasti-dip and had some Rustoleum automotive clearcoat left over form another project and decided to give it a try. A few months after I noticed a few imperfections on a wheel so I thought I would peel off the old and apply new...2 hours later and only getting the dip off a narrow outer section of one wheel, I gave up! I used their repair formula ("special" mix of paint thinners) to smooth over the edges and just applied a new coat all over.
 
Yes, do not use regular clear coat over plasti-dip. If you want high gloss use the "glossifier" that plasti-dip makes, will still peel like normal.

24926815_29710797_trimmed.jpg
 
Clearcoating over the plasti-dip removes its plasti-dip qualities. It will no longer peel off easily. Unfortunately I learned the hard way :frusty:

It does make it easier to clean...just don't plan on peeling it off. I did my wheels a while back with a fresh coating of plasti-dip and had some Rustoleum automotive clearcoat left over form another project and decided to give it a try. A few months after I noticed a few imperfections on a wheel so I thought I would peel off the old and apply new...2 hours later and only getting the dip off a narrow outer section of one wheel, I gave up! I used their repair formula ("special" mix of paint thinners) to smooth over the edges and just applied a new coat all over.
Thanks for the heads up!!! I always prefer to learn from others mishaps... since I have enough of my own.:doh:

Yes, do not use regular clear coat over plasti-dip. If you want high gloss use the "glossifier" that plasti-dip makes, will still peel like normal.
great find I think I saw this used on a few Youtube videos where they did the rims and used it as a last coat.... I don't want it too "glossified" but maybe a quick coat to make it last a little longer.
 
Thanks for the heads up!!! I always prefer to learn from others mishaps... since I have enough of my own.:doh:


great find I think I saw this used on a few Youtube videos where they did the rims and used it as a last coat.... I don't want it too "glossified" but maybe a quick coat to make it last a little longer.

Hey Vegas!

Don't use more than one coat of that Plastic Dip gloss. In my experience if you use too much it turns cloudy, making your black look a little grey.
 
Upgraded to 285 Duratracs!!! It was just my time... It was just my time...

Bit of a pain in the process... Discounts Tires wasn't a fan of my Spidertrax spacer so they had to remove them to install the tires.. If i knew how much time it would take to clean all the old Loctight off the threads I might have pulled the truck in the parking lot and jacked up the truck and rolled 1 wheel in the shop at a time.
2013-02-24 16.24.45.jpg
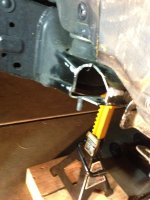
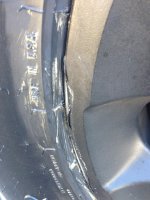
Also had to do some body chomping to fit the 285+Spidertrax... need to find a shop to weld a plate

2013-02-24 21.14.03.jpg
Oh yeah FYI lots of sparks flying when trying out the grinder didn't have a face shield so had to get creative to keep my face pretty.
2013-02-24 18.29.48.jpg
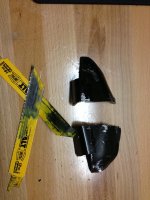
in the end used the jigsaw less sparks involved and only broke two blades
2013-02-24 21.19.19.jpg
 

Attachments

  • 2013-02-24 16.24.45.jpg
    2013-02-24 16.24.45.jpg
    122.3 KB · Views: 2,323
  • 2013-02-24 21.14.03.jpg
    2013-02-24 21.14.03.jpg
    132.1 KB · Views: 2,098
  • 2013-02-24 18.29.48.jpg
    2013-02-24 18.29.48.jpg
    85.8 KB · Views: 2,137
  • 2013-02-24 21.19.19.jpg
    2013-02-24 21.19.19.jpg
    131 KB · Views: 2,117
So all done for a min...(till I hit the lottery and get some rigid lights)
Still getting a little rub after the chomp chomp so going to take advantage of my Firestone lifetime alignment and and take all the notes given to me in this thread: http://www.toyota-4runner.org/5th-g...lifetime-alignment-icon-lift-1-no-so-far.html
and tell them I want +4 degrees caster and hope that solves it.
Thanks to all the continued help.:cheers:
2013-02-25 11.00.18.jpg

2013-02-25 11.01.22.jpg
gotta love my cell phone pics!!!

and going to have to redo the plasti-dip on the rims... they don't hold up too well when switching tires, this time I'll keep them on the car.
2013-02-25 11.01.59.jpg
 

Attachments

  • 2013-02-25 11.00.18.jpg
    2013-02-25 11.00.18.jpg
    135.2 KB · Views: 9,893
  • 2013-02-25 11.01.22.jpg
    2013-02-25 11.01.22.jpg
    136.9 KB · Views: 3,258
  • 2013-02-25 11.01.59.jpg
    2013-02-25 11.01.59.jpg
    130.9 KB · Views: 2,095
Storage ideas?

Got this pretty thing today... not sure if I am going to install it or use it to power my walkman.
Photo Mar 20, 9 24 54 PM (HDR).jpg

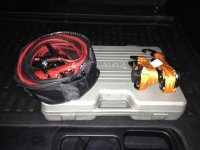
Next up on the Mod list is finding some kind of storage chest/box for misc. stuff to keep it from rolling around the back. I don't have too much gear for in town commutes.. just a tool box, some jumper cables and ratcheting straps.
Photo Mar 20, 9 25 59 PM (HDR).jpg

I would like to have it fit next to the sub to keep as much rear area available and also make sure I can still use the slide out tray.
Photo Mar 20, 9 23 24 PM.jpg

I am super impressed with the storage boxes I have seen you kids build around this joint lately... but carpentry is way down on my need-to-learn skills... still need to learn soldering and then welding... then I'll try build a bird house and if that turns out ok, I'll attempt a storage box.

so right now I am thinking the gobi tool box would fit the bill but I kind of have trust issues leaving anything in a metal box on my roof... I think hoodlums would have no hesitation breaking in thinking I had snap-on tools in there when jokes on them they are Crescent... whammy.

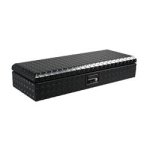
really like this option thanks to Mick1
Deflecta-Shield Challenger ATV Storage Boxes 288272 - PowerSportsPlace.com

dea-288272_w_ml.jpg

But it's a lil' bit too big (that's what she said) to fit... :jaw:
 

Attachments

  • Photo Mar 20, 9 24 54 PM (HDR).jpg
    Photo Mar 20, 9 24 54 PM (HDR).jpg
    125.9 KB · Views: 2,091
  • Photo Mar 20, 9 25 59 PM (HDR).jpg
    Photo Mar 20, 9 25 59 PM (HDR).jpg
    129.6 KB · Views: 2,068
  • Photo Mar 20, 9 23 24 PM.jpg
    Photo Mar 20, 9 23 24 PM.jpg
    135.5 KB · Views: 2,160
  • dea-288272_w_ml.jpg
    dea-288272_w_ml.jpg
    5.1 KB · Views: 2,047
Is height your concern with that box or the length to fit within the Gobi rails?

Every website has different dimensions for that stupid box. :crazy:

There was a guy that mounted it on his xterra and indicated that the length was only 32" and it fit between his rails.

Only reason I don't like that box is the 6" height. Truck is 74" right now. When I get 285 tires, that'll be 74.5". I am trying to still be able to fit in a 6'8", (80") garage.

I would like to get the recovery straps and junk mounted on the roof. I may go price out a custom box. This place indicates it does custom and has dealers all over. Have to work through a local dealer. Pro-Tech Industries Cab Racks, Tractor Trailer Accessories, Pickup Truck Accessories, Toolboxes, etc.
 
Is height your concern with that box or the length to fit within the Gobi rails?

Every website has different dimensions for that stupid box. :crazy:

There was a guy that mounted it on his xterra and indicated that the length was only 32" and it fit between his rails.

Only reason I don't like that box is the 6" height. Truck is 74" right now. When I get 285 tires, that'll be 74.5". I am trying to still be able to fit in a 6'8", (80") garage.

I would like to get the recovery straps and junk mounted on the roof. I may go price out a custom box. This place indicates it does custom and has dealers all over. Have to work through a local dealer. Pro-Tech Industries Cab Racks, Tractor Trailer Accessories, Pickup Truck Accessories, Toolboxes, etc.

You want to mount all that stuff to the roof? But you just made that sweet cargo drawer system that could fit a few bodies... Never mind after looking at the new pics of what your skids plates looked like before repainting them, it appears your 4runner gets way more use than mine...

I am with you on the height factor of that box, right now I have about 4 inch clearance getting into the parking garage at my work... Once I don't fit I'll have to park in the oversized lot which is uncovered, which means my black car will sit in the Vegas Sun for 10 hours @ 110-120 degree heat:flame:

But I actually wanted to try to fit that box next to my subwoofer in the cargo area but I only have 29in of free space with the sub there... And looks like the box is 32ins so it's a no go... So prob go with a gobi tool box on the rack at least it's out of the way... (((On a side-note I shouldn't have listen to Antman this "one" time on that sub, it's so loud I have it turned pretty much down to the lowest setting, if not my dogs may go retarded... Should have gone under the seat, would have been plenty for me or looked into the crazy expensive box that is built into the rear panel... Now I know Antman is that kid that drives up and down the street vibrating every panel listening to Hard Bass Greatest Booms Volume 2))

Oh and your truck is looking great, kind of jealous of your garage too... if i didn't have to run out and buy a tool every time I work on the truck I could spend more $$$ on the parts... But kind of like building a decent set of tools, could be a 1/2 snap-on 80 teeth ratchet in my near future I'll be buried with it:rip:
 
(((On a side-note I shouldn't have listen to Antman this "one" time on that sub, it's so loud I have it turned pretty much down to the lowest setting, if not my dogs may go retarded... Should have gone under the seat, would have been plenty for me or looked into the crazy expensive box that is built into the rear panel... Now I know Antman is that kid that drives up and down the street vibrating every panel listening to Hard Bass Greatest Booms Volume 2))

Oh and your truck is looking great, kind of jealous of your garage too... if i didn't have to run out and buy a tool every time I work on the truck I could spend more $$$ on the parts... But kind of like building a decent set of tools, could be a 1/2 snap-on 80 teeth ratchet in my near future I'll be buried with it:rip:

You gotta turn the gain down on the amp, and the bass on the head unit should be at -2 or -3.
Mine sounds great- not too much (unless I put in the Hard Bass Greatest Booms Volume 2 CD, that is).

Remember- you're the bass boss, not the sub, LOL.
Play with your knobs a bit, just don't tell your Mom you did it.:frisky:
 
You gotta turn the gain down on the amp, and the bass on the head unit should be at -2 or -3.
Mine sounds great- not too much (unless I put in the Hard Bass Greatest Booms Volume 2 CD, that is).

Remember- you're the bass boss, not the sub, LOL.
Play with your knobs a bit, just don't tell your Mom you did it.:frisky:

Look what the bass did to chunk.. my now special.. English bull dog.
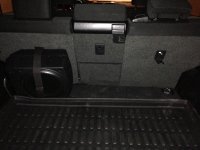
image.jpg
Hope your happy Antman.
 

Attachments

  • image.jpg
    image.jpg
    71.5 KB · Views: 1,799

Members online

Forum statistics

Threads
278,310
Messages
3,554,079
Members
248,016
Latest member
Advally Service

Trending content

Back
Top