What did you do to/in your 5th Gen today?!

Had some fun down in Moab...

pegemu2a.jpg

ujeduqy7.jpg

ry7udyvu.jpg

a6ubymav.jpg

Cleaning out the newly acquired sand
ra2a9uhe.jpg


e2u5u6e3.jpg

6uru3ymy.jpg


qyre3ahu.jpg


3umuzebu.jpg


ma5e7ape.jpg


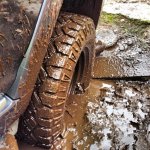
We found a big water hole and I got lucky. BFG MTs and ATRAC saved my bacon...

ybu5y3y7.jpg

eqemuna2.jpg

y9y5ezup.jpg

yhe2u7u5.jpg

Nice and dirty after the hole and dragging the Taco out...
uveju3a8.jpg


My friend wasn't so lucky in his Taco

http://www.youtube.com/watch?v=ZR4MyWKXj-8
7usuje4a.jpg

re8ubu9e.jpg

Inside the cab
a3udevu2.jpg

Some redneck CV ripped boot repair.
aduju7uh.jpg


The CV ended up self destructing, but he was able to drive the truck home without any issues.


Ran into Jeremy that night and spoke with him in the morning, very nice guy and nice well used rig.
a5y4ynab.jpg
 
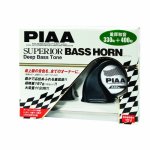
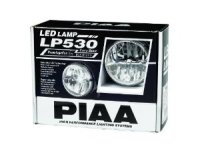
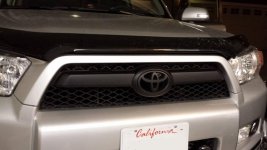
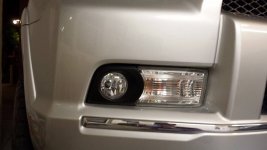
Installed Piaa's Superior Bass Horn & Piaa's LP530 LED fog lights (yes, in addition to the stock ones that came with the truck) and did some plasti dippin. I think I'm hooked on plasti dippin!

The new horns are very loud (did managed to scared my wife) but the fog lights are a little disappointing. Will have pics of the "lights show" later.

To the pics!
 

Attachments

  • 05.jpg
    05.jpg
    46.1 KB · Views: 1,211
  • 06.jpg
    06.jpg
    14.3 KB · Views: 1,198
  • 01.jpg
    01.jpg
    52.9 KB · Views: 1,193
  • 02.jpg
    02.jpg
    39.3 KB · Views: 1,187
  • 03.jpg
    03.jpg
    36.6 KB · Views: 1,190
  • 04.jpg
    04.jpg
    41.1 KB · Views: 1,203
Light offroading (hardly counts though -- never even needed to leave 2hi). Hollister Hills SVRA green trails, because it was my first time ever trying this crazy driving-on-dirt thing.

6cI99VE.jpg
 
Ran into one of the more famous 5th gens on my way back from Capitol Reef in Green River this morning. Ran Lockhart Basin on the way home from there.
Copy%20of%20DSCN1577.jpg

Copy%20of%20DSCN1582.jpg

Copy%20of%20DSCN1590.jpg
Copy%20of%20DSCN1591.jpg

Copy%20of%20DSCN1593.jpg

Copy%20of%20DSCN1598.jpg

Copy%20of%20DSCN1602.jpg

Copy%20of%20DSCN1607.jpg

Copy%20of%20DSCN1608.jpg

Copy%20of%20DSCN1617.jpg
 
went out to shiloh ridge park in Alto, TX. didnt do much riding around in the 4runner. only a few washouts but nothing pic worthy.just had a blast on the side x sides.


trails are much steeper than the pictures make them seem

ran into this awesome old willys out there going down pretty much all the trails


and the owner of the parks ford
 
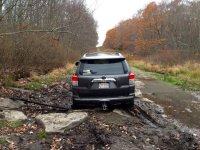
Made the mistake of wheeling by myself on Sunday. Well, my brother was with me but we were in my truck. Was sure missing the New England crew at this particular moment lol. I always know not to go by myself but just couldn't resist. Explored an area not far from my parent's place. Nothing difficult at all except for this sloppy, soft muddy part. I figured I'd try to stay on the rocks. That plan quickly fell apart. Lesson learned.
 

Attachments

  • IMG_1494.jpg
    IMG_1494.jpg
    139 KB · Views: 1,070
  • IMG_1512.jpg
    IMG_1512.jpg
    138.9 KB · Views: 1,063
  • IMG_1513.jpg
    IMG_1513.jpg
    141.8 KB · Views: 1,048
  • IMG_1501.jpg
    IMG_1501.jpg
    138.4 KB · Views: 1,054
working on putting LED's in the 2014 trail. anyone know how to remove the lights in the hatch. i have tried to but dont want to break anything
 
working on putting LED's in the 2014 trail. anyone know how to remove the lights in the hatch. i have tried to but dont want to break anything

If it is the same as my '13, you just lightly pry the housing out with a flathead screwdriver. The wire connection will be on one side so you will have to pry the opposite side out first.
 
If it is the same as my '13, you just lightly pry the housing out with a flathead screwdriver. The wire connection will be on one side so you will have to pry the opposite side out first.

got it thanks. installed a 3175 that i had gotten by mistake for my 4th gen.
ordering all the other bulbs tomorrow.

i have a 6418 not in use but it does not fit. i do like the way these housing are made because you can get good 3175's vs 3022 led's
 
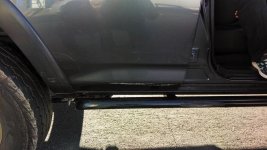
New mod courtesy of another motorist not paying attention...

Good news is that little 3M clear sticker they put on the bottom of the doors worked...no paint damage! $10 replacement sticker from the dealer.

She took the powdercoat off the slider but oh well! Good thing I didn't have the BEEFY KICKOUTS or her airbag may have gone off.
 

Attachments

  • IMG_20131103_152125027_HDR.jpg
    IMG_20131103_152125027_HDR.jpg
    98.5 KB · Views: 1,730
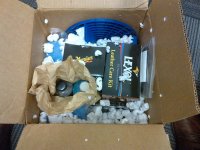
A lil' variety pack arrived from Autogeek. Let's see: we've got some ONR, Iron-X, Meguiar's Smooth Surface Clay Kit, Lexol Leather Cleaner and a Conditioner, a grit guard, 2 Lake Country foam wash sponges (never used them before), a 20 pack of nitrile gloves, and the Waxing power pack for my Meguiar's DA Power System.
 

Attachments

  • IMG-20131104-00332.jpg
    IMG-20131104-00332.jpg
    136.7 KB · Views: 1,624
I installed my Tr4unner as well as other stickers yesterday and someone actually noticed them today.
The pic is on the order you decals here thread.
 
Great job. I look forward to bookmarking your writeup.

and you got it out of the garage! nice job! :clap2:
i'm also looking forward to bookmarking—and referring to—your suspension install writeup for KDSS vehicles. :cheers:

and [MENTION=80024]STX4Runner[/MENTION]

Here you go guys: http://www.toyota-4runner.org/5th-gen-t4rs/154230-how-lift-installation-kdss-equipped-vehicles.html

It took me WAY too long today writing up just the front install, so I will have to continue the rest of the write up later. So please stay tuned :)
 
Well, I had the day off so I decided to put some sound deadener on my doors. I got Best Buy to price match Amazon on the Dynamat and also tried a couple rolls of Peel and Seal per Antman to put on the inner door. I also used the Sp8ball/Antman door panel removal guide. Considering I know next to little about disassembling the inside of my car, things went pretty well. The first door was a pain in the a$$ to put back on. I couldn't think of any more expletives to say while doing it, but it finally went in. The other 3 were pretty easy.

2d5z.jpg

How much is needed per door?
 
How much is needed per door?

I ended up deciding to use the Peel & Seal rolls from Lowes recommended by Antman in the inner doors. I used 1.5 rolls of that. It costs $17ish/roll.

I used about 1.5-1.75 boxes of the Dynamat Door kits inside the plastic door panel. I bought the Dynamat at Best Buy. It runs 100.00/box there, but I got them to price match the amazon price at 56.13/box.

That's for 4 doors.
 
Last edited:
Came in the mail today!

MDktu3J.jpg


17x9 Procomp 7069. Tires are coming tomorrow, and then I just need to figure out the TPMS situation and wait for my lift to arrive. The center cap is a bit much, might not end up on the car but we'll see.
 
Finally got around to installing my LR UCAs tonight :)


Ladies and gentlemen, my suspension setup is finally complete :whoo:

Total install time, ~4 hours, but that was including me running around town looking for a stupid socket big enough to tighten the ball joint adjust nut with. That nut is huge, lol. (1-1/4" socket for those wondering).

Now all I need is to get a quick alignment for now while the springs settle in and to hold me over until I can make my way down to Scott @High-Tech for a REAL alignment :naughty:
 
ti49.jpg


Welp, took 3 years, but I finally got around to getting the front windows and sunroof tinted. Went with some llumar ceramic tint from a reputable shop here in town. I think it turned out pretty good.
 

Members online

No members online now.

Forum statistics

Threads
278,317
Messages
3,554,128
Members
248,016
Latest member
Advally Service

Trending content

Back
Top