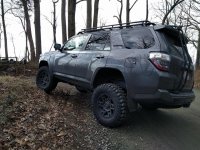
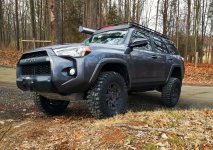
What did you do to/in your 5th Gen today?!

Another trip to the dump. PNW winter keeps me from burning it for a few months still.

And if you wondered what the regular trash bin looks like.


20d1e54802df0fe486b0c7654f5de8cb.jpg


0be308dc658033e75e3efcefdb48fa44.jpg


Sent from my iPhone using Tapatalk
 
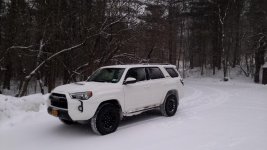
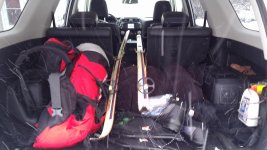
Snow Day

Went cross country skiing in the hills above Brant Lake ~ Weather Beaters FTW ~ A little blustery ~ My organizational layout for the cargo area. I call it Chuck N Go
 

Attachments

  • IMG_20170209_083749.jpg
    IMG_20170209_083749.jpg
    136.8 KB · Views: 751
  • IMG_20170209_115036.jpg
    IMG_20170209_115036.jpg
    130.9 KB · Views: 727
  • IMG_20170209_152314.jpg
    IMG_20170209_152314.jpg
    63 KB · Views: 706
  • IMG_20170209_124640.jpg
    IMG_20170209_124640.jpg
    133.9 KB · Views: 732
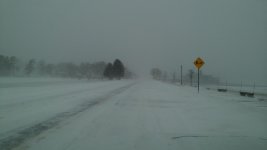
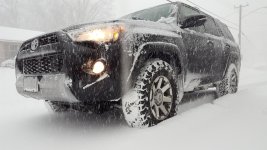
Drove home from work this morning in a snow storm. Ko2s did great. There were less equipped cars flying on the highway. So stupid. Just goes to show that the best way to drive in the snow is to not.
 

Attachments

  • 20170209_095706.jpg
    20170209_095706.jpg
    139.1 KB · Views: 656
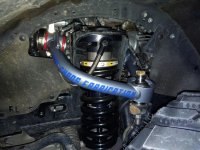
Ran out to do a quick flex check on the new suspension/tire setup
 

Attachments

  • T3.jpg
    T3.jpg
    135.9 KB · Views: 644
  • T5.jpg
    T5.jpg
    140.5 KB · Views: 644
  • T4.jpg
    T4.jpg
    138 KB · Views: 654
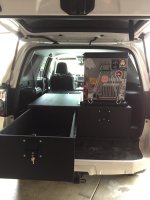
two weeks after removing the third row, I've finally got these installed. Approached it with zero wood working skills and zero schematics; with that being said, I'm pretty happy with the result.

Thanks to [MENTION=143767]maddiesel67[/MENTION] for documenting his incredible intricate build and recommending great paint and latches that I ended up using as well.

And for those wondering: I still have some stickers to install to ensure proper insulation with the fridge. :whistle:
 

Attachments

  • FullSizeRender.jpg
    FullSizeRender.jpg
    125.2 KB · Views: 729
two weeks after removing the third row, I've finally got these installed. Approached it with zero wood working skills and zero schematics; with that being said, I'm pretty happy with the result.

Thanks to [MENTION=143767]maddiesel67[/MENTION] for documenting his incredible intricate build and recommending great paint and latches that I ended up using as well.

And for those wondering: I still have some stickers to install to ensure proper insulation with the fridge. :whistle:

Looks very nice! Curious on placing the fridge on the passenger side?
 
Looks very nice! Curious on placing the fridge on the passenger side?

Thank you!

No definitive reason for passenger placement, but since you ask I think it went on that side so I can get a clear view behind my seat and its the side the power is on (something I'm probably going to reconfigure anyway, so not a reason at all haha)

Something I did consider before placing it there was the blind spot, but there is a booster seat that goes in front of it that I've already learned to cope with and deemed it not an issue.
 
two weeks after removing the third row, I've finally got these installed. Approached it with zero wood working skills and zero schematics; with that being said, I'm pretty happy with the result.

Thanks to [MENTION=143767]maddiesel67[/MENTION] for documenting his incredible intricate build and recommending great paint and latches that I ended up using as well.

And for those wondering: I still have some stickers to install to ensure proper insulation with the fridge. :whistle:

Great build looking box! What is your overall height from the bottom of the box to the top? It's deceiving since you had the 3rd row (taller fender well covers). I agree with another poster, you would have lost less rearward vision if you put your fridge on the drivers side.
 
Great build looking box! What is your overall height from the bottom of the box to the top? It's deceiving since you had the 3rd row (taller fender well covers). I agree with another poster, you would have lost less rearward vision if you put your fridge on the drivers side.

Thanks man.

Height is 12.5"
Width 42"
Depth 34"

Added height to get more storage space. and left a touch room in the depth department so that the seats can slide back all the way and recline once both my kids are out of their already blind spot causing boosters.

I agree on the logic of viewing area and considered it before placing, but it doesn't bug me one bit. I actually always have my rearview angled a touch toward the driver side to easily see directly behind me and the passenger side view is flared out a bit more to cover the area.

For work I drive a vehicle with no rear view mirror or over the shoulder views so I suppose I've gotten used to it.

Another thing that may be working in my favor with passenger placement would be that I'm 280lbs or so and I don't think my 4 runner would ever forgive me for jumping in the driver seat with a stocked fridge that's also on the same side haha.
 
Thanks man.

Height is 12.5"
Width 42"
Depth 34"

Added height to get more storage space. and left a touch room in the depth department so that the seats can slide back all the way and recline once both my kids are out of their already blind spot causing boosters.

I agree on the logic of viewing area and considered it before placing, but it doesn't bug me one bit. I actually always have my rearview angled a touch toward the driver side to easily see directly behind me and the passenger side view is flared out a bit more to cover the area.

For work I drive a vehicle with no rear view mirror or over the shoulder views so I suppose I've gotten used to it.

Another thing that may be working in my favor with passenger placement would be that I'm 280lbs or so and I don't think my 4 runner would ever forgive me for jumping in the driver seat with a stocked fridge that's also on the same side haha.

Makes since to me. I too am planning a build similar to maddiesel and I keep flipping my design trying to decide which side to put the fridge and the kitchen. Like you they can't be on the same side due to weight and access. I had a JKU and I replaced the rearview with a LCD screen and a camera mounted to the tire carrier, it was awesome because it removed all rearward vision restrictions such as seats, small window, tire, etc. I'll likely do the same on my 4R.

Last questions, what make/model fridge? and how did you secure the main casing to the 4R?
 
Last edited:
Makes since to me. I too am planning a build similar to maddiesel and I keep flipping my design trying to decide which side to put the fridge and the kitchen. Like you they can't be on the same side due to weight and access. I had a JKU and I replaced the rearview with a LCD screen and a camera mounted to the tire carrier, it was awesome because it removed all rearward vision restrictions such as seats, small window, tire, etc. I'll likely do the same on my 4R.

Last questions, what make/model fridge? and how did you secure the main casing to the 4R?


sounds like a sweet rear view set up!

For the fridge I went with Whynter FM-65G

As for securing, the short of it is I used the factory anchoring points for the 3rd row seats I removed.

The long of it: In the front of the case I used the two outside mounting points and anchored it down using a m10x1.25 70mm flange bolt on each side.

In the rear I mounted two generic d rings on the outer mounting points that are used for the 3rd row with m10x1.25 20mm flange bolt. I also mounted a cabinet pull, something like the fridge handle, at the top of the case and ran a strap through the d rings and handle and yanked it tight and it stays down when I pull the fridge all the way out.

Another bit is the difference in floor height from behind passenger seats to the rear hatch. right behind the passenger seats is a ridge and the difference in height iirc was about 1.5" so I had to fashion up some spacers to level it out.

Like I mentioned in my first post, my knowledge of this is novice at best and I'm cautiously learning as I go. I may change this in the future to having mounted D rings to the back corners and strapping down directly to each floor mount.

I took some snaps, if curious I can send some your way just lmk.
 
I mapped out my next tire purchase. there is a CLEAR winner here IMO, with what I'm looking for. A tall, not super heavy, not too wide, great off roading/overlanding AT tire. (S/T maxx 255/80). Will make an official spreadsheet soon.
afa2f63af490c77312e0c2e3f69b4246.jpg


Maybe we should sticky this.


Btw I was only looking into 275/285 sized tires. That's why you will only find a limited size range listed. Many tires do not offer a 275 also.


Sent from my iPhone using Tapatalk
 
Last edited:

Members online

Forum statistics

Threads
278,317
Messages
3,554,129
Members
248,016
Latest member
Advally Service

Trending content

Back
Top