What did you do to/in your 5th Gen today?!

Early fathers day present. Wife surprised me with some red line flag graphics. My wife and kids are the best
d8625d4032fc48499dd393ca2d1595dd.jpg
aacea7d70fed2bc6ff04d26b8e68efb2.jpg


Sent from my SM-N920V using Tapatalk

Hmm... I just noticed the stars are upside down... other than that it looks good.
 
Rode my MTB. Got some PR's. Got my HR up. #CARDIOBRO
d994e23b17f47cd6c7406cb659f39065.jpg
e578bf3f73a07e98d0fa8ce372ac2c97.png


OME 895E/883 + Bilstein 5100 | GOBI stealth | RCI alum front skid | FN Countersteer X | BFG 265's | AVS hood visor | morimoto HID's
 
I was impatient and didn't feel like waiting until the rest of the order showed up...so I replaced the dash speakers after work today.

19055273_10155472864191289_8427552861073902116_o.jpg


19222919_10155472866801289_3634984568133238815_o.jpg


These are coming as soon as the CBI brackets show up.
Either tomorrow or Monday, UPS doesn't deliver out here on Saturday :crybaby:

19238096_10155472877201289_4741109321361190062_o.jpg
 
Last edited:
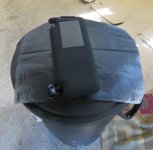
Painted my visors

I really didn't like seeing all the safety stickers when my visors were down, so as a continuing effort to black out most of my 4runner I did my visors yesterday/today.

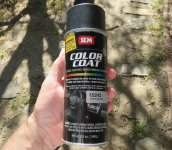
I did the passenger side first, to compare before/after. I asked the paint store for something that would work on automotive plastic and fabric, and this is what they recommended, SEM Color Coat.

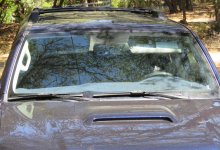
Tomorrow I'm getting my moonroof and back windows tinted. I've already done the front, at the time not realizing the difference between tint and privacy glass....
 

Attachments

  • visor_before_after.jpg
    visor_before_after.jpg
    142.1 KB · Views: 702
  • visorpainted.jpg
    visorpainted.jpg
    130.7 KB · Views: 708
  • visor_paint.jpg
    visor_paint.jpg
    106.5 KB · Views: 709
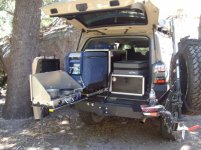
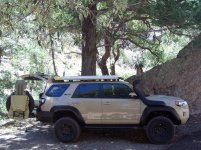
Got my Baja Rack and CVT Summit tent.

Impressed with initial quality and packing with both. Baja rack had great instructions, CVT were somewhat vague.

I'll get it set up completely this week and will get better picks then.

My wife wasn't so keen on it when I ordered it but once she got in it she couldn't get over how stable it is and how comfortable it is.

Got a CVT awning to mount as well.


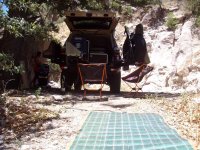
Day trip checking out some areas and a nice lunch...
 

Attachments

  • cm1.jpg
    cm1.jpg
    135.6 KB · Views: 845
  • cm2.jpg
    cm2.jpg
    139.4 KB · Views: 858
  • cm3.jpg
    cm3.jpg
    142.2 KB · Views: 863
  • cm4.jpg
    cm4.jpg
    138.4 KB · Views: 872
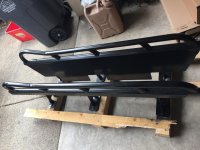
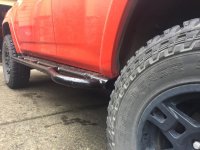
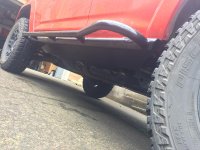
Mostly* installed 4x4 labs sliders

The other night I got my sliders mounted up, with the exception of the front U-bolts on each side. Seeking some advice from others who might have installed them themselves or watched the process closely enough to know what I'm talking about. [MENTION=89562]bimrunner[/MENTION] [MENTION=129593]MTN4RNR[/MENTION] [MENTION=113049]rochmpr[/MENTION]

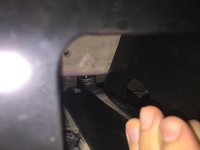
The issue I had with the fronts was that the massive nuts they provide don't fit in the very tight space between the frame and the cab (I couldn't get a good picture, but if you've done this install you will probably know what I mean). My plan now is to get a shallower nut, but even then it's going to be a real pain in the ass to get it threaded. If that fails I'll try giving the guys at 4x4 labs a call on Monday and see what the trick is. Am I missing something?

Other impressions and pros/ cons of the sliders just based on what I've observed so far:

Cons: $$$$, heavy (67lbs each), PITA to install, had to be proactive with communication to get them shipped when complete but the guys are awesome to work with... that's about it.
Pros: Full protection underneath, huge surface area to stand on to access rack, quality and fitment is amazing, heavy (pro and con), 5 week lead time, as high clearance as sliders can get.

Here are some crap pics:
 

Attachments

  • IMG_5975.jpg
    IMG_5975.jpg
    135.2 KB · Views: 828
  • IMG_5996.jpg
    IMG_5996.jpg
    135.9 KB · Views: 809
  • IMG_6001.jpg
    IMG_6001.jpg
    133.7 KB · Views: 833
  • IMG_6005.jpg
    IMG_6005.jpg
    135.4 KB · Views: 838
Last edited:
The other night I got my sliders mounted up, with the exception of the front U-bolts on each side. Seeking some advice from others who might have installed them themselves or watched the process closely enough to know what I'm talking about. [MENTION=89562]bimrunner[/MENTION] [MENTION=129593]MTN4RNR[/MENTION] [MENTION=113049]rochmpr[/MENTION]

The issue I had with the fronts was that the massive nuts they provide don't fit in the very tight space between the frame and the cab (I couldn't get a good picture, but if you've done this install you will probably know what I mean). My plan now is to get a shallower nut, but even then it's going to be a real pain in the ass to get it threaded. If that fails I'll try giving the guys at 4x4 labs a call on Monday and see what the trick is. Am I missing something?

Other impressions and pros/ cons of the sliders just based on what I've observed so far:

Cons: $$$$, heavy (67lbs each), PITA to install, had to be proactive with communication to get them shipped when complete but the guys are awesome to work with... that's about it.
Pros: Full protection underneath, huge surface area to stand on to access rack, quality and fitment is amazing, heavy (pro and con), 5 week lead time, as high clearance as sliders can get.

Here are some crap pics:

Take the front wheel off, my front... I can get after it from the front... jack it up a little. I do have an LE so when my whole rocker came off it has a little easier access. Looks like you still have a small part in there. I can take a pic of what mine looks like if you need it.

You basically have to have the unbolt go directly into the nut as soon as it goes around the frame. It's not fun or easy but once mounted, it is super strong!
 
Last edited:
Take the front wheel off, my front... I can get after it from the front... jack it up a little. I do have an LE so when my whole rocker came off it has a little easier access. Looks like you still have a small part in there. I can take a pic of what mine looks like if you need it.

You basically have to have the unbolt go directly into the nut as soon as it goes around the frame. It's not fun or easy but once mounted, it is super strong!

Thanks, I think I see what you're saying! I did take all the rocker trim off but was able to fit the end cap on the bottom of the fender back on. You're right, the nut will have to be ready to go as soon as the threads on the bolt go through as there's just no room to do it any other way. Should be a real treat. And yeah, even with just the back two bolted on I can hardly get these suckers to move, awesome design!
 

Attachments

  • IMG_6028.jpg
    IMG_6028.jpg
    116.5 KB · Views: 770
Started the install of my ditch lights.
Has anyone else not taken CBI's suggestion of cutting the cowl for the brackets to sit right and just modifying it some other way? I dont want to cut it if I dont have to.

19390496_10155476375421289_5470945165459872897_o.jpg
 
Started the install of my ditch lights.
Has anyone else not taken CBI's suggestion of cutting the cowl for the brackets to sit right and just modifying it some other way? I dont want to cut it if I dont have to.

I started cutting and really didn't like that idea either. Apply heat gun on the area where the brackets are hitting until the cowl plastic isgood and soft, then close the hood and put your weight over that part of the hood for about 15-30 seconds. Looks a lot cleaner than cutting and is much easier.
 

Members online

Forum statistics

Threads
278,317
Messages
3,554,129
Members
248,016
Latest member
Advally Service

Trending content

Back
Top