What did you do to/in your 5th Gen today?!

Added some much needed D-rings in the cargo area after seeing [MENTION=198043]DreamsOfDirt[/MENTION] 's post a few days back.
http://www.toyota-4runner.org/5th-gen-t4rs/259363-more-tie-down-upgrades-write-up.html

I used different d-rings and got this 4 pack for $14 on Amazon...
https://www.amazon.com/gp/product/B01CGXSNC0/ref=oh_aui_detailpage_o00_s00?ie=UTF8&psc=1

...and purchased two m6-1x45mm bolts at Home Depot.

Less than $20 later and I have 4 new solid tie down points! I wish I had done this years ago.

zxa9.jpg

116m9g9.jpg

1zbgwp0.jpg

Those D-rings actually look better than FJ OEM D-rings to replace the 4Runner ceiling hooks. They uniformly cover the two holes that the OEM Runner hooks utilize. To cover the holes with the FJ D-Rings you need to pivot them opposite directions -- which gets my OCD going. Not to mention that the FJ D-Rings are between $11-$16 EACH!
 
Were you using the sport shift or just left the gear shift in drive?

>> TEMP vs MILES OF LIFETIME

> > 175º = 100,000
> > 195º = 50,000
> > 220º = 20,000
> > 240º = 10,000 Varnish Starts to Form
> > 260º = 5,000 Seals start to harden

I had the shifter slapped over and held in 4th for basically the whole trip. There were a couple times I knocked down to 3 just to speed up a little bit because it didn't seem to want to shift on its own.

And yeah, I have seen that chart as well. I read elsewhere on a thread (can't find at the moment) that yes, while high heat is not desirable, you don't really need to worry until sustaining over 250 degrees with these trucks. Either way, I'm OCD about swapping fluids, and she'll certainly be getting a change early and frequently.
 
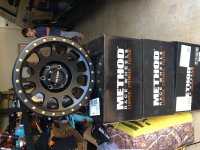
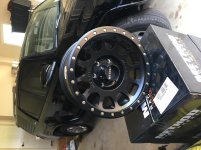
New rims!!! Method NV 17”

So the aren’t on yet but I got them in, I guess that’s half the battle! Love the look of these to go on my black on black!
 

Attachments

  • DE0531F0-D2E4-4BC0-A714-D4C31B1561D0.jpg
    DE0531F0-D2E4-4BC0-A714-D4C31B1561D0.jpg
    129 KB · Views: 1,046
  • 5B4EEFFD-F0BE-4D42-81EE-B51C356C0CA6.jpg
    5B4EEFFD-F0BE-4D42-81EE-B51C356C0CA6.jpg
    136.8 KB · Views: 1,056
Those D-rings actually look better than FJ OEM D-rings to replace the 4Runner ceiling hooks. They uniformly cover the two holes that the OEM Runner hooks utilize. To cover the holes with the FJ D-Rings you need to pivot them opposite directions -- which gets my OCD going. Not to mention that the FJ D-Rings are between $11-$16 EACH!

I just ordered 2 sets myself. Waay cheaper than the Toyota ones.
 
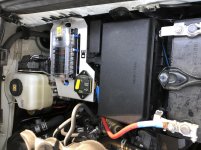
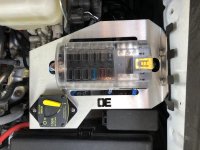
Installed a new fuse block. Looking to make life easier with future electrical mods.
 

Attachments

  • BD4820A9-3366-4D46-B96D-F4960F11406C.jpg
    BD4820A9-3366-4D46-B96D-F4960F11406C.jpg
    137.8 KB · Views: 1,022
  • EA594506-6C7F-4078-B1EA-BB002869D583.jpg
    EA594506-6C7F-4078-B1EA-BB002869D583.jpg
    135.3 KB · Views: 1,004
Got more info on this setup?[/

https://overlandequipped.com/collec...-for-5th-generation-toyota-4runners-2010-2017

If you scroll down on this page it shows you the fuse block to get and the breaker. The links will bring you to blue sea systems. This stuff is marine grade. I ended up buying the breaker on eBay(new). I got the fuse block from amazon. The 4 gauge wire I used from the breaker to the battery came from a seller on eBay. I used that same cable from the other side of the breaker to the fuse block. I used a pre made ground cable (Walmart) from the other end of the block to the vehicle ground.
The bracket is very well made and fits perfectly onto existing threaded holes.
The setup is very convenient for powering any lighting or any other electrical needs. It also makes everything very clean and organized.
 
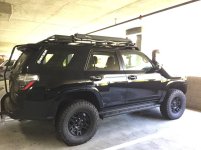
Ask and you shall receive [MENTION=147414]EddieV4runnin[/MENTION]
This happened a few weeks ago now.
IMG_6320.JPG
IMG_6321.JPG
IMG_6328.JPG
IMG_6330.JPG


Sent from my iPhone using Tapatalk
 

Attachments

  • IMG_6320.JPG
    IMG_6320.JPG
    125.7 KB · Views: 1,045
  • IMG_6321.JPG
    IMG_6321.JPG
    123 KB · Views: 1,084
  • IMG_6328.JPG
    IMG_6328.JPG
    117.8 KB · Views: 1,041
  • IMG_6330.JPG
    IMG_6330.JPG
    122 KB · Views: 1,043
Ask and you shall receive [MENTION=147414]EddieV4runnin[/MENTION]
This happened a few weeks ago now.
View attachment 304458
View attachment 304459
View attachment 304460
View attachment 304461


Sent from my iPhone using Tapatalk

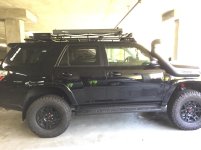
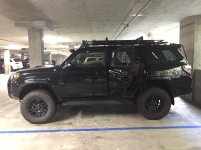
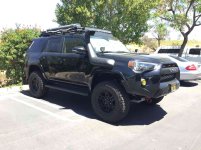
Damn that snorkel looks good and the lift is perfect. I’m still debating about adding one after I install my new bumper. Just can’t find it in me to take a hole saw to the fender. You’re a better man than I am. Hope to see you at some of the upcoming trail runs :clap2:
 
Alright am I missing something or does the fender liner mod only affect the driver's side? There are no instructions at all about the passenger side anywhere and it's a completely different style than the driver's side.

But holy hell even with just running 265's with wheel spacers on Trail wheels, I'm rubbing the bumper cover like a mother****er on both sides. Figured I'd have to trim them but had no idea it would be so bad with 265's.
 
Damn that snorkel looks good and the lift is perfect. I’m still debating about adding one after I install my new bumper. Just can’t find it in me to take a hole saw to the fender. You’re a better man than I am. Hope to see you at some of the upcoming trail runs :clap2:

Hahaha ya there was definitely an oh shit! moment when I started cutting. Used a hole saw first then a dremel. And used a step bit for the bolt holes.

I'm really happy with how the lift and tires turned out. Had some reservations going into it, but it turned out perfect! I need some armor before I hit some more gnarly stuff, but I'd like to hit up some runs that I would be able to do.
 
Alright am I missing something or does the fender liner mod only affect the driver's side? There are no instructions at all about the passenger side anywhere and it's a completely different style than the driver's side.

But holy hell even with just running 265's with wheel spacers on Trail wheels, I'm rubbing the bumper cover like a mother****er on both sides. Figured I'd have to trim them but had no idea it would be so bad with 265's.

Same thing happened to me when I put wheel spacers on with my 265's. Procedure is the same for both sides. Unscrew the two screws, pull fender liner forward, drill two new holes in fender liner to line up with existing holes in bumper, screw back in, then trim the excess bumper now sticking out towards the tire. An extra set of hands helps, but can be done on it's own in 15 mins.
 
Last edited:
Rago Sliders

Finally got the Rago sliders back from powder coating (gunmetal gray) and mounted them up.
 

Attachments

  • IMG_0289[1].jpg
    IMG_0289[1].jpg
    140.4 KB · Views: 1,005
  • IMG_0296[1].jpg
    IMG_0296[1].jpg
    133.4 KB · Views: 991
  • IMG_0297[1].jpg
    IMG_0297[1].jpg
    138.7 KB · Views: 1,021
  • IMG_0298[1].jpg
    IMG_0298[1].jpg
    138.2 KB · Views: 1,049
  • IMG_0299[1].jpg
    IMG_0299[1].jpg
    139.2 KB · Views: 993
  • IMG_0300[1].jpg
    IMG_0300[1].jpg
    139 KB · Views: 994
Same thing happened to me when I put wheel spacers on with my 265's. Procedure is the same for both sides. Unscrew the two screws, pull fender liner forward, drill two new holes in fender liner to line up with existing holes in bumper, screw back in, then trim the excess bumper now sticking out towards the tire. An extra set of hands helps, but can be done on it's own in 15 mins.

Alright. I was confused by the passenger side because the front-most screw goes into a plastic boss instead of a clip, so it seems like you definitely have to make the hole on that side much larger plus, as far as I could push the liner forward, I wasn't able to push it forward enough to drill a brand new hole on the front-most screw, instead it would just be like I'm slotting the existing hole.
 
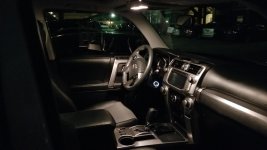
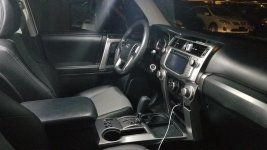
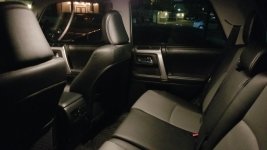
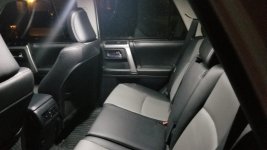
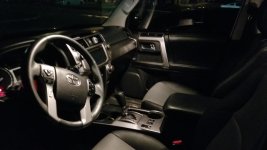
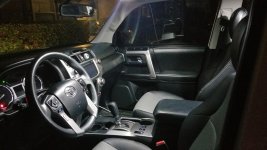
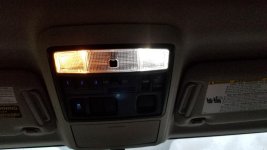
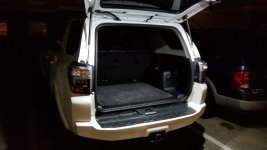
Replaced all interior lights with LED's for nice fresh white lighting. i can now open my trunk and light up a parking lot.
 

Attachments

  • 20180710_215608_resized_1.jpg
    20180710_215608_resized_1.jpg
    125.6 KB · Views: 889
  • 20180712_215615_resized_1.jpg
    20180712_215615_resized_1.jpg
    133.3 KB · Views: 883
  • 20180710_215720_resized_1.jpg
    20180710_215720_resized_1.jpg
    128.8 KB · Views: 897
  • 20180712_215646_resized_1.jpg
    20180712_215646_resized_1.jpg
    130.3 KB · Views: 862
  • 20180710_215732_resized_1.jpg
    20180710_215732_resized_1.jpg
    123.1 KB · Views: 895
  • 20180712_215705_resized_1.jpg
    20180712_215705_resized_1.jpg
    134.3 KB · Views: 881
  • 20180712_195544_resized_1.jpg
    20180712_195544_resized_1.jpg
    135.1 KB · Views: 876
  • 20180704_215105_resized_1.jpg
    20180704_215105_resized_1.jpg
    127.7 KB · Views: 878
Replaced all interior lights with LED's for nice fresh white lighting. i can now open my trunk and light up a parking lot.

What bulb did you use for the rear hatch? I know Amazon is littered with them but I've had so-so results with random Amazon bulbs.

I'll probably be keeping my interior lights incandescent just because it's easier on the eyes at night but I do like the idea of having more light in the back.
 

Members online

Forum statistics

Threads
278,317
Messages
3,554,129
Members
248,016
Latest member
Advally Service

Trending content

Back
Top