What did you do to/in your 5th Gen today?!

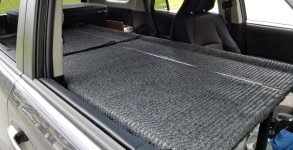
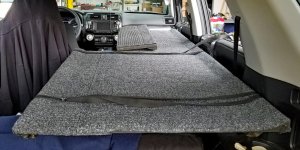
...More Progress On My Sleeping Platform-Part-4...

...Howdy, again!

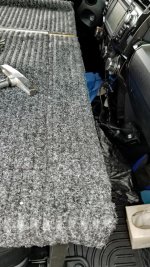
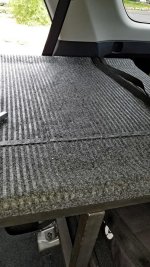
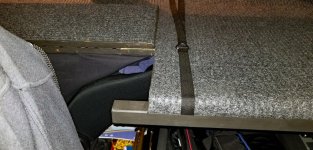
...Once the platform was bolted to the metal-support frames that are attached to the front and 2nd-row seat hard-points with nylon-locking nuts...

...I then finished nailing down the two carpets strips that covered the bolt-heads...

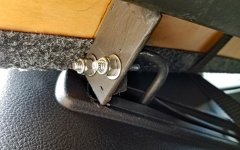
...The toughest connection was the seat-back hard-point for the back of the 2nd-row seat...that U-shaped metal loop that holds the seat-back rigidly in place when upright....I thought this would be an excellent place to also bolt the platform to the side wall....to give it more lateral stability....

...The genius fabricator that did all my work created a spur to capture that loop using a U-bolt...and it was one Helluva tight fit gettin that sucker in there to bolt up!...

...Profuse and highly creative obscenities screamed quite loudly for prolonged periods seemed to aid in it's final placement....

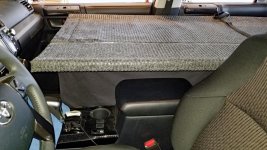
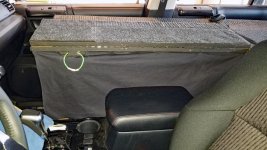
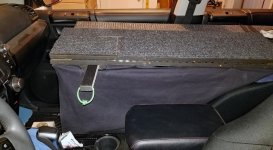
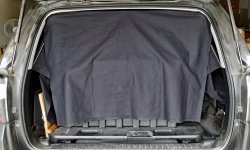
...I then added a black curtain to the underside that folded over...to hide items I might want to store on the front seat while driving...like binoculars or a camera, etc....

...I believe it is best NOT to tempt an honest man, ya see?...

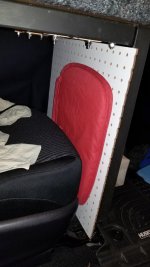
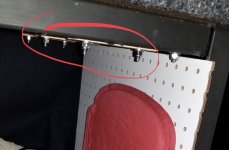
...I also zip-tied a piece of pegboard to the rear of the front platform...and added a cushion to it..in case I had to make an emergency-stop...to prevent the delicate contents of the seat from flying forward onto the floor....

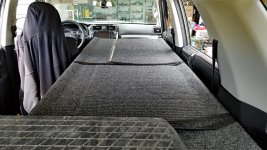
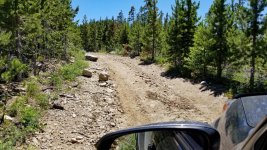
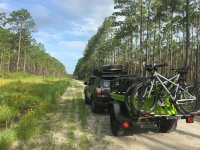
...The final weight came to about 85 pounds....so I took it out on some National-Forest service roads for a shakedown-cruise...and it is incredibly Solid!...

...I am quite pleased with the way it turned out...the fabricator did Amazing work....highly-precise and accurate...and it is great to take an idea from inside your twisted and crowded head and finally see it completed even better than you had envisioned it would be!...

...SOooo...next...onto some blackout curtains for when I have to reluctantly spend nights in organized campgrounds with close neighbors....

...Please see the pics below to make all this a bit more clearerer:
 

Attachments

  • 20180708_135140e.jpg
    20180708_135140e.jpg
    147.8 KB · Views: 1,089
  • 20180708_145423e.jpg
    20180708_145423e.jpg
    140.4 KB · Views: 1,046
  • 20180708_141340e.jpg
    20180708_141340e.jpg
    139.9 KB · Views: 1,059
  • 20180708_150012e.jpg
    20180708_150012e.jpg
    143.3 KB · Views: 1,067
  • 20180708_150208e.jpg
    20180708_150208e.jpg
    145.8 KB · Views: 1,070
  • 20180710_154022e.jpg
    20180710_154022e.jpg
    145.9 KB · Views: 1,062
  • 20180710_171335e.jpg
    20180710_171335e.jpg
    140.6 KB · Views: 1,077
  • 20180710_173206e.jpg
    20180710_173206e.jpg
    140.5 KB · Views: 1,103
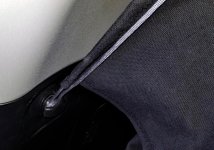
Just installed the Raingler rear cargo attic net. Doesn't fit quite like I expected, and I'm wondering if it's actually going to hold my stuff up there (i.e. jumper cables, Gorilla Tape, extension cord, etc). Hope it works well.

Anyone have experience and/or advice?
8fe65512b97076493f786eb257f5cd11.jpg
978a8e08abafd39b40e1e3361f2640c0.jpg
91dc6cd696e2a1f03e0349e0d14066eb.jpg


Sent from my SM-G892A using Tapatalk
 
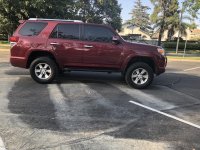
Lift and rock sliders

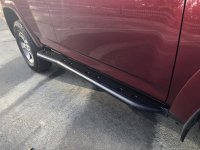
Just got these Perfreybilt Rock sliders that I found on Craigslist paid $180

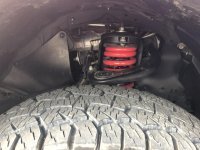
And also the TRd pro suspension with the dobinsons springs

Let me know what you guys thinks??????
 

Attachments

  • D2F4D9FB-84E3-4BD8-9F44-77FC07971C27.jpg
    D2F4D9FB-84E3-4BD8-9F44-77FC07971C27.jpg
    128.5 KB · Views: 1,040
  • 3158F4EE-C616-4BC2-B1D3-FB42CDBA638C.jpg
    3158F4EE-C616-4BC2-B1D3-FB42CDBA638C.jpg
    136.9 KB · Views: 1,070
  • 595D6D7A-981E-44C3-B51C-E4926605380B.jpg
    595D6D7A-981E-44C3-B51C-E4926605380B.jpg
    139.1 KB · Views: 1,052
...Final Touches to My Sleeping-Platform

...Howdy, once again!

...OK...so ran out of available spaces for pics in post 33801 above....so here are the last few:

...( I also realized I never showed the final version of the support post for the portion that folds over flat up in front...This is the oak board that slides out to support the frontmost corner of the platform..all surfaces covered in adhesive-backed felt to prevent rattling when driving..)...

...I had the fabricator extend the lower frame 3-inches to provide solid support for the rear portion of the fold-over part as well...

...Included below is a pic of the pegboard and cushion to prevent the seat-contents from shooting onto the front floor in case of an emergency braking situation...

...Once it was All done....took it out for 47 miles of rough NPFS roads to see if anything would rattle or loosen...but the entire thing is incredibly SOLID!...

...and some of the views made my crushed-kidneys worth it!....LOL!...

...Now....onto the curtains in the next installment post!...:thanks:
 

Attachments

  • 20180719_192459e.jpg
    20180719_192459e.jpg
    140.4 KB · Views: 1,066
  • 20180719_193931e.jpg
    20180719_193931e.jpg
    141.8 KB · Views: 1,067
  • 20180719_184943e.jpg
    20180719_184943e.jpg
    137.3 KB · Views: 1,072
  • 20180711_135846e.jpg
    20180711_135846e.jpg
    147.4 KB · Views: 1,094
  • 20180711_130454e.jpg
    20180711_130454e.jpg
    148.7 KB · Views: 1,058
  • 20180711_145223e.jpg
    20180711_145223e.jpg
    144.6 KB · Views: 1,129
...Blackout Curtains...

...Howdy!

...Sorry!....didn't mean to store it up and then post it all at once...but it just kinda worked out that way......:Cry:

...Since I will be sleeping and working in my 4Runner..there would be times when I would need some privacy from prying-eyes....as in when it would be sadly necessary to spend a night or two in crowded campgrounds...( think National-Parks )...and also to offload images from my memory-cards at the end of a full day of shooting and filming....

...( I do a LOT of time-lapses...and those full RAW images tend to chew-up the empty space in memory-cards way too quickly! )...

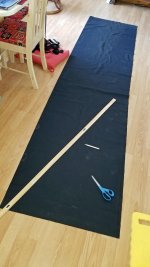
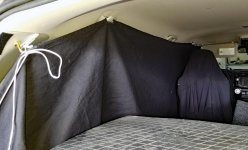
...I saw on this forum that another guy made some simple, yet effective curtains for the sides of his 4Runner....so I modified his idea using much heavier black cotton-duck material and nylon ripcord...

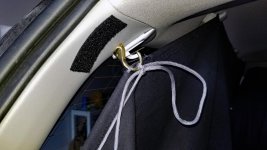
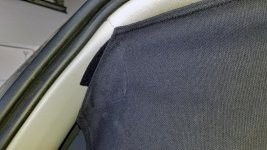
...I attached the cord to the post on the front visors using a simple small clip...then stretched the cord tight and added a hook to the rear panel...

...I sewed the material over the cord...with cutouts for the over-door handles..and hangar in the back...drawing the cord down to the double-hook on the lower back-panel...then brought the cord back up and tied it off on the additional hook I added up top...

...I added velcro up front on the forward posts...and just left the extra material in back in case I need to pull-out my camera-gear box while the curtains are still in place...

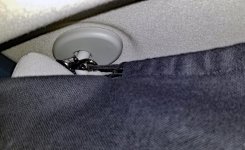
...The rear curtain is small..so didn't need any cord...so I just used velcro to hold it up in place....( there is a center plastic-cap covering one of the screws holding the headliner panel in place...which made a strong and convenient spot for a chunk of industrial-strength velcro )...

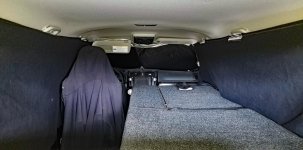
...It's pretty cotton-pickin dark inside...which was the planned results from the start....Not too expensive, effective...and washable.....( ain't too pretty...but I was going for substance over style here...)...:thumb3:

...Hopefully...the pics below will make all of this easier to comprehend?...:shrug:
 

Attachments

  • 20180712_164020e.jpg
    20180712_164020e.jpg
    135.3 KB · Views: 1,062
  • 20180718_163720e.jpg
    20180718_163720e.jpg
    136.7 KB · Views: 1,069
  • 20180718_163732e.jpg
    20180718_163732e.jpg
    138.1 KB · Views: 1,053
  • 20180718_163740e.jpg
    20180718_163740e.jpg
    137.8 KB · Views: 1,053
  • 20180718_163837e.jpg
    20180718_163837e.jpg
    136.5 KB · Views: 1,101
  • 20180718_164950e.jpg
    20180718_164950e.jpg
    139.1 KB · Views: 1,057
  • 20180718_165121e.jpg
    20180718_165121e.jpg
    139.6 KB · Views: 1,087
  • 20180718_165142e.jpg
    20180718_165142e.jpg
    139.5 KB · Views: 1,049
Trying to get the damn tires to stop rubbing the mud flaps! Heated the problem area with a hair drier for a few minutes then shoved a 1/2" drive in there. Now waiting for it to set back at ambient temperature and hope it stays put when I pull the drive out.

W2fyb1W.jpg


Also tested my kayak mounts on the Gobi for the first time last weekend

zfWOp21.jpg
 
Raingler Ceiling Cargo Net

I've got the EZ-install cargo net with the net webbing and mesh. I've got the same thing happening when loaded. I ended up putting in a stiff lightweight board above the net to minimize sagging. I have a small fire extinguisher, moving blanket, first aid kit and some clothing items. Your cargo net should hold your stuff, it'll just sag.


Just installed the Raingler rear cargo attic net. Doesn't fit quite like I expected, and I'm wondering if it's actually going to hold my stuff up there (i.e. jumper cables, Gorilla Tape, extension cord, etc). Hope it works well.

Anyone have experience and/or advice?
8fe65512b97076493f786eb257f5cd11.jpg
978a8e08abafd39b40e1e3361f2640c0.jpg
91dc6cd696e2a1f03e0349e0d14066eb.jpg


Sent from my SM-G892A using Tapatalk
 
...Howdy!

...Sorry!....didn't mean to store it up and then post it all at once...but it just kinda worked out that way......:Cry:

...Since I will be sleeping and working in my 4Runner..there would be times when I would need some privacy from prying-eyes....as in when it would be sadly necessary to spend a night or two in crowded campgrounds...( think National-Parks )...and also to offload images from my memory-cards at the end of a full day of shooting and filming....

...( I do a LOT of time-lapses...and those full RAW images tend to chew-up the empty space in memory-cards way too quickly! )...

...I saw on this forum that another guy made some simple, yet effective curtains for the sides of his 4Runner....so I modified his idea using much heavier black cotton-duck material and nylon ripcord...

...I attached the cord to the post on the front visors using a simple small clip...then stretched the cord tight and added a hook to the rear panel...

...I sewed the material over the cord...with cutouts for the over-door handles..and hangar in the back...drawing the cord down to the double-hook on the lower back-panel...then brought the cord back up and tied it off on the additional hook I added up top...

...I added velcro up front on the forward posts...and just left the extra material in back in case I need to pull-out my camera-gear box while the curtains are still in place...

...The rear curtain is small..so didn't need any cord...so I just used velcro to hold it up in place....( there is a center plastic-cap covering one of the screws holding the headliner panel in place...which made a strong and convenient spot for a chunk of industrial-strength velcro )...

...It's pretty cotton-pickin dark inside...which was the planned results from the start....Not too expensive, effective...and washable.....( ain't too pretty...but I was going for substance over style here...)...:thumb3:

...Hopefully...the pics below will make all of this easier to comprehend?...:shrug:

Nice work.

"To the Bat-Cave!"
 
...Howdy, once again!

...OK...so ran out of available spaces for pics in post 33801 above....so here are the last few:

...( I also realized I never showed the final version of the support post for the portion that folds over flat up in front...This is the oak board that slides out to support the frontmost corner of the platform..all surfaces covered in adhesive-backed felt to prevent rattling when driving..)...

...I had the fabricator extend the lower frame 3-inches to provide solid support for the rear portion of the fold-over part as well...

...Included below is a pic of the pegboard and cushion to prevent the seat-contents from shooting onto the front floor in case of an emergency braking situation...

...Once it was All done....took it out for 47 miles of rough NPFS roads to see if anything would rattle or loosen...but the entire thing is incredibly SOLID!...

...and some of the views made my crushed-kidneys worth it!....LOL!...

...Now....onto the curtains in the next installment post!...:thanks:

The platform design looks good!
I guess you’ll never have passengers again!
Looking at the underside, you might want to put some plastic caps on the exposed bolt threads so you don’t tear up hands or gear.
Have you slept in it yet?
 

Attachments

  • D8046C75-7AB4-4752-9439-574EC43F9FA6.jpeg
    D8046C75-7AB4-4752-9439-574EC43F9FA6.jpeg
    94.5 KB · Views: 825
I've got the EZ-install cargo net with the net webbing and mesh. I've got the same thing happening when loaded. I ended up putting in a stiff lightweight board above the net to minimize sagging. I have a small fire extinguisher, moving blanket, first aid kit and some clothing items. Your cargo net should hold your stuff, it'll just sag.

I tightened it up and reorganized and it is significantly higher now. You mind posting a pic of yours?
 
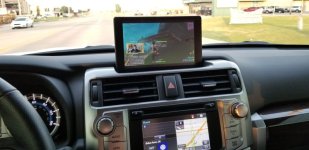
Got my tablet mounted, it fits there perfectly and almost looks factory, have it bluetoothed.
 

Attachments

  • 20180720_200242.jpg
    20180720_200242.jpg
    133.9 KB · Views: 941
Tablet mount

Looks great! I'm fine tuning my setup (magnets and a tablet stand) to do the same thing. I just ran into a snag, when I wear my polarized sunglasses, the tablet screen is all black.
What hardware are you using to hold up your tablet?


Got my tablet mounted, it fits there perfectly and almost looks factory, have it bluetoothed.
 
The platform design looks good!
I guess you’ll never have passengers again!
Looking at the underside, you might want to put some plastic caps on the exposed bolt threads so you don’t tear up hands or gear.
Have you slept in it yet?

...NO passengers unless they want to lay prone on the platform?....LOL!....

...I agree with you and do plan to put caps on the threads....but Muchos Thanks for the great suggestion!...:bravo:

...I have not slept in it yet...now sewing up a removable liner for my sleeping-bag...so it can be removed and washed after trips....:emptybath:

...Gettin there...one small....slooow step at a time!...:snacker:
 

Members online

Forum statistics

Threads
278,317
Messages
3,554,128
Members
248,016
Latest member
Advally Service

Trending content

Back
Top