What did you do to/in your 5th Gen today?!

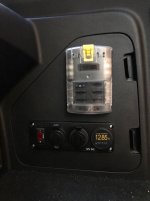
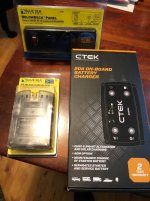
Parts are arriving so I started my dual battery install yesterday. Wires run from engine bay to rear passenger cargo area and got these installed. Waiting on C4 Fab battery tray to decide where C-Tek unit will go and the finish up wiring.
 

Attachments

  • IMG_1132.jpg
    IMG_1132.jpg
    101.6 KB · Views: 1,099
  • IMG_1128.jpg
    IMG_1128.jpg
    130.1 KB · Views: 1,098
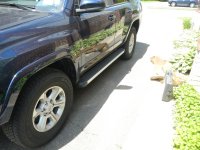
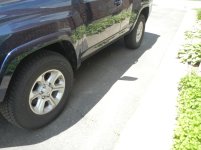
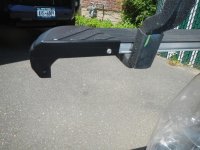
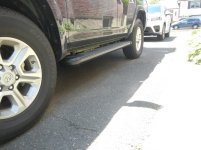
Painted the side steps

I really don't care for the side steps and don't want to spend $$ right now for nicer ones. My wife thinks the Runner is too high without them and they are handy for putting stuff on the roof racks soooo...
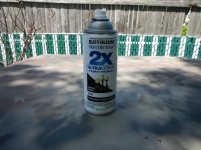
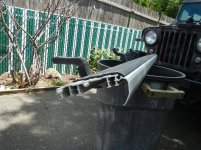
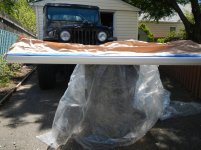
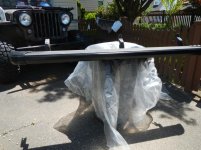
An easy job but time consuming. I didn't want to worry about over spray on the car with all the masking that would entail so I took them off. You'll need a 12MM socket if you decide to do this. Also a 8MM to take of the small bolt holding the end caps on. I wanted to remove the rubber tread but it's dovetailed on there and I tried for a while to slide them off with no luck. Tape doesn't like to stick to them but I did the best I could.There's a picture of the paint I used, I like the satin finish. Took about 4 hours including taking them off, prep, masking and painting. I waited about an hour for the paint to dry enough then I put them back on. I'm happy with the results. It will be interesting to see how they hold up. Easy touch up when that becomes necessary.
The bolts holding them on to the truck are long with a pretty fine thread and I'm lazy so I used my drill/driver to spin them off and on then final tightening with a ratchet.
 

Attachments

  • DSCN5338.jpg
    DSCN5338.jpg
    127.4 KB · Views: 1,014
  • DSCN5328.jpg
    DSCN5328.jpg
    134.8 KB · Views: 1,030
  • DSCN5329.jpg
    DSCN5329.jpg
    127.6 KB · Views: 1,022
  • DSCN5330.jpg
    DSCN5330.jpg
    140.3 KB · Views: 1,020
  • DSCN5331.jpg
    DSCN5331.jpg
    136.8 KB · Views: 1,012
  • DSCN5332.jpg
    DSCN5332.jpg
    136.1 KB · Views: 1,008
  • DSCN5333.jpg
    DSCN5333.jpg
    136.8 KB · Views: 1,011
  • DSCN5335.jpg
    DSCN5335.jpg
    133.3 KB · Views: 1,018
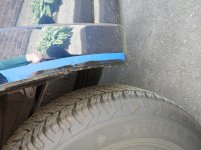
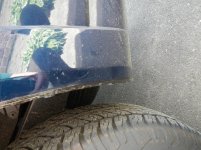
Siliconed the gap on the rear mud flaps

Anyone who has removed/cut the mud flaps know there's a gap where the bumps are for the plastic rivets. I've seen where some guys ground them off but I decided to use black silicone and fill the gaps. I made sure a good amount got squeezed into the gap. Looks smoother in person than the pic.
 

Attachments

  • DSCN5336.jpg
    DSCN5336.jpg
    136.2 KB · Views: 1,030
  • DSCN5337.jpg
    DSCN5337.jpg
    137.3 KB · Views: 1,029
Came across a wreck in our neighborhood just a second or two after it happened. People were just running over to help as I pulled up. A Tacoma and a smaller vehicle collided, and the Taco flipped. Both occupants of the Taco were injured. Fortunately it happened in front of an urgent care office, and a doc came out and tended to the victims until the EMTs got there:

DASH_2019_05_16.jpg


.
That dash cam thing is handy for catching things like that. I caught a guy running over a kid on a bicycle yesterday and was able to get it to the PD. But i need to get a better resolution dash cam and a rear cam.
 
So I finally paid homage to the 1st gen I used to have.
I have tried several local graphics shops and no one could come close to the correct striping. So I’m going to plug the guy who did the print job. James Dean Creations. Perfect dot matrix printing done on 3m vinyl with exact Toyota color codes.
21651799c7005562e9c5a31edbd100bf.jpg


Sent from my iPad using Tapatalk
 
So I finally paid homage to the 1st gen I used to have.
I have tried several local graphics shops and no one could come close to the correct striping. So I’m going to plug the guy who did the print job. James Dean Creations. Perfect dot matrix printing done on 3m vinyl with exact Toyota color codes.
21651799c7005562e9c5a31edbd100bf.jpg


Sent from my iPad using Tapatalk

i think you need some door bumper/moldings to complete the look. Otherwise, pretty cool man
 
Managed to install my Ellis Precision shift knobs before the Whalers/Hurricanes get swept by the Bruins.

They do great work. I too sent for and received a custom logo.
Props for the Whalers logo. They had one of the best sweaters in all of hockey.

v5NMRIQ.jpg
 
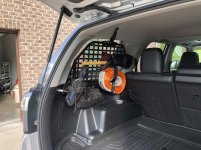
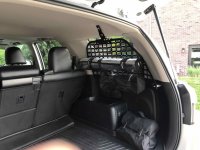
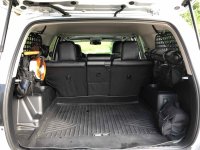
Rago Fabrication Molle Panels

Ordered these about 4 weeks ago and they finally came in. The workmanship is excellent. Watched their install video and very easy to install. All bolts/nuts/washers were accounted for.

I used to carry a medium plastic tote in the back to keep all this stuff in one place. The dog didn't appreciate that... The only thing I have on the cargo floor now is the heavy air compressor.

Very happy with the results. Still playing around with arrangements and I have room for more stuff.
 

Attachments

  • IMG_2959.jpg
    IMG_2959.jpg
    133.6 KB · Views: 882
  • IMG_2960.jpg
    IMG_2960.jpg
    131.1 KB · Views: 905
  • IMG_2961.jpg
    IMG_2961.jpg
    131.8 KB · Views: 894
I always wanted dial clock and the one that is on all the time even when ignition is off. I've little use for cup holder but clock and cover is easily removed in few seconds if drinks need place to rest:

-and-lt;-and-lt;-and-lt;-and-lt;-albums-trail-picture55361-altimeter-clock.jpeg
 
I always wanted dial clock and the one that is on all the time even when ignition is off. I've little use for cup holder but clock and cover is easily removed in few seconds if drinks need place to rest:

-and-lt;-and-lt;-and-lt;-and-lt;-albums-trail-picture55361-altimeter-clock.jpeg

Nobody tell this guy about watches, the shock might kill him. :clock:
 
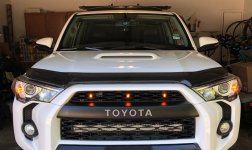
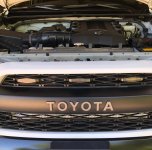
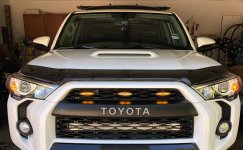
Raptor lights

Decided to change it up some with some different grill lights. Going to give these smoke eBay specials a try. Not bad for 35 bucks.
 

Attachments

  • E60B917D-3755-4297-A10E-EEC5278BE0D9.jpg
    E60B917D-3755-4297-A10E-EEC5278BE0D9.jpg
    133.5 KB · Views: 1,189
  • C5CF3D78-4C6A-44B9-8BE4-9CBC0C0892BD.jpg
    C5CF3D78-4C6A-44B9-8BE4-9CBC0C0892BD.jpg
    122.8 KB · Views: 1,208
  • 287035CD-DA5D-4C53-9B86-86233C199D54.jpg
    287035CD-DA5D-4C53-9B86-86233C199D54.jpg
    135.2 KB · Views: 1,187
I reapplied some plastidip to the chrome letters on the back. I first did them about 3 weeks ago and they turned out fantastic, but now they’re chipping. Very frustrating.. but I can’t seem to find overlays that match the grey color on my Pros grill
 
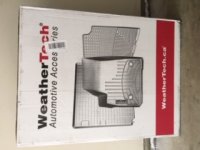
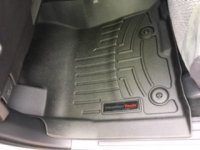
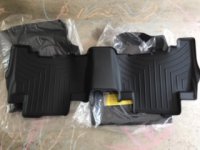
I installed the Weathertech floor liners for the first and second row in the 4Runner.

I initially ordered the Husky liners but I returned them. I order the Weathertech ones after. I preferred the Weathertech ones over the Husky because the Husky ones had too many nubs/cleats over some plastic areas and they scratched the plastic panels.
 

Attachments

  • 3BF92ADD-4512-4C50-A955-1B4D8CC5716F.jpeg
    3BF92ADD-4512-4C50-A955-1B4D8CC5716F.jpeg
    29.5 KB · Views: 1,011
  • E731BFD5-0878-43E9-A1BB-07F009492B4D.jpeg
    E731BFD5-0878-43E9-A1BB-07F009492B4D.jpeg
    28.9 KB · Views: 1,011
  • C297F46E-E1C3-4F94-A2A3-F2AEA0ED8653.jpeg
    C297F46E-E1C3-4F94-A2A3-F2AEA0ED8653.jpeg
    30.9 KB · Views: 1,003
Done quite a lot the past few days.

Swapped my toytec rears for Dobinson C59-325
dNHuh1I.jpg

OchoSg3.jpg

Vu0wnjb.jpg


Replaced a CV axle cause the boot tore. CV is perfectly fine and I'll be rebooting it in the future. Running a NAPA CV axle and all was fine until I noticed at full droop, the axle binds. It will rotate just fine until it stops and catches, and have to forcefully rotate the tire and the front driveshaft will have a rotation too until the binding stops. First time I've ran into axle binding so I had a bit of a panic. I'll let it stress me out another day. It wasn't too bad of a job but first time doing it, I was stressed the new axle wouldn't go in right away. Should be easier next time.
yqqC5vF.jpg


And lastly, I installed Element LED Micropod ditch lights today.
SWkhecm.jpg

UgyLzui.jpg

Vxdtxch.jpg

PwBXmNJ.jpg

i14ixeZ.jpg

wyw07ck.jpg
 

Members online

Forum statistics

Threads
278,316
Messages
3,554,113
Members
248,016
Latest member
Advally Service

Trending content

Back
Top