What did you do to/in your 5th Gen today?!

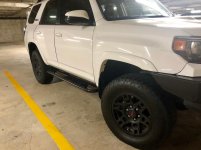
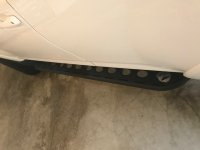
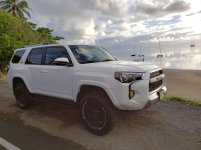
Shrockworks Sliders

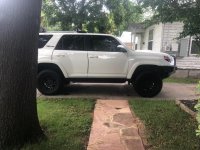
I was in Houston the other day and swung by the Shrockworks shop. It just so happens they keep a few sets of sliders in stock. Got them on today another stout product from Shrockworks.
 

Attachments

  • 3E7AE586-4168-4C98-841A-7C52C63C770A.jpg
    3E7AE586-4168-4C98-841A-7C52C63C770A.jpg
    138 KB · Views: 999
  • 3A6289F4-FEE8-45B7-B818-AA681E4851BB.jpg
    3A6289F4-FEE8-45B7-B818-AA681E4851BB.jpg
    126.4 KB · Views: 1,001
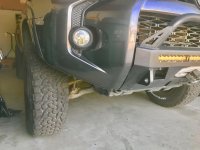
Did a quick high clearance mod/cut. I think I have to adjust the inner fender to make it a little tighter and cleaner.

Happy with the results. I basically taped the lower fender line, then cut at the bottom of the tape, to give it a little more depth.
 

Attachments

  • FullSizeRender-1.jpg
    FullSizeRender-1.jpg
    127.4 KB · Views: 973
  • FullSizeRender-3.jpg
    FullSizeRender-3.jpg
    124.9 KB · Views: 972
  • FullSizeRender-5.jpg
    FullSizeRender-5.jpg
    132.6 KB · Views: 989
Fixed a lingering problem caused by a small mishap last year:

IMG_1311c.jpg


I can pop it back in place but it doesn't stay put very long, and I'm always worried it'll catch on something when I'm off-road. The cost to have it repaired is astronomical. So I came up with my own solution, using stainless steel sheet metal screws and washers:

IMG_3391cc.jpg


IMG_3391cx.jpg


IMG_3386cc.jpg


It's not perfect but it works, and I like the way it looks -- kind of looks "tough". :)


.

...Hey, Ray!....put identical ones on the opposite fender...and it will look like it came that way from the factory!...:thumb3::cheers:
 
Does your sunroof still open properly or did you move the crossbars?

My sunroof slides open fine. When I TILT it up it looks like it's touching the crossbar, but I don't know for sure... I need to loosen up the crossbar and watch it from the outside to be sure. I'll get back to you.
 
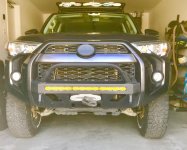
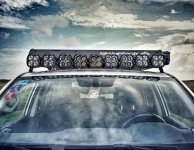
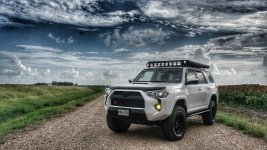
Installed a new light bar. BD XL Sports high speed spots! love the way it turned out.
 

Attachments

  • DSC00790-01.jpg
    DSC00790-01.jpg
    134.8 KB · Views: 852
  • DSC00762-01.jpg
    DSC00762-01.jpg
    143.6 KB · Views: 860
Fixed a lingering problem caused by a small mishap last year:

IMG_1311c.jpg


I can pop it back in place but it doesn't stay put very long, and I'm always worried it'll catch on something when I'm off-road. The cost to have it repaired is astronomical. So I came up with my own solution, using stainless steel sheet metal screws and washers:

IMG_3391cc.jpg


IMG_3391cx.jpg


IMG_3386cc.jpg


It's not perfect but it works, and I like the way it looks -- kind of looks "tough". :)


.

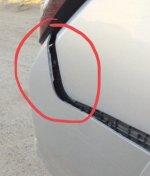
I have a similar problem, but not as severe. I had a little bump and the section popped out. I didn’t examine it closely, just pushed it back in and the area by the tire snapped into place. But the section by the tail light still protrudes a little. Does anyone know how this trim actually clips in? Any more detailed photos of the clip system? Thx.
 

Attachments

  • 22D8027F-A81F-4707-BF60-27AE5C0698F3.jpeg
    22D8027F-A81F-4707-BF60-27AE5C0698F3.jpeg
    67.2 KB · Views: 837
Hey everyone. So, longtime lurker but I read lots of your posts and have picked up tons of hints and mods. I appreciate all of you.

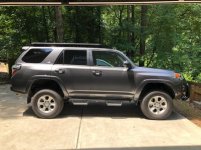
So I installed an Icon Stage 2 lift in my Silver 2016 Trail Premium with KDSS. I also installed a one inch body lift. This is almost the same route I took with my 2000 4Runner although I had added the Toyota supercharger and a bunch of URD mods. I kept that truck for 16 years and hated seeing it leave my driveway. I do, however, love my 5th gen. Finally had my 295/70/17 Nitto Ridge Grapplers and Icon Rebound wheels installed and an alignment performed. Previous to this, I did do a body mount chop moved the front inner fender liners forward, removed the front mud guards and trimmed the front fenders inside the wheel wells just a bit. They got my truck all aligned at 4.30 caster and it drives just awesome. I was a bit worried about rubbing but to my surprise I have had absolutely zero rub on road (and I have tried like hell in forward and reverse with the wheel locked). Keep in mind I have not taken the truck off road yet and I do assume when stuffed, I will get some rubbing but with 295s I couldn't be happier with the road manners and lack of rubbing. The Nittos, for being fairly aggressive are surprisingly quiet on road.

So, as far as KDSS. I have read everything I could about lifting a 5th gen with it. I did, and you absolutely can install the front coilovers without disconnecting the KDSS at all. I did my install with jack stands, on the ground in a driveway. Driver's side was simple with some jack pressure on the opposite side under the KDSS bar. Passenger side was a bit more difficult but simply required a jack under the KDSS boot and a fat guy with a bar to wedge down the lca. I did ucas as well so those obviously should be at least disconnected.

In the rear, which was much simpler, I only disconnected the KDSS on the passenger side. Springs and shocks went in without much effort and reattaching the KDSS on one side was a piece of cake. Many ways to do the same thing. Not saying mine is the best but it certainly can be done. If you feel like disconnecting the KDSS completely in front is the better option, have at it. Just telling you how I did it.

Icon Rebound wheels are 17 x8.5 with 0 offset and 4.75in backspace. These put the 295s maybe just a tad outside the wheel wells but I think it looks great. I do think the body lift may have helped just a bit with rubbing issues but 1in is fairly easy and I like the look better.

Other additions to the 4Runner are as follows:

Tinted windows
Painted the silver roof rails black
Black out tail lights from Unique Style Racing
TRD Pro Emblems
TRD grill and black front and rear bumper valances
2019 TRD Pro black hood scoop insert
Blackout 4Runner letters on rear hatch
K&N performance air filter
"Raptor" lights in grill
HID low beams
LED fogs
LED rear turn signals
Libberway Red D rings on front
Agency 6 Red Shackle Block and D ring
Lamin-X yellow fog light film
Green Lane Offroad aluminum front skid plate
Nfab Nerf bars - To be replaced by sliders
Antman's rear bumper cup holder mod
Salex center console and glove compartment organizer
Center console tray
OEM bug guard
Weathertech floor mats
Husky rear mat
Weathertech rain guards

I do have a 32in LED light bar to be mounted behind the grill. Just crafting some brackets for it.

Ordered or to be ordered:

Ellis Precision pewter shift knob set with TRD logo
Pedal Commander or Sprint Booster
Toyota OEM red brake caliper covers with white TRD decals
I am sure there are more to come.

Thanks again for all of you who have posted your experience and documented your installs. Extremely helpful. And if you are on the fence about doing something like a lift yourself but have the room and the tools, I say go for it. Nothing better than wrenching on your own vehicle plus you learn a ton. A realize everybody doesn't have that option. Thank you guys again,

Rob (Primo)

Ok, here are some crappy pics of my dirty 4Runner:
 

Attachments

  • IMG_0729[1].jpg
    IMG_0729[1].jpg
    132.1 KB · Views: 337
  • IMG_0743[1].jpg
    IMG_0743[1].jpg
    135 KB · Views: 343
Last edited:
I have a similar problem, but not as severe. I had a little bump and the section popped out. I didn’t examine it closely, just pushed it back in and the area by the tire snapped into place. But the section by the tail light still protrudes a little. Does anyone know how this trim actually clips in? Any more detailed photos of the clip system? Thx.

That sliver of plastic sticking out of the bumper plastic (in the circled area) snaps into the black plastic piece attached to the rear quarter of the truck. It will make sense if you follow my instructions.

That particular tab is flimsy and if you look at it closely you will see it's bent down. Happend to me when I took mine off to run breather lines.

Undo that half the bumper to the centerline of the cargo area. That will allow you to access the tab. Do your best to bend that tab back up into place. Then working from the centerline of the cargo area to the fender start fastening the bumper down. When you get to that tab slowly help guide it into it's little slot on the fender and then you can press/snap it back in. Pop, Snap, and screw the rest of the bumper together and you're good.
 
Last edited:
My sunroof slides open fine. When I TILT it up it looks like it's touching the crossbar, but I don't know for sure... I need to loosen up the crossbar and watch it from the outside to be sure. I'll get back to you.

Good info, I appreciate it! I figure if it does touch, I'd just ditch that one bar.
 
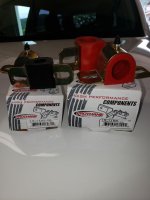
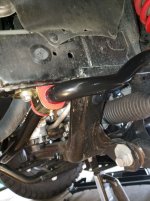
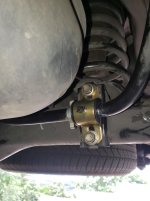
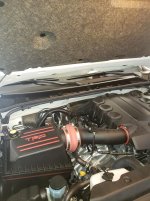
Sway bar bushing upgrade and TRD CAI

Upgraded to greaseable Poly Sway Ba Bushing for front and rear and added a TRD CAI.
Not only can I corner like it's "ON RAILS" but I can go 0-60 in less than 5 minutes!
 

Attachments

  • _copie-0_20190612_063923.jpg
    _copie-0_20190612_063923.jpg
    131.4 KB · Views: 932
  • _copie-0_20190629_111718.jpg
    _copie-0_20190629_111718.jpg
    118.9 KB · Views: 928
  • _copie-0_20190629_113755.jpg
    _copie-0_20190629_113755.jpg
    129.8 KB · Views: 958
  • _copie-0_20190629_121030.jpg
    _copie-0_20190629_121030.jpg
    117 KB · Views: 937
  • _copie-0_20190629_121315.jpg
    _copie-0_20190629_121315.jpg
    137.2 KB · Views: 933
Last edited:
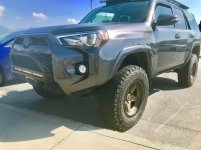
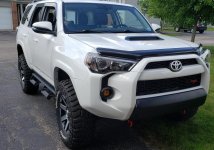
Last weekend but BD fogs and painted my valance while the bumper was off.
 

Attachments

  • 2019-06-29 16.27.07-2.jpg
    2019-06-29 16.27.07-2.jpg
    138.7 KB · Views: 780

Members online

Forum statistics

Threads
278,317
Messages
3,554,129
Members
248,016
Latest member
Advally Service

Trending content

Back
Top