What did you do to/in your 5th Gen today?!

New 2020 RED! ORP woohoo

Parked my new ORP in my old, awful, (supposed to be rebuilt), carport. Also drove it...good times.
Sad part, traded in my 4th gen, overland built, go anywhere, do anything, kick ass truck. But it was silver, so I'm over it. :dance:
 

Attachments

  • 59252448375__902DE3D3-CB12-4E36-AAA0-970B1D317E74[7086].jpg
    59252448375__902DE3D3-CB12-4E36-AAA0-970B1D317E74[7086].jpg
    140.4 KB · Views: 1,005
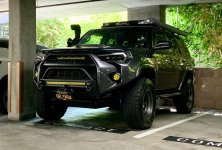
Blacked out the bumpers. $20 for some Plasti Dip and masking tape. [emoji41]. That’ll keep her looking a bit better until I can put some proper bumpers on her.

Also blacked out the C-pillar labels

72cd8bd5be0fe025612da32f2384a93e.jpg

1ffd2c421aa94ed40f9642883aa2c3d7.jpg

2e02e307e8c22d07541ac811c0fafa58.jpg
 
Last edited:
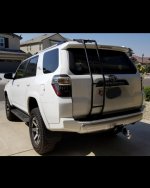
After almost a month, got to install this used gobi ladder. Run into some issues guess coz its used, but its done, its very sturdy and didnt damage any part of the ladder or the truck
 

Attachments

  • 20191012_175018.jpg
    20191012_175018.jpg
    57.3 KB · Views: 932
Small lift. Bilstein 5100s all around set at 1.75 front, and Dobinsons 1.25" lift rear springs c59 599. Also the air lift 1000 air bags for the stock springs fit in the new Dobinsons springs.
zHKQ5mE.jpg

IQuXXjO.jpg

F73ljbT.jpg

vClp5v2.jpg

Before and after
ZMzSICC.jpg
 
Last edited:
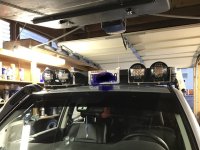
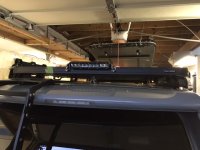
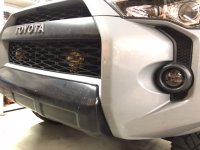
Trying something different here..... all Rigid Industries lights (2x spot/hyperspot, 2x driving/spot) on a Front Runner (also ARB awning mount, 2x Rotopax and quick release for the Autohome). Rear facing spot/flood. 2x driving with amber covers behind the grill. Also, Swapped our fogs for Morimoto. The fun part of wiring the SwitchPro still to come....
 

Attachments

  • 9FD7A086-A26C-4DE4-8842-F62CD4404DAA.jpeg
    9FD7A086-A26C-4DE4-8842-F62CD4404DAA.jpeg
    106.1 KB · Views: 805
  • 30193EA4-E982-4BCA-9D7D-0391750537B6.jpeg
    30193EA4-E982-4BCA-9D7D-0391750537B6.jpeg
    81.6 KB · Views: 808
  • 32BDE860-F897-4BF6-8CC7-1DE0D909B46D.jpeg
    32BDE860-F897-4BF6-8CC7-1DE0D909B46D.jpeg
    80.4 KB · Views: 782
Trying something different here..... all Rigid Industries lights (2x spot/hyperspot, 2x driving/spot) on a Front Runner (also ARB awning mount, 2x Rotopax and quick release for the Autohome). Rear facing spot/flood. 2x driving with amber covers behind the grill. Also, Swapped our fogs for Morimoto. The fun part of wiring the SwitchPro still to come....

Do you have pictures of the install for the behind the grill lights?
 
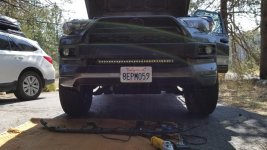
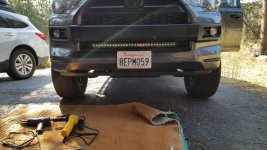
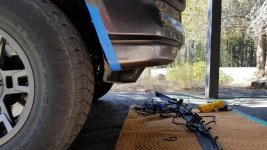
Trimmed the Lim & installed MLC

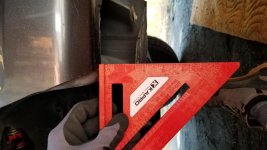
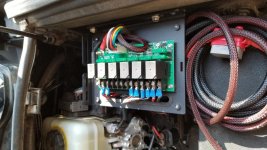
Running 1.5" RC wheel spacers. Caster adjustments took care of rear rubbing, but the limited trim hangs down in the front sooo much... It's been annoying me for a while. So, I got the angle grinder and heat gun out. Was able to trim the lower wind thing, cut the brackets off that hold wind thing to the bumper, and trim a lot of fender liner. Actually remounted the liner to the fender post-cut - a la liner push forward mod that has been discussed ad nauseam - but, mine is now much farther forward. Anyway, this was kinda fun, and now you can see all my undercarriage bits.

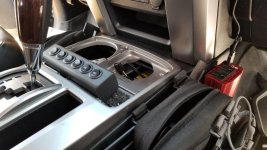
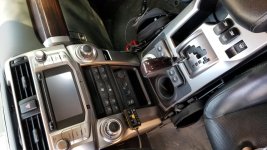
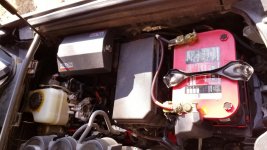
Also! Installed a Rough Country MLC switch and power distribution block. Cleaned up my wiring and am currently using 4 of the 6 switches. There really isn't a good place to mount the switch housing in the interior of the 5th gen, so I made one. Cut out the "pen holder tray" just forward the gear shifter. The gasket is something I will likely upgrade and clean up, as it sort of bowed up in the cold overnight. BUT, really happy with where these switches are and the cleaned up simplicity of the MLC system.

Switches powering
1 - 30" single row (road)
2 - 8 qty very helpful rock lights (rock)
3 - 2 qty 6 inch roof rack lights (rack)
4 - blank
5 - blank
6 - power inverter (mounted to left of lower dash)

Anyway, here are some photos:

 

Attachments

  • 20191012_123620.jpg
    20191012_123620.jpg
    139.7 KB · Views: 1,169
  • 20191012_102408.jpg
    20191012_102408.jpg
    140.7 KB · Views: 1,184
  • 20191012_123640.jpg
    20191012_123640.jpg
    141.5 KB · Views: 1,156
  • 20191012_131025.jpg
    20191012_131025.jpg
    136.3 KB · Views: 1,166
  • 20191012_144740.jpg
    20191012_144740.jpg
    142 KB · Views: 1,199
  • 20191012_112012.jpg
    20191012_112012.jpg
    135.8 KB · Views: 1,164
  • 20191012_102046.jpg
    20191012_102046.jpg
    141.4 KB · Views: 1,153
  • 20191012_150226.jpg
    20191012_150226.jpg
    138.1 KB · Views: 1,157
[MENTION=3233]RedRunner[/MENTION], all brackets are custom bent out of I think 16ga aluminum except behind the grill, 90 degree “L” shaped brackets out of steel. I think Rago sells behind the grill brackets for round lights tho.
 
Intake today, combined it with Trd exhaust for for the win! really brought out a beast mode
Added bonus, did a 30 mile trek on the highway set cruise @55 (speed limit here and cops everywhere) and got 25. Doing the same pre intake never even broke 24

20191013_130152-jpg.33444


20190904_182409-jpg.31752


20191013_141242-jpg.33445
 
Last edited:
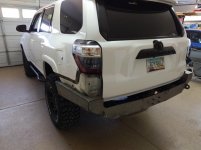
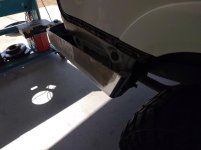
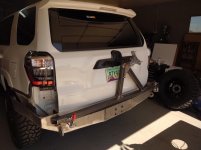
Week two of my Coastal Offroad rear bumper build. Didn't like the blocky look of the kit but liked the price. I tacked the bumper kit together as it was shipped to me then started in on customizing it. 4 of the corners got cut out and replaced with a section of 1.38" OD dom to make the corners flow a little better. There was also room to cut another facet into the rear. Basically cut a pyramid shaped piece out of each side, starting from just outside the rear mounting bolts to nearly the shackle hangers. Hard to see in the pics but it basically makes the bumper look like it is tapered up and forward from the back. Still have plans to integrate some backup lights.

Spare tire carrier was needed for the 295/70-17's that went on a few weeks back. Winged it on the carrier, using a 4X Innovations hinge/tire plate and Destaco clamp. A ball/socket setup near the clamp eliminates any movement when latched. Spare is parallel to the rear window leaving room under it for a hi-lift jack (mount TBD).
 

Attachments

  • IMG_20191005_083430983.jpg
    IMG_20191005_083430983.jpg
    79.5 KB · Views: 1,138
  • IMG_20191013_123927235.jpg
    IMG_20191013_123927235.jpg
    59.5 KB · Views: 1,116
  • IMG_20191013_123832235.jpg
    IMG_20191013_123832235.jpg
    76.5 KB · Views: 1,113
Exposed this:
48862386181_e73d02e144_c.jpg


And filled it with this:
48894875461_02756cddd0_c.jpg


Also organized some tools:
48894877656_c530a4b9c2_c.jpg


And installed a Wizgear magnetic cellphone holder in just the right spot:
48894345208_d656599aab_c.jpg
 
How did you light the pumpkin?

Came with a light bulb, so just running it through the door frame behind the snorkel and closing the door to keep it in place. Left a little slack so bumps and stuff it doesn't yank.

Then just plugging it into an inverter in the cigarette lighter.
 
Came with a light bulb, so just running it through the door frame behind the snorkel and closing the door to keep it in place. Left a little slack so bumps and stuff it doesn't yank.

Then just plugging it into an inverter in the cigarette lighter.
Rofl!!!!!! That made my day
 
Last edited:

Members online

Forum statistics

Threads
278,316
Messages
3,554,124
Members
248,016
Latest member
Advally Service

Trending content

Back
Top