What did you do to/in your 5th Gen today?!

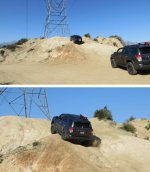
Just finished Cleghorn Trail for the first time ever ... Enjoyed it but didn't do too much of the off shoots because the fam was with and wifey was scaredy cat.

If I still lived in SoCal I would go back. This was one of my first trail runs in my 2013. It was very good with a helpful and friendly group to go with. -- That is not us going up the hill.
 

Attachments

  • Tower3.jpg
    Tower3.jpg
    103.9 KB · Views: 1,056
Last edited:
If I still lived in SoCal I would go back. This was one of my first trail runs in my 2013. It was very good with a helpful and friendly group to go with. -- That is not us going up the hill.

They closed of the section of Edison Hill ...

I wanted to do some more of technical stuff but like I said wifey being a scaredy cat and on top of that we did it solo. None of my friends could make it last minute.

I would like to do more technical stuff next time when I'm not solo.
 
Installed some new speakers and cld mat

Speakers are Kenwood xr-1800p components
CLD mat siless 80mil from Amazon
Misc items from home depot

Custom sail tweeters to come
84067e66bec474e2762f8c3bc667116c.jpg
9056eb001c0f1f0ae8547da37ab3c19f.jpg
3f36495f346e4a0ccad05bdb4a882282.jpg
00cf9613869ebe823a651daef8dd6091.jpg
c0be581075b0aa328ff1043c03777dd6.jpg
c5920d47b270e63a4a7a26064eee3287.jpg
8a3606f2ff1c77034abf19393f9c4e44.jpg
40a85dcb3f3a2da8c64459f1098bdc35.jpg
0bb4eda459c3c383294653dd1ee1a990.jpg


Sent from my ONEPLUS A6013 using Tapatalk
 
Finished redoing my setup in the back..
Orange box molle panel DS
Canvasback custom one piece for the seatbacks and storage cubby
Drawer with double slide mounted to factory sliding tray.

Looks great! Where did you get the bags/pouches for the Molle panels? Which first aid kit is that? I got the Rago ones recently during their Raw sale. Having to wait for warmer weather to paint/install them though.
 
Looks great! Where did you get the bags/pouches for the Molle panels? Which first aid kit is that? I got the Rago ones recently during their Raw sale. Having to wait for warmer weather to paint/install them though.

Thanks! I got them from AMAZON. If you search for molle pouches they have a decent selection, I ordered the first aid one empty and added my own supplies.
 
Installed some new speakers and cld mat

Speakers are Kenwood xr-1800p components
CLD mat siless 80mil from Amazon
Misc items from home depot

Custom sail tweeters to come

Great work, how are the hands and arms feeling this morning?
I cut the sh*t out of my hands when reaching into the door with the roller and tennis ball to form the matting over the curved areas. It was an awful experience yet the improvement is amazing.
 
Installed Trunk Hatch Pop Switch and Rear Window Control in Rear for camping

Installed Trunk Hatch Pop Switch and Rear Window Control in Rear for camping.

This is great for car camping to pop the trunk from the rear or control the rear window and even lock/unlock the car.

Reach out to NYTOSC to purchase. $60 ish shipped

Install Video here: YouTube

YouTube">YouTube" type="application/x-shockwave-flash" width="425" height="350">
 
Last edited:
Installed some new speakers and cld mat

I've installed plenty of Dynamat and equivalent in my day, but never on the exterior door skins. I'll bet it makes a heck of a difference. Nicely done!

I've got a few boxes of the stuff waiting for warmer days. I hate beating up my hands in confined sharp spaces in cold weather!
 
Great work, how are the hands and arms feeling this morning?
I cut the sh*t out of my hands when reaching into the door with the roller and tennis ball to form the matting over the curved areas. It was an awful experience yet the improvement is amazing.

Good thing I wear long sleeve to work. Feel like I got in a fight with a cat. CLD foil is surprisingly sharp as well.
 
I've installed plenty of Dynamat and equivalent in my day, but never on the exterior door skins. I'll bet it makes a heck of a difference. Nicely done!

I've got a few boxes of the stuff waiting for warmer days. I hate beating up my hands in confined sharp spaces in cold weather!

just to reduce panel resonance, but wear protective long sleeves doing doors. lots of sharp points and nearly impossible to roll out every square inch. i want to say it helps a but for speaker response, but not something that you need to go all out on. Ideal is 25% coverage inner and outer, with emphasis on behind and around the speaker.
 

Just confirming this is the correct one? The listing pic doesn't look like it will adjust to 90 degrees angle like yours does?
Thanks!

I neglected to mention that I had to modify it a little. It's not quite a 90-degree angle. I used a dremel to trim a half-moon shaped notch in the collar-screw and the socket that the ball snaps into. It was a lot of positioning, measuring, making a small cut, then repeat several times. Every time I trimmed, the collar-screw would progress a little more because of the flex. But in the end, it was nice and tight.
 
Stripped the back down to the frame

First of all, thanks to the many members!! I have read hundreds of posts to get ideas to design my Sleeping Platform/Drawer System.

My first post:

Removed the rear seats, carpet, and foam. Screwed a 2x4 horizontally that fits with rear seats installed and another 2x4 onto the spot where the seats screw in. Took out the rubber caps in the cargo floor and bolted on a few 2x4s lengthwise to create my subframe. Cut my 3/4" Maple plywood floor to fit the back. Plan to cut another 3/4" to fit the area where the rear seats were. Cargo floor is permanent, whereas the front portion is easy in/out with a few screws.

Drawers to come. Thinking 1/2" Plywood with some 2x3 supports.

Anyone used the two 1" diameter holes in the cargo floor that are capped with rubber black circular plugs? I bolted 2x4s with rubber and metal washers on each side. Hoping it doesn't leak!

 
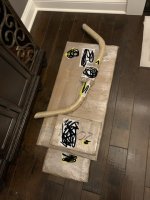
Got a package yesterday

Guess what I’m going to be doing with some of my holiday time off.
 

Attachments

  • 017116C1-68D9-4781-A690-51AACB6EDA43.jpeg
    017116C1-68D9-4781-A690-51AACB6EDA43.jpeg
    88.7 KB · Views: 1,017
Ran into a slight setback on my IS projector retrofit. This little piece shown at the bottom of the projector housing is an interference point for the 3rd mounting hole on the bracket. Also one of the shutter ears interferes with the internal headlight assembly (not pictured). Aside from that, progress was OK. Both headlights are open, one OEM bracket has been cut apart to fit the IS housing. STI-R lenses are in.
01ead7ebb6f01b081db9f1ba55639419.jpg


Sent from my iPhone using Tapatalk
 
Last edited:

Members online

Forum statistics

Threads
278,317
Messages
3,554,128
Members
248,016
Latest member
Advally Service

Trending content

Back
Top