What did you do to/in your 5th Gen today?!

Great idea. Did you use the Spot, Cornering, or Scene version? Can you post a night photo? Thx.

I used the wide cornering initially, and the throw was excellent, but it did not illuminate the periphery to my satisfaction. I switched the lens to a scene/work lense and it is much more diffuse light and seems to have a wider spill. I’ll try to grab some night shots tonight for you.
 
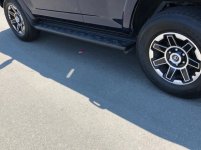
While waiting for my lift/tires (seems ARB can't get product here in a reasonable time :mad: ) I decided that I didn't like the OEM wheels anymore. I thought they would grow on me but they never did. I like the wheel style and but I just couldn't stand so much shiny steel all over them. I was on the fence with Plasti Dip or powder coating or just buying new wheels until I ran into these. I like how it turned out. Easy going on and if/when I get some trail damage I can just remove and replace.

It's subtle but I think it makes the OEM wheels pop a little ...
 

Attachments

  • IMG_1671.jpg
    IMG_1671.jpg
    45.2 KB · Views: 672
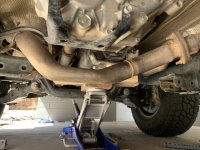
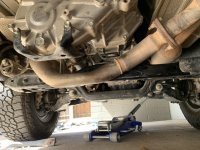
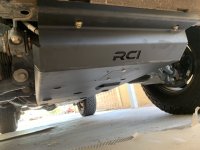
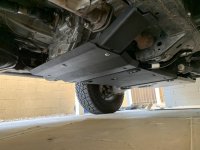
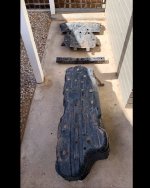
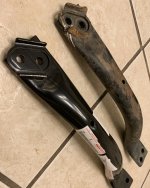
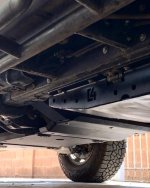
Swapped the trans crossmember out. Going to lube and tq the driveshafts while I have good access. Then I’m throwing in the RCI skids and the c4.
 

Attachments

  • A473C990-49B2-478F-8C20-09C15B936EB2.jpeg
    A473C990-49B2-478F-8C20-09C15B936EB2.jpeg
    119.4 KB · Views: 897
  • EA4319D9-B5D4-4639-858A-1D0479A6AFEF.jpeg
    EA4319D9-B5D4-4639-858A-1D0479A6AFEF.jpeg
    123.7 KB · Views: 928
Today I used the Carista OBD2 app to change a few vehicle settings. I was mostly after enabling the windows down using the key fob and turning off the horn when arming/disarming, but found a few others things to change too.

I had a bluetooth OBDII reader already, so I just purchased the 9.99 one-week pass to allow customization. Was super easy -- took all of 5 minutes probably.
 
Some follow-on work from a couple of days ago https://www.toyota-4runner.org/3519384-post43741.html - SSO Slimline Bumper install

First two other install notes:
  • If you have front shocks with a reservoir system (King, etc.) you want to remove the front bolts from the reservoir brackets before attempting to jack the bumper up into position :). That's the same hole the bumper 'ears' get bolted to.
  • Another point with the reservoir - you can bend the aluminum mounting bracket to fit over top of the 'ears' of the bumper that attach to the radiator mounting block. However you might want to pick up some washers to bump out the spacing of the rear bolt mounting point of the reservoir. That way you can match the thickness added by the bumper 'ear' to the front mounting point.

On the issue I had with the front fitment. It wasn't 'bad', but it just wasn't right... I talked with SSO yesterday afternoon about the way the lower bracket pushed out the fascia. Everything else went together so smoothly, I was surprised that this was an issue.

The customer/tech support rep said that he hadn't seen this problem before. He advised to start tightening at the wheel-well, and then tighten the bracket to the bumper. That didn't help me, but perhaps that approach will help others.

He had also said that he would talk to their CAD team, to see if they had any prototypes for more adjustability. I told him that if the tightening order method didn't work, I'd try drilling some holes and send them some feedback. So, I'll be sending this info to them for their review and consideration.

Photos
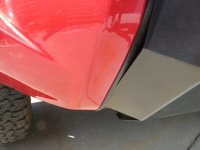
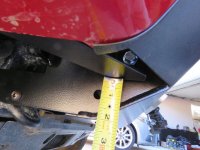
1 - With stock bracket in place the front fascia is pushed down and out, so the lower part winds up in front of the bumper.
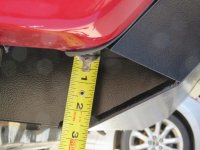
2 - Stock bracket base is about 2 1/8 inches from the bottom of the bumper, so it is lower than the natural line that the fascia would have if it were sitting without the bracket there at all.
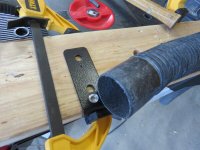
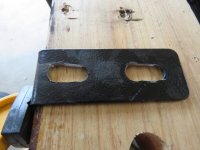
3 & 4 - Modified the stock brackets by drilling and dremel-ing to create a slot that allowed for 5/8 inch of adjustability.
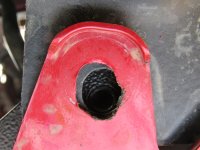
5 - Very loosely attached bracket to bumper (2 bolts), then ran the bolt through the fascia at the wheel-well end of the bracket, and finally did a bit of enlarging of the forward hole of the fascia to allow that hole to line up.
6 - Tightened things down, which was a bit of a challenge, as the lower bracket bolt is now very close to the bracket bend point. Now the bracket is 2 3/4 inches up from the bottom of the bumper, and the fascia sits behind the bumper. :)
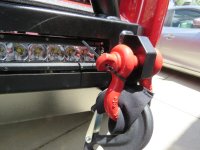
7 - And for good measure, we made some sleeves for the D-rings and towing hook from scrap neoprene, and added zip ties so they won't work themselves loose.

 

Attachments

  • IMG_3012.JPG
    IMG_3012.JPG
    32.3 KB · Views: 885
  • IMG_3020.JPG
    IMG_3020.JPG
    50 KB · Views: 886
  • IMG_3022.JPG
    IMG_3022.JPG
    52.5 KB · Views: 884
  • IMG_3026.JPG
    IMG_3026.JPG
    41.5 KB · Views: 878
  • IMG_3030.JPG
    IMG_3030.JPG
    48.8 KB · Views: 884
  • IMG_3031.JPG
    IMG_3031.JPG
    47.5 KB · Views: 898
  • IMG_3027.JPG
    IMG_3027.JPG
    49.3 KB · Views: 877
Got the apex recovery points and RSG skid plate installed. Got my Dobinsons suspension delivered today so hopefully tomorrow I can get that in. Sadly I kind of fought with the skid plate. One of the holes didn't align correctly so I spent what felt like forever in the heat loosening and tightening bolts. Nothing a die grinder can't fix in about 10 seconds, but for now I am done.

turOlsg.jpg

5Cy2bg3.jpg


Hopefully tomorrow I can show this installed. Then in a week it's off to explore some OHV areas and random forest roads.

HsxT5v5.jpg
 
I still had open bed envy and traded it in on a Taco TRD Off Road so I'm still in the family. It's still on the boat so I'll be around for a few more weeks. I learned a lot from the many super nice and knowledgeable folks here, hopefully a helped a few as well.

4 Runner accessory take off sale coming soon!

Aloha!
 
RCI’s went in pretty easy. Going to pace myself and tackle the gas tank skid tomorrow. Started getting grouchy.
 

Attachments

  • 14068E01-685A-4BD6-9A5E-A2CE3CCAB5BE.jpeg
    14068E01-685A-4BD6-9A5E-A2CE3CCAB5BE.jpeg
    90.7 KB · Views: 790
  • 8B66B652-DB2B-4690-B716-BFF2630DA7D8.jpeg
    8B66B652-DB2B-4690-B716-BFF2630DA7D8.jpeg
    94.3 KB · Views: 801
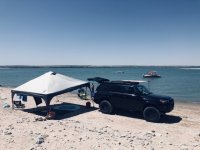
Lake McConaughy NB

Went camping with my kids and met up with some friends!
 

Attachments

  • C1ABB3E0-FCAE-4B82-9C3D-C747399E3650.jpeg
    C1ABB3E0-FCAE-4B82-9C3D-C747399E3650.jpeg
    92 KB · Views: 734
RSG sliders should be getting shipped out Monday so I removed the running boards and wish I had done sooner. Makes the recent Eibach lift stand out way better.

laoxpEt.jpg

lWQXikS.jpg

heVPWTu.jpg
 
Yesterday, I drove my 4Runner to my very first flight ever. It was an old biplane. I should be over the whole fear of flying thing now, so I'll try a short airliner passenger flight somewhere after all this coronavirus crap is over before taking a trip to Australia.

On the way home while driving on the Garden State Parkway, I got sideways! Some jackass in a convertible decided he was going to squeeze into the tiny space between my vehicle and the SUV very near me between 10 and 11 o'clock to pass us both. Thank goodness I was in the right lane and had the shoulder to dip into. I slammed on the brakes and ducked right. Then I had to correct left and lost traction for a bit! I could feel the inertia of my 4Runner moving forwards while its heavy body and the rear wheels were rotating behind me. I was able to straighten out without killing anybody, thank goodness.

It was crazy. Me and the guy in the other SUV were just driving normally, and this jackass comes from out of nowhere and nearly kills himself and maybe others. I could have seen myself pushing the convertible into the other SUV, too. I probably would have survived, but this convertible would have been painted red, I'm sure.
 
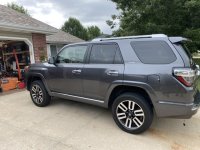
Just something simple. New 2-1/2” daystar leveling kit. Wheels and tires installed on Wednesday. Moving from the 20” Limited to the 17” TRD grey wheels. More pics to follow later this week.
 

Attachments

  • C4AC285C-2342-4F5E-BF05-0D713462580A.jpeg
    C4AC285C-2342-4F5E-BF05-0D713462580A.jpeg
    114.8 KB · Views: 600
LAst night after boating had some energy & installed Raptor lights. Pikup the Tail light pwr & they are controlled by Parking lights!:becky::whoo::thumb:
 
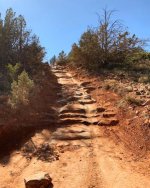
I 50/50 board slid my basically new runner down the devils staircase in Sedona without walking, and a spotter.... It was ****ing hilarious to me at the time and amazingly fun. But, it cost me in more ways than two. At long last I finally completed my repairs.

Love this truck. It’s a breeze to work on. Thank ****.
 

Attachments

  • 010435B3-3D75-4EA6-81D3-4F52973BDCED.jpg
    010435B3-3D75-4EA6-81D3-4F52973BDCED.jpg
    67.1 KB · Views: 885
  • FCF1FAF1-CFB8-467E-A750-335B6E72A00A.jpeg
    FCF1FAF1-CFB8-467E-A750-335B6E72A00A.jpeg
    107.6 KB · Views: 886
  • A28F30DC-7D13-48C5-9BED-8135A8C33B78.jpeg
    A28F30DC-7D13-48C5-9BED-8135A8C33B78.jpeg
    113.1 KB · Views: 879
  • 0E081B4E-5A3C-40DE-AD66-2E152C521CAD.jpeg
    0E081B4E-5A3C-40DE-AD66-2E152C521CAD.jpeg
    99.4 KB · Views: 899
Last edited:
Just something simple. New 2-1/2” daystar leveling kit. Wheels and tires installed on Wednesday. Moving from the 20” Limited to the 17” TRD grey wheels. More pics to follow later this week.
Whoa this is exactly what I was looking for today! I've already got the TRD Pro rims but been looking at different lift options past couple days.

Sent from my Pixel 4 XL using Tapatalk
 

Members online

Forum statistics

Threads
278,316
Messages
3,554,124
Members
248,016
Latest member
Advally Service

Trending content

Back
Top