After relocating the factory USB/Aux to the glovebox, this was just plug and play. It plugs in between the supply wiring to the cigarette lighter and the lighter itself, then just put it in the factory opening previously occupied by the USB/Aux. It also has an inline fuse for added protection.
That is funny as I just got two of the GSI rocker chairs that are normally ~$75 for $50 from REI during their last sale.
I would recommend you going to MESO site and seeing if they even have them in stock. I had to put my name on the waiting list to be notified when they were in stock and I think it took maybe 3 or 4 months until I received my email. Now I am waiting for an email on their "G" key mod.
I recently replaced the shocks and struts on 2014 SR5. I went with the KYB's below because they were advertised as OE recommended replacements. My intention was to keep the factory rake, but now it is level or possible higher in the front: how is the best way to check? I was thinking by putting a level on the running boards, but I've had a tough time finding level ground. Is there a better way?
Does anyone have experience with these shocks/struts. Could they have been installed wrong?
As someone else mentioned, measure from center of wheel hub to bottom of fender.
For reference, my stock height on a '19 sr5 was 20 inches in the front and 22 inches in the rear which would be a 2 inch difference (rake).
I wasn't sure how I was going to route it, so I got the 6ft version. You can easily do it with the 3ft version and still have excess cable left over.
There are 2 removable panels in the glovebox (one in the rear and one on the console side), those give you access for routing cable. In the center console/dash, you'll need to pull off the side trim panels and AC controls, that gives you access to the USB/Aux & lighter.
Pop out the blank (I used the rectangular one) in the glove box and using a dremel trimmed out the center portion to fit the new USB port. Then I routed the cable down to the center section near the USB/Aux & cigarette lighter. Plugged the now modified blank and port into the glove box and put it's cover panels back in place.
Unhook the USB/Aux and pop it out of the center console panel. Plug it back in, hook up the extension, then tape them together so it doesn't come loose. Tuck the loose wire back in and reinstall the AC controls and side trim.
All done. Really simple and takes less than 20mins start to finish & testing (I tested before I put the panels, controls, and trim back in place). Sorry, but I didn't take any pictures along the way. I could get some when I get home, but that's going to be over a week (I'm still at work until Aug 6th).
I finally got around to relocating my rear camera. Using the instructions from Victory 4x4 but using the C4 relocation kit. I modified it to my liking. Just need to hook up with a welder to fabricate real bracket for the camera...
I finally got around to relocating my rear camera. Using the instructions from Victory 4x4 but using the C4 relocation kit. I modified it to my liking. Just need to hook up with a welder to fabricate real bracket for the camera...
I got some wheel spacers on today. 1.25". Finally looks proper. I got a bit of wheel rub, as expected, so I will do some trimming tomorrow. No pictures, as you guys have seen a hundred wheel spacers before, I am sure.
I finally got around to relocating my rear camera. Using the instructions from Victory 4x4 but using the C4 relocation kit. I modified it to my liking. Just need to hook up with a welder to fabricate real bracket for the camera...
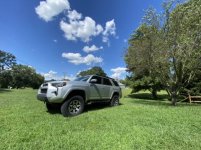
That picture is from the parking area before the trail up to the fire tower at the end of FS 67. We also did a 10mi round-trip up to Wayah Bald and back a couple days later. Met quite a few Appalachian Trail hikers each day.