What did you do to/in your 5th Gen today?!

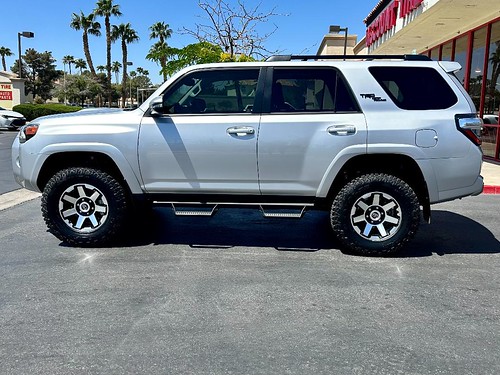
Paid it off, then powdercoated and installed ORP wheels on my (mostly) stock SR5 to celebrate. Looks much better.

Next is to find a take-off 21+ PRO Fox suspension and Westcott lift.

Dude, that looks really good. I actually may like those more than the TRD pro wheels. Nicely done.
 
Brought home our new teardrop!
fa3b22b1bf7d6f0e09019cd51bd836e4.jpg


Sent from my moto g(7) using Tapatalk
 
Elevate 2.5” lift with Fox 2.5 shocks and Elevate rear springs, Elevate upper control arms, and differential drop. Goodyear UltraTerrain AT 285/70/17.
 
Last edited:
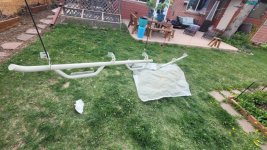
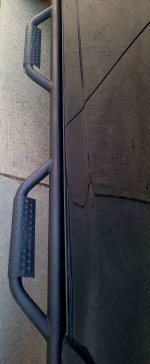
NFAB nerf bars are all primed and the painting is underway. Hoping to have them back on the vehicle tonight!
20230429_174117.jpg

Sent from my SM-N986U using Tapatalk
 

Attachments

  • 20230429_174117.jpg
    20230429_174117.jpg
    137.6 KB · Views: 709
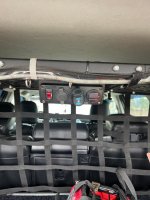
Installed rago modular device dash panel.
Also haven’t logged on here since 2017 when I had my 3rd gen, but I now have a 5th gen I bought off a friend that I’ve been modding non stop
 
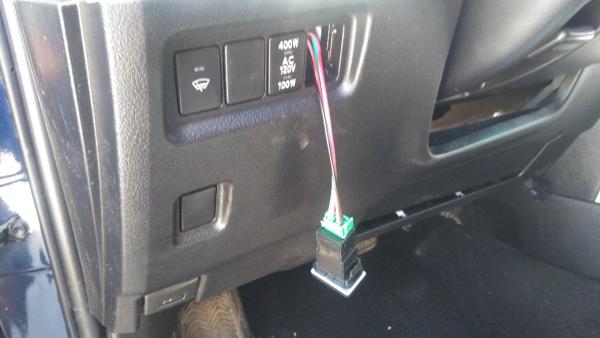
Remember that single blank switch spot on the dash near the driver's left knee just above the hood release (ignore the previous work being done in this photo)?

moonrakerscm-albums-photos-picture61805-dash-switch-details.jpg


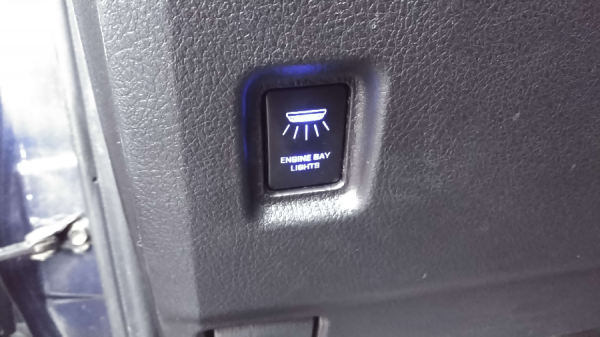
Welp, I installed another push switch there... it does not illuminate when 'off', but the lights turn on when pushed 'on'. (This again required trimming of the little interior tabs in the switch spot so that it depresses to the 'on' position properly.)

moonrakerscm-albums-photos-picture62557-engine-bay-switch.png


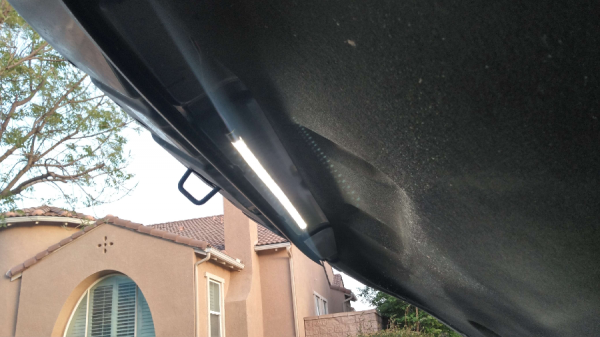
As you can see, it says something the 4runner is sorely lacking... some light in the engine bay! I installed this stick on LED strip a while back, ran the wire down from the hood, did all the electrical with a relay, fuse etc. and got it to the switch in the dash. It's awesomely nice and bright. Next time I need to jump someone in the dark, it'll be just a little bit easier.

moonrakerscm-albums-photos-picture62558-engine-bay-lights.png
 
had this rago 12 volt panel sitting around for a year, so got off my butt to install it.

It's alright. Now i have a big hole i have to cover up where my panel use to be.... first world problems.
 

Attachments

  • thumbnail-102.jpeg
    thumbnail-102.jpeg
    131.4 KB · Views: 656
Installed my auxbeam 6 gang switch panel. I don’t have plans at the moment for additional lights so my only accessory is my compressor. My previous vehicle I had a bit of a rats nest so I opted to start with the auxbeam unit to prepare for future mods. I chose to mount the control box on the fuse box lid. It’s sturdy and still allows me to remove the fuse box lid to access everything.
Overall, it’s a nice complete kit. Easy install. The only issue I had was the double sided tape for the switch panel isnt worth crap. Had to run to the store for heavy duty velcro.
Pics to come later today.


Sent from my iPhone using Tapatalk
 
idk about other snorkel owners but for me, the snorkel side is always dirtier from the spray than the driver side. Especially the passenger side windows. Decided to get some abs plastic to make some half fender flaps. They are obviously inspired by the wranglers w/ the xtreme recon or 392 packages that run a half flap to cover the 35s. Aussies seem to do this all the time to meet regulations with stock body vehicles and oversized tires. We'll see how well these work in keeping the passenger side cleaner.



Here you can see how dirty the windows get (I cleaned the passenger front, but it was just as dirty. You can see how the spray travels under the snorkel and get directed up to the passenger side mirror and windows.

3qFKpvc.jpg


Here are the flaps.

67hAn9N.jpg

lht15kV.jpg
 
Last edited:
Finally got those bedliner-painted nerf bars back on.

Now comes the test of time.
20230504_191551.jpg

Sent from my SM-N986U using Tapatalk
 

Attachments

  • 20230504_191551.jpg
    20230504_191551.jpg
    55.5 KB · Views: 916
idk about other snorkel owners but for me, the snorkel side is always dirtier from the spray than the driver side. Especially the passenger side windows. Decided to get some abs plastic to make some half fender flaps. They are obviously inspired by the wranglers w/ the xtreme recon or 392 packages that run a half flap to cover the 35s. Aussies seem to do this all the time to meet regulations with stock body vehicles and oversized tires. We'll see how well these work in keeping the passenger side cleaner.

I need to do something similar. Unfortunately I trimmed 1-1.5" off the front fenders/flare, so I don't have much to attach them to.
 
Had front 5100’s installed at .85 today and rear cornfed spacers installed, pass rear 1/2”, driver rear 3/4”. I put the rear 5100’s a few days ago.

Pre install
Front driver 19 3/4
Front passenger 20”
Both rears 22”

Post
Both fronts 21 1/2
Both rears 23
 
No more rubbing with 285/70/17s

Had to fix some rubbing on the front of the inner fender liner. Instead of the heat gun method and bending the liner, I removed the two screws holding the bottom edge of the inner fender liner and pushed it forward (away from the tire) and re-drilled the screw holes to secure. Now no rubbing in reverse while turning with my 285/70/17s.
 
Last edited:
Had to fix some rubbing on the front of the inner fender liner. Instead of the heat gun method and bending the liner, I removed the two screws holding the bottom edge of the inner fender liner and pushed it forward (away from the tire) and re-drilled the screw holes to secure. Now no rubbing in reverse while turning with my 285/70/17s.

PICS please
 

Members online

Forum statistics

Threads
278,317
Messages
3,554,125
Members
248,016
Latest member
Advally Service

Trending content

Back
Top