What Did You Do To Your 3rd Gen Today?

Status
Not open for further replies.
Could you please give me a few pointers and parts I need to buy to mount the compressor. I have the CKSA12 compressor, which is smaller than what you have. I am guessing I would have to make a metal bracket and mount the compressor on it. Thanks!

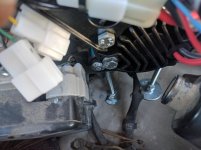
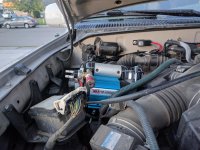
I used the bracket supplied with the compressor. I didn't take any during photos but these should give you a pretty good idea of what to do.

Parts List:

4) 1/4" x 4" panhead bolts
16) 1/4" nuts
4) 1/4" nylon thread nuts
12) 1/4" locking washers
12) 1/4" x 1 1/2" washers

If you want to use it for on-board air for tires you'll also need:

1) 3/8" x 1 1/2" brass nipple
1) 3/8" Brass Tee
1) 3/8" x male quick connect


Start by reading the compressor manual. There are three adjustments on the compressor. One to rotate the body(2 black alled screws). One to rotate the reservoir(black 10mm? bolt). One to remove the compressor from the mounting bracket(4 allen screws).

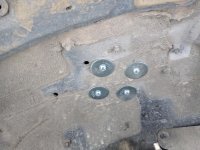
First remove the compressor from the bracket. Then measure the distance between hole. Make sure the bracket is in the correct orientation. Then mark the hole. There will be an electric line in the way you want to miss with holes on either side of it. Drill the holes with a 5/16th drill bit. Start with an smaller bit to avoid skating.

Take the panheads and put washers on the bottom. Slide them through the holes you just drilled from the wheel well side. Put washer, then lock washer, then nut on them from the motor side. Tighten them up snugly for now.

Take the mounting bracket and see if it fits. It won't because of the round surface your mounting the bolts through. You'll want the bracket off the fender by about 3" or so. Tweak the bolts slightly till the bracket fits. Now remove the bracket and tighten the crap out of them. Once super tight add another 1/4" nut as a lock nut.

Now add another 1/4" nut about 1" from the top of the bolt to each bolt. Put the bracket on and align the compressor as best you can. Find a height that allows clearance from all the engine components. Once your satisfied with it lower the nut a few turns and add another 1/4" nut as a lock nut. Tighten the crap out of them..

Add a large washer to the bolt and put the bracket on. Take the black washers supplied with the compressor and put that over the bracket. Take a 1/4" lock washer and 1/4 nylon nut and tighten the bracket down. Trim off any bolt past the nut. It's gotta be flush or the compressor won't fit.

Put the compressor on the bracket and try your hardest to start the 4 allen screws that hold it to the bracket. Once started tighten the crap out of them. This was the biggest PIA of the whole thing. I managed not to drop any but it took a ton of patience. lol

Now rotate the compressor body however you want to fit. Lock down the 2 allen screws to secure the compressor.

If your doing on board air now dope and teflon the brass nipple, ARBs pressure switch, and the air quick connect. Assemble them before connecting to the reservoir. Now rotate the reservoir straight up and thread and tighten that assembly you just made. Rotate the reservoir down to where you want it and lock the nut tight.

Wire that thing up and test it. Congrats your done.

PS: I want that locker your putting in. lol Mine have to wait a few more months.
 

Attachments
  • IMG_20170604_193221.jpg
    IMG_20170604_193221.jpg
    135.7 KB · Views: 473
  • IMG_20170604_193311.jpg
    IMG_20170604_193311.jpg
    125.7 KB · Views: 460
  • IMG_20170604_193405.jpg
    IMG_20170604_193405.jpg
    136.2 KB · Views: 461
Last edited:
Took out the old broken power antenna and replaced it with a rubber metra universal antenna, fits good. Had to work on the angle to get it to look right. Still a little off but I'm not to bothered by it. Might put a stubby on just to look a little better. Also had to remove the fender flare to pull the splash guard to access the antenna. Noticed how much dirt was under them. So of course had to remove all of them and wash, clay and quick detail to protect some more. Have a few rubbed through spots that are showing some surface rust. I'll be getting some touch up paint and take care of those spots soon. And probably figure out a way to get some gasket in between the flare and body so it doesn't rub.

Sent from my Nexus 6P using Tapatalk
 
Might want to check the pressure rating on that cap. You need .9 bar to 1.1 bar ideally — 1.1 being if your cooling system is in good shape (hoses and radiator specifically) and can handle a slightly elevated working pressure.

It's all splitting hairs really though.

where's this coming from woody? I replaced the original 88kPa cap on my '00 with the exact same 88kPa cap which was the exact part number for my rig according to camelback.

as you said, splitting hairs... but might explain why I run several degrees warmer than the majority of this forum with similar cooling system maintenance/mods.
 
Did my brake pads today for the first time, and I have to say. That is the easiest damn brake job I've ever done.
No wrenches needed to change just the pads?!
Yes please!
(Except to bleed of course)

Sent from my SM-G930T using Tapatalk
 
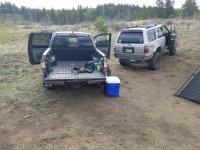
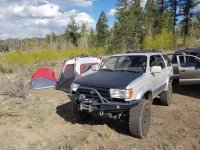
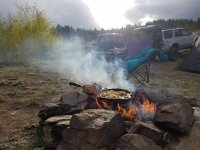
Took her camping.
 

Attachments

  • 20170528_171815.jpg
    20170528_171815.jpg
    135.4 KB · Views: 421
  • 20170528_165224.jpg
    20170528_165224.jpg
    134.6 KB · Views: 426
  • 20170528_184343.jpg
    20170528_184343.jpg
    137 KB · Views: 411
  • 20170602_194901.jpg
    20170602_194901.jpg
    135.9 KB · Views: 396
at this point in, knowing what you know, would you have removed the wheel to wrap it from the start?

No. Because the time spent sending the slack around is less time than it'd take to pull the wheel, still have to pull the slack around, and reinstall. Those two sides are the majority of a 50ft roll. If you do this, start on the right side of the top of the wheel and toss the slack out the drivers door. You can do TWO wraps before you need to pull the slack. YMMV. :becky:

I will say since I know it won't take as much to do the bottom of the wheel I'm probably going to lop off 15ft or so before I start.
 
Last edited:
Snagged two 5 spoke limited rims and a whip antenna from the junk yard this weekend. Going to get my spares swapped onto the rims so I never run into fitment issue with the TBU if we catch a front flat.

Man...I fricken love the junkyard.
 
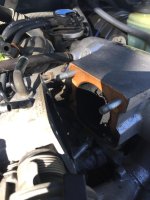
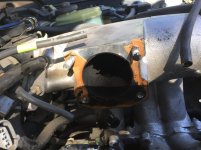
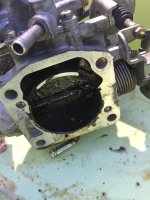
Removed and cleaned MAF, throttle body, intake and IAC. Wow, never seen this much carbon build up before! This seems to have cured my hot start issues, and erratic RPM in Park and Drive(danger).....so far.....
 

Attachments

  • IMG_2558.jpg
    IMG_2558.jpg
    123.6 KB · Views: 464
  • IMG_2559.jpg
    IMG_2559.jpg
    132.1 KB · Views: 477
  • IMG_2560.jpg
    IMG_2560.jpg
    133.7 KB · Views: 459
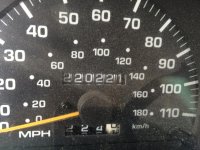
Replaced leaky valve cover gaskets and cleaned iac/tb. This is my top end after 233k miles.
168ed6eae06cb2032523608f1c2c4000.jpg


Sent from my iPhone using Tapatalk
 
A little PSA:

The other day I put some stuff in my cart from The Retro Fit Source. I was gonna purchase then and there so I made an account. I got sidetracked and forgot about it. Today they sent me an email with a 10% off coupon code valid for 10 days. Pretty nice considering I was more than willing to pay full price. lol
 
New TRD decals. Old ones were silver and blended in too well with the desert dune paint. At some angles it was barely visible. New ones are matte black and they are way more visible. I may have gained more torque with by adding the mountain design in addition to the increase in HP from the TRD.
955ac642e81e286e8815a83dce9bb308.jpg
2f9c3f3c786afc2ecc253e50e3f39365.jpg


Sent from my SM-N910T using Tapatalk
 
Got my 2" body lift in the mail today! Super speedy shipping which I was not expecting.

Shout out to Fat Pat's Custom Body Lifts.
d4e49d6f9dc06548cebffe4fdacc55a6.jpg


Sent from my SAMSUNG-SM-N920A using Tapatalk
 
Status
Not open for further replies.

Members online

Forum statistics

Threads
278,316
Messages
3,554,120
Members
248,016
Latest member
Advally Service

Trending content

Back
Top