What Did You Do To Your 3rd Gen Today?

Status
Not open for further replies.
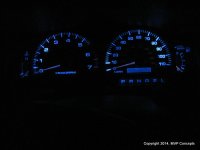
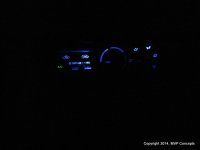
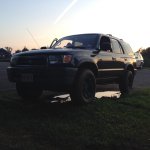
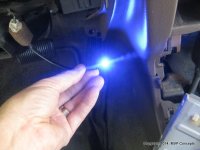
Worked on the 2000 SR5 Sport 4WD today:

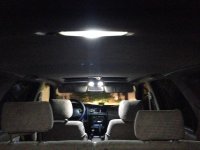
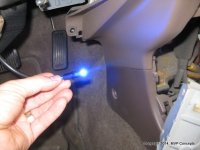
1. LED dash light upgrade
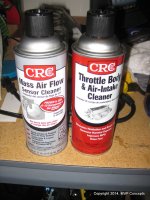
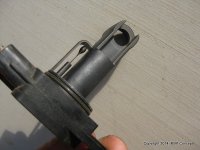
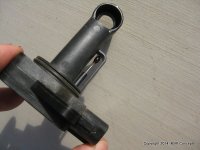
2. Cleaned MAF
3. Cleaned Throttle Body

Throttle response is so much improved, it is hard to believe that it is same truck!
 

Attachments

  • IMG_5912.JPG
    IMG_5912.JPG
    102.7 KB · Views: 688
  • IMG_5913.JPG
    IMG_5913.JPG
    96.6 KB · Views: 694
  • IMG_5928.JPG
    IMG_5928.JPG
    71.2 KB · Views: 712
  • IMG_5929.JPG
    IMG_5929.JPG
    73.4 KB · Views: 679
  • IMG_5930.JPG
    IMG_5930.JPG
    53.9 KB · Views: 678
  • IMG_5925.JPG
    IMG_5925.JPG
    132.5 KB · Views: 685
  • IMG_5921.JPG
    IMG_5921.JPG
    100.9 KB · Views: 683
  • IMG_5922.JPG
    IMG_5922.JPG
    101.2 KB · Views: 706
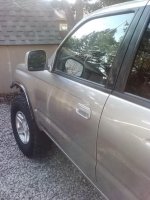
Window seals and the little mini fender flares were looking 100 years old, so I washed the truck and did a couple coats of armor-all... seems temporary, but a lot better
Also ordered some 20% window film for the front windows and some cheap black Dickies seat covers today... see how they hold up
Also hoping to do the Andy-Mod 2.0 soon, as well as maybe paint my wheels some kind of gun-metal dark greyish/black color and make enough cashy to order my savage rear bumper
 

Attachments

  • unnamed.jpg
    unnamed.jpg
    32.5 KB · Views: 643
Last edited:
Worked on the 2000 SR5 Sport 4WD today:

1. LED dash light upgrade
2. Cleaned MAF
3. Cleaned Throttle Body

Throttle response is so much improved, it is hard to believe that it is same truck!
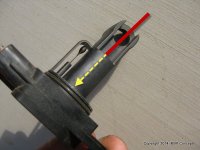
I think ya just cleaned the air temp sensor; in order to clean the MAF look down the MAF housing tube and you will see two little filaments, similar to what is seen in an incandescent light bulb. A couple of shots with the CRC cleaner, give it a couple of minutes to dry, then reinstall.

As noted in other posts in the past, the factory screws are JIS FYI......
 
Did lower ball joints and tie-rod ends today. Pretty easy job actually. Front end feels much tighter. Now, for those pesky inner tie-rod ends.
 
Washed it on Friday night .. I expected clear skies for weeks since it is summer in San Diego.

Well it rained Sat & Sunday making the truck look like crap.

Luckily it cleared up tonight around 6 so I washed it again. I should be good for next week or so!
 
Installed a new rack and pinion this weekend since my A1Cardone started puking itself a few weeks ago. Only got 40,000 miles on the Cardone, hoping the Toyota rack lasts a tad longer!

Fixed the tweaked eyebrow and part that surrounds the marker/turn signal. Kissed a tree on that last wheely trip. A couple of times. Same tree, big annoying slidey root problem.

Washed and waxed it. Makes it look like it's only got a lot of pinstripes and not a bazillions of them.
 
Took my winch off and got started on rusty body repair.
nygesyry.jpg
ysuhyre6.jpg
4yhahehu.jpg

Yup. That rusted all the way through.
Fiberglass to the rescue!!
 
I think ya just cleaned the air temp sensor; in order to clean the MAF look down the MAF housing tube and you will see two little filaments, similar to what is seen in an incandescent light bulb. A couple of shots with the CRC cleaner, give it a couple of minutes to dry, then reinstall.

As noted in other posts in the past, the factory screws are JIS FYI......

Well ain't that cool, I cleaned the MAF and the air temp sensor... seriously did not know what that thing was but cleaned it anyhow.

I stuck the nozzle near the tube and shot down into the hole real good a number of times. Was a bit messy but seemed to help Betty run a lot better than before.

Here's a photo of what I did. Action shot not available as the lighting was a pain and I only have so many hands. If I messed something up, let me know...
 

Attachments

  • IMG_5921-B.jpg
    IMG_5921-B.jpg
    55.6 KB · Views: 595
Well ain't that cool, I cleaned the MAF and the air temp sensor... seriously did not know what that thing was but cleaned it anyhow.

I stuck the nozzle near the tube and shot down into the hole real good a number of times. Was a bit messy but seemed to help Betty run a lot better than before.

Here's a photo of what I did. Action shot not available as the lighting was a pain and I only have so many hands. If I messed something up, let me know...

Nope, you are good to go. I was on the fence if you had done such or not, but my plane was boarding at the time so I ran out of time to ask.:party:

Next time grab a small light and you can see the filaments (wires) down there. IMHO it is good maintenance to clean the MAF every 30,000 miles or so. :bigok:
 
I did a few things to duke today I paint the rims took 1 running board off the other side had some sized up nuts and bolts. So tomorrow at work im taking fire to it. And I put instaaled some leds inside. non 4runner related] took my lil bro fishing and he got his 1st fish
 
I did a few things to duke today I paint the rims took 1 running board off the other side had some sized up nuts and bolts. So tomorrow at work im taking fire to it. And I put instaaled some leds inside. non 4runner related] took my lil bro fishing and he got his 1st fish

Forgot to add pictures
 

Attachments

  • 8-4-14 014.jpg
    8-4-14 014.jpg
    132.3 KB · Views: 502
  • 8-4-14 013.jpg
    8-4-14 013.jpg
    131.3 KB · Views: 514
  • 8-4-14 042.jpg
    8-4-14 042.jpg
    118.2 KB · Views: 508
  • 8-4-14 009.jpg
    8-4-14 009.jpg
    138 KB · Views: 495
Had a rock chip in a turn signal so I threw on some cheap clear lenses. Looks much better. Makes the anthracite look less brown and more charcoal.
4u6u4ypu.jpg
 
Took it to Moonlight Racing this last weekend for some wheeling. We did a little trail maintenance here and there, lopping undergrowth, then did some wheeling.

I was having fun keeping my stock vehicle from getting too much trail damage. No armor, no sliders, makes for a nervous time.

P8034196_zps75f58981.jpg~original


Had the rear wheels dangling a bunch, the fronts as well once (going up something steep). I only had to get pulled up one waterfall (the camera is making it look pretty flat in the pic there) - tires just weren't having any luck on the damp limestone.

Broke a rear shock (top pin was mostly rusted through - 194K mile original shocks, no real loss), pinstriped it pretty well (par for the course here in MO), used the Rola roof rack as an impromptu slider where a ledge and a root conspire to tile the top into a leaning tree, and put several decent sized dings in the rear bumper. And tweaked the front bumper slightly on a ledge - but it mostly bent back by hand.
 
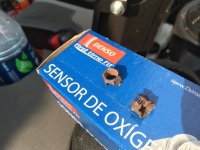
Replaced rear O2 sensor and wow what a job!! should have taken like 5 min but the nuts were so rusty .....WOW Only advise i have for others that may have to replace it is lots of PB blaster and vice grips. And patience :lookout:
 

Attachments

  • IMG_2112.jpg
    IMG_2112.jpg
    132.1 KB · Views: 771
In the last couple weeks:

Monstaliner'd the lower valence black
Rustoleum Flexdip'd (Plastidip competitor) wheels flat black
Installed the Curt 18115 Roof Rack with 18117 Extension
Installed used OEM trailer hitch and Rola hitch mounted Cargo Tray (not pictured)
Installed Auto Ventshade Bugflector II 25116
Chevron Techron Fuel System Cleaner 65740
Clay'd & waxed

Before heading to the Nevada desert (Burning Man) at the end of the month I plan on replacing the front end links and making sure everything is nice and greased up.

IMG_0142_zpsc6801804.jpg~original


IMG_0148_zps4dfeb995.jpg~original


IMG_0154_zpsc8aac651.jpg~original
 
Status
Not open for further replies.

Members online

Forum statistics

Threads
278,316
Messages
3,554,120
Members
248,016
Latest member
Advally Service

Trending content

Back
Top