What Did You Do To Your 3rd Gen Today?

Status
Not open for further replies.
My roof rack I had made was making quite a bit of noise on the freeway, so I set off to Lowes to buy some stuff to make a faring.

After gathering a length of aluminum, nuts, bolts, plexiglass, and some other odds and ends my total was creeping up on $100 (mostly due to the plexiglass being way bigger than I needed).

So, I put it all back and headed to amazon where I found an Inno Faring I thought would work for about $75.

Got it in and installed it and I am pretty pleased. The sound is eliminated, and I think it looks good. My only complaint is with the brackets that attach to the rack... Pretty barbaric looking.

Better than I could have made, I think.

Fbx2k8Kl.jpg


55DmoJUl.jpg
 
This is legit! Im gunna need to try this...i dont think 5th gens even have this feature.

Check into the 4th gen rear hatch release... the 4th gen+ uses an actuator instead of a lever like the 3rd gens... I know people have the 4th gen figured out, but the 5th gen should be similar! Good Luck!
 
This weekend in total, completed now;

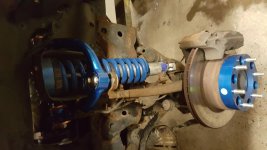
Front lift coils, new sway bar bushings/end links, diff drop kit, bolted skids on for the first time since ownership, misc cleaning and such on the front suspension, SS brake lines.

Rear springs removed, 3" bump stop extensions, SS brake line (stock length but it's still 1.5" longer from stoptech),rear sway bar bushings, cut off oem end links and replaced with new, new axle bearings, seals, fluid, shoes, painted and cleaned drums.

Bled brakes, torqued wheels, just need rear lift coils tomorrow and it's done til the SC comes next week.
 
A tip on those LCA bushings... Throw them in the freezer. Now.

After you take the LCAs off, just have a shop press them out unless you've got an air hammer or a LOT of time on your hands. I did the bottle jack trick on one of mine and it launched that thing out with who knows how much energy. The other side it pushed the rubber part out, but left the metal sleeve...

With the old bushings out, and your new ones nice and cold, they're slide right into the LCAs. One of mine I had to bop once with a mallet to get it all the way in.

Thanks for the advice Alex. That's one reason why I picked up two LCA's at G&R Wrecking. I read about the PITA everyone says about them and decided right then I was just going to grab and extra set. Think I paid $70 for both. I have an extra set of spndles, axles and LCA's from the same donor vehicle. Might as well change my VIN number. Just threw the bushings in the freezer. Looking forward to the upgrade. I'll keep you posted.
 
This is my first post! I've been looking through the tons of information on this forum for awhile and figured I should probably start interacting! Today I replaced the LEDs in my 02' at the gear shifter and the ac controls! Had some trouble with the power outlet ring led, in terms of making it fit. I also plasti dipped my back emblems to black! I think it looks pretty nice.

FullSizeRender_zpsyw6odv3u.jpg~original
 
[MENTION=63487]A.Wilson013[/MENTION], What roof rack is that? I've been wanting a flat top rack.
**EDIT** Nevermind, I just looked through your build thread. I love it.
---
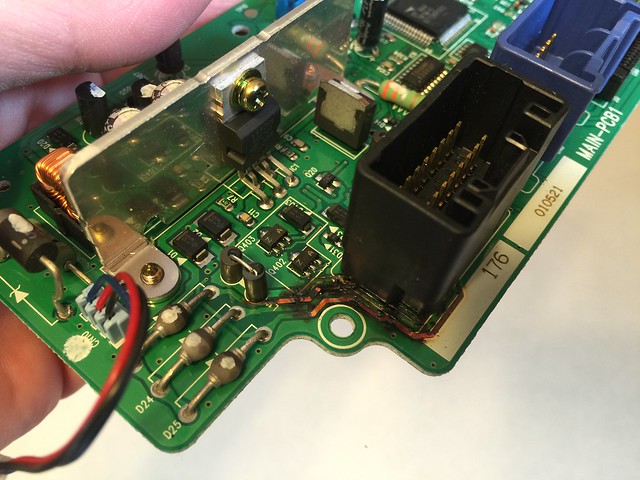
[MENTION=99383]amalik[/MENTION] The long story... My dome light had a broken switch, so I tried to solder a jumper wire in that would allow the door function to work at all times. I mistakenly attached the wire to the wrong leads and created a short. Not knowing I had done that, I plugged it in to test it and immediately smelled an electrical burn. When I finally bought a new dome light and installed it I found that my dome light would come on with the switch, but not when the driver and rear passenger doors were open. Oddly enough, it did come on with the front passenger door open. After alot of research & taking the interior apart, I determined that the burning smell came from a fried ribbon on that circuit board in the combination meter. It's amazing how many of the T4R's electrical circuits run through that one board.

 
Last edited:
A tip on those LCA bushings... Throw them in the freezer. Now.

After you take the LCAs off, just have a shop press them out unless you've got an air hammer or a LOT of time on your hands. I did the bottle jack trick on one of mine and it launched that thing out with who knows how much energy. The other side it pushed the rubber part out, but left the metal sleeve...

With the old bushings out, and your new ones nice and cold, they're slide right into the LCAs. One of mine I had to bop once with a mallet to get it all the way in.

Do you have to hold the suspension in place with a jack stand or jack while LCA are off? Is this a good thing to do while doing front shocks?
 
I attempted to do my lower control arm bushings this Sat. First off both of my lower OME shock bolts seized and had torn the rubber bushing int he shocks so I have to cut them out. When trying to remove control arm bolts they also would not come out and I may need to cut those also. Did not even get to the hard part of removing old bushings. Got super pissed off, put it back together, went to mountains and wheeled the crap out of her. Got stuck in a ditch and snow, had to winch out. All and all I felt better after that.

Then woke up Sunday to find a flat rear tire and power steering fluid on the ground. All in all a bad weekend!

One good thing is I already have a set of 285/75r16 Treadwright BFG knocksoffs in garage waiting.
 
^^^^
I know I need to get around to the lower control arm bushings, but the more threads I read about it, the more I just want to buy the control arms new and just install. My mechanic even talked me into that route when I had it done on our old Limited. Maybe he's just lazy haha.
 
^^^^
I know I need to get around to the lower control arm bushings, but the more threads I read about it, the more I just want to buy the control arms new and just install. My mechanic even talked me into that route when I had it done on our old Limited. Maybe he's just lazy haha.

If you do this then make sure you get OEM. Non OEM bushings can fail in less than a year. Even OEMS fail if you wheel it hard. If you dont wheel OEM bushings should last you fine.
 
Trying to replace the UCA bushing on ATS UCA just for measurement but no luck at this point on removing the darn ball joint. Will try again.
 
If you do this then make sure you get OEM. Non OEM bushings can fail in less than a year. Even OEMS fail if you wheel it hard. If you dont wheel OEM bushings should last you fine.

I thought everyone on here does aftermarket poly bushings on the LCA UCA and they are much better? Is that only for swaybar and links and the rack bushings then?

Also, is UCA bushings the same process? get the arm out and have them pressed out etc?
 
I thought everyone on here does aftermarket poly bushings on the LCA UCA and they are much better? Is that only for swaybar and links and the rack bushings then?

Also, is UCA bushings the same process? get the arm out and have them pressed out etc?

Yes you are correct but I was replying to the guy about replacing the LCA's with new ones. Best bet would be to replace bushings with polys no madder what.
 
Stipped tranmission pan drain plug?

I started the process of a drain and fill on my transmission as preventative maintenance, but found that once I broke the drain plug free it gave an abnormal amount of resistance to keep turning. It feels like it may be stripped or misaligned or something - even though I could pretty easily force it out I'm not sure that's a good idea. I snugged it back in and am watching for leaks, but nothing yet.

After reading some more I may just leave the fluid alone. 125K miles, not sure on the history before 115K. Fluid is dark red (from the dipstick, color is a bit hard to tell) and doesn't smell too burnt.
 
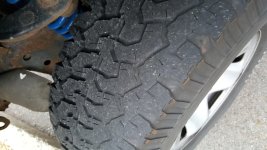
Too bad to was too late for my new tires... i can believe they wore so fast...:cry:
 

Attachments

  • 20160229_084521.jpg
    20160229_084521.jpg
    136.5 KB · Views: 530
Lazy Mans Fix


I've tired of seeing the yellowish plastic on my center caps and decided to do something about it. While it may not hold up over time and it won't win any contest for best paint job, it was quick, easy and cheap — and since it doesn't effect safety or performance, I'm ok with that.

I don't have time to do it the fancy ( proper ) way where it is sanded and textured then primer is applied....etc.

Lazy man's way:

No prep, 1 spray can, 2 coats for a total of $6 and 30 min of time.

If it starts to look bad one day, I'll consider doing it the proper way. But until then I'm happy with it.
 
Status
Not open for further replies.

Members online

Forum statistics

Threads
278,316
Messages
3,554,120
Members
248,016
Latest member
Advally Service

Trending content

Back
Top