What Did You Do To Your 3rd Gen Today?

Status
Not open for further replies.
Picked up a cargo LED light from Autozone. The package advertised it to put out 450 lumens and I can confirm that it's bright! Simple install with the leads tying in to the stock dome light. I ran the wiring as cleanly as possible so that it is mostly concealed and protected. Overall, very pleased with the increase in light that illuminates everything within a 20 foot radius.
DC839C33-72CE-45C4-BB6F-A96A7E28B0C0 by
[url=https://flic.kr/p/24HProD]
A41D5DAA-EE77-42D5-981B-25DC12C0C3B6 by https://www.flickr.com/photos/140393666@N08/, on Flickr
7A43548A-6BB9-4004-A44E-15939B3BC1EA by https://www.flickr.com/photos/140393666@N08/, on Flickr
 
Last edited:
Replaced my transmission mount and shifter bushings, no more shaking shifter. My transmission mount was so bad I think that's what contributed to the bushings.

I also put my new transmission speed sensor in but check engine light still on. Should I clear the codes and see what happens or does it take a while?

Sent from my SM-G930V using Tapatalk
 
I started retrofitting my new SPC control arms with bronze sleeve bearings so they rotate smoothly with less potential for wear and squeaks.

I've done this mod in a few other vehicles' control arms, and it works very well for locations where there's a lot of rotation, like pivots of a double wishbone suspension.

Do you have the parts #s/sizes for the pieces to do this? Definitely looks like a good way to go.
 
The Wotefusi hilux 167 snorkel on amazon.

Great thanks. Here is one review on Amazon: "Fits US market 3rd Gen 4Runners. Great quality roto-molded snorkel. The mounting hardware is not cheap either and they even send some extra nuts and bolts. I chose not to use the blind rivets for the A-pillar mount and opted to use #8 1/2in self-tapping screws and Loctite. The rubber L-shape hose from the airbox to the snorkel ripped while I was fitting it to the airbox and I'll have to replace that. Be extremely careful and take your time as this rubber piece is hard to fit to the airbox. The mounting holes on the template do not match up and must be done by hand. GO SLOW, measure three times, drill once. Remember to seal everything up! Otherwise I'm highly satisfied and my truck seems to breathe easier and drive nicely. Application is a 1997 Toyota 4Runner 4WD manual trans in the US."
 
I just pulled my ash tray out yesterday during my commute home thinking "I have only touched this thing like 3 times in the last 4 years - I wonder if I could mount a ScanGauge there somehow...." hah. So that's what it looks like. I kind of like it. :yo: It doesn't look like it hangs out too far..

It's growing on me. Doesn't stick out much. It's just angled up to see it instead of down like the ashtray. Being on the steering column was ok when I was concerned with my trans temp but I added a B&M supercooler (thx @BFAD) so I don't feel the need to constantly watch it. I got the bracket from paranoid fabrications.
 
Do you have the parts #s/sizes for the pieces to do this? Definitely looks like a good way to go.

Sure. This is mostly a starting point, since some custom work is needed.

The SPC arms use 1" diameter sleeves; the bearings are 1" OD and 7/8" ID, which requires downsizing the steel sleeves to 7/8" OD. This downsizing is not a problem, since the original 1" sleeves are already quite large relative to other kits, and Energy Suspension and others use 3/4" OD sleeves in their OEM poly kits. One thing to look out for is that there may be multiple versions of the SPC control arm bushings -- this stuff is all sized to fit brand new arms I bought a couple of weeks ago.

  • x8 1" OD, 7/8" ID SAE 863 sleeve bearings (two per bushing). I buy 1-1/2" long ones from McMaster-Carr (P/N 2868T192) and cut them down to 15/16" since that size is cheap and available, and it leaves a nice gap for grease to flow.
  • x4 7/8" OD steel sleeves. Basically, you replicate the existing sleeves in every way except the OD. I turned these from 1144 SP rod on my lathe and matched the SPC sleeves' length at 2.07" (IIRC). The ID should be quite a close fit for the M14 UCA bolt, so I bored these to 14.25mm.
  • x4 M6x1.0mm grease fittings (McMaster-Carr P/N 1105K71). I put these on the tops of the control arm bores, so I will need to use a 90* coupler to access them.
  • x4 Red grease fitting caps (McMaster-Carr P/N 1098K14).
 
Installed a StopTech rear brake line, installed Speed Bleeders, extended the rear diff breather, and added one 10mm OME trim packer to each of my 906s.

WVShgOT.jpg

Trim packer on 906

kYQEKte.jpg

Diff breather on 5/16 fuel hose with Oetiker clamps. Went up in the filler neck shroud.
 
Dude! Whats up with that vintage stereo equipment!!!??? :girl:
Long time audiophile here! :trophy:

Oh that's actually my dad's equipment. He's been into collecting vintage stereos for as long as I can remember, especially if it's Pioneer. Pretty bad ass setup if I must say so, and everything still works like it did in the 70s!
 
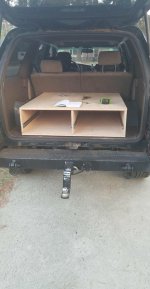
Placed the order for my snorkel and started a new storage box today. About 400 with a new saw and sander. Got the box done but not the drawers. The wife needed help with the kiddos so its on hold.
attachment.php
 

Attachments

  • received_10155031953052447.jpg
    received_10155031953052447.jpg
    137.2 KB · Views: 624
I bought one!

Minty So Cal, 2000 Sport. Right around 145K

Zero Rust!

Planning a few mods on her. I'll start a thread when I do. Lift a little, maybe new bumper (off road) remove the running boards, upgrade stereo, add camera, and maybe a few more things along the way. Open for ideas.

IMG_7182.jpg


IMG_7183.jpg
 
Last edited:
Alternator job was going well until this.

TSApedW.jpg


Still trying to confirm the part number, but I think this might be it. 16385-62020 (#5 on diagram)

8414065.gif
 
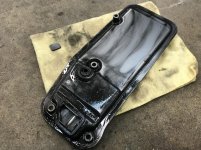
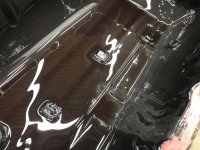
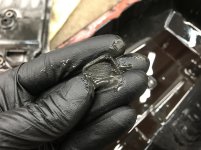
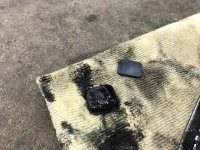
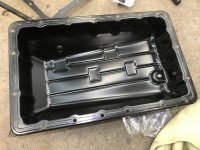
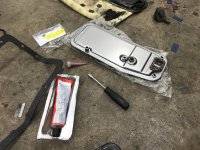
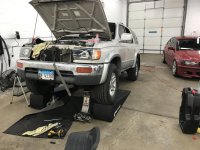
Replaced what looks like 260,000 mile old trans fluid and filter. Satoshi grill and finally connecting aux cooler, temp gauge and inline filter soon.
 

Attachments

  • F43A346F-3F8F-4093-A713-46E9646323C9.jpg
    F43A346F-3F8F-4093-A713-46E9646323C9.jpg
    140.9 KB · Views: 588
  • 1CE081FC-2E58-42B5-A25D-8CC37F4B1EE2.jpg
    1CE081FC-2E58-42B5-A25D-8CC37F4B1EE2.jpg
    128.1 KB · Views: 579
  • FE629DC2-E83B-439F-BB20-C3D669EF99FE.jpg
    FE629DC2-E83B-439F-BB20-C3D669EF99FE.jpg
    131.1 KB · Views: 601
  • A7A622EE-E48C-4F91-B39E-80D25156AFC6.jpg
    A7A622EE-E48C-4F91-B39E-80D25156AFC6.jpg
    141.3 KB · Views: 600
  • B956D70D-5EC1-4A22-9EF5-2CE1F64C914B.jpg
    B956D70D-5EC1-4A22-9EF5-2CE1F64C914B.jpg
    135.6 KB · Views: 597
  • 987A41E7-B274-404A-8E6F-D0D2B18A05B1.jpg
    987A41E7-B274-404A-8E6F-D0D2B18A05B1.jpg
    139.7 KB · Views: 579
  • 7FFB9FE3-AF58-41EC-A114-286FA8165A31.jpg
    7FFB9FE3-AF58-41EC-A114-286FA8165A31.jpg
    134.6 KB · Views: 586
Started the unusually beautiful day getting some coffee on the way to work.

juyy3Qah.jpg


Noticed some staining on the driver running board after work... what's this? Crap. Everything looked clean before winter and unfortunately the rot looks like it spread to the inner fender well too.

nVuCvXOh.jpg

Lq4DtvGh.jpg


The rest of the truck is solid except I'm not sure what's going on with the passenger door jamb. Looked like iron buildup at first but its definitely a tiny amount of rust, makes me nervous about what might be hiding underneath.

lc3Ixt8h.jpg
 
Status
Not open for further replies.

Members online

Forum statistics

Threads
278,316
Messages
3,554,120
Members
248,016
Latest member
Advally Service

Trending content

Back
Top