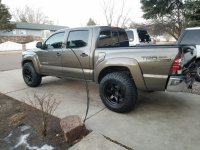
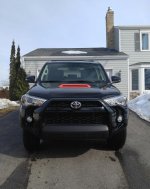
Raptor Liner, it cost 200 for paint and another 150 in materials, tape, primer and etc. I have been painting for other people too and it's a lot of fun and looks mean af.
Make sure to do a wet application, I put it on wet and lined it up before I trimmed it. Very high quality vinyl and pleased even with the 3 weeks of wait time because they were waiting for more flat black material. They made it up by sending a free flag decal so they won me over. Going to have them do a custom for my rear window also.
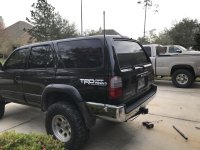
Finally was able to reinstall my rear swaybar today. I put it off so long because a few months ago I snapped one of the bolts while replacing the bushings but still put it back on, but when I went off roading shortly after that the bracket came out from the axle and twisted the entire sway bar lol. So I got a junkyard bar and new 2nd gen 4Runner links with poly bushings. I forgot how nice it is to have that swaybar in, wow...
Also messed with the rack guide as the factory put it on too tight with my new rack causing the steering to drift and not self center easily. Combine that with the 5* of caster I put in yesterday and this thing handles so well now. It will happily track straight on the highway, and no more vibrations thanks to the toe adjustment and wheel balance I did to it.
Disassembled this weekend to replace my leaking valve cover gaskets. Waiting for the parts to arrive to put it back together. Also electrically tested the coil packs and injectors to try and figure out my jolting issue at 2100-2300 rpm. All seem electrically fine so hopefully the new plugs and wires will solve it.
Is it normal for the valve cover bolts to be like...finger tight? They required no breakaway force whatsoever. Maybe that was part of the issue, lol.
Thanks to the awesome write ups on here for tackling this job so far to this point
Did some front door sound deadening since I was putting in new door speakers. I used constraint layer damper (CLD) tiles from SoundDeadenerShowdown on the outer skin, along with a barrier layer of MLV mass-loaded vinyl (MLV) and closed-cell foam (CCF). The hard part was making the MLV barrier as complete as possible without adding interference in the door beyond making the door trim take a solid push to reattach.
Stuffed butyl rope between the door bar and outer skin to help prevent door bar resonance.
Applied CLD tiles to the outer door skin.
Started making an MLV barrier by tracing the inner door panel.
Many steps of trimming later, this is what the barrier looks like. It's held onto the outer door with industrial velcro and has a CCF backing.
The reasoning behind this approach: CLD controls resonance in panels. MLV blocks noise by making a limp layer of heavy material that is hard to move, limiting its ability to transmit acoustic energy. The CCF backing on the MLV helps it stay limp and not just rigidly couple to the metal inner door skin.
I scanned for codes again and saw a pending P0420 after clearing it out on Friday, so I rechecked all of the sealing gaskets/hardware and felt around for more leaks from the thin rusted metal around the welds for the hangers and detected another pin hole, plus both cats are reading hotter on the inlet side than the outlet side with the thermal gun, so I just grinned and pressed the 'buy it now' button on Rock Auto for both cats from Bosal. I got the 'premium' load for the cat closest to the engine and it was actually cheaper than the 'standard' load.
Between new tires and now new cats, it has been an expensive week for this old truck.
got rid of all the real wood trim that was put on back in 2000. And painted my worn out hub caps. Turned out pretty well and looks a ton better than the faded look.
Rebuilt my heat blend servo actuator thing... Anytime it needed to close off heat it would click endlessly and hopelessly. I took it off and opened it up and found the final and largest gear was totally stripped. In the only 45° section it ever used. So I switched the little copper contact forks and turned the Cog 180° so the contacts lined up but the teeth were mint!
My driver side door lock decided it was done turning. I took it apart to investigate why and found a split wafer refusing to retract on one side. I tried some silicone spray to no avail. Ive already been to locksmith for new keys in November (He also sprayed some lock grease into the lock cylinder then) so I decided to just remove it. Problem solved, took about an hour from disassembly to reassembly.
Took the running boards off my 2002 SR5, starting poking the driver side rocker with a screw driver, and now here we are.
Unfortunately the passenger side has a few bubbles starting in the same spot. Going to get a quote today to repair it but probably won't like the number.