What Did You Do To Your 3rd Gen Today?

Status
Not open for further replies.
New gas tank strap. It's a rust belt thing. *sigh* My wife needed to replace the strap on her '96 a few weeks ago - she went ahead and pulled the tank completely out and replaced the intank pump and sock filter. After she did that, I happened to be under my '99 looking at the u-joints (slight vibration under power... not sure what it is yet) and I noticed that my gas tank was resting on the gas tank skid, and the strap was loose.

I started taking the skid off and right off the bat the first bolt I tried (the one mid tank that goes into the frame) broke. Then the skid mount bolt in the driver's side wheel well broke. Then thankfully the PBLaster worked on the next couple of bolts (the strap bolt in the driver's wheel well and the center skid mount) came out. I sort of looked at those three bolts on the front edge of the tank and... chickened out. No way those were going to cooperate. And I didn't want to mess with that many broken bolts, so I left them alone. I used a socket extension through one of the holes in the gas tank skid to lift the tank back up while allowing the skid to dangle down, more than enough room to take the old rusted, broken strap out and put the new one in. Then some minor PITA work drilling and retapping the two broken bolts and putting the skid back in place.

Done. Taking the skid all the way off, wire wheeling it, and painting it would have been nice, but not worth the hassle.
 
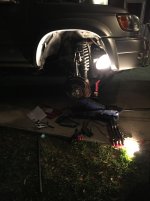
Spent 3+ hours trying to install new 5100/OME front shocks on the 99 this weekend to no avail. I can't get the LCA down far enough to allow the top hat on the new spring to fit in. I also don't think the Duralast top hat is the same size (measures ~1/8th inch bigger than OEM) so that isn't helping the situation. Tried loosening the UCA bolt, disconnected the LBJ/sway bar and used weight/leverage with a long crow bar.

Now looking at completely dropping the LCA, taking the time to do new bushings and installing the shocks at that time. On the fence about just doing new UCAs while I am at it too.

Thoughts? I didn't think this install would be such a damn hassle.
 
Spent 3+ hours trying to install new 5100/OME front shocks on the 99 this weekend to no avail. I can't get the LCA down far enough to allow the top hat on the new spring to fit in. I also don't think the Duralast top hat is the same size (measures ~1/8th inch bigger than OEM) so that isn't helping the situation. Tried loosening the UCA bolt, disconnected the LBJ/sway bar and used weight/leverage with a long crow bar.

Now looking at completely dropping the LCA, taking the time to do new bushings and installing the shocks at that time. On the fence about just doing new UCAs while I am at it too.

Thoughts? I didn't think this install would be such a damn hassle.

You can loosen the LCA cam bolts and that should give you the ability to put the strut in. Then you need to take it in immediately for an alignment. Unless you know how to do a string alignment. Or you can go all the way and do new bushings.
 
Spent 3+ hours trying to install new 5100/OME front shocks on the 99 this weekend to no avail. I can't get the LCA down far enough to allow the top hat on the new spring to fit in. I also don't think the Duralast top hat is the same size (measures ~1/8th inch bigger than OEM) so that isn't helping the situation. Tried loosening the UCA bolt, disconnected the LBJ/sway bar and used weight/leverage with a long crow bar.

Now looking at completely dropping the LCA, taking the time to do new bushings and installing the shocks at that time. On the fence about just doing new UCAs while I am at it too.

Thoughts? I didn't think this install would be such a damn hassle.

I feel your pain, after breaking a pair of spring compressors from autozone. Scariest thing to happen, luckily no injuries. My brother and I went with the NO spring compressor way. We had both in within 45 minutes. Youll need another person to help.

Part 1:
https://youtu.be/5E6u7dC7EHg

Part 2:
https://youtu.be/jo0FJSi-KYs
 
Last edited:
Took the running boards off my 2002 SR5, starting poking the driver side rocker with a screw driver, and now here we are.

Unfortunately the passenger side has a few bubbles starting in the same spot. Going to get a quote today to repair it but probably won't like the number.

w38NURLh.jpg

Damn that sucks. Got more photos of the truck and the frame ? Curious how it looks compared to your photo. Pull the carpet over the fender well in the back. See if it’s rusty inside under the carpet.
 
Just spent about $1,000 or so last night on new parts! It's been long overdue. This was not including the $240 I spent last week to replace the windshield that has not been tinted yet. :(

231mm Toyota Tundra 13WL Brake Kit from PowerStop (Caliper/Rotor/Pads)
Magnefine 3/8" Inline Magnetic Transmission/Power Steering Filter
Toytec Brake Line Relocation Kit
Toytec Diff Drop Spacer Kit
Stoptech Stainless Steel Braided Brake Lines (Front)
Wheeler's Offroad Extended Red Brake Line (Rear)
Energy Suspension Front Polyurethane Anti-Sway Kit
Energy Suspension Rear Polyurethane Anti-Sway Kit
Energy Suspension Steering Rack Polyurethane Bushing Kit
OEM Lower Ball Joints
OEM Outer Tie Rod Ends
Low-Range Off Road 555 Inner Tie Rod Ends
NAPA MaxDrive CV Axles
 
Spent 3+ hours trying to install new 5100/OME front shocks on the 99 this weekend to no avail. I can't get the LCA down far enough to allow the top hat on the new spring to fit in. I also don't think the Duralast top hat is the same size (measures ~1/8th inch bigger than OEM) so that isn't helping the situation. Tried loosening the UCA bolt, disconnected the LBJ/sway bar and used weight/leverage with a long crow bar.

Now looking at completely dropping the LCA, taking the time to do new bushings and installing the shocks at that time. On the fence about just doing new UCAs while I am at it too.

Thoughts? I didn't think this install would be such a damn hassle.

I used the ol bottle jack trick to get mine in.
 
Two weeks ago...replaced both front wheel bearings and a new hub on passenger side.

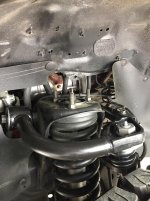
This past weekend, installed SPC upper control arms so I could get the camber back within spec.

Hopefully done spending money on this thing for a while!
 

Attachments

  • unnamed.jpg
    unnamed.jpg
    127.9 KB · Views: 432
  • SPC arms.jpg
    SPC arms.jpg
    137.1 KB · Views: 437
Whew, busy couple of weeks for me. Changed out my 2 front CV Axles, only to find that the original seals started to leak, so 2 days later, took it all apart again and replaced the seals too. That took care of it thankfully.

Also, last month, replaced my rear axle seals (I guess it was bound to happen).

Replaced front LBJs as PM.

Oh, while installing my Supercharger last month, I found out that the valve cover bolts were barely on handtight, so I tightened it to spec and cleaned up the engine and no leaks.

Replaced both liftgate struts. On a recent trip up to mountains, they could barely keep the hatch up, but they work find at sealevel. I swapped it out and boy do they pop open! I setup a limiter on it using nylon cord, so they won't hit my garage door.

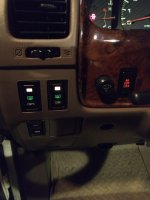
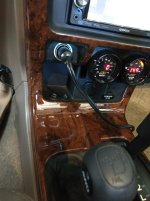
Also rewired my compressor for my Airlift and added a 120V outlet and power button (using 2nd gen buttons).

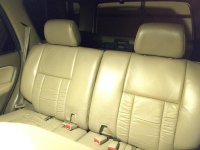
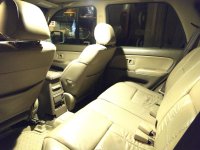
I also found mint condition 2nd gen front oak leather headrests which worked great for the rear (they tilt forward, which is nice as a headrest).

I also replaced the overhead lights with warm white LEDs (nicely bright without having that harsh blue/white color).

Swapped all the exhaust nuts and bolts (they weren't really rusted, but just to make it easier in case I need to in the future), used Nickel anti-seize.

Wired up a light for the Rear Diff locker switch.

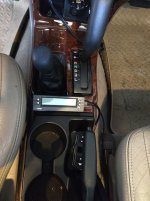
Also, rewired a 2nd gen window button to control my garage remote and moved my scangauge to the shifter console since I needed the area it was in for the new buttons.
 

Attachments

  • IMG_20180305_092932853.jpg
    IMG_20180305_092932853.jpg
    121.4 KB · Views: 415
  • IMG_20180305_093131526.jpg
    IMG_20180305_093131526.jpg
    139.8 KB · Views: 418
  • IMG_20180305_093102732.jpg
    IMG_20180305_093102732.jpg
    132.1 KB · Views: 419
  • IMG_20180305_092733008.jpg
    IMG_20180305_092733008.jpg
    133.1 KB · Views: 415
  • IMG_20180305_092725936.jpg
    IMG_20180305_092725936.jpg
    42.3 KB · Views: 430
Also, rewired a 2nd gen window button to control my garage remote
.[/QUOTE]


Can you elaborate and post pics of this please? Thanks


Sent from my iPhone using Tapatalk
 
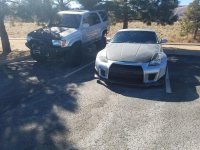
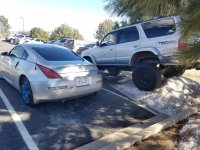
Buddy said he was scared snow would melt and my car would crush his nissan. Lol.
 

Attachments

  • 20180305_141727.jpg
    20180305_141727.jpg
    136.9 KB · Views: 374
  • 20180305_142544.jpg
    20180305_142544.jpg
    138.7 KB · Views: 360
Finally found some doors to replace my smashed up ones. Now I just have to figure out the rocker panel situation...(thinking I can conceal with some rock sliders when I get a bumper)
Before:
After:
The doors actually match quite well. When I took the shot, the rest of the car was dirtier than the doors I put on lol..

Also threw some 20% on the front windows...

I'm happy with how everything came out :clap2:

Your pictures are not working
 
Also, rewired a 2nd gen window button to control my garage remote
.


Can you elaborate and post pics of this please? Thanks


Sent from my iPhone using Tapatalk[/QUOTE]

Sorry, I should have taken pics and done a DIY. But long story short, I figured out which pin was common on the window switch and wired that up to the common + on the remote buttons. Then I soldered a wire to the button's shorting pin and connected that to the top or bottom engagement pins. I have two remotes, so it was important that I wired both up correctly using the common + so it wouldn't cause a short in the remotes. It'd be much simpler if you only have one remote though.
 
Status
Not open for further replies.

Members online

Forum statistics

Threads
278,316
Messages
3,554,120
Members
248,016
Latest member
Advally Service

Trending content

Back
Top