What Did You Do To Your 3rd Gen Today?

Status
Not open for further replies.
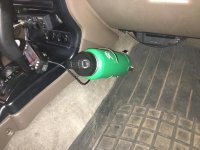
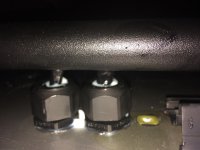
Finally after many many designs I found out an old French Press works the best. I’m going to paint it black with the rubber rd texture stuff to keep it for rattling
 

Attachments

  • B28B7867-F191-4FF8-88C4-FFFE9AB7D4E0.jpg
    B28B7867-F191-4FF8-88C4-FFFE9AB7D4E0.jpg
    128.4 KB · Views: 722
Oddest thing today- I pulled the instrument cluster to replace a burned out light bulb ( e-brake light) and while the cluster was out, I turned on the ignition to roll down the windows and I noticed the auto climate control screen was showing the temp setting in Celsius instead of Fahrenheit. I hit the 'outside temp' button and it was showing 30°, which is about 86°F ( which was the outside temp).
Just by having the instrument gauge cluster unplugged it switched to metric. Once I got everything put back together ( using a PC74 because none of the dealerships had any of the "correct" bulbs in stock) and turned the key back on, the climate control went back to Imperial measurements.

Anyone else ever notice this happening?
 
Finished my new Scan Gauge II case. I hate the aesthetics of the stock parts.

I was hoping to make it super simple so other people could order the parts and make their own. But my focus on design took over (I'm by no means an industrial designer, but I try) and it made it difficult to assemble . These are the reasons it's hard to make:

1. I wanted the front to be clear acrylic with black paint, sort of like an Apple monitor. I laser cut the acrylic with tape on there, including a low-intensity laser pass to cut only the tape so I could leave the LCD screen area masked off and paint the rest black. This was a pain in the ass because I'm not very familiar with the laser cutters at work (settings and software have a learning curve).

2. I still had to order 3D printed parts -- the rear shell and the little bracket inserts (more on that below), in addition to the laser-cut front panel. They cost about $15 which isn't too bad.

3. I wanted to the reduce the apparent size by sloping the sides back. If you looking at it almost straight on or at a slight angle, this gives the illusion that it's slimmer than it really is because you can't see the depth (unlike if it were a rectangular box, where you could see how deep it is). However, this requires removing the side cable connector by prying it off the PCB (very risky) or desoldering it (somewhat risky, depending on skill level). The rear port works fine, the side and rear connectors are wired in parallel if one is removed it doesn't affect the function of the other port.

4. I didn't want to use any external screws, so I held the front panel on with VHB tape (very sticky double-sided foam tape made by 3M). One side sticks to the painted side of the acrylic front plate. The other side... well, there was nowhere good to stick it so I made two little 3D printed backets that are held in with the same screws that hold the PCB in place. I'm pretty happy with how it looks, but the design sucks because you can't disassemble the thing without ruining the tape AND peeling the paint on the back of the front panel :(


8dv4z5w.jpg

0mQzHZm.jpg

MSl2Ckh.jpg

Yu6McUq.jpg


I still need to cut a rectangular slot into the plastic onto of my steering wheel (as I've seen others do) and mount it there. Overall, I'm happy with how it looks but I'm not sure it was worth the time spent!
 
The steering wheel is a Grip Royal wheel, I do not recommend them as the leather deteriorated and began to peel a couple months after getting it. The hub is a Momo hub https://www.amazon.com/gp/product/B009IZAHCY/ref=oh_aui_search_detailpage?ie=UTF8&psc=1

I got the steering wheel because it resembled the Nardi Classic which is one of my favorite designs https://jhpusa.com/products/nardi-classic-330mm-steering-wheel-black-leather-silver-spokes-grey-stitch

The steering wheel will be replaced some time in the near future with either a Momo https://www.momo.com/en-us/product/race/ or Nardi.

Install was straight forward with removal of the Airbag after disconnecting the battery and pulling the old wheel off. I chose not to keep cruise control so I didn't worry about remounting that control stalk. The adapter comes with a clock spring contact point and two wires to connect for the horn button on the new wheel. You will need a resistor ( I think 3 ohm) to plug into your air bag connector to allow your passenger airbag to still function and prevent an airbag light from being constantly illuminated on your dash.

What mm is your steering wheel?
 
Well today was productive.

Replaced my worn out hatch supports with the Strongarm 6815 set along with the nylon bushing for the top mount.

Installed my repaired Climate Control (thanks John). It feels so good to know I can actually use my AC and heater again, without playing whack-a-mole with my knobs and buttons!

I cleaned out my blower squirrel cage. Easy to do and it was pretty dirty in there. No surprises inside which was nice!

I replaced my blend door actuator with a new unit. I had pulled it out before and flipped the gear for the new teeth but that was short lived before the buzzing and clicking began again.

Before I checked everything for operation, I lubricated the heater control cable with some TriFlow teflon based lubricant. That made a huge difference in the operating of that cable. Before it was ridiculously difficult to move and now it's smooth.
 
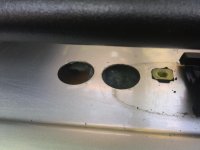
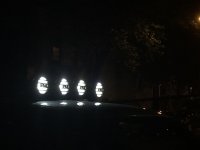
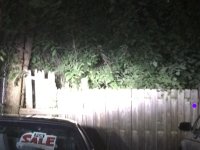
Today, I finally wired my PIAA LP550s that I installed on the roof 9 Months ago. I drilled through the roof and used Heyco connectors.
 
Attached are pictures I forgot to include
 

Attachments

  • IMG_4427.jpg
    IMG_4427.jpg
    137.5 KB · Views: 603
  • IMG_4428.jpg
    IMG_4428.jpg
    97.4 KB · Views: 624
  • IMG_4429.jpg
    IMG_4429.jpg
    112.7 KB · Views: 638
  • IMG_4432.jpg
    IMG_4432.jpg
    129.6 KB · Views: 643
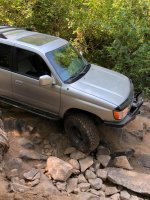
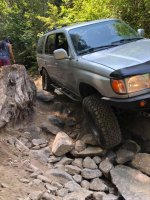
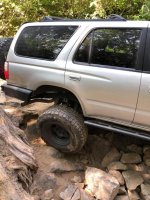
Surprise Lake 07-28-18

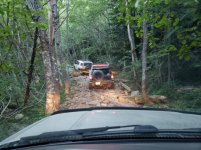
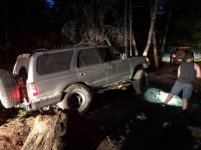
This one was fun and the most challenging trail ride to date. We started off with a group of nine vehicles. We had two 3rd gens, one 4th gen, two Tacomas, (2nd and 3rd gen DCLB) And four FJs, (one pulling a trailer.)

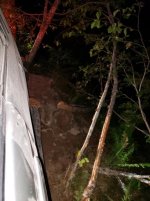
It started out pretty typical, but the trail went from dirt road, to rocky, to almost all rocks, with a few serious obstacles to overcome. I think it was an old mining of perhaps logging road. We got lucky on our way back seeing as how you can travel for about 15 minutes without the possibility of being able to pull off to allow someone to pass as most of it was heavy playing land with the mountain face on one side, and a cliff on the other. We got into our camp site ay about 1030 pm. LOL.

The pictures never seem to capture the totality of the situation at hand, but I had a great time this weekend 4 wheeling and camping with some cool people.
 

Attachments

  • IMG_20180728_232004.jpg
    IMG_20180728_232004.jpg
    61.9 KB · Views: 584
  • IMG_20180728_232501.jpg
    IMG_20180728_232501.jpg
    42.2 KB · Views: 589
  • IMG_20180728_232059.jpg
    IMG_20180728_232059.jpg
    47.6 KB · Views: 587
  • IMG_20180728_232146.jpg
    IMG_20180728_232146.jpg
    9.9 KB · Views: 592
  • IMG_20180728_232313.jpg
    IMG_20180728_232313.jpg
    25 KB · Views: 580
  • IMG_20180728_232632.jpg
    IMG_20180728_232632.jpg
    112.1 KB · Views: 609
  • IMG_20180728_232538.jpg
    IMG_20180728_232538.jpg
    111.5 KB · Views: 612
  • IMG_20180728_232517.jpg
    IMG_20180728_232517.jpg
    105.2 KB · Views: 598
These are legit hilux visors but I guess it does look different from that angle. They're pretty darn wide/deep and I assure you these are oem toyota from a hilux surf. Might sell these if you're interested but they cost a pretty penny.

how shiny is this penny? I may be interested...
 
What I Did Today ... and Get to Do Again .... COILS

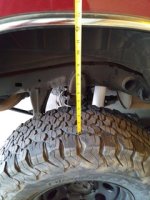
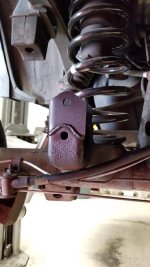
I have a '96 4Runner, new to me. Need to fix a drooping rear. I was gifted some 97' LC coils for my rear ... 9 coils for a coil length of 19 inches. It was only 108 C, here, today in AZ so why not? Well, now I can answer why not. Gargantuan lift! I knew it was going to be a lot, but holy barely got it out of my garage door. Next weekend ... cutting wrungs from coils and going from 9 to 7 coils. I bet I get it done faster than today. Practice makes ... yuh smarter. Maybe next weekend will be hotter! Yippee
 

Attachments

  • Message_1532916430215_resized_1.jpg
    Message_1532916430215_resized_1.jpg
    89.5 KB · Views: 496
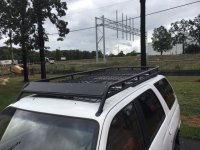
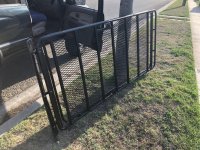
Got my eimkeith panhard correct kit installed by Outgearsolutions. He gave me a lead on one of his racks being sold
DC9CB232-9027-481D-A969-FB3DC45DE1EE.jpg

So I picked it up for a good price.
1C731227-0BBD-4D95-95A4-1D3E49E34D5E.jpg

My bank account is feeling a lot lighter
 

Attachments

  • DC9CB232-9027-481D-A969-FB3DC45DE1EE.jpg
    DC9CB232-9027-481D-A969-FB3DC45DE1EE.jpg
    132.4 KB · Views: 775
  • 1C731227-0BBD-4D95-95A4-1D3E49E34D5E.jpg
    1C731227-0BBD-4D95-95A4-1D3E49E34D5E.jpg
    138.1 KB · Views: 785
Last edited:
Installed Total Chaos UCAs
Installed OME890 rear coils
Adjusted front 5100s to 3rd notch from bottom to try to match rear height
Installed new rear rubber flap vent thing, otherwise known as a dust funnel. I couldn’t believe how much dirt was piled up behind that rear panel.
Started installing new body mount bushings from Energy Suspension, only got the drivers side finished

Lot of hours spent underneath my truck this weekend. Why is the tool you need always just out of reach when you’re on your back under the vehicle?!?! :noidea:
 
Replaced heater valve. Original was slow leaking for a long time unbeknownst to me. It wasn't cracked, but the plastic under the hose was slowly disintegrating, thus preventing the hose from sealing against the plastic correctly. I only found it after replacing the coolant with new, bright red Asian spec.:wave:
 
Status
Not open for further replies.

Members online

Forum statistics

Threads
278,316
Messages
3,554,120
Members
248,016
Latest member
Advally Service

Trending content

Back
Top