What Did You Do To Your 3rd Gen Today?

Status
Not open for further replies.
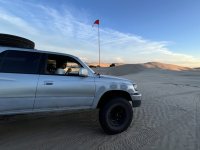
Almost to the end of my 1997 4runner build. I started this project in 2021 to build the best 3rd gen I could...
Google Sheets[/url]

Wow...I do NOT want to know what the (still on-going) total for all the...ummm...maintenance of and for my 96!

The spreadsheet is a good idea, and the truck looks great.
 
Finally had time to cut the metal brackets for the lc80 rear calipers. It's wild, seeing it transform from wood template to an actual metal part. Crazy! My 3 mistakes were I didn't put on sun block, chipped my 1/2 inch drill, and I should have put my drill press on my table.

Just got to prep them for paint and cut out the pad spacers for the parking brake. Then install time! Whoot!
 
A few days ago, I replaced the brushes in my alternator to fix my intermittent lack of charging issue. I used this one for my 1997, other models have a different part number. Toyota Alternator Holder - 27370-35060.

Yesterday I pulled the front seats from an E90 (2006 BMW 325i) for a future swap project. All manual adjustments, so hopefully it should be only figuring out mounting and not all the wiring that others have done in the E90 seat swap thread.
 
finally.
 

Attachments

  • hw.jpg
    hw.jpg
    99.7 KB · Views: 346
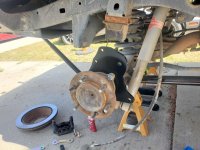
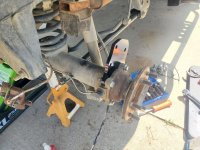
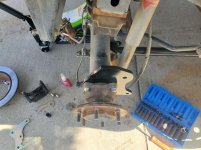
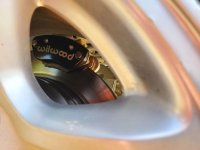
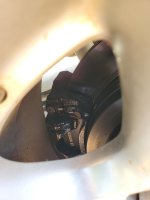
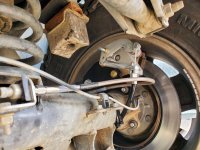
On my days off today and yesterday I finished the rear disc conversion. It's lc80 calipers and wilwood mc4 parking brakes, lc80 booster and lc80 master cylinder.

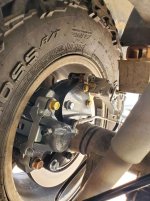
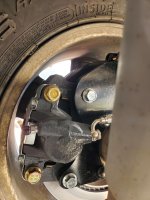
Everything went smoothly. The brackets I made came out fantastic! Only had to file down a small corner as it was hitting the axle housing. The booster was interesting. It seems the stud spacing is reversed compared to the 4runners oem booster. Simple solution was to flip the booster 180 degrees. Now I have a 4 bolt booster! Bench bleed the master, made a new line for the rear line.

Today was the finishing of the parking brake. Ran the new cables and adjusted the caliper. I will need to shorten the oem cable a bit. But I want the new cables to stretch then I'll adjust again.

Then I had a bit of spare time so I threw on some 1.25" spidertrax wheel spacers. News flash, they don't fit manual locking hubs, wop wop (sad piano music). But I needed them on, so I trimmed the aisin hub studs flush to the nut and had to grind the nuts a bit to clear. 30 bucks of hardware if I want to replace it vs modding a 150 buck spacer. Even more expensive fix would be new rims at around 1,300 bucks plus tax I'll pass for now.

Had to get this done so only pics I got were the bracket installed. I'll get some pics another time.

Yes, I have some perry parts bumps to replace my janky stock stuff.

 

Attachments

  • 20240604_111613 (1)_mmpEgl0n2y.jpg
    20240604_111613 (1)_mmpEgl0n2y.jpg
    136.4 KB · Views: 220
  • 20240604_111626_L3dbwSia9r.jpg
    20240604_111626_L3dbwSia9r.jpg
    137.6 KB · Views: 220
  • 20240604_111619_ClZSxUdp6O.jpg
    20240604_111619_ClZSxUdp6O.jpg
    136.7 KB · Views: 221
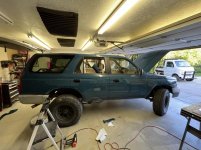
Finally finished filling all the limited flare holes and some other dents over the weekend, then wrapped all but the rear hatch in blue. Unfortunately my terrible body work is somewhat visible when you look at it closely, but I'm happy with how clean it looks now that it's all one color.

I should've taken her outside for a good picture but I have already taken off the rear hatch and started cutting it apart for the next super cool yet stressful project.

Before(silver/primer) vs After(blue!)
 

Attachments

  • IMG_6813.jpg
    IMG_6813.jpg
    112.6 KB · Views: 226
  • IMG_6820.jpg
    IMG_6820.jpg
    98.6 KB · Views: 227
I should've taken her outside for a good picture but I have already taken off the rear hatch and started cutting it apart for the next super cool yet stressful project.

Whatcha got planned?
Split hatch a la FJ80?
Side-swing??
Gut it/pin glass/bob it 6"???

Can you tell I've been itching to mess with mine?
 
Whatcha got planned?

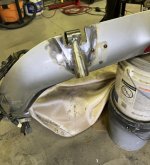
Nothing quite that drastic, but it's still very involved. I'm adding some 1.5" tubing to the hatch so I can mount my spare tire. What's your plan?

I helped build a slightly different hatch tire carrier with my buddy on his 4th gen, and the hinges ended up being the weak point. With stronger gas struts it would bend the hinge/top of the hatch trying to shut it.

My solution is to make new beefy hinges and weld some 1/8" plate around the removed sections. I went a little crazy with the grinder cleaning it up as you can see

Just finished the hinges tonight and now the hatch opens and closes perfectly. If the rest of it goes as planned it should be crazy sturdy and look super cool.
 

Attachments

  • IMG_6821.jpg
    IMG_6821.jpg
    58.6 KB · Views: 206
Nothing quite that drastic, but it's still very involved. I'm adding some 1.5" tubing to the hatch so I can mount my spare tire. What's your plan?

Nice!! Looking forward to the progress. Very novel approach indeed.

I probably won't do anything too soon (I do have a spare hatch tho),
but it would be fun to tuck/lighten it. I don't actually use 2 of the 6
moving glass assemblies that often - if at all, but anything beyond
deleting them I can tell is asking for trouble...
 
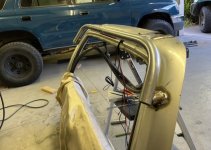
Made some progress on my hatch-mounted tire carrier.

Drilled a hole where the strut bracket bolts to, then fitted a tube through and bent a piece to tie it all together. Welding it all up will finish off the upper half of the exoskeleton. The tight spots under the tubing are too difficult to weld, so I will run a bead of silicone around every tube to keep it weatherproof( and to hide some of my ugly welds.)

The next step is to reinforce around the latch, then make the tubing that connects the top and bottom to give the tire a place to mount.

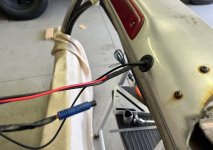
Also widened the hole for the rear windshield sprayer, then ran my wires for the new brake light, license plate light, and rear camera.
 

Attachments

  • IMG_6835.jpg
    IMG_6835.jpg
    57.8 KB · Views: 161
  • IMG_6831.jpg
    IMG_6831.jpg
    112.7 KB · Views: 162
Gave the old boy a wash! He looks much better now. Then after that went to bed in the new brake components. Everything went smoothly! Man it's nice to have stock feeling brakes again! And damn do they feel balanced too!

Then too cool everything off I drove for about 30 mins or so on the freeway.

Ran some errands and scored on 2 six packs of souix city sarsparilla! Heck yeah!

Came back home and tested the parking brake, holds just like the stock one did! Whoot! I'm super stoked with this set up! Just need to readjust and trim the parking brake cable and I'm set.
 

Attachments

  • 20240611_165117_zqoNgdMg1S.jpg
    20240611_165117_zqoNgdMg1S.jpg
    112.3 KB · Views: 124
  • 20240611_165132_e45FMwzJ1w.jpg
    20240611_165132_e45FMwzJ1w.jpg
    115.8 KB · Views: 124
  • 20240611_165326_9TqMmaVM4q.jpg
    20240611_165326_9TqMmaVM4q.jpg
    135 KB · Views: 126
  • 20240611_165333_XnZMwIaX1Z.jpg
    20240611_165333_XnZMwIaX1Z.jpg
    133.7 KB · Views: 124
  • 20240611_165203_n5oNO8wZ5N.jpg
    20240611_165203_n5oNO8wZ5N.jpg
    136.4 KB · Views: 125
Last edited:
fixed my cylinder misfires

Instead of paying $2k for the local shop to swap out spark plug wires & spark plugs (plus some other things), I did it myself. I'm not good at this kinda stuff at all, so it took me a whole day (I know, go ahead and laugh). Afterwards, I realized I applied dielectric grease all wrong AND, I messed up my wire ordering, so I had to redo it. At least the second time only took like 1.5 hours. In the end, it runs great again, and it's super satisfying to unbreak something :)
 
I did it myself. I'm not good at this kinda stuff at all

Everyone has to start somewhere. That is awesome that you did the job yourself! Don't worry about messing up, that's how we learn. Hell, I make mistakes all the time too. Keep learning something new and never give up! Glade your 4runner is back up to running tip top again!
 
Status
Not open for further replies.

Members online

Forum statistics

Threads
278,316
Messages
3,554,120
Members
248,016
Latest member
Advally Service

Trending content

Back
Top