What did you do with your 4runner today?

So I have the rotational metal grinding noise in the passenger rear. Goes away when going over a bump and no weight is on the rear or quiets down a bit upon braking. Got my tire off and when spinning the rotors there is some other noise? Question is do I need new rear pads and rotors? I have done the bearing test in holding the tire at 9 and 3 and seeing if the tire shifts and it does not. Any help would be great.
29b7659535ad2a111b761d82931c3df2.jpg
 
Last edited:
So I have the rotational metal grinding noise in the passenger rear. Goes away when going over a bump and no weight is on the rear or quiets down a bit upon braking. Got my tire off and when spinning the rotors there is some other noise? Question is do I need new rear pads and rotors?
29b7659535ad2a111b761d82931c3df2.jpg

Pull your caliper off and check your pad. Maybe I'm wrong, but in that pic it looks like your pads are gone and it is metal on metal tearing your rotor up.
Could be wrong, it's hard to tell from the pic, but worth checking into.
 
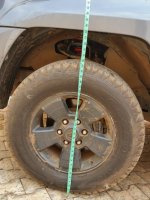
installed the rancho quicklift pre assembled strut.
comparism shot...still undecided if i like it or not.
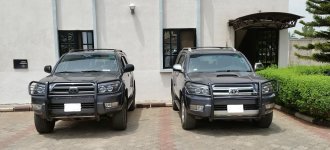
could some1 with photoshop skills please delete the brush guards
 

Attachments

  • 20150307_115221.jpg
    20150307_115221.jpg
    144.7 KB · Views: 435
  • 20150307_161926.jpg
    20150307_161926.jpg
    131.8 KB · Views: 435
Last edited:
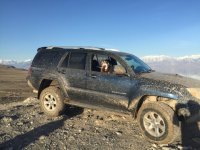
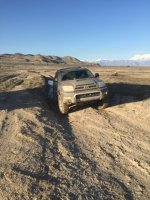
used mine today the way it was meant to be used. DAC made the car buck and grind down the hill....not sure what that means but I shut it off quickly and crept down in 4lo just fine.
 

Attachments

  • IMG_0394.jpg
    IMG_0394.jpg
    67.4 KB · Views: 383
  • IMG_0392.jpg
    IMG_0392.jpg
    76.1 KB · Views: 384
Successfully did my first oil change ever and put on a fumoto valve. Oh and did I metntion I put on a magnaflow exhaust 45'd out the side painted black:reddance:
 
Successfully did my first oil change ever and put on a fumoto valve. Oh and did I metntion I put on a magnaflow exhaust 45'd out the side painted black:reddance:

i love my fumoto valve. and with my lift now i dont need to even jack it up to change the oil. it is nice to be able to change the oil tool free
 
I spent my tax return...


Here's all the goodies that were inside:


  • Brand new '06-'09 Sport Edition housings (Conicelli Toyota / partznet.com)
  • Filler trim pieces in Titanium Metallic (Conicelli Toyota / partznet.com) to convert my '03
  • Morimoto Mini D2S RetroQuick kit for '06-'09 4Runner (TheRetrofitSource)
  • 35W ballasts and Osram Xenarc 4300K D2S bulbs


I baked and opened my brand new lights, replaced the projectors and everything was going well until I got to this part:


So this project is on hold until I get a solution to that worked out with TRS. I also need to take care of the wiring for the parking lights before I put these in, so maybe one of the next two weekends I will have this totally done. I'll probably start a build thread at this point, so I'll post more details in there about some other plans I have in the works.
 
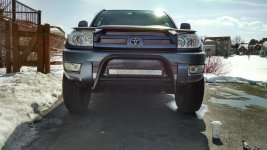
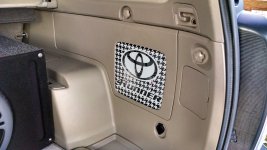
Installed lower billet grill and changed the amp cover logo
 

Attachments

  • IMG_20150308_130754259_HDR.jpg
    IMG_20150308_130754259_HDR.jpg
    139 KB · Views: 409
  • IMG_20150308_183500623_HDR.jpg
    IMG_20150308_183500623_HDR.jpg
    136.1 KB · Views: 409


So this project is on hold until I get a solution to that worked out with TRS. I also need to take care of the wiring for the parking lights before I put these in, so maybe one of the next two weekends I will have this totally done. I'll probably start a build thread at this point, so I'll post more details in there about some other plans I have in the works.

try hooking up the ballast connecter at 12, 3 or 9 oclock to see if that helps. it doesnt have to install at 6 oclock. in previous retros i have done, i found it actually fit better in one of these positions.

remember too that if its tight up against something, this will most likely affect you ability to adjust/aim the lights as well.
 
Last edited:
try hooking up the ballast connecter at 12, 3 or 9 oclock to see if that helps. it doesnt have to install at 6 oclock. in previous retros i have done, i found it actually fit better in one of these positions.

remember too that if its tight up against something, this will most likely affect you ability to adjust/aim the lights as well.
Now why didn't I think of that? Ha ha. (My first time ever messing with HID components.) Thanks for the tip, I'll give that a try to see if it helps. I suspect it might be better with a straight connector rather than the 90 degree, but it's certainly worth a shot. If I can get the grommet on with it at a different position I think I may still have trouble when adjusting the aim, like you mentioned.
 
Now why didn't I think of that? Ha ha. (My first time ever messing with HID components.) Thanks for the tip, I'll give that a try to see if it helps. I suspect it might be better with a straight connector rather than the 90 degree, but it's certainly worth a shot. If I can get the grommet on with it at a different position I think I may still have trouble when adjusting the aim, like you mentioned.

Can you put that rubber grommet on first, then put the ballast through it? This would provide the seal you need, and still get it hooked up.
 
Yesterday I installed a DPDT switch for my AUX reverse light. Didn't get a pic of the switch, but I did of the lights working.

My local wheeling spot had a night crawling event. So I wanted to get those hooked up so I could run them manually, or have them work automatically with my reverse lights.

SAM_0918_zpsobhfbxag.jpg~original


And obviously... last night I did a little wheeling.

SAM_0955ee_zpsncvw1czu.jpg~original


SAM_0934e_zpswjxv4hno.jpg~original
 
Installed smokers kit

Finally installed the smokers kit. I still plan on transforming my center console from a 05 to an 08+, until then, this will do.

Before:

524C99BD-90C1-4BA5-8FCE-E3EF6034D38F_zpsalhaicb9.jpg~original


After:
A4DDAE31-AE6A-4531-985C-CBD5A38F7C2E_zpsecfoltts.jpg~original


Night shot: lights up (posted this b/c I've never seen the kit lit up)
D070D451-D29A-4B45-86A9-BF653A8E3C0B_zpsu9pzgcbg.jpg~original


There's also a small light when you open the trap door (where the ashes go).

Like so:
C2A9CDA2-000B-427D-A4CF-54896055D24C_zpsckl9bxzu.jpg~original


ALSO, washed her to get all the salt crud off:
0EB2B172-3FF4-4BDE-B329-F66687BB43EF_zpssuaczkhw.jpg~original
 
Last edited:
Was yesterday, went driving in the Lake, no snorkel.
Water levels are definitely WAY TO LOW, around here.
IMG_20150308_112554.jpg
 

Attachments

  • IMG_20150308_112554.jpg
    IMG_20150308_112554.jpg
    125.1 KB · Views: 391

Members online

Forum statistics

Threads
278,316
Messages
3,554,113
Members
248,016
Latest member
Advally Service

Trending content

Back
Top