What did you do with your 4runner today?

What kind of alignment numbers are you able to get with those TC UCAs? They holding up well? How long have you had them?
I never got the printout when I had it aligned after they were installed so I can't answer that. I will get it this next time though. I don't remember when I got them, it's been at least three years I believe. Maybe more. They are holding up well, and of you don't already know, I am hard on things. Everything was still good and tight. I do keep them lubed regularly.

Sent from the Far Side
 
Sounds awesome! Those headers come with everything to hook them up to the stock exhaust? How difficult was the install?
Install probably a 7/10. Required some tools I didn't have, was a pain due to clearance/accessability, and took a long time. It requires welding new pipe or catalysts with new flanges or old catalyst with existing flange to them in order to bolt up. I built a jig off of t-mans old manifolds and had a friend weld pipe and flanges onto the new headers for a bolt in ordeal.

2f78f2bc0b34248955bc64ee11e495e9.jpg


68694c667a965fc042a44c231681c9bf.jpg


19349f0608881fc1bce6dcac8372776f.jpg

HAHAHA!!!.....should have made a lap around your neighborhood late that night.
Gf in the house was like "WTF are you doing out there?!?" Detached garage out back too, it was pretty nasty. I'm sure the sheriffs around the corner would have agreed.
 
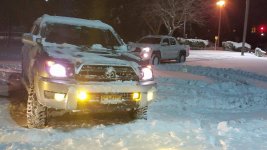
A couple of days late with the pics.. but went out after the 15+ inch blizzard we had the other day on longisland with some friends.
 

Attachments

  • 16735604_10208463613812971_1913801669_o.jpg
    16735604_10208463613812971_1913801669_o.jpg
    135.9 KB · Views: 276
  • 16776238_10208463612972950_516521179_o.jpg
    16776238_10208463612972950_516521179_o.jpg
    137.9 KB · Views: 263
  • 16776032_10208463613252957_1241640001_o.jpg
    16776032_10208463613252957_1241640001_o.jpg
    137.1 KB · Views: 264
  • 16763650_10208463614492988_494906416_o.jpg
    16763650_10208463614492988_494906416_o.jpg
    137.9 KB · Views: 275
  • 16776389_10208463612932949_1740679582_o.jpg
    16776389_10208463612932949_1740679582_o.jpg
    137.1 KB · Views: 275
  • 16735063_10208463613372960_817446638_o.jpg
    16735063_10208463613372960_817446638_o.jpg
    135.7 KB · Views: 268
  • 16777150_10208463614012976_2103605718_o.jpg
    16777150_10208463614012976_2103605718_o.jpg
    136.7 KB · Views: 269
LED's

I caught the LED bug from the "easy weekend mods" thread and had Borat Great Success with a cheap $15-ish eBay set for the interior and running boards.

So then I ordered more expensive VLEDs for the reverse lights - I heard cheap ones wouldn't work well here so I went for these VLED's: HIGH OUTPUT WHITE 360° 15 LED 921

$30/each is a lot for a reverse light bulb but I'm impressed. Old v. new on my garage door:

LO2gBa8.jpg
 
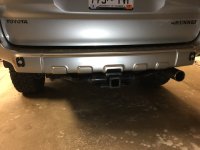
Installed TRD pro suspension from a 2015, installed Gibson stainless side dual tip exhaust, and had some 275/65/18 Duratracs put on.

Oh... and put my Whitson rack back on.

31e9f622dff5330c719039786e39f1ab.jpg


Sent from my iPhone using Tapatalk
 
Last edited:
Made a tool to help with my timing belt replacement

I am in the middle of doing engine maintenance, and one project is replacing the timing belt. I got to the point where it required removing the crank pulley bolt. That bolt is torqued to 181 pound feet and is difficult to remove. I did some reading and saw various suggestions on how to remove the bolt...some solutions were to use a long breaker bar wedged against the ground and bump the starter, use a bar wedged into the flexplate or flywheel to lock the engine, use chain wrenches, and purchase ready made tools. The ready made tools cost about $70 and I thought that was too much for a tool I may never use again, so I made a tool. It cost me about $1.60 for two bolts, some scrap steel I had left over from my bumper build, and maybe a half hour of my time.

Here is the tool I ended up with:


It fit on the crank and worked flawlessly


I rested the long end on top of the frame and used a breaker bar and the bolt came right off, not even a struggle! When I put the new belt on tomorrow all I have to do is put the tool back on with it resting on the other side of the frame and I will be able to torque the required value with no problem.
 
Last edited:
I am in the middle of doing engine maintenance, and one project is replacing the timing belt. I got to the point where it required removing the crank pulley bolt. That bolt is torqued to 181 pound feet and is difficult to remove. I did some reading and saw various suggestions on how to remove the bolt...some solutions were to use a long breaker bar wedged against the ground and bump the starter, use a bar wedged into the flexplate or flywheel to lock the engine, use chain wrenches, and purchase ready made tools. The ready made tools cost about $70 and I thought that was too much for a tool I may never use again, so I made a tool. It cost me about $1.60 for two bolts, some scrap steel I had left over from my bumper build, and maybe a half hour of my time.

Here is the tool I ended up with:


It fit on the crank and worked flawlessly


I rested the long end on top of the frame and used a breaker bar and the bolt came right off, not even a struggle! When I put the new belt on tomorrow all I have to do is put the tool back on with it resting on the other side of the frame and I will be able to torque the required value with no problem.



Love that ingenuity! If you were close, I'd ask to borrow that tool next month!


Sent from my iPhone using Tapatalk
 
Love that ingenuity! If you were close, I'd ask to borrow that tool next month!


Sent from my iPhone using Tapatalk

I used an old sign post for my tool like this. Cut a chunk out of the back to fit a socket through and the bolt holes just so happened to be spaced correctly to line up with the crank pulley. Works great.
 
Love that ingenuity! If you were close, I'd ask to borrow that tool next month!


Sent from my iPhone using Tapatalk

If you have access to a welder it's a simple tool to make. I suppose you could even make one from a long piece of plate and just drill the holes...it should be long enough to cover the pulley and reach to the frame.
 
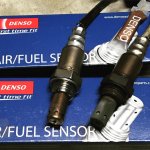
Late night A/f sensor install. Kind of a pain to reach on the V8. Extensions a swivel and the 02 socket tool made it possible. Waiting on the downstream 02 sensors today for install.
 

Attachments

  • IMG_1809.jpg
    IMG_1809.jpg
    127.2 KB · Views: 326

Members online

No members online now.

Forum statistics

Threads
278,316
Messages
3,554,120
Members
248,016
Latest member
Advally Service

Trending content

Back
Top